30/05/02
Document Systems Support V1.0
18
8.
You can check to see if your settings have been accepted by going back into the
menu’s previously mentioned.
9.
In case of difficulty your Dealer can test the unit using an engineering mode,
please ask them for assistance.
Stage 2
What Next?
Now you have programmed your DP unit you now need to install the printer driver
on your PC.
Follow these instructions to add the DP unit as a printer. You will need the CD-ROM
that came with your DP unit.
You can download the latest printer driver from our Web site at the following link:
http://www.panasonic.co.jp/mgcs/download/index.html
Windows NT4 – For Windows 2000 skip to No 34
1.
Place the CD-ROM into your computer drive; the disk will auto run and display
a menu, you can read the manual from here or simply close this window.
2.
Open up your Printers folder and click on “Add printer”.
3.
Make sure the radio button for “My Computer” is checked then click “next”.
4.
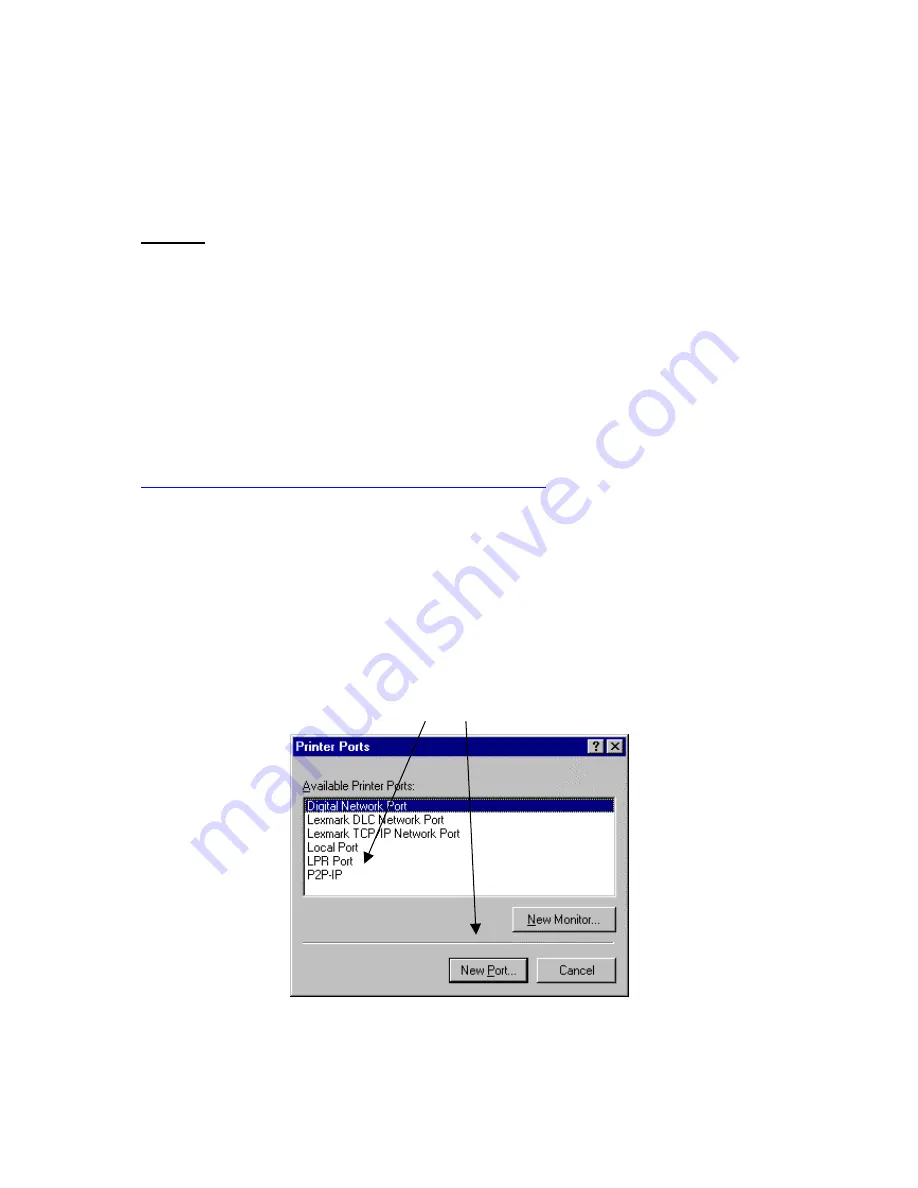
Now click on “Add port”.
5.
Now choose “LPR” port
6.
Now choose “New port” as shown below.
Содержание Network Printing DP2000/2500
Страница 1: ...DP2000 2500 Network Printing Setup Guide ...
Страница 41: ...30 05 02 Document Systems Support V1 0 41 NOTES ...
Страница 42: ...30 05 02 Document Systems Support V1 0 42 NOTES ...
Страница 43: ...30 05 02 Document Systems Support V1 0 43 NOTES ...
Страница 44: ...30 05 02 Document Systems Support V1 0 44 ...


