background image

Содержание NE-9930

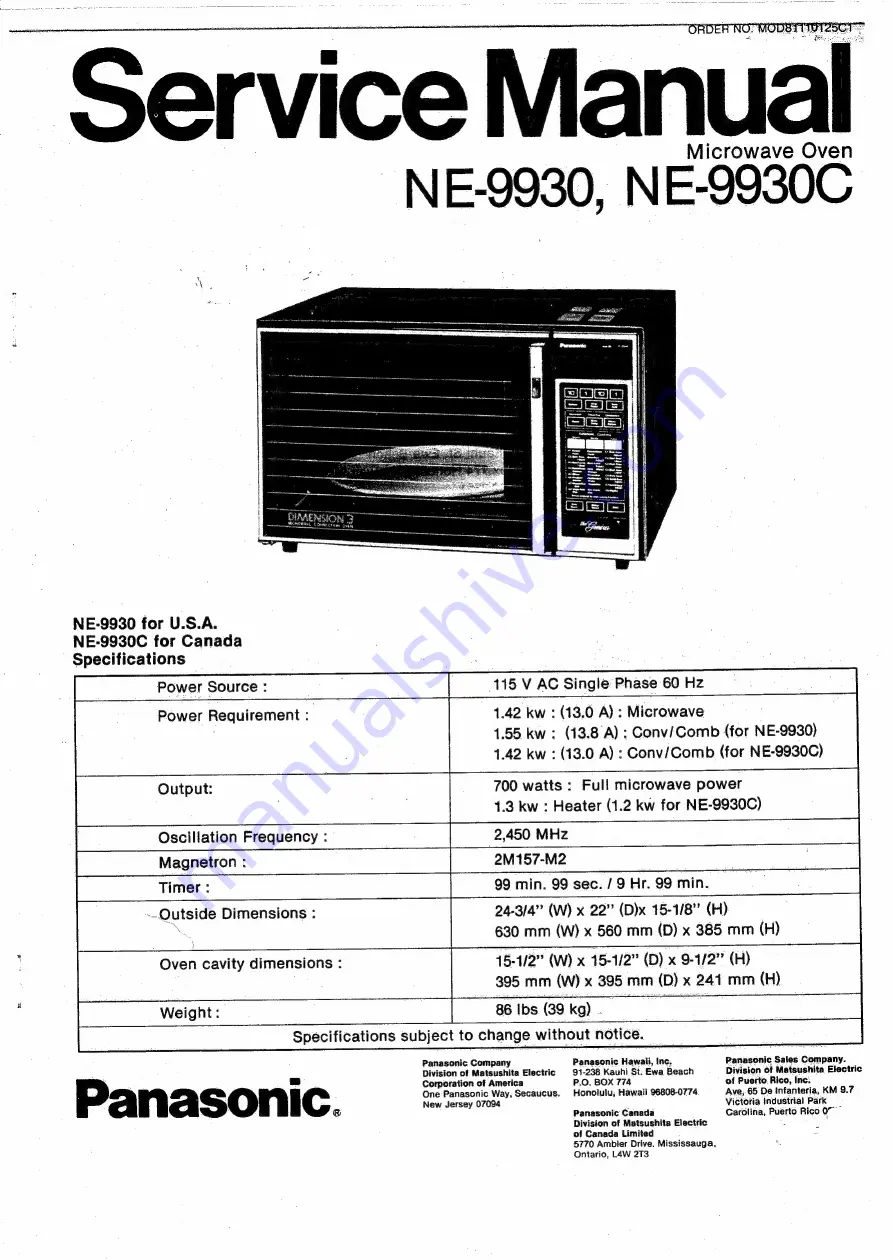
Страница 1: ...H 395 mm W x 395 mm D x 241 mm H 86 Ibs 39 kg Specifications subject to change without notice Output Oscillation Frequency Magnetron Timer Qutside Dimensions sn j Oven cavity dimensions Panasonic Comp...

Страница 2: ...omponents used in the microwave oven which are important for safety These parts are shaded on the schematic diagram and marked witha A on the replacement parts list It is essential that these critical...

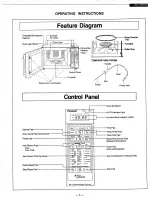
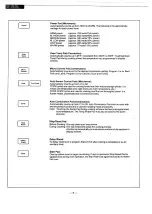
Страница 3: ...E Defrost Pad Oven Temp Pad Convection Power Pad Auto Sensor Pads Cook Froz Cook Auto Sensor Cooking Guide Delay Stand Pad Stop Reset Pad TEMPERATURE PROBE Handle Probe Jack Control Panel Clock Set Bu...

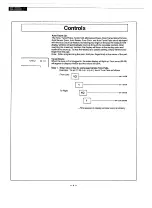
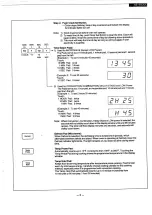
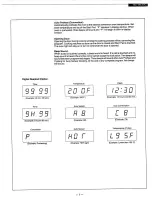
Страница 4: ...he starting point and continue to count up To stop the readout at a specific setting simply remove your finger from the pad Note When programming the oven hold your finger firmly in the center of the...

Страница 5: ...h 1 HOUR Pad twice 10MIN Pad twice Cc H Pa 1MIN Pad 5 times le Example 2 To set 45 minutes Touch 10 MIN Pad 4 times H u 5 1MIN Pad 5 times Note When Convection Combination Delay Stand or LOW power is...

Страница 6: ...om their natural storage places i e meats are refrigerated cold cake mixes are room temperature etc FROZ COOK cycles are used for cooking food that are thoroughly frozen i e frozen meats casseroles an...

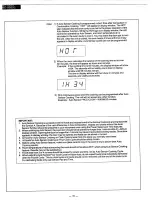
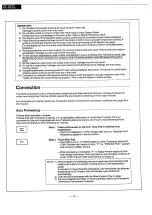
Страница 7: ...he door is opened Beep Sound When a pad is touched correctly a beep sound is heard Ifa pad is touched and no beep sound is heard the unit has not or cannot accept the instruction Two beeps will sound...

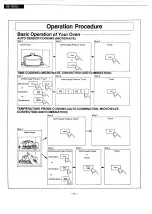
Страница 8: ...CONVECTION AND COMBINATION Step 1 Step 2 Step 3 Continuously Press or Touch Continuously Press or Touch Microwave Power or Defrost Lom Ge or PX Convection i 2 1 VN TEMPERATURE PROBE COOKING AUTO COMB...

Страница 9: ...or lights also appear in display window The AUTO indicator light turns on Step 2 Touch Start Pad Microwave activity starts The Auto status indicator light for the first operating stage starts to blink...

Страница 10: ...with the foods and recipes found inthe Genius Cookbook and marked with the Symbol A Because of the vast differences in food composition recipes and charts without the Auto Sensor Symbol should be prep...

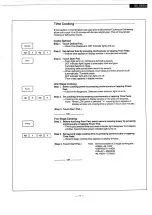
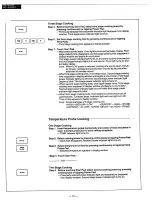
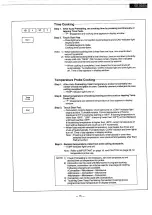
Страница 11: ...me of day appears in display window One Stage Cooking Step 1 Select cooking power by pressing continuously or tapping Power Pad Clock time disappears Selected power indicator light turns on Step 2 Set...

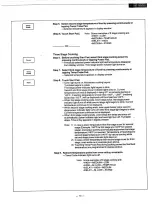
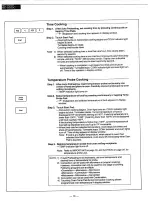
Страница 12: ...cond stage power indicator light begins to blink Third stage power indicator light remains on When second stage cooking ends oven again beeps twice Third stage cooking time reappears in display window...

Страница 13: ...ends oven beeps twice first stage power indicator light turns off while second stage light begins to blink Current temperature continues to be displayed When second stage cooking ends oven again beeps...

Страница 14: ...ogram Time of day will appear in display window Convection You ll find a convection oven in most bakeries restaurants and other institutional kitchens because professional cooks have long known that t...

Страница 15: ...begins Oven light turns on CONV indicator light begins to blink Turntable rotates Current temperature of food is displayed in 5 F increments starting at 100 F Ifstarting temperature is lower than 100...

Страница 16: ...vection cooking begins Oven light turns on CONV indicator light begins to blink Turntable rotates Current temperature of food is displayed in 5 F increments starting at 100 F Ifstarting temperature is...

Страница 17: ...ed Step 5 Remove temperature probe from oven ceiling receptacle TEMP indicator light turns off Refer to IMPORTANT on page 18 and CAUTION on page 29 for temperature probe use NOTE 1 Combination can be...

Страница 18: ...hen display minutes and seconds and seconds will visibly count down Delay Start Delay Step 1 Touch Delay Stand Pad Z Stand Clock time disappears from display window DELAY indicator light turns on 4 1...

Страница 19: ...apping Time Pads A maximum of 9 hours 99 minutes may be programmed twice Stand time appears in display window Touch Start Pad Oven light turns on Previously selected program appears in display window...

Страница 20: ...FFFF appears in display window it is an indication that the oven has automatically shut off due to a malfunction of the Auto Sensor Control or Temp Probe settings Touch Stop Reset Pad to clear FFFF fr...

Страница 21: ...ning There is a possibility of excessive noise from the turntable iffood spills are 21 Care of Your Microwave Convection Oven allowed to collect on the rollers or the bottom of the oven Simply wipe th...

Страница 22: ...thitor strike the control panel with objects such 5 THE TEMPERATURE PROBE must be at least as silverware utensils etc Breakage may occur In 1 inch 3 cm into food for an accurate temperature case the p...

Страница 23: ...e used for two level reheating of leftovers with Microwave or Combination cooking Follow the procedure given below 1 Center the Rack onthe Glass Ceramic Tray 2 Arrange dishes in oven one on the Glass...

Страница 24: ...bursting Microwave Browning There are a few foods which are not cooked long enough in the microwave oven to brown and for more eye appeal may need a browning agent See Panasonic Microwave Cookbook for...

Страница 25: ...HOdHOO NI WVHOVIC O1ILVA3HOS SIH NO V3U O3QVHS 3HL 3LON AL3dVS INV LYOdWI auvod A INVYUEWAW LINMOYIO YIWWVuS0 d W1I5Id HOLSISIY JOUNS uaguosey Q AW13 u3MOd 9 Ais YIMOd N33u9 Le O HOLIMS 30010 d WWT NS...

Страница 26: ...VHOdHO ON WYHOVIC SILVINAHOS SIHL NO WaH CAGVHS 3HL JON Al34VS INVLYOdWI auvod AI INVYEWSN LINDHID YAaWWVu90u d WA1I5I0 yO O OO OOOO Tt NOHLANSVW O SNWHL OLSIS3Y 39VLI0A JUS uaayOsay J9YNS 8 AV138 O 7...

Страница 27: ...KEY BOARD 8 9 FUSE 15A SURGE ABSORBER K y SURGE RESISTOR 3 32 Lens com SWITCHB wD A a 4 N O Le 0 IN HUMIDITY SENSOR AT OVEN TEMP SENSOR SOLENOID 2 yy Sy oom SPARK KILLER im G3 G4 8 ORANGE YELLOW GRAY...

Страница 28: ...AL ABSORBER PROGRAMMER 3 0 CIRCUIT A K 7 SURGE RESISTOR Dontses am 1 Ls N HOS GVEN LAM crise E iil SS ll LATCH SWITCH B 8 a _ eee HUT HAGT se omg aoe 12 wet Haw CO LOW VOLTAGE TRANSFORMER 2 on eaqt pO...

Страница 29: ...conds the variable power switch will be energized and de energized every 1 second C During any of the standing periods the variable power switch is not activated by the DPC so there is no microwave po...

Страница 30: ...signal is applied to power relay B heater will turn off HEATER E After oven heater turns off the oven temperature will increase for a while and then reduce as shown in Fig 11 5 When oven temperature g...

Страница 31: ...cts it and the FROZEN COOK microprocessor calculates the balance of cooking time PO which is called T2 time This T2 time is then shown in the pow display and begins counting down NOTE The humidity sen...

Страница 32: ...f hinges and latches 5 Evidence of dropping or abuse Before turning on microwave power for any service test or inspec tion within the microwave generating compartments check the magnetron wave guide o...

Страница 33: ...ergized DO NOT measure the voltage in the high voltage circuit including filament voltage of magnetron WARNING Never touch any circuit wiring with your hand nor with an insulated tool during operation...

Страница 34: ...G DIAGRAM on pages 27 and 28 TURNTABLE 2 PIN CONNECTOR FAN MOTOR BRACKET 2 Replacement of the fan motor and turntable fan motor see Fig 21 and 22 A Disconnect 2 pin connectors of fan motor and turntab...

Страница 35: ...e door will be simply lifted off the bottom hinge pin at the same time NOTE Do not lose spacer at the lower hinge C When mounting the door assembly to the oven assembly be sure to adjust the door asse...

Страница 36: ...RFACE door hook assembly Latch switch B short switch and oven lamp switch are installed onto the door hook assembly as shown in Fig 33 NOTE No specific adjustment during installation of latch switch B...

Страница 37: ...enter of the oven B Set the radiation monitor to 2450MHz and use it following the manufacturer s recommended test procedure to assure correct results C When measuring the leakage always use the 2 inch...

Страница 38: ...el selected 5 Display indicates a number different from one touched For example touch 5 and 3 appears in the display Refer to B FROZ COOK COMB CONV TEMP DEF 6 Specific numbers for example 2 or 3 will...

Страница 39: ...continuity of both latch switch A s contacts and latch switch B s contacts with door partially open until short switch contacts close Both continuity Shorted contacts of latch switch A and in correct...

Страница 40: ...horted contacts of Check continuity of Continuity latch switch B latch switch B s con tacts with door par tially open until short switch contacts close Check continuity of primary winding of Aer Open...

Страница 41: ...ent CONDITION CHECK RESULT REMEDY 15A fuse blows once in a while Defective D P C Faulty contacts of power relay B Check continuity of thermal cutout magnetron Outlet has proper voltage Fuse does not o...

Страница 42: ...lay A or Replace open relay coil Check continuity bet ween 14 pin connec tor and DPC Loose connection of Abnormal 14 P connector 4 Repair or replace Normal Defective D P C Replace 2 Check continuity o...

Страница 43: ...voltage trans Refer to component test procedure on page 50 Replace Adjust or replace Malfunction of door Check continuity of switch door switch Loose connection of door switch s wiring FF FF appears i...

Страница 44: ...BE VERY CAUTIOUS OF HIGH VOLTAGE WHENEVER DOING TESTS WITH THE OVEN ATTACHED TO A LIVE CIRCUIT Defective digital pro grammer circuit Open protector Refer Figure WIRING MATERIAL on page 61 Open windin...

Страница 45: ...tch coil NOTE 5 Refer to page 29 for the tim ing periods of the variable power switch Lower than 105 volts source voltage Decrease in power Customer education Abnormal NOTE 6 Defective digital pro Rep...

Страница 46: ...uity of lead wire between sensor jack and Digital Programmer _circuit Check the continuity of sensor probe Check continuity bet ween terminals of sensor jack unit RESULT Open or ioose Continuity Appro...

Страница 47: ...ck humidity sen sor element and D P C Refer to component test procedure on page 51 Defective humidity sensor Defective digital pro grammer circuit Auto cooking does ls the oven tocated in not operate...

Страница 48: ...Heater does not heat at all Check the voltage between heater ter minals Check the voltage between terminals 7 and 8 of power relay B Approx 24V DC Open heater Normal reading approx 9 10 ohm Loose conn...

Страница 49: ...relay B TROUBLE 10 Combination cooking is not working in correct order The following chart shows the timing period of variable power switch microwave oscillation and power relay B Heater for combinati...

Страница 50: ...ig 42 Continuity checks can only indicate an open filament or a shorted magnetron To diagnose for an open filament or shorted magnetron A Isolate magnetron from the circuit by disconnecting the leads...

Страница 51: ...ogrammer circuit is in working order if above condition is obtained 3 A 8 To test the sensor probe s thermistor see Fig 47 Fill a container partially with tukewarm water and place a ther mometer in it...

Страница 52: ...starts blinking Function word indicator lights turn on 2 00 00 appears Numbers tapped are displayed on the display win dow Colon keeps blinking eColon stops blinking and stays on eTOD has now been re...

Страница 53: ...EP OPERATION e HIGH and MED appear and HIGH begins Set LOW power for 1 minute 7 to blink 2nd stage eAfter completing 1st stage program oven automatically switches to 2nd stage ePower indicator light s...

Страница 54: ...e magnetron has started oscillation When the humidity sensor detects the steam approx imately 2 to 4 minutes after the start pad is touched Auto Sensor T1 Cooking automatically switches to Time Cookin...

Страница 55: ...ty starts e Turntable begins to rotate HIGH power indicator light begins to blink Current temperature of food is displayed in rising 5 F increments starting at 100 F If starting temperature is lower t...

Страница 56: ...Wait for a couple of bright and dim cycles This in dicates that heater turns on and off to keep a con stant oven temp As soon as oven light dims unplug the AC power plug and 14p connector from DPC Mea...

Страница 57: ...g time for 2 min e P disappears in the display window H 2 appears in the display window CONV Tap start pad Oven light turns on Turntable begins to rotate Convection cooking begins CONV indicator light...

Страница 58: ...starting at 100 F If starting temperature is lower than 100 F L95F mean ing lower than 100 F will be displayed until food reaches 100 F NOTE During auto combination cooking there is a 22 second base t...

Страница 59: ...time for 2 min Oven lamp turns on Combination cooking begins e COMB indicator light begins to blink e Turntable begins to rotate Cooking time starts to count down Tap start pad NOTE During combination...

Страница 60: ...INE DYSU NE 9930C EXPLODED VIEW AND PARTS LIST lhe egea ae ui uy Zz co t 7 N oO o a 2 ba Q Oo Oo oS _ os 28 3B So uw nz For NE 9930C 44 EXPLODED VIEW NE 9930 NE 9930C...

Страница 61: ...3SVa NOSHOLNOSS ATS NSSSV O0 66 3N HOS LINDYIO YAWWVESOUd TVLIDIG adVL HOLOOS 5ulysed uaym Spf syed OM OVW 31ND d18Vi NYNL AlTaW3assy AVUL ONINOOD SSV1D chee Sp dai eTGan0 aya ul ing as SOV ONISIVa a...

Страница 62: ...P Lever pin ANE3081B60AP Spacer ANE6037GO0AP ANE6126L10AP Capacitor bracket Power relay Power relay Cc ANE6306910AP ANE6238B60AP ANE630GL20AP ANE630GL20CP insulation sheet R Spacer Heater A Heater A A...

Страница 63: ...20AP ANE0107580AP ANEO601K20AP Outer case Outer case Filler set Door sheet Glass ceramic tray oe oe oe ares ANEO648K20AP ANEQ60XK20AP ANEO603K20AP ANEO603K20AP ANE0113K20AP ANEO108K20AP Spatter shield...

Страница 64: ...3 2 1 2 1 2 2 2 2 2 1 1 2 2 14 3 3 3 2 2 2 2 2 4 4 2 2 1 2 2 1 1 2 1 1 1 2 2 1 2 1 1 4 1 1 1 2 1 1 Outer panel Lamp cover Thermal cutout For magnetron H V Transformer Power relay bracket Escutcheon b...

Страница 65: ...owave power 2M157 M2 99 min 99 sec 9 hr 99 min Low and Delay Stand Outside Dimensions 24 3 4 W X 22 D X 15 1 8 H 630 mm W X 560 mm D X 385 mm H Oven Cavity Dimensions 15 1 2 W X 15 1 2 D X 9 1 2 H 395...

Страница 66: ...ER oy DIGITAL PROGRAMMER CIRCUIT IMPORTANT SAFETY NOTE THE SHADED AREA ON THIS SCHEMATIC DIAGRAM INCORPORATES SPECIAL FEATURES IM PORTANT FOR PROTECTION FROM MICROWAVE RADIATION FIRE AND ELECTRICAL SH...

Страница 67: ...ed in this manual before the oven is released to the owner E A microwave leakage check to verify compliance with the Federal Performance Standard should be performed on each oven prior to release to t...

Страница 68: ...etion Deletion Deletion ANE0001Z10PP ANE3139B60AP ANE3107K20AP ANE800LZ10AP ANE6479Z10AP ANE603LZ10PP ANE0003Z10PP ANE0013Q00PP ANE0351 770 ECQJ0186N ANE0361 C90 Schematic diagram Door key lever B Doo...

Страница 69: ...e SEMICONDUCTORS RESISTORS AEIC16703960 AEICuPC324 AEICuPD4069C uPD4069C ERD25TJ223 AEICuPC4558 uPC4558 ERD25TJ103 2SC1685 R S Transistor 13 14 15 24 34 48 50 54 65 67 73 77 28C1318 R S Transistor 78...

Страница 70: ...b a re MICROCOMPUTOR vss 1C 1 k4 MP3960 x2 KI 4umidity Sensor H V TRANSFORMER 4TH WINDING CHASSIS GROUND eee J L POWER RELAY 0 Sensor Heater Der Sensor a f T DISPLAY TUBE 62 OOK 2 POWER RELAY A c23 to...

Отзывы: