background image

Panasonic Corporation

http://www.panasonic.net/

© 2013 Panasonic Appliances Company of America,

Division of Panasonic Corporation of North America.  All Rights Reserved.

Pursuant to the directive 2004/108/EC, article 9 (2)
Panasonic Testing Centre
Panasonic Service Europe, a division of Panasonic Marketing Europe GmbH
Winsbergring 15, 22525 Hamburg, F.R. Germany

C01ZDYD10E00

Issued in 08 2013

ACØ1ZDYDZØEØ

Printed in Mexico

- 20 -

Содержание MC-CL934

Страница 1: ...these instructions carefully before using the vacuum cleaner and save these instruction for future reference This product complies with the directive 2006 95 EC and 2004 108 EC Operating Instructions VACUUM CLEANER HOUSEHOLD Model No MC CL934 Washable Filter ...

Страница 2: ... Requesting Service 16 Specifications 17 Reminder for Customer 17 Disposal Information 18 Guarantee 19 2 To avoid damaging the vacuum cleaner never let the vacuum cleaner pick up wet matter mud burning ashes or large and sharp objects Do not pull on the mains lead when disconnecting the appliance from the mains socket always pull on the plug body itself Keep the vacuum cleaner away from heat sourc...

Страница 3: ...NTO ANY 13 AMP SOCKET If a new plug is to be fitted please observe the wiring code as shown below If in any doubt please consult a qualified electrician IMPORTANT The wires in this mains lead are coloured in accordance with the following code Blue Neutral Brown Live As the colours of the wire in the mains lead of this appliance may not correspond with the coloured markings identifying the terminal...

Страница 4: ...he mains lead around sharp edges or corners Do not run over the mains lead with the vacuum cleaner Keep the mains lead away from heated surfaces Do not handle plug or vacuum cleaner with wet hands Do not put any object into openings Do not use with any opening blocked keep free of dust lint hair and anything that may block or reduce air flow Keep hair loose clothing fingers and all parts of body a...

Страница 5: ...rol Crevice Tool Hose Telescopic Wand Hose Swivel Dusting Brush Handle Quick Release Mains Lead Washable Primary Filter inside Cord Rewind Button Carrying Handle HEPA Media Exhaust Filter inside Exhaust Filter Tray Dust Cup On Off Switch Floor Brush Carpet Bare Floor Selector Dusting Brush Quick Release Pedal Wand Button Parquet Nozzle ...

Страница 6: ...e Quick Release ASSEMBLY Tilt the canister back Align the hose latch tab and notch in canister and insert hose into canister until it snaps in place To remove Press hose latch tab inward and pull out on hose Hose Latch Tab Notch Hose Telescopic Wand Wand Button Dusting Brush Dusting Brush Place dusting brush onto wand until the wand button snaps into place To remove Press wand button and remove du...

Страница 7: ...g while rewinding to prevent damage or injury from the moving cord Push rewind button On Off Switch On Off Switch To turn vacuum cleaner on or off press on the on off switch TO OPERATE VACUUM CLEANER Mains Lead Telescopic Wand Floor Brush Quick Release Pedal Floor Brush Insert wand into floor brush until the wand button snaps into place To remove Press quick release pedal and pull the wand straigh...

Страница 8: ... nozzle can be used for cleaning wood floors Handle Quick Release Button Quick Release Pedal Tools The floor brush can be adjusted to suit the floor Carpet Bare Floor Selector Suction Control Suction Control Increase Suction Decrease Suction Suction control allows you to change vacuum cleaner suction for different fabric and carpet weight Opening control decreases suction for draperies and lightwe...

Страница 9: ...imately fifty 50 minutes and then plug the vacuum cleaner in and turn back on to see if the motor protector has reset Motor Protection System Motor Protector This vacuum cleaner also has a motor protector bypass valve which prevents motor overheating and damage The valve opens to provide cooling air when a clog prevents normal air flow to the vacuum cleaner suction motor You will notice a change o...

Страница 10: ...the dirt For best cleaning results keep the airflow passage open Check the starred areas occasionally for clogs Turn off and unplug vacuum cleaner from outlet before checking Cleaning Exterior and Tools Unplug mains lead from wall outlet Clean exterior using a clean soft cloth that has been dipped in a solution of mild liquid detergent and water and wrung dry DO NOT drip water on vacuum cleaner Wi...

Страница 11: ... area Rotate dust cup handle to the vertical position Hold dust cup over a trash container Press the dust cup latch slightly outwards and downward to release the door The door will swing open and the debris will fall into the trash container Shake the dust cup to release any debris that might hang in the pre filter After the dust cup is empty of debris firmly close the door Make sure you hear a cl...

Страница 12: ...t cup Check the pre filter frequently and clean when dirty Remove the dust cup see DUST CUP p 11 Make sure the dust cup is empty Rotate dust cup lid assembly counterclockwise as indicated on the lid and lift off Grasp pre filter and rotate counterclockwise to remove Clean pre filter by gently tapping over a trash container Tap on several sides to ensure best cleaning If necessary rinse with cold w...

Страница 13: ...gnment tabs inside dust cup lid assembly Rotate pre filter clockwise to lock in place Replace the lower portion of the dust cup by aligning marks as shown UNLOCKED For Cleaning Rotate while pressing downward until marks align as shown LOCKED For Use Reinstall the dust cup See DUST CUP p 12 Tabs Slots ...

Страница 14: ...e filter See CONSUMABLE PARTS page 5 Remove dust cup See DUST CUP p 11 Pull the dust cup lid latch and open the lid Remove the primary filter Wash with cold water only DO NOT use detergent or soap Squeeze by hand and allow to air dry Allow parts to dry 24 hours before putting back into vacuum cleaner DO NOT operate without primary filter installed DO NOT wash in the dishwasher DO NOT install damp ...

Страница 15: ...er Pull out and up on the exhaust filter tray to remove from the canister Remove exhaust filter from filter tray and dispose Replace exhaust filter cartridge Place the new filter cartridge into the exhaust filter tray as shown Reinstall the exhaust filter tray Press into place until it snaps closed Exhaust Filter Tray WARNING Fire and or Electrical Shock Hazard Do not operate with a clogged exhaus...

Страница 16: ...Vacuum cleaner picks 1 Suction too strong 1 Open suction control up moveable rugs or floor brush pushes too hard Mains lead won t 1 Dirty mains lead 1 Clean the mains lead rewind 2 Mains lead jammed 2 Pull out mains lead and rewind Sound changes 1 Tool use restricts air flow 1 Check tools for fuzz lint pet Bypass valve open hair or other debris 2 Clogged air path 2 See MOTOR PROTECTION SYSTEM page...

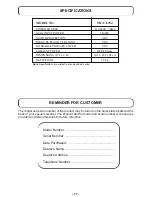
Страница 17: ...ided and retain this book for future reference Model Number Serial Number Date Purchased Dealer s Name Dealer s Address Telephone Number MODEL NO MC CL934 POWER SOURCE 230 240V 50Hz MAX INPUT POWER 1200W MOTOR PROTECTION YES PARQUET FLOOR CLEANING YES WASHABLE PRIMARY FILTER YES EXHAUST FILTER HEPA Media DIMENSIONS W x L x H 36 5 x 38 x 108 cm NET WEIGHT 7 5 kg Note Specifications are subject to c...

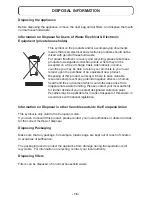
Страница 18: ...aluable resources and prevent any potential negative effects on human health and the environment which could otherwise arise from inappropriate waste handling Please contact your local authority for further details of your nearest designated collection point Penalties may be applicable for incorrect disposal of this waste in accordance with national legislation Information on Disposal in other Cou...

Страница 19: ...pplication at www pas europe com Most major credit and debit cards accepted All enquiries transactions and distribution facilities are provided directly by Panasonic U K It couldn t be simpler Also available through our Internet is direct shopping for a wide range of finished products Take a browse on our website for further details The guarantee conditions set by our representatives in the countr...

Страница 20: ...sonic Corporation of North America All Rights Reserved Pursuant to the directive 2004 108 EC article 9 2 Panasonic Testing Centre Panasonic Service Europe a division of Panasonic Marketing Europe GmbH Winsbergring 15 22525 Hamburg F R Germany C01ZDYD10E00 Issued in 08 2013 ACØ1ZDYDZØEØ Printed in Mexico 20 ...

Отзывы: