Live streaming by operating the camera
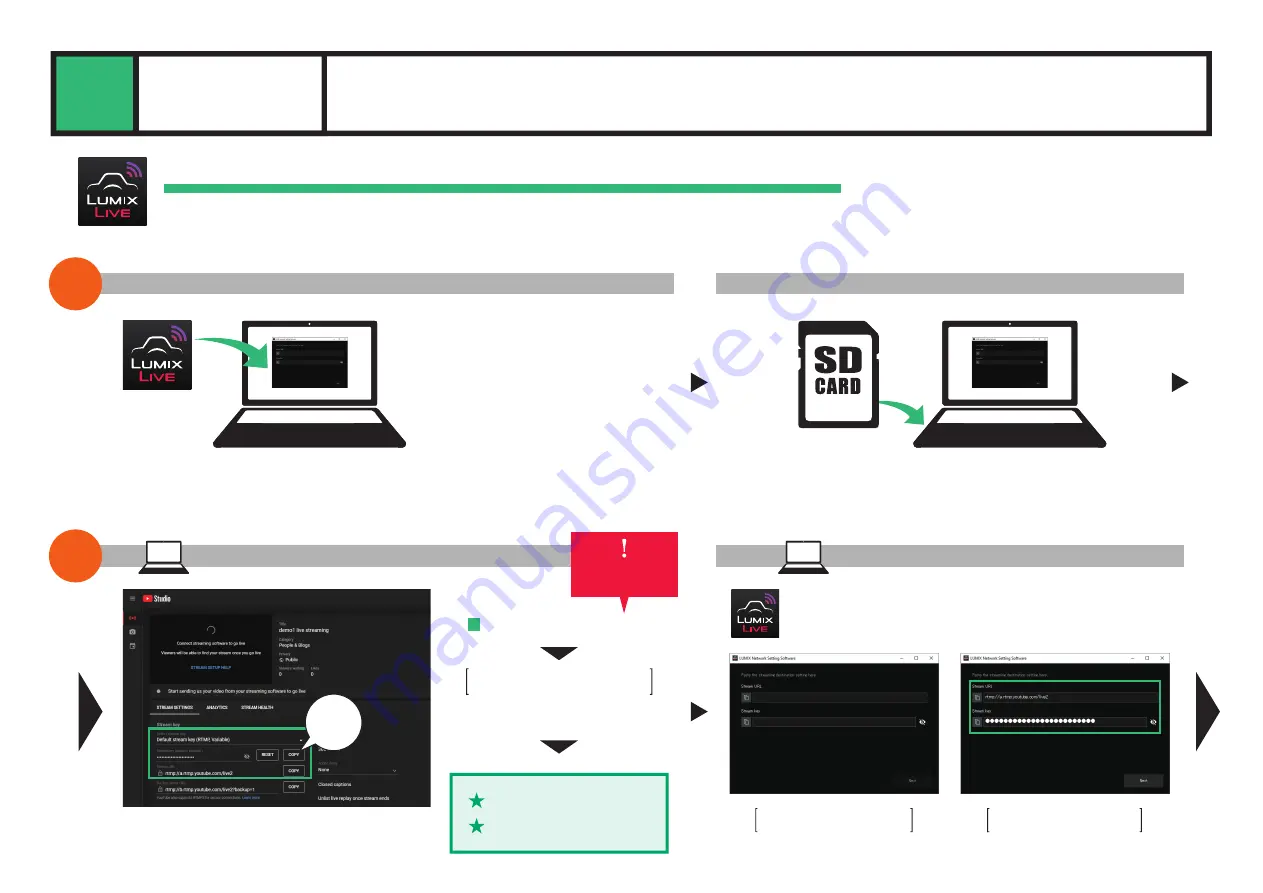
Set the streaming destination with your PC and save onto an SD memory card.
Insert the card into your camera and start live streaming by loading the streaming settings onto your camera.
STEP 2
[ Prepare your PC ]
STEP
1
Install the LUMIX Network Setting Software onto your PC
Insert an SD card into your PC
Obtain the streaming content settings from the platform
Input to the LUMIX Network Setting Software
[ LUMIX Network Setting Software ]
Download site
https://av.jpn.support.panasonic.com/support/global/
cs/dsc/download/index3.html
PC software
Login to your account.
Copy the stream URL
Copy the stream key
STEP
2
*Please use an SD memory card with free space.
*If your PC does not have an SD memory card slot, use an SD card reader.
*Here we will be explaining using the YouTube LIVE (YouTube Studio) settings as an example.
Supported OS (as of September 2021)
Windows: Windows 10
Mac: macOS 10.13, 10.14, 10.15.3-10.15.7, 11.0-11.2
Copy from
the platform
STEP 3
NEXT PAGE
Launch the LUMIX Network
Setting Software
Paste the stream URL and
stream key that you copied
Configure settings from
the social streaming platform
Download the software
and install it onto your PC
Obtain the URL
from the platform
Set the privacy settings and date and time.
Set other details.
LIVE STREAMING
LIVE STREAMING USING A PC, SOFTWARE AND CAMERA
9
SETTING 4


