


18
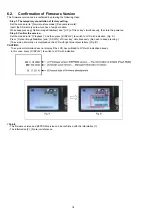
6.2.
Confirmation of Firmware Version
The Firmware version can be confirmed by ordering the following steps:.
•
Step 1. The temporary cancellation of factory setting:
Set the mode dial to “[ Normal picture mode ] (Red camera mark)”.
Insert the SD memory card which has a few photo data.
While keep pressing [ Optical Image Stabilizer ] and “[ UP ] of Cross key” simultaneously, then turn the power on.
•
Step 2. Confirm the version:
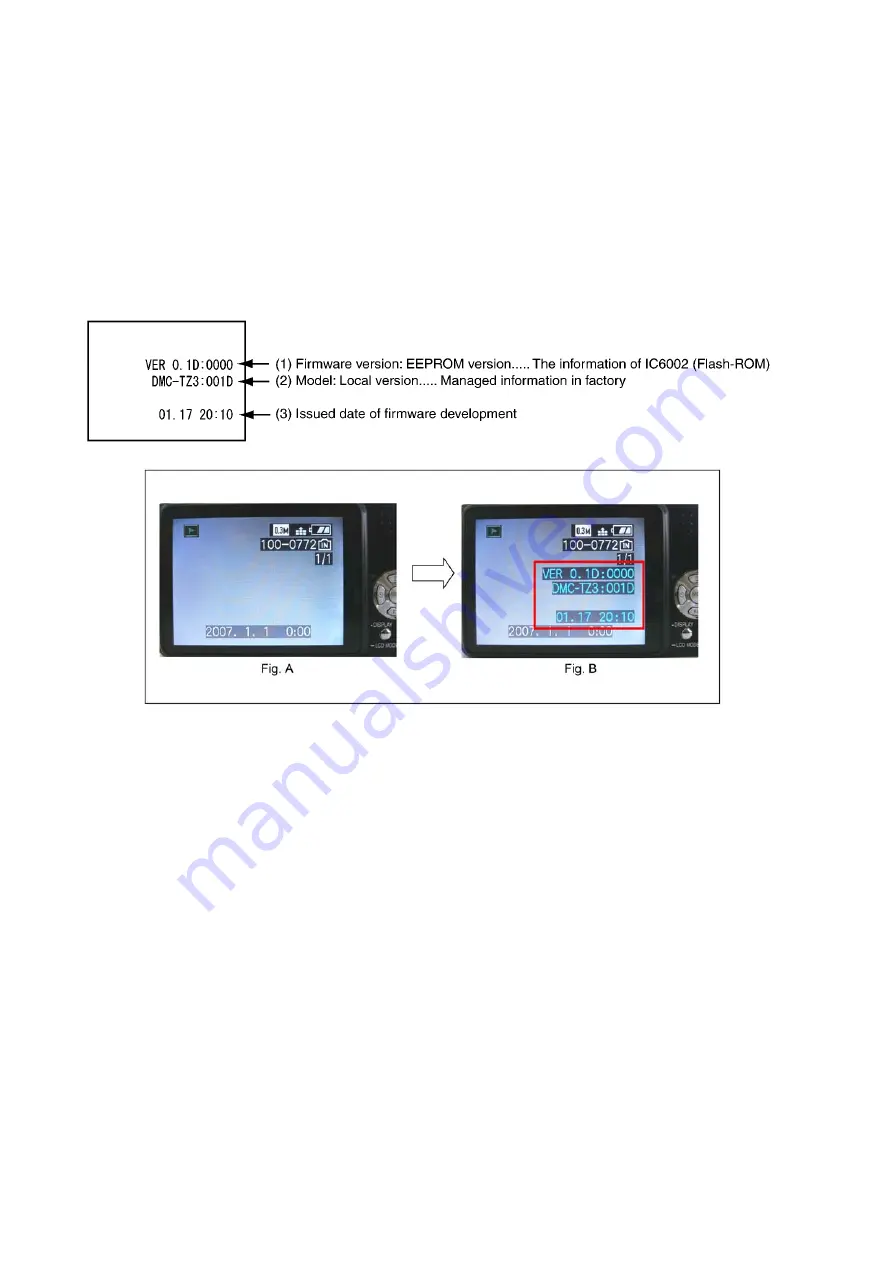
Set the mode dial to “[ Playback ]” and then press [ DISPLAY ] to switch to LCD with indication. (Fig. A)
Press [ Optical Image Stabilizer ] and “[ DOWN ] of Cross key” simultaneously. (No need to keep pressing.)
(The version information is displayed on the LCD with light blue colour letters.) (Fig. B)
CAUTION:
The version information does not display if the LCD has switched to LCD with indication already.
In this case, press [ DISPLAY ] to switch to LCD with indication.
<Point>
• The firmware version and EEPROM version can be confirmed with the information (1).
• The information (2), (3) are just reference.
Содержание Lumix DMC-TZ2P
Страница 12: ...12 4 Specifications...
Страница 13: ...13 5 Location of Controls and Components...
Страница 14: ...14...
Страница 22: ...22 8 Disassembly and Assembly Instructions 8 1 Disassembly Flow Chart 8 2 PCB Location...
Страница 24: ...24 For DMC TZ2 Fig D1a 8 3 2 Removal of the LCD Unit For DMC TZ3 Fig D2 For DMC TZ2 Fig D2a...
Страница 27: ...27 8 3 8 Removal of the Flash Unit Battery Frame Unit Lens Plate and Front Grip Fig D9 Fig D10...
Страница 34: ...34 8 5 7 Assembly for the Zoom Motor Unit and Master Flange Unit...
Страница 52: ...S 14...
Страница 60: ...S6 3 Packing Parts and Accessories Section 2 S 22 406 409 412 410 411 401 403 404 414 408 405 413 402 407...


