


18
•
Step 5. Choose the Model Suffix in “Initial Settings”: (Refer to “CAUTION”)
[Caution: After replacing the Main P.C.B. and/or Flash-ROM]
The model suffix can been chosen,
JUST ONE TIME
.
Once one of the model suffix have been chosen, the model suffix lists will not be displayed, thus, it can not be changed.
Therefore, select the area carefully.
Select the area with pressing “[ UP ] / [ DOWN ] of Cursor buttons”.
•
Step 6. Set the Model Suffix in “Initial Settings”:
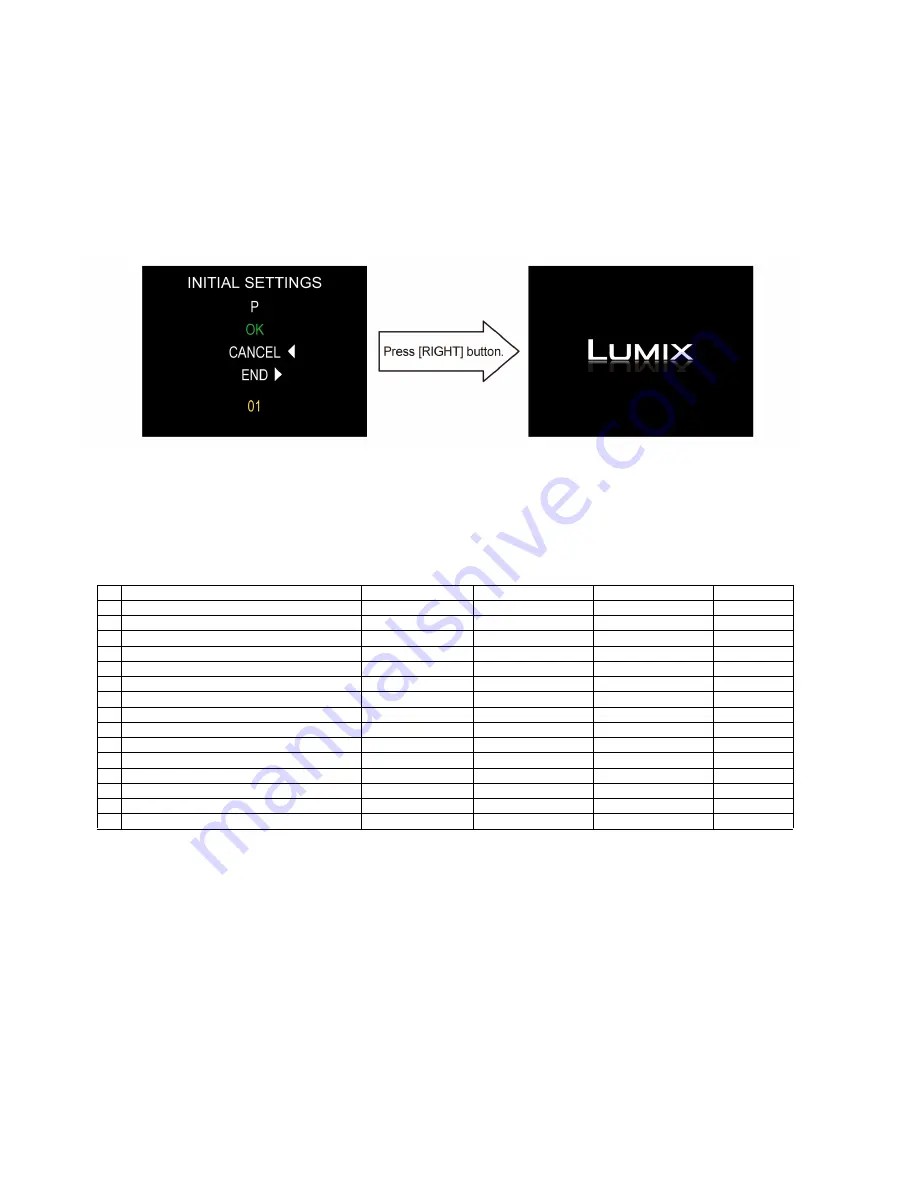
Press the “[ RIGHT ] of Cursor buttons”.
The only set area is displayed, and then press the “[ RIGHT ] of Cursor buttons” after confirmation.
(The unit is powered off automatically.)
•
Step 7. Confirmation:
Confirm the display of “PLEASE SET THE CLOCK” in concerned language when the unit is turned on again.
When the unit is connected to PC with USB cable, it is detected as removable media.
(When the “GK” or “GT” model suffix is selected, the display shows “PLEASE SET THE CLOCK” in Chinese.)
As for your reference, major default setting condition is as shown in the following table.
•
Default setting (After “Initial Settings”)
MODEL
VIDEO OUTPUT
LANGUAGE
DATE
REMARKS
a) DMC-GH4 (Japan domestic model)
NTSC
Japanese
Year/Month/Date
b) DMC-GH4P
NTSC
English
Month/Date/Year
c) DMC-GH4PC
NTSC
English
Month/Date/Year
d) DMC-GH4PU
NTSC
Spanish
Month/Date/Year
e) DMC-GH4EB
PAL
English
Date/Month/Year
f) DMC-GH4EC
PAL
English
Date/Month/Year
g) DMC-GH4EE
PAL
Russian
Date/Month/Year
h) DMC-GH4EF
PAL
French
Date/Month/Year
i) DMC-GH4EG
PAL
English
Date/Month/Year
j) DMC-GH4GC
PAL
English
Date/Month/Year
k) DMC-GH4GD
NTSC
Korean
Year/Month/Date
l) DMC-GH4GH
PAL
English
Date/Month/Year
m) DMC-GH4GK
PAL
Chinese (simplified)
Year/Month/Date
n) DMC-GH4GN
PAL
English
Date/Month/Year
o) DMC-GH4GT
NTSC
Chinese (Traditional)
Year/Month/Date
Содержание Lumix DMC-GH4A
Страница 20: ...20 ...
Страница 21: ...21 ...
Страница 22: ...22 ...
Страница 23: ...23 4 2 Lens ...
Страница 25: ...25 5 2 Lens ...
Страница 27: ...27 Error Code List The error code consists of 8 bit data and it shows the following information ...
Страница 29: ...29 7 Troubleshooting Guide 7 1 Checking Method of Body and Interchangeable Lens ...
Страница 30: ...30 ...
Страница 31: ...31 ...
Страница 32: ...32 ...
Страница 33: ...33 ...
Страница 38: ...38 7 4 Failure Diagnosis of NFC ...
Страница 44: ...44 9 1 2 P C B Location ...
Страница 47: ...47 Fig D2 Fig D3 9 1 3 2 Removal of the Main P C B Fig D4 ...
Страница 49: ...49 Fig D8 9 1 3 5 Removal of the Top Case Unit Fig D9 Fig D10 ...
Страница 50: ...50 9 1 3 6 Removal of the Battery Case Unit and Capacitor P C B Unit Fig D11 Fig D12 ...
Страница 51: ...51 9 1 3 7 Removal of the Wi Fi NFC P C B and NFC Unit Fig D13 Fig D14 ...
Страница 52: ...52 9 1 3 8 Removal of the Tripod and Wi Fi BG FPC Fig D15 Fig D16 ...
Страница 53: ...53 9 1 3 9 Removal of the Mount Box Unit Fig D17 Fig D18 ...
Страница 55: ...55 Fig D21 Fig D22 ...
Страница 56: ...56 9 1 3 12 Removal of the LCD IF P C B Fig D23 Fig D24 ...
Страница 57: ...57 9 1 3 13 Removal of the LCD Packing Fig D25 9 1 3 14 Removal of the Rear Operation Unit and Speaker Fig D26 ...
Страница 58: ...58 Fig D27 Fig D28 ...
Страница 59: ...59 9 1 3 15 Removal of the LCD Lock Holder Unit Fig D29 9 1 3 16 Removal of the SD Door Unit Fig D30 ...
Страница 61: ...61 Fig D33 9 1 3 19 Removal of the EXT Mic P C B Unit Fig D34 ...
Страница 62: ...62 9 1 3 20 Removal of the Flash P C B Unit Fig D35 Fig D36 ...


