background image

Useful Features

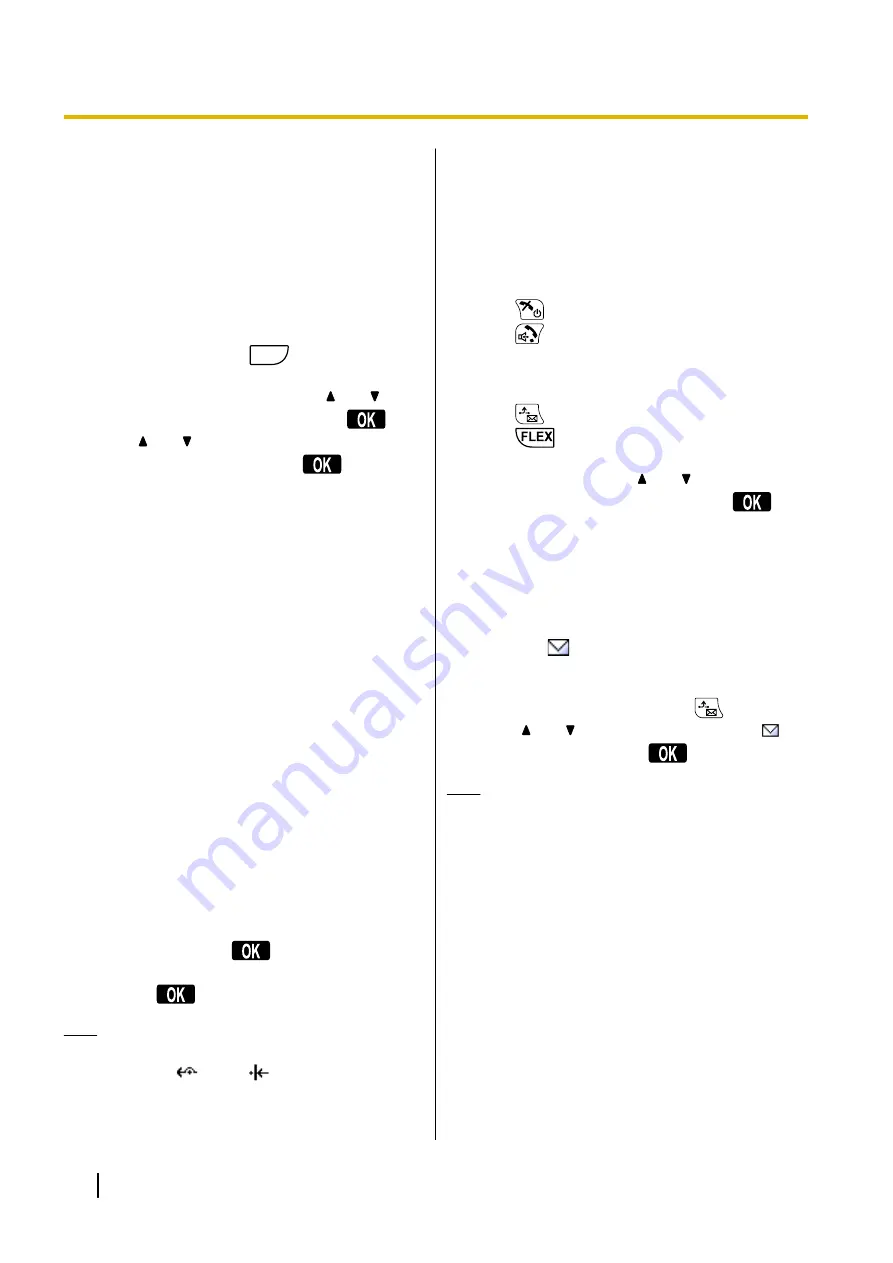
Call Forwarding/Do Not Disturb

You can have incoming calls automatically forwarded
to another destination. You can also have incoming
calls rejected (Do Not Disturb).

To access the FWD/DND settings
1.

In standby mode, press 

FUNC

, and then 6 ("

Fwd/

DND

").

2.

If the unit has multiple lines, press 

[ ]

 or 

[ ]

 to

select the desired line, and then press 

.

3.

Press 

[ ]

 or 

[ ]

 to select the type of FWD or DND

setting to apply, and then press 

.

The settings are as follows:

Fwd/DND Off

*1

: Disable Forward and Do Not

Disturb
(All incoming calls are accepted. )

DND

: Enable Do Not Disturb

(All incoming calls are automatically rejected.)

Fwd(All)

: Enable Forward All Calls

(All incoming calls are forwarded.)

Fwd(Busy)

: Enable Forward Busy

(Incoming calls are forwarded only when your
extension is in use.)

Fwd(NA)

: Enable Forward No answer

(An incoming call is forwarded if you do not
answer the call within a certain amount of time.)

Fwd(B/NA)

*1

 : Enable Forward Busy or No

Answer
(An incoming call is forwarded when your
extension is in use or you do not answer the call
within a certain amount of time.)

*1

Fwd/DND Off and Fwd(B/NA) are only available if the
CS is connected to a KX-NS1000 PBX.

4.

If a Forward setting is selected, enter a new forward
destination number, or confirm and modify a
previously set forward destination number.

If the CS is connected to a KX-NS1000 PBX,
press 

#

 and then 

.

If the CS is not connected to a KX-NS1000 PBX,
press 

.

Note

When Call Forwarding and/or Do Not Disturb is
enabled, 

 and/or 

 appears on the display

in standby mode.

FWD settings cannot be used on a shared line.

Call Waiting

During a conversation, if a second call arrives, you will
hear a call waiting tone. You can answer the second call
by disconnecting or holding the current call.

To disconnect the current call and then talk to
the new party
1.

Press 

 while hearing the call waiting tone.

2.

Press 

.

To hold the current call and then talk to the new
party
1.

Press 

 while hearing the call waiting tone.

2.

Press 

.

3.

Press the dial key corresponding to the flashing
green DN key, or press 

[ ]

 or 

[ ]

 to select a

flashing green DN key, and then press 

.

Listening to Voice Mail
Messages

When you receive a voice message, "

Message

" is

displayed, and 

 will appear.

You can check your new messages by accessing your
mailbox.

1.

In standby mode, press and hold 

.

2.

Press 

[ ]

 or 

[ ]

 to select the line on which 

 is

displayed, and then press 

.

Note

Step 

is not necessary if only one line is

configured on the handset.

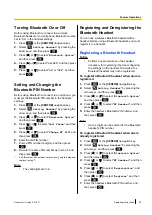
Bluetooth

You can use Bluetooth to connect to a Bluetooth
wireless headset and transfer phonebook data from a
cell phone.
The following Bluetooth headsets can be used with this
unit. (Not all operations with the headsets can be
guaranteed.)

Selected Plantronics

®

-brand headsets

Selected GN Netcom Jabra

®

-brand headsets

32

Operating Instructions

Document Version  2012-11  

Feature Operations

Содержание KX-UDT131

Страница 1: ...y before using this product and save this manual for future use Please use only the battery provided and charge the battery for about 3 hours before using the handset for the first time For details se...

Страница 2: ...strator Guide Describes information about the programming and maintenance of the SIP Cell Station Unit CS Installation Guide Briefly describes basic information about the installation of the SIP Cell...

Страница 3: ...d in identification in the event of theft MODEL NO SERIAL NO DATE OF PURCHASE NAME OF DEALER DEALER S ADDRESS DEALER S TEL NO Trademarks The Bluetooth word mark and logos are owned by the Bluetooth SI...

Страница 4: ...he Handset Phone Number Display 25 Editing the Names of the Flexible Keys 25 Adjusting the Ringer Volume 25 Changing the Vibrate Setting 25 Adjusting the Receiver Speaker Bluetooth headset Volume 26 F...

Страница 5: ...Phonebook and vCard Transfer by Bluetooth 38 Assigning Hot Keys 40 Memo Alarm Setting 40 Entering Characters 42 Character Mode Table 43 Deleting Stored Items 44 Changing Handset Settings 45 Handset S...

Страница 6: ...this product Only qualified personnel should service this product Opening or removing covers may expose you to dangerous voltages or other risks Incorrect reassembly can cause electric shock Unplug th...

Страница 7: ...oduct on an unstable surface as a fall may cause serious internal damage CAUTION The AC adaptor is used as the main disconnect device Ensure that the AC outlet is installed near the product and is eas...

Страница 8: ...confidentiality we recommend that you erase the information such as the phonebook or call log from the memory before you dispose of transfer or return the product or have the product repaired Set the...

Страница 9: ...tional legislation and the Directives 2002 96 EC and 2006 66 EC By disposing of these products and batteries correctly you will help to save valuable resources and prevent any potential negative effec...

Страница 10: ...Panasonic Testing Centre Panasonic Marketing Europe GmbH Winsbergring 15 22525 Hamburg Germany For users in New Zealand This equipment shall not be set to make automatic calls to the Telecom 111 Emer...

Страница 11: ...walls will restrict your operating range A handset may not work when it is too far from the CS depending on the structure of the building We strongly suggest you hold the bottom half of the handset t...

Страница 12: ...t off 1 Bluetooth off Narrowband Mode Up to about 13 h While Talking Backlight on 2 Bluetooth on Wideband Mode Up to about 7 h While not in use Standby Up to about 200 h 1 When the Talking setting of...

Страница 13: ...attery see Battery Installation Page 54 When the low battery warning is displayed charge the battery for about 3 hours The battery strength icon will then display the correct reading Please use only P...

Страница 14: ...26E KX UDT131AL PNLV226AL Charger 1 Battery 1 1 Battery Cover 2 1 Belt Clip Replacement Cover 1 1 For details consult your administrator or dealer 2 The battery cover comes attached to the handset Not...

Страница 15: ...irm a selection If in standby mode pressing the keys perform the following functions LEFT Used to display the Incoming call log UP Used to adjust the ringer volume RIGHT Used to open the phonebook DOW...

Страница 16: ...the feature shown directly above it on the display For details about the soft keys displayed here see Soft Keys Page 20 J POWER CANCEL Key Used to end calls exit the phonebook or Function mode Press...

Страница 17: ...key for more than 2 seconds The icon will change to to indicate the keys have been unlocked Note If you select Manual Password or Auto Password for Key lock type you need to enter the password to unlo...

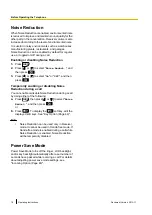
Страница 18: ...e Reduction during a call You can enable or disable Noise Reduction during a call by doing either of the following a Press FUNC then press or to select Noise Reduct and then press or b Press To displa...

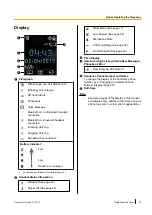
Страница 19: ...25 Ringer Off See page 25 Silent Mode See page 17 Auto Answer See page 24 Microphone Mute Call Forwarding See page 32 Do Not Disturb See page 32 Time Display Date Incoming Call Log Status New Message...

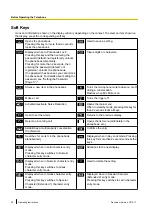
Страница 20: ...ate Noise Reduction Opens the main menu When in standby mode pressing this key for than 2 seconds locks all keys Used to set the Alarm Returns to the previous display Reject an incoming call Opens the...

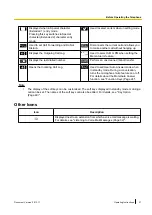
Страница 21: ...fer Opens the Incoming Call Log Used to set clear Auto Answer mode when in standby mode During a conversation turns the microphone mute feature on or off For details about the Mute Auto Answer functio...

Страница 22: ...s the line assigned to the DN key When a call arrives at the DN key pressing the key answers the call Status Indication Off Idle Green on You are on a call using the DN key Flashing green rapidly A ca...

Страница 23: ...l Log Function Keys In standby mode 1 Flexible Keys Ringer Volume Press the Navigator Key 1 If soft key display settings are changed the soft keys shown here may not be displayed The selected item wil...

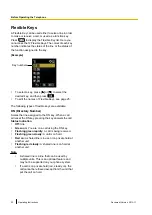
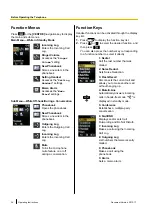
Страница 24: ...rough the display key list 1 Press FUNC to display the function key list 2 Press or to select the desired function and then press You can also press the number key corresponding to a function number t...

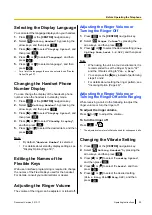
Страница 25: ...r dealer Adjusting the Ringer Volume The volume of the ringer can be adjusted or turned off Adjusting the Ringer Volume or Turning the Ringer Off 1 Press or the CENTRE navigation key 2 Select Ringer V...

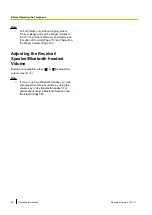
Страница 26: ...Adjusting the Receiver Speaker Bluetooth headset Volume During a conversation press or to adjust the volume Level 1 6 Note If you are using a Bluetooth headset you can also adjust the receiver volume...

Страница 27: ...out searching for an item in the phonebook see Searching for an Item in the Phonebook Page 28 For details about entering characters see Entering Characters Page 42 For details about storing an item in...

Страница 28: ...an search by category 1 While in standby mode press or 2 Press and then press 3 Press or to select a category and then press 4 Enter the name or the first character s of the desired name of the item i...

Страница 29: ...000 PBX For details refer to the documentation of the KX UDS124 Rejecting an incoming call You can reject an incoming call from your handset 1 While an incoming call is ringing press 2 The call will b...

Страница 30: ...dial key corresponding to the slowly flashing green DN key or press or to select a slowly flashing green DN key and then press Transferring a Call Call Transfer You can transfer a call to another des...

Страница 31: ...r the called party answers press FUNC and then press 5 Conference Note The soft key can also be used to access the Conference function directly To display this key edit the displayed soft keys For det...

Страница 32: ...is connected to a KX NS1000 PBX press and then If the CS is not connected to a KX NS1000 PBX press Note When Call Forwarding and or Do Not Disturb is enabled and or appears on the display in standby...

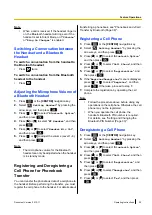
Страница 33: ...0 9 Registering and Deregistering the Bluetooth Headset You can use a wireless Bluetooth headset with a handset Before using a Bluetooth headset you must register it to a handset Registering a Bluetoo...

Страница 34: ...en press Note The default setting is On Disconnecting the Bluetooth Headset 1 Press or the CENTRE navigation key 2 Select Setting Handset by pressing the arrow keys and then press 3 Press or to select...

Страница 35: ...the handset For details about transferring a phonebook see Phonebook and vCard Transfer by Bluetooth Page 38 Registering a Cell Phone 1 Press or the CENTRE navigation key 2 Select Setting Handset by...

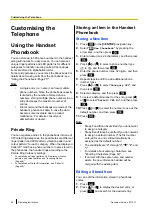
Страница 36: ...ns and colour patterns see Incoming Option Page 46 2 For details about Caller ID information see Caller ID Page 29 Storing an Item in the Handset Phonebook Storing a New Item 1 Press or the CENTRE nav...

Страница 37: ...a category Steps 9 and 10 can be omitted if you do not want to assign a default number The first number entered for an entry will automatically be assigned as the default number For details about ente...

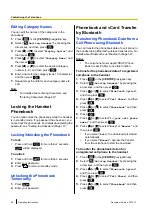
Страница 38: ...Transferring Phonebook Data from a Cell Phone using Bluetooth You can transfer the phonebook data of a cell phone to the handset using Bluetooth wireless transmission For details about Bluetooth see B...

Страница 39: ...screen of the handset see Display Page 19 Transferring vCard Data using Bluetooth vCard is a standard file format for an electronic business card A vCard can include a name and phone numbers You can s...

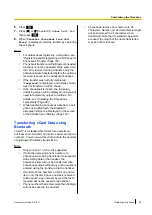
Страница 40: ...y Option Page 49 Memo Alarm Setting An alarm will sound at the set time A memo can also be displayed Memo Alarm is available only when the handset is within range of a CS Note You can select the ringe...

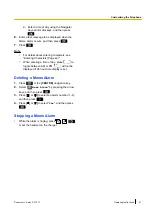
Страница 41: ...press to toggle between AM or PM will not be displayed if 24 hour time display is set Deleting a Memo Alarm 1 Press or the CENTRE navigation key 2 Select Memo Alarm by pressing the arrow keys and the...

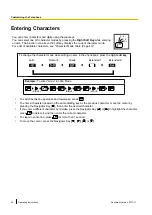
Страница 42: ...ric Greek Extended 1 Extended 2 Example To enter Anne in Latin Mode RIGHT RIGHT RIGHT To switch between uppercase and lowercase press To enter a character located on the same dialling key as the previ...

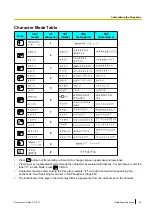
Страница 43: ...he characters associated with that key For example to enter the letter C in Latin Mode press 3 times Characters that are entered using the key for example cannot be entered when searching the phoneboo...

Страница 44: ...1 second 2 Press 3 Press or to select Delete and then press 4 Press or to select Yes and then press Note In step 1 while the Hot Key s information is displayed you can press or to select another Hot...

Страница 45: ...tion Speaker Volume Receiver Volume Talk On Charger Answer Option Any Key Answer Quick Answer Auto Ans Delay Key Option Soft Key Edit Soft Key Name Key Lock Type Auto Lock Time Hot Key Time Display Op...

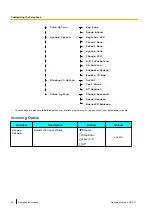
Страница 46: ...T Headset Other Option Change Password Reset Handset MasterCS Address 1 These settings are made available through Web user interface programming For details consult your administrator or dealer Incomi...

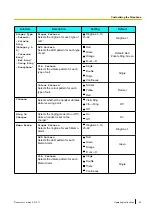
Страница 47: ...lour Pattern 2 Selects the colour pattern for each type of call Normal Normal Yellow Red Vibrate Selects whether the handset vibrates while receiving a call Vib Ring Off Vib Ring Off Ring On Charger S...

Страница 48: ...S is connected to the SIP server 5 This Ringer Type is available if the CS is connected to a KX NS1000 PBX Talk Option Sub Item Description Setting Default Speaker Volume Adjusts the rear speaker volu...

Страница 49: ...e the handset key lock is activated when Auto is selected as the Key Lock Type 0 60 s 10s Hot Key Time Selects the number of seconds before a call is automatically made when a Hot Key assigned to Auto...

Страница 50: ...light of the LCD Level 1 6 Level 3 Standby Display Selects what is shown on the display while in standby mode 1 Handset Number Handset Number Base H S No Edit Off Edits the name displayed on the LCD w...

Страница 51: ...On Off Range Alarm Selects whether the range alarm tone rings or not On On Off System Option Sub Item Description Setting Default Register H S Registers a handset to a base Base 1 4 Not stored Cancel...

Страница 52: ...PIN Sets or changes the Bluetooth PIN number Enter the PIN Code 4 digits Not registered BT Headset Connection 1 Connects or disconnects a Bluetooth headset On On Off Registration Registers or deregist...

Страница 53: ...egistered xxx xxx xxx xxx will be displayed 1 To avoid unauthorised access to this product Set a password that is random and cannot be easily guessed Change the password regularly 2 Make a note of the...

Страница 54: ...rd to the cord holder Use only the included Panasonic AC adaptor For details see Accessory Information Page 14 WARNING To reduce the risk of fire or electric shock do not overload AC outlets and exten...

Страница 55: ...py this page and use as a reference for wall mounting Make sure to set the print size to correspond with the size of this page If the dimension of the paper output still deviates slightly from the mea...

Страница 56: ...ou can remove the attached belt clip by following the steps below 1 Remove the screw with a screwdriver 2 Remove the belt clip 3 Attach the belt clip replacement cover included accessory using the sam...

Страница 57: ...mm Handset only with belt clip 55 0 mm 32 6 mm 151 5 mm Handset on charger 71 5 mm 80 5 mm 165 0 mm Weight Handset including battery 150 g Handset including battery and charger 200 g Operating Enviro...

Страница 58: ...ection or is obstructed during the conversation The front of the handset should face you and the microphone should not be covered For details see Location of Controls Page 15 You cannot make receive a...

Страница 59: ...e contacts without damaging them and charge once more It is time to change the battery Replace with a new battery While charging the battery the handset and the AC adaptor feel warm These are normal c...

Страница 60: ...the handset Register the Bluetooth headset to the handset For details see Registering a Bluetooth Headset Page 33 A connection error has occurred Turn the Bluetooth headset off and then turn it on an...

Страница 61: ...o the handset The Bluetooth function is not ready The Bluetooth function cannot be accessed immediately after turning on the handset Wait a few seconds and try again A connection could not be made bet...

Страница 62: ...There is an error with the fixed internal memory Consult your dealer System Locked The System Option menu has been locked and cannot be accessed Consult your administrator or dealer Password Not Store...

Страница 63: ...ing a phonebook download Ensure the handset and the other device are within range of each other and then perform the download operation again BT Headset Link Error The Bluetooth headset is out of rang...

Страница 64: ...iting names 25 Function keys 24 Function menus 24 H Hold 30 Hot Key Assigning 40 Deleting 44 Dialling 27 K Key Lock 17 L Lock Keys 17 Phonebook 38 M Memo Alarm 40 N Noise Reduction 18 O One touch Dial...

Страница 65: ...ext entering 42 Three party conference 31 Transferring a call 30 V Vibrate 25 Voice Mail 32 Volume Receiver Speaker Bluetooth headset 26 Ringer 25 Document Version 2012 11 Operating Instructions 65 In...

Страница 66: ...opyright This material is copyrighted by Panasonic System Networks Co Ltd and may be reproduced for internal use only All other reproduction in whole or in part is prohibited without the written conse...

Отзывы: