background image

Содержание KX-TGA651

Страница 1: ...al Cordless Phone KX TG4011 KX TG4021 KX TG4031 KX TG4051 KX TG6511 KX TG6521 KX TG6531 KX TG6541 KX TG6581 KX TG7531 You must register this handset with your base unit before it can be used This installation manual describes only the steps needed to register and begin using the handset Please read the base unit s operating instructions for further details Charge the batteries for about 7 hours be...

Страница 2: ...ions for additional replacement accessories Optional headsets KX TCA60 KX TCA93 KX TCA94 KX TCA400 KX TCA430 Setting up Connections Wall mounting Accessory item Order number Quantity Charger PNLC1010ZB 1 AC adaptor PQLV219Y 1 Rechargeable batteries HHR 4DPA Part No HHR 55AAABU or N4DHYYY00004 2 Handset cover 1 PNYNTGA652BR 1 Belt clip PNKE1054Z1 1 Hooks 25 4 mm 1 inch 120 V AC 60 Hz Screws Not sup...

Страница 3: ...onic rechargeable batteries noted on page 2 LWipe the battery ends S T with a dry cloth LAvoid touching the battery ends S T or the unit contacts LConfirm correct polarities S T LUSE ONLY Ni MH batteries AAA R03 size LDo NOT use Alkaline Manganese Ni Cd batteries Charge for about 7 hours LWhen the batteries are fully charged the charge indicator goes off and Fully charged is displayed Note LIf the...

Страница 4: ...play Operation Operating time In continuous use 13 hours max If Eco mode is on Not in use standby 11 days max If Eco mode is on A Charge indicator Ringer indicator Message indicator B Nonslip pad LNonslip pad offers support when you cradle the handset between your shoulder and ear C Speaker D C TALK E s SP PHONE Speakerphone F Headset jack G Dial keypad TONE H Receiver I Display J OFF K FLASH CALL...

Страница 5: ... keys with printed function names Press the soft key corresponding to the desired operation page 4 A Example When selecting setting the desired item in programming LSome KX TGA651 soft key names are different to the button names described in your base unit s operating instructions Registering a handset to a base unit 1 Base unit NKX TG4011 KX TG6511 series Press and hold LOCATOR for about 5 second...

Страница 6: ...o the base unit s operating instructions Display language 1 MENU i 1 1 0 2 V Select the desired setting 3 SAVE i OFF Date and time 1 MENU i 1 0 1 i Enter the current month date and year by selecting 2 digits for each i OK Example For July 15 2010 enter 0 7 1 5 1 0 2 Enter the current hour and minute 12 hour clock format by selecting 2 digits for each Example For 9 30 enter 0 9 3 0 3 AM PM Select A...

Страница 7: ...cribed in the chart below Main feature differences Operational differences in other features NChanging group names in the shared phonebook See Changing group names page 9 NEditing entries in the shared phonebook See Editing entries page 10 Feature KX TGA651 KX TG4031 KX TG4051 series handset KX TG7531 series handset Display size 1 8 inches 1 8 inches 2 1 inches Button size Large Extra large Large ...

Страница 8: ...onal differences in other features Date and time page 6 Chain dial page 10 Voice guidance language page 11 Selecting Greeting only page 11 Calling back during playback Caller ID subscribers only page 11 Feature KX TGA651 KX TG4011 KX TG4021 series handset Page Display size 1 8 inches 1 4 inches Phonebook settings Group All erase r 9 10 Message alert r 11 15 Alarm r 13 Silent mode r 13 Voice mail s...

Страница 9: ...assign it to one of 9 groups 1 C i ADD 2 Enter the party s name 16 characters max i OK 3 Enter the party s phone number 24 digits max i OK 4 V Select the desired group i SELECT 2 times LTo add other entries repeat from step 2 5 OFF Changing group names The default group name is Group 1 to Group 9 1 C i MENU i V Group i SELECT 2 V Select the desired group i SELECT 3 V Group name i SELECT 4 Edit the...

Страница 10: ...desired group i SELECT 3 V Select the current setting of the group ringer tone i SELECT 4 V Select the desired ringer tone i SAVE i OFF Editing entries 1 C i V Select the desired entry i EDIT 2 Edit the name if necessary 16 characters max i OK 3 Edit the phone number if necessary 24 digits max i OK 4 V Select the desired group i SELECT 2 times i OFF Erasing all entries 1 C i MENU i V Erase all i S...

Страница 11: ...message asking callers to call again later Calling back Caller ID subscribers only While caller information is displayed during playback press PAUSE i V Call back i SELECT NEditing the number before calling back Press PAUSE during playback i V Edit Call i SELECT i Press EDIT repeatedly until the phone number is shown in the desired format i C Message alert default on You can select whether or not ...

Страница 12: ...ion 1 CID 2 ERASE i V Yes i SELECT i OFF NStoring caller information to the phonebook 1 CID i V Select the desired entry LTo edit the number press EDIT repeatedly until the phone number is shown in the desired format 2 SAVE i V Phonebook i SELECT 3 Continue from step 2 Editing entries page 10 Transferring calls conference calls 1 During an outside call press INT to put the call on hold 2 V Select ...

Страница 13: ...n you select Off go to step 5 3 Set the desired time i AM PM Select AM or PM i OK 4 V Select the desired alarm tone i SELECT 5 SELECT i OFF LWhen the alarm is set E is displayed Note LTo stop the alarm press any dial key or place the handset on the base unit or charger Silent mode Silent mode allows you to select a period of time during which the handset will not ring for outside calls Important L...

Страница 14: ...rt feature page 11 for voice mail service 1 MENU i 3 3 1 2 Enter your access number 24 digits max 3 SAVE i OFF Note LWhen storing your voice mail access number and your mailbox password press PAUSE to add pauses between the access number and the password as necessary Contact your service provider telephone company for the required pause time LTo erase the voice mail access number Press and hold CL...

Страница 15: ...1 1 VM or MENU i 3 3 0 LThe speakerphone turns on LIf there are no new messages in the voice mail VM is not displayed 2 Follow the pre recorded instructions i When finished press OFF Note LIf the handset still indicates there are new messages even after you have listened to all new messages turn it off by pressing and holding until the handset beeps Turning the time adjustment on off Caller ID sub...

Страница 16: ...or electrical shock do not expose the product to rain or any type of moisture L Do not place or use this product near automatically controlled devices such as automatic doors and fire alarms Radio waves emitted from this product may cause such devices to malfunction resulting in an accident CAUTION Installation and location L The AC adaptor is used as the main disconnect device Ensure that the AC ...

Страница 17: ...er cord and batteries indicated in this manual Do not dispose of batteries in a fire They may explode Check with local codes for possible special disposal instructions Routine care L Wipe the outer surface of the product with a soft moist cloth L Do not use benzine thinner or any abrasive powder Notice for product disposal transfer or return L This product can store your private confidential infor...

Страница 18: ...e that may cause undesired operation Privacy of communications may not be ensured when using this phone CAUTION Any changes or modifications not expressly approved by the party responsible for compliance could void the user s authority to operate this device NOTE This equipment has been tested and found to comply with the limits for a Class B digital device pursuant to Part 15 of the FCC Rules The...

Страница 19: ...ts identified with this logo have reduced noise and interference when used with T Coil equipped hearing aids and cochlear implants T Compatible with Hearing Aid T Coil TIA 1083 LThis product is designed for use in the United States of America Sale or use of this product in other countries may violate local laws LCet appareil est conçu pour être utilisé aux États Unis d Amérique La vente ou l emplo...

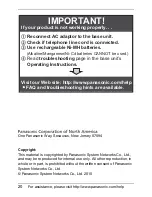
Страница 20: ...ithout the written consent of Panasonic System Networks Co Ltd Panasonic System Networks Co Ltd 2010 1 Reconnect AC adaptor to the base unit 2 Check if telephone line cord is connected 3 Use rechargeable Ni MH batteries Alkaline Manganese Ni Cd batteries CANNOT be used 4 Read troubleshooting page in the base unit s Operating Instructions If your product is not working properly IMPORTANT Visit our ...

Страница 21: ... complaint a return address and provide a day time phone number where you can be reached P O Boxes are not acceptable Keep the tracking number for your records A copy of valid registered receipt is required under the 1 year parts and labor Limited Warranty For Limited Warranty service for headsets if a headset is included with this product please follow instructions above IF REPAIR IS NEEDED DURIN...

Страница 22: ...Dealer or Service Center purchase Parts and Accessories or make Customer Service and Literature requests by visiting our Web Site at http www panasonic com help or contact us via the web at http www panasonic com contactinfo You may also contact us directly at 1 800 211 PANA 1 800 211 7262 Monday Friday 9 am to 9 pm Saturday Sunday 10 am to 7 pm EST ITTY users hearing or speech impaired users can ...

Отзывы: