background image

Useful Information

33

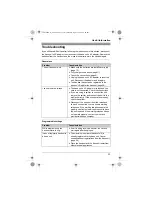
Troubleshooting

If you still have difficulties after following the instructions in this section, disconnect 
the base unit’s AC adaptor, then reconnect the base unit’s AC adaptor. Remove the 
batteries from the handset, and then insert the batteries into the handset again.

General use

Programmable settings

Problem

Cause/solution

The unit does not work.

L

Make sure the batteries are installed correctly 
(page 10).

L

Fully charge the batteries (page 11).

L

Check the connections (page 9).

L

Unplug the base unit’s AC adaptor to reset the 
unit. Reconnect the adaptor and try again.

L

The handset has not been registered to the 
base unit. Register the handset (page 24).

I cannot hear a dial tone.

L

The base unit’s AC adaptor or telephone line 
cord is not connected. Check the connections.

L

If you are using a splitter to connect the unit, 
remove the splitter and connect the unit to the 
wall jack directly. If the unit operates properly, 
check the splitter.

L

Disconnect the base unit from the telephone 
line and connect the line to a known working 
telephone. If the working telephone operates 
properly, contact our service personnel to have 
the unit repaired. If the working telephone does 
not operate properly, contact your service 
provider/telephone company.

Problem

Cause/solution

While programming, the 
handset starts to ring.

L

A call is being received. Answer the call and 
start again after hanging up.

I cannot register a handset to 
a base unit.

L

The maximum number of handsets (6) is 
already registered to the base unit. Cancel 
unused handset registrations from the base unit 
(page 24).

L

Place the handset and the base unit away from 
other electrical appliances.

TG9361BX(e)_OI.book  Page 33  Wednesday, April 16, 2008  3:08 PM

Содержание KX-TG9361BX

Страница 1: ...ider telephone company Please read these operating instructions before using the unit and save them for future reference Charge the batteries for about 7 hours before initial use Operating Instructions Expandable Digital Cordless Phone Model No KX TG9361BX TG9361BX e _OI book Page 1 Wednesday April 16 2008 3 08 PM ...

Страница 2: ...ng calls 13 Answering calls 13 Useful features during a call 14 Dial lock 15 Shared Phonebook Shared phonebook 16 Programming Programmable settings 18 Special instructions for programmable settings 22 Registering a unit 23 Caller ID Service Using Caller ID service 25 Caller list 26 Intercom Locator Intercom 28 Transferring calls conference calls 28 Handset locator 29 Useful Information Wall mounti...

Страница 3: ...art No Part No Quantity KX TG9361 KX TG9361 KX TGA936 1 Block calls Allows the unit to reject calls from specified phone numbers that you do not want to answer such as junk calls page 22 Night mode Allows you to select a span of time during which the handset will not ring for outside calls page 22 Drop and splash resistant handset This design protects from splashes and occasional dropping TG9361BX...

Страница 4: ...mend using Panasonic rechargeable batteries Order No HHR 4MPT Expanding your phone system 1 KX TGA930BX has the same feature as the supplied handset KX TGA936BX not available as an option but is not designed to be drop splash resistant No Accessory item Part number Quantity 1 AC adaptor for base unit PQLV207BX 1 2 Telephone line cord 1 3 Wall mounting adaptor 1 4 Rechargeable batteries 1 2 5 Hands...

Страница 5: ... use this product near automatically controlled devices such as automatic doors and fire alarms Radio waves emitted from this product may cause such devices to malfunction resulting in an accident Operating safeguards L Unplug the product from power outlets before cleaning Do not use liquid or aerosol cleaners L Do not disassemble the product L Do not spill liquids detergents cleansers etc onto th...

Страница 6: ...mpatible base unit or charger to charge the batteries Do not tamper with the base unit or charger Failure to follow these instructions may cause the batteries to swell or explode Important safety instructions When using your product basic safety precautions should always be followed to reduce the risk of fire electric shock and injury to persons including the following 1 Do not use this product ne...

Страница 7: ...ound near metal objects such as wire fences etc L Operating the product near electrical appliances may cause interference Move away from the electrical appliances Routine care L Wipe the outer surface of the product with a soft moist cloth L Do not use benzine thinner or any abrasive powder Notice for product disposal transfer or return L This product can store your private confidential informatio...

Страница 8: ...TALK F s SP PHONE Speakerphone G Dial keypad TONE H FLASH CALL WAIT I Charge indicator Ringer indicator J Receiver K Display L OFF M Navigator key V Volume V N REDIAL PAUSE O HOLD INTERCOM P Microphone Q Charge contacts A B J M N C L I O P Q C D E F G H A B K TG9361BX e _OI book Page 8 Wednesday April 16 2008 3 08 PM ...

Страница 9: ...lied telephone line cord Using another telephone line cord may not allow the unit to work properly Note L The AC adaptor must remain connected at all times It is normal for the adaptor to feel warm during use L The AC adaptor should be connected to a vertically oriented or floor mounted AC outlet Do not connect the AC adaptor to a ceiling mounted AC outlet as the weight of the adaptor may cause it...

Страница 10: ...tteries Wipe the battery ends S T with a dry cloth Avoid touching the battery ends S T or the unit contacts Ensure correct polarities S T L When replacing the batteries USE ONLY rechargeable Ni MH batteries AAA R03 size Do NOT use Alkaline Manganese Ni Cd batteries We recommend using the Panasonic rechargeable batteries noted on page 4 6 1 Release the battery cover latch and lift the cover open 2 ...

Страница 11: ...umidity Battery level Note L The batteries need to be charged if the handset beeps while you are engaged in a call Panasonic Ni MH battery performance supplied batteries Note L Actual battery performance depends on a combination of how often the handset is in use and how often it is not in use standby L Even after the handset is fully charged the handset can be left on the base unit or charger wit...

Страница 12: ... 1 5 0 7 0 8 3 Enter the current hour and minute 12 hour clock format by selecting 2 digits for each Example 9 30 0 9 3 0 4 AM PM Select AM or PM 5 Save i OFF Note L To correct a digit press V or to move the cursor to the digit then make the correction L The date and time may be incorrect after a power failure In this case set the date and time again Symbol Meaning The words in the brackets indica...

Страница 13: ...Yes i OFF Pause for PBX long distance service users A pause is sometimes required when making calls using a PBX or long distance service When storing a calling card access number and or PIN in the phonebook a pause is also needed page 17 Example If you need to dial the line access number 9 when making outside calls with a PBX 1 9 i PAUSE 2 Dial the phone number i C Note L A 3 5 second pause is ins...

Страница 14: ...ty cannot hear you 1 Press Mute during an outside call L Mute flashes 2 To return to the conversation press Mute again Note L Mute is a soft key visible on the handset display during a call Flash FLASH allows you to use the special features of your host PBX such as transferring an extension call or accessing optional telephone services Note L To change the flash time see page 20 For call waiting o...

Страница 15: ...mum of 3 parties including 1 outside party can join a conversation using 2 extensions Dial lock This feature prohibits making outside calls The default setting is OFF Important L When dial lock is turned on only phone numbers stored in the phonebook as emergency numbers numbers stored with a at the beginning of the name can be dialed using the phonebook page 16 We recommend storing emergency numbe...

Страница 16: ...d using the phonebook even when dial lock is turned on page 15 To store a number as an emergency number add at the beginning of the name see Adding entries page 16 Character table for entering names L To enter another character that is located on the same dial key first press to move the cursor to the next space Correcting a mistake Press or to move the cursor to the character or number you want t...

Страница 17: ...s 1 Find the desired entry page 16 2 Erase i Yes i OFF Chain dial This feature allows you to dial phone numbers in the phonebook while you are on a call This feature can be used for example to dial a calling card access number or bank account PIN that you have stored in the phonebook without having to dial manually 1 During an outside call press MENU L Instead of pressing MENU you can also press P...

Страница 18: ...e cases you may need to select from sub menu 2 i Select 4 Press V or to select the desired setting i Save L This step may vary depending on the feature being programmed L To exit the operation press OFF Note L See page 20 for the default settings Main menu Sub menu 1 Sub menu 2 Page Block calls 1 22 Night mode On Off 23 Start End 23 Ringer setting Ringer volume Ringer tone Set date time Date and t...

Страница 19: ...ing another handset 2 If the Caller ID time and date display service is available in your area this feature allows the unit to automatically adjust the date and time setting when caller information is received To use this feature set the date and time first TG9361BX e _OI book Page 19 Wednesday April 16 2008 3 08 PM ...

Страница 20: ...n 1 3 1 24 Dial lock 2 5 1 r 15 HS registration Handset registration 1 3 0 24 Key tone 3 1 6 5 1 On 0 Off LCD contrast Display contrast 1 4 5 1 6 Level 1 6 3 Night mode On Off 2 3 8 1 On 0 Off 23 Night mode Start End 2 3 7 11 00 PM 06 00 AM 23 Ringer tone 4 Handset 1 6 1 1 3 Tone 1 3 4 7 Melody 1 4 Ringer volume Handset 1 6 0 1 Low 2 Medium 3 High 0 Off Set alarm 7 2 0 1 Once 2 Daily 0 Off 23 Set ...

Страница 21: ... a dial tone or no one on the line when you answer the call 5 The flash time depends on your telephone exchange or host PBX Contact your PBX supplier if necessary 6 Generally the line mode setting should not be adjusted If Line in use is not displayed when another phone connected to the same line is in use you need to change the line mode to A 7 If the Caller ID time and date display service is av...

Страница 22: ... page 26 with Storing unwanted callers from the caller list 1 View CID 2 V Select the item to be blocked i Select L To edit the number press Edit then edit the number see step 3 Editing a caller s phone number before calling back page 26 3 Save 4 V Block calls i Select 5 Yes i OFF Storing unwanted callers by entering phone numbers 1 MENU i 2 1 7 i Add 2 Enter the phone number 32 digits max L To er...

Страница 23: ...date and time beforehand page 12 1 MENU i 7 2 0 2 V Select the desired alarm option i Select 3 Set the desired time i OK 4 V Select the desired ringer tone i Save L If you set a tone or melody we recommend selecting a different one for outside calls 5 OFF Note L To stop the alarm press any dial key or place the handset on the base unit or charger L When the handset is in use the alarm will not sou...

Страница 24: ...nds 3 Handset Press OK then wait until a long beep sounds 4 OFF Note L While registering Base registering is displayed on all registered handsets L When you purchase an additional handset refer to the additional handset s installation manual for registration Deregistering a handset A handset can cancel its own registration or the registration of another handset that is stored in the base unit This...

Страница 25: ...ot answered the unit treats the call as a missed call The display shows Missed call This lets you know if you should view the caller list to see who called while you were away Phonebook name display When caller information is received and it matches a phone number stored in the phonebook the stored name in the phonebook is displayed and logged in the caller list Ringer ID This feature can help you...

Страница 26: ...de before using Caller ID page 25 Calls from the same area will be recorded in the caller list without the area code You do not have to remove it before calling back the caller or storing in the phonebook 1 MENU i 2 5 5 2 Enter your area code 8 digits max L To correct a digit press or to move the cursor then press Clear Enter the correct number 3 Save i OFF To erase your area code 1 MENU i 2 5 5 2...

Страница 27: ... the number press Edit then edit the number see step 3 Editing a caller s phone number before calling back page 26 3 Save 4 V Phonebook i Select L If there is name information for the caller go to step 6 5 Enter the name 16 characters max page 16 i Next i Save 6 OFF TG9361BX e _OI book Page 27 Wednesday April 16 2008 3 08 PM ...

Страница 28: ...erring calls conference calls Outside calls can be transferred between 2 handsets 2 handsets can have a conference call with an outside party 1 During an outside call press INTERCOM to put the call on hold 2 V Select the desired unit i Transfer 3 Wait for the paged party to answer L If the paged party does not answer press C to return to the outside call 4 To complete the transfer Press OFF L The ...

Страница 29: ...e unit LOCATOR L All registered handsets beep for 1 minute 2 To stop paging Base unit Press LOCATOR Handset Press OFF Note L When the ringer volume for outside calls is set to off page 20 the handset rings at a low level for paging TG9361BX e _OI book Page 29 Wednesday April 16 2008 3 08 PM ...

Страница 30: ...line cord inside the wall mounting adaptor A Connect the AC adaptor cord and telephone line cord B 3 Insert the hooks on the wall mounting adaptor into the holes 1 and 2 on the base unit 4 Adjust the adaptor to hold the base unit then push it in the direction of the arrow until it clicks into place A B Hook 2 2 1 1 TG9361BX e _OI book Page 30 Wednesday April 16 2008 3 08 PM ...

Страница 31: ...lip You can hang the handset on your belt or pocket using the supplied belt clip To attach the belt clip To remove the belt clip Headset optional Connecting a headset to the handset allows for hands free conversations Switching a call between the headset and handset speakerphone To switch to the handset speakerphone press s To return to the headset press C 220 240 V AC 50 60 Hz Screws 83 mm To sin...

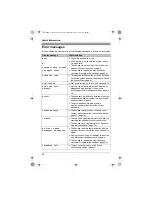
Страница 32: ...teries noted on page 4 10 Error L The handset s registration has failed Move the handset and base unit away from all electrical appliances and try again L The entered password was wrong in programming dial lock Enter the correct password Insert battery L The handset was placed on the base unit or charger without batteries Insert the batteries properly page 10 Invalid L There is no handset register...

Страница 33: ...connected Check the connections L If you are using a splitter to connect the unit remove the splitter and connect the unit to the wall jack directly If the unit operates properly check the splitter L Disconnect the base unit from the telephone line and connect the line to a known working telephone If the working telephone operates properly contact our service personnel to have the unit repaired If...

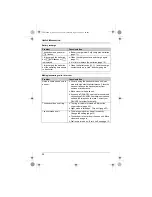
Страница 34: ...out L You are using the handset or base unit in an area with high electrical interference Place the base unit and use the handset away from sources of interference L Move closer to the base unit L If you use a DSL ADSL service we recommend connecting a DSL ADSL filter between the base unit and the telephone line jack Contact your DSL ADSL provider for details The handset does not ring L The ringer...

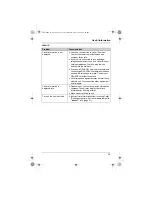
Страница 35: ...ng a DSL ADSL filter between the base unit and the telephone line jack Contact your DSL ADSL provider for details L Other telephone equipment may be interfering with this unit Disconnect the other equipment and try again Caller information is displayed late L Depending on your service provider telephone company the unit may display the caller s information at 2nd ring or later L Move closer to the...

Страница 36: ... cannot remember the dial lock password L Turn the dial lock off using the following method 1 MENU i 2 5 1 2 Press 7 0 0 0 3 Save i Yes i OFF Problem Cause solution Liquid or other form of moisture has entered the handset base unit L Disconnect the AC adaptor and telephone line cord from the base unit Remove the batteries from the handset and leave to dry for at least 3 days After the handset base...

Страница 37: ...W Maximum Approx 5 7 W Charger 1 Standby Approx 1 0 W Maximum Approx 5 0 W Operating conditions 5 C 40 C 20 80 relative air humidity dry Dimensions Base unit Approx 61 mm 145 mm 116 mm Handset Approx 166 mm 53 mm 35 mm Charger 1 Approx 56 mm 77 mm 90 mm Mass weight Base unit Approx 180 g Handset Approx 170 g Charger 1 Approx 70 g 1 If you purchase an optional handset a charger is included Note L D...

Страница 38: ...mmands 20 Display Contrast 20 E Emergency numbers 16 Error messages 32 F Flash 14 20 H Handset Deregistration 24 Locator 29 Registration 24 Headset optional 31 Hold 14 I Intercom 28 K Key tone 20 L Line mode 20 M Making calls 13 Missed calls 25 Mute 14 N Night mode 22 P Pause 13 Phonebook 16 Power failure 9 R Redialing 13 Ringer tone 20 Rotary pulse service 15 S SP PHONE Speakerphone 13 T Time adj...

Страница 39: ...Notes 39 TG9361BX e _OI book Page 39 Wednesday April 16 2008 3 08 PM ...

Страница 40: ...al is copyrighted by Panasonic Communications Co Ltd and may be reproduced for internal use only All other reproduction in whole or in part is prohibited without the written consent of Panasonic Communications Co Ltd 2008 Panasonic Communications Co Ltd All Rights Reserved Serial No Date of purchase found on the bottom of the base unit Name and address of dealer Attach your purchase receipt here T...

Отзывы: