k
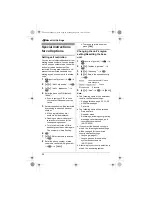
Phonebook
19
3
{^}
/
{V}
: Select the category you
want to search.
i
#
L
If you select
“
All
”
, the unit will
end the category search.
4
{^}
/
{V}
: Scroll through the
phonebook if necessary.
5
{C}
Editing entries
1
Find the desired entry (page 18).
i
"
2
{^}
/
{V}
:
“
Edit
”
i
#
3
Edit the name if necessary (16
characters max.; page 44).
i
#
4
Edit the phone number if necessary
(24 digits max.).
i
#
5
{^}
/
{V}
: Select the desired category.
i
#
6
{^}
/
{V}
:
“
Save
”
i
#
i
{ih}
Erasing entries
Erasing an entry
1
Find the desired entry (page 18).
i
"
2
{^}
/
{V}
:
“
Erase
”
i
#
3
{^}
/
{V}
:
“
Yes
”
i
#
i
{ih}
Erasing all entries
1
n
(left soft key)
i
"
2
{^}
/
{V}
:
“
Erase All
”
i
#
3
{^}
/
{V}
:
“
Yes
”
i
#
4
{^}
/
{V}
:
“
Yes
”
i
#
i
{ih}
One touch dial
Assigning an entry in the handset
phonebook to a one touch dial key
Dial keys
{
1
}
to
{
9
}
can each be used as
a one touch dial key, allowing you to dial
a number from the handset phonebook
by simply pressing a dial key.
1
Find the desired entry (page 18).
i
"
2
{^}
/
{V}
:
“
One Touch Dial
”
i
#
3
{^}
/
{V}
: Select the desired dial key
number.
i
#
L
When the dial key is already used
as a one touch dial key,
“
@
”
is
displayed next to the dial key
number. If you select this dial key,
you can overwrite the previous
assignment.
4
{^}
/
{V}
:
“
Save
”
i
#
i
{ih}
Making a call using a one touch dial
key
1
Press and hold the desired one
touch dial key (
{
1
}
to
{
9
}
).
L
You can view other one touch dial
assignments by pushing the
joystick up or down.
2
{C}
Cancelling a one touch dial
assignment
1
Press and hold the desired one
touch dial key (
{
1
}
to
{
9
}
).
i
"
2
{^}
/
{V}
:
“
Erase
”
i
#
3
{^}
/
{V}
:
“
Yes
”
i
#
i
{ih}
TG8200_8220FX(e-e).book Page 19 Monday, August 6, 2007 5:25 PM


