4
5.
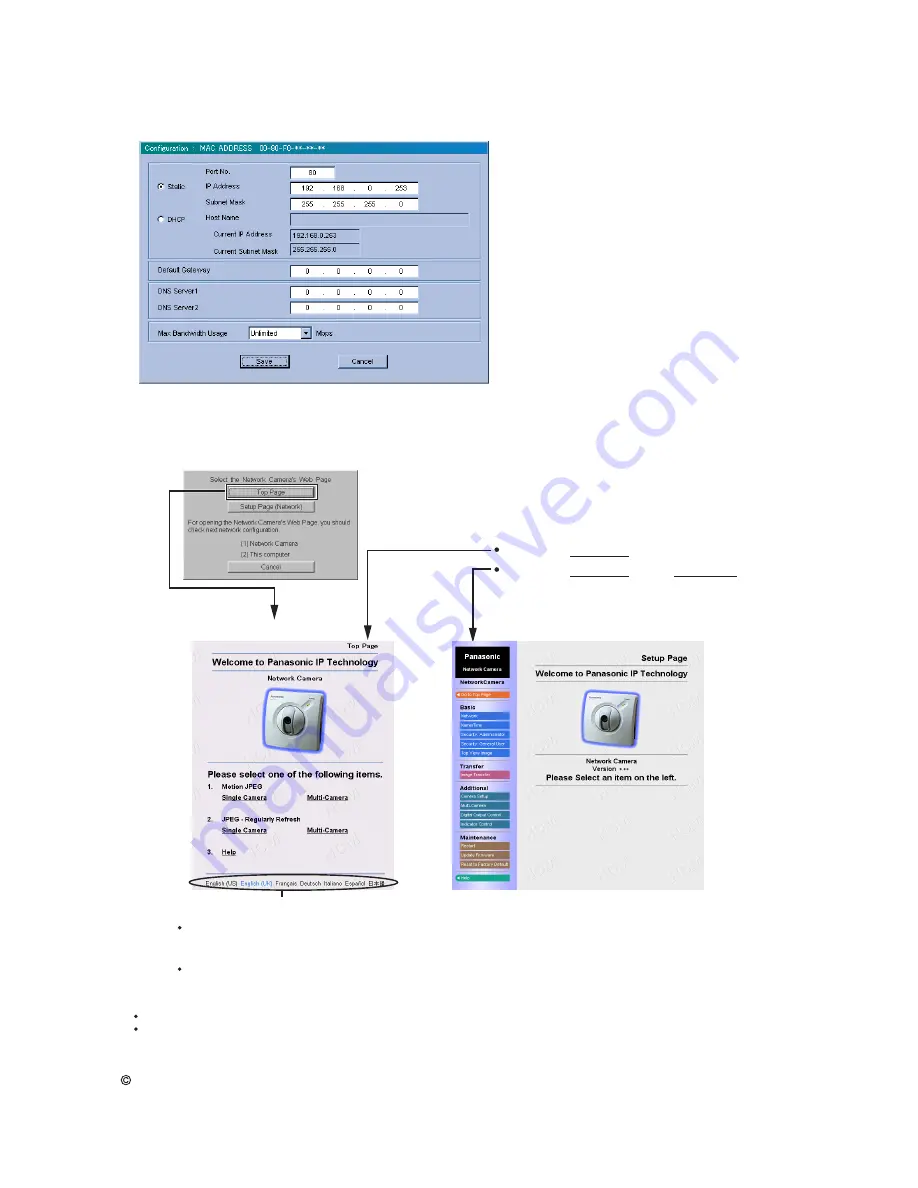
Click
[Save]
on the
Configuration window
when finishing. The "Successful!" message boxes appear
and click
[OK]
. The following message box appears and have the links to
Top Page
and
Setup Page
(Network window)
. Click
[Top Page]
and Top Page appears. Please refer to Operating Instructions for
the details.
Enter "
http://IP address
:Port No."
(When port no. is 80 (default), you do not need
to enter port no.)
in the address field and press
[Enter]
.
Accessing from the web browser
Setup Page
Top Page
If you are configuring in
[Type 3]
, Top Page may not appear at this point. After the Network Camera is directly connected
with the modem, please check the Network Camera Access from the Internet on Page 32 in the Operating Instructions.
Notes
First viewing the image on the Internet Explorer may display a pop up Security Warning window. The window requests
your permission to download ActiveX
®
Controls (OCX file) used to display Motion JPEG. Please refer to Page 38 in the
Operating Instructions.
Enter "
http://IP address
:Port No.
/config.html
"
4.
Select your target Network Camera from the list as shown on example
(A)
on the
Network Camera List
window
and click
[Select]
. The
Configuration window
appears. Please refer to Page 2 in this Getting
Started and enter the correct network parameters.
2002 Kyushu Matsushita Electric Co., Ltd. All Rights Reserved.
Screen shots reprinted with permission from Microsoft Corporation.
ActiveX is either a registered trademark or a trademark of Microsoft Corporation in the United States and/or other countries.
All other trademarks identified herein are the property of their respective owners.
Trademarks
Ethernet is either a registered trademark or a trademark of Xerox Corporation in the United States and/or other countries.
Click the language to change the display.


