Operating Instructions
42
3.3.1
Using Operation Bar
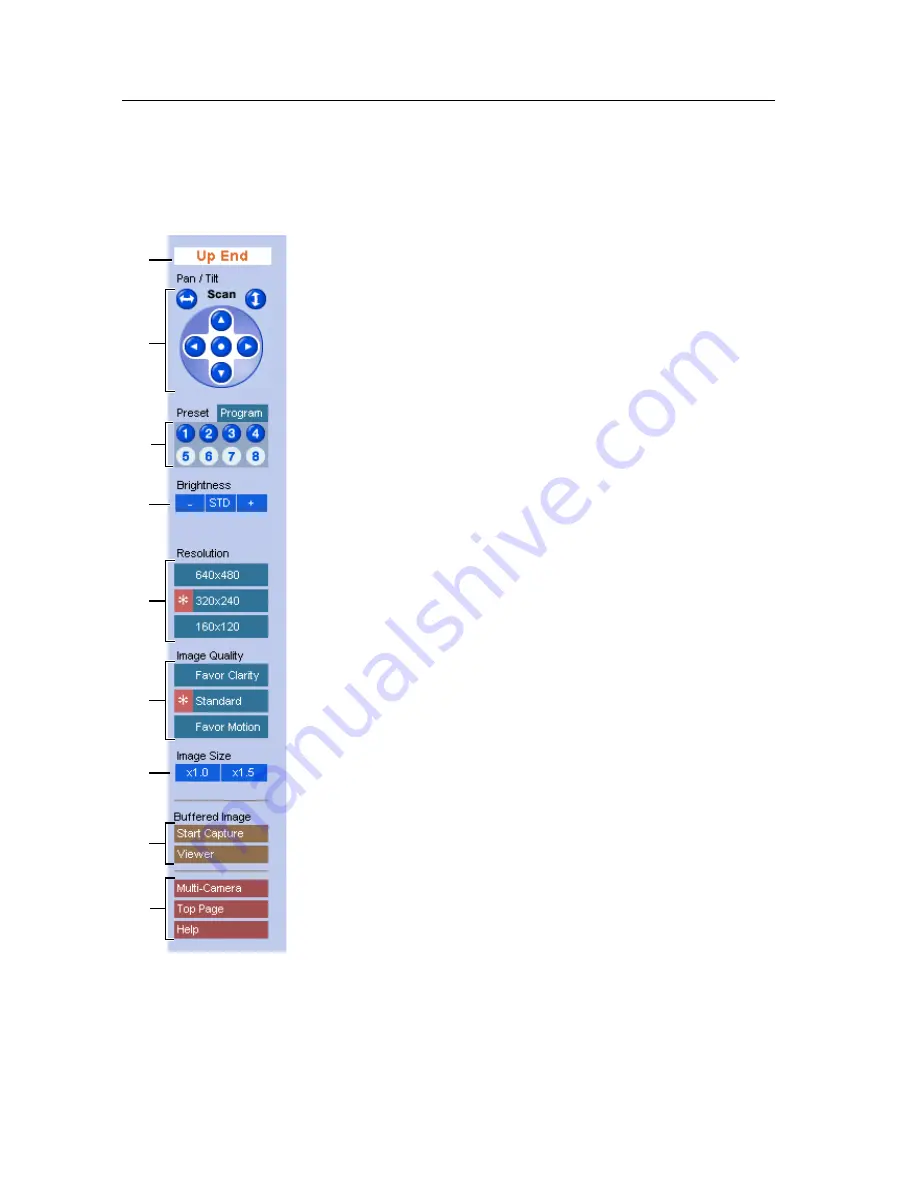
Operation bar controls the general use of Network Camera. The following sections
describe the general way of using it.
(1) End Display: When Pan/Tilt operation has reached the
end of corner, Left End, Right End, Up End or Down
End appears.
Locked Display: Pan/Tilt/Preset, Brightness Control and
Preset program can be locked. Locked appears when the
operation bar is clicked.
Preset Display: Preset name appears when clicking
Preset Button.
(2) Pan/Tilt Scan, Pan/Tilt and Home Position:
Refer to page 43.
(3) Preset Buttons: Refer to page 44.
(4) Brightness: Brightness control has nine steps including
[STD] (Standard). Clicking [-] and [+] buttons changes the
brightness of image. Brightness can be locked on Camera
Setup window on page 78.
(5) Resolution: [640 x 480], [320 x 240] (default) or [160 x
120]
(6) Image Quality: [Favor Clarity] optimizes the image for
good clarity. [Standard] keeps the standard quality.
[Favor Motion] optimizes the image for motion display.
(7) Image Size: The default image size is x 1. [x 1.5] expands
only the size. The resolution does not change.
(8) Buffered Image: [Start Capture] starts buffering the
image. [Viewer] links to the Buffered Image screen on
page 46. Each button changes to [Primary] and
[Secondary] button when using Image Transfer feature.
(9) Link Buttons: Each buttons link to Multi-Camera screen,
Top Page and Help Page.
(1)
(3)
(4)
(7)
(5)
(2)
(6)
(8)
(9)
Содержание KX-HCM10
Страница 7: ...Operating Instructions For assistance please call 1 800 272 7033 7 Section 1 Product Introduction ...
Страница 16: ...Operating Instructions 16 Section 2 Network Camera Setup ...
Страница 34: ...Operating Instructions 34 ...
Страница 72: ...Operating Instructions 72 Setting Example b a c d e f ...
Страница 91: ...Operating Instructions For assistance please call 1 800 272 7033 91 Section 4 Technical Guides ...
Страница 118: ...Operating Instructions 118 ...
Страница 119: ...Operating Instructions 119 Index ...


