


8. Programmable Features
26
8 Programmable Features
Features Summary
8.1 Programming
8.1.1 Programming basic features
1
Press
{
MENU
}
.
2
Select the feature you wish to program.
Press
{
<
}
or
{
>
}
repeatedly to display the desired
feature.
L
The current setting of the feature will be
displayed.
3
Press
{A}
or
{B}
repeatedly to display the desired
setting.
L
This step may be slightly different depending on
the feature.
4
Press
{
SET
}
.
L
The setting you selected is set, and the next
feature will be displayed.
5
To exit programming, press
{
MENU
}
.
8.1.2 Programming advanced features
1
Press
{
MENU
}
.
2
Press
{
<
}
or
{
>
}
repeatedly to display
“
ADVANCE
SETTINGS
”
.
3
Press
{
SET
}
.
4
Select the feature you wish to program.
Press
{
<
}
or
{
>
}
repeatedly to display the desired
feature.
L
The current setting of the feature will be
displayed.
5
Press
{A}
or
{B}
repeatedly to display the desired
setting.
L
This step may be slightly different depending on
the feature.
6
Press
{
SET
}
.
L
The setting you selected is set, and the next
feature will be displayed.
7
To exit programming, press
{
MENU
}
at any time.
To program by entering the program code number
directly
You can select a feature by directly entering its program
code (# and a 2-digit number) instead of using
{
<
}
or
{
>
}
.
1.
Press
{
MENU
}
.
2.
Press
{#}
and the 2-digit code (page 26 to page 28).
3.
Press
{A}
or
{B}
repeatedly to display the desired
setting.
L
This step may be slightly different depending on
the feature.
4.
Press
{
SET
}
.
5.
To exit programming, press
{
MENU
}
.
To cancel programming
Press
{
MENU
}
to exit.
8.2 Basic features
Code #01: Setting the date and time
SET DATE & TIME
PRESS SET
See page 10 for details.
Code #02: Setting your logo
YOUR LOGO
PRESS SET
See page 10 for details.
Code #03: Setting your fax number
YOUR FAX NO.
PRESS SET
See page 12 for details.
Code #04: Printing a sending report
SENDING REPORT
=ERROR
[
±
]
To print a sending report for fax transmission results
(page 18).
“
ERROR
”
(default): A sending report will be printed only
when fax transmission fails.
“
ON
”
: A sending report will be printed after every
transmission.
“
OFF
”
: The sending reports will not be printed.
Code #06: Changing the ring setting in FAX ONLY
mode
FAX RING COUNT
RINGS=2
[
±
]
To change the number of rings before the unit answers a
call in FAX ONLY mode.
You can select
“
1
”
,
“
2
”
(default),
“
3
”
,
“
4
”
or
“
5
EXT.TAM
”
.
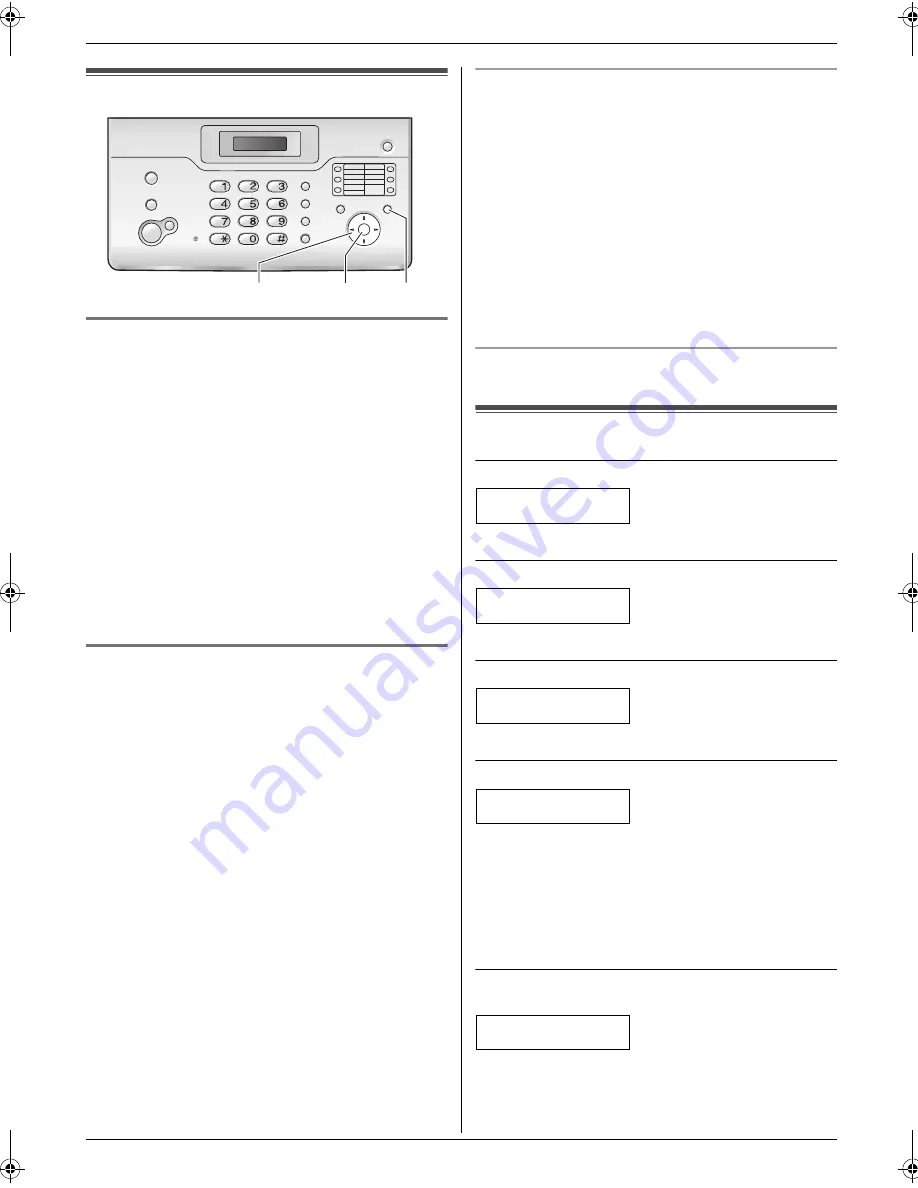
{A}{B}{
<
}{
>
}
{
MENU
}
{
SET
}
FT932_934HK-PFQX2561YA-en.book Page 26 Monday, May 8, 2006 5:05 PM
Содержание KX-FT932HK
Страница 42: ...42 Notes ...
Страница 43: ...43 Notes ...


