


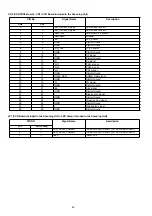
34
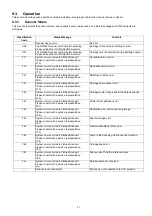
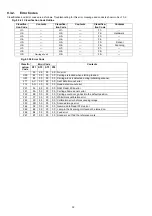
9.3.5.
Test
Item
Operation
Default
Remarks
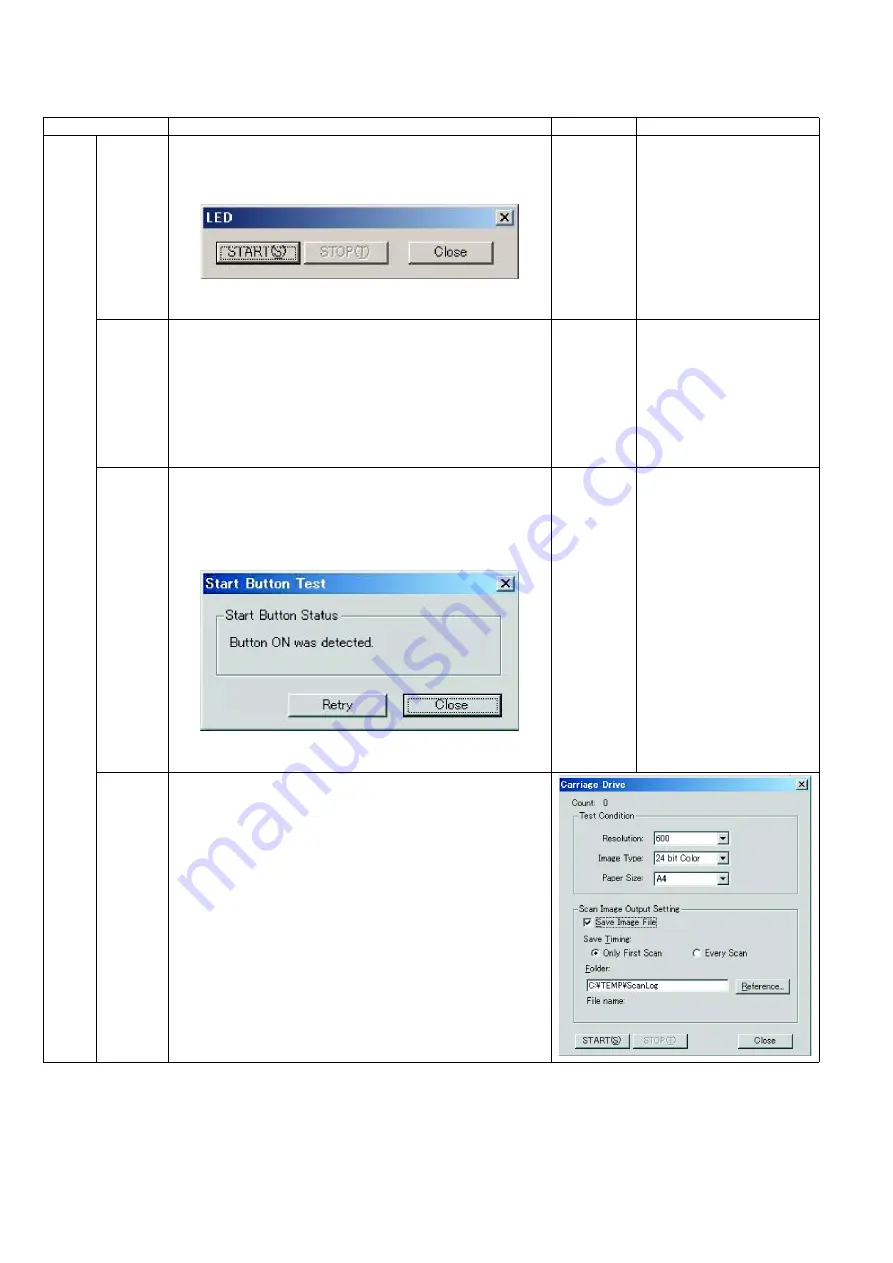
Flatbed LED
1. Click
“Flatbed Test”
on the main menu.
2. Click
“LED”
on the
"Flatbed Test"
dialog box.
3. Click
“START”
on the
“LED”
dialog box to start LED Test
that continues until
“STOP”
is clicked.
4. Click
“Close”
to return to the
"Flatbed Test"
dialog box.
5. Click
“Close”
to return to the main menu.
Each LED (Red, Green)
turns on and/or off in a
constant period as follows:
Red: ON, Green: ON
↓
Red: OFF, Green ON
↓
Red: OFF, Green OFF
↓
Red: ON, Green: ON
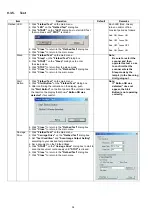
Sleep
1. Click
“Flatbed Test”
on the main menu.
2. Click
“Sleep”
on the
"Flatbed Test"
dialog box.
3. Click
“START”
on the
“Sleep”
dialog box to enter
the sleep mode.
4. Click
“STOP”
to return from the sleep mode.
5. Click
“Close”
to return to the
"Flatbed Test"
dialog box.
6. Click
“Close”
to return to the main menu.
Note:
Be sure to restart the
scanner and then
operate this test so as
to confirm that the
scanner enters the
Sleep mode by the
lamp's (in the Scanning
Unit) going out.
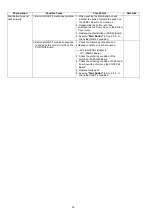
Start
Button
1. Click
“Flatbed Test”
on the main menu.
2. Click
“Start Button”
on the
"Flatbed Test"
dialog box.
3. After confirming the indication on the display, push
the
"Start Button"
on the front panel of the unit and check
the result on the display that shows
"Button ON was
detected”
if successful.
4. Click
“Close”
to return to the
"Flatbed Test"
dialog box.
5. Click
“Close”
to return to the main menu.
Note:
If “Button ON was
detected” does not
appear, the Start
Button is not operating
correctly.
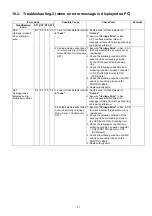
Carriage
Drive
1. Click
“Flatbed Test”
on the main menu.
2. Click
“Carriage Drive”
on the
"Flatbed Test"
dialog box.
3. Set
“Test Condition”
and
“Scan Image Output Setting”
according to your desired test parameter.
4. Set a document on the Flatbed Glass.
5. Click
“START”
on the
“Carriage Drive”
dialog box to start to
scan the document continuously until
"STOP"
is clicked.
6. Click
“Close”
to return to the
"Flatbed Test"
dialog box.
7. Click
“Close”
to return to the main menu.
Содержание KV-SS080
Страница 7: ...7 3 COMPONENT IDENTIFICATION 3 1 Part Names ...
Страница 8: ...8 3 2 Scanner Status ...
Страница 15: ...15 5 SECTIONAL VIEWS 5 1 Flatbed Block and Boards ...
Страница 24: ...24 8 2 8 PANEL Board 1 Remove the Top Cover Assy See 8 2 4 2 Remove the 2 screws a and 1 connector ...
Страница 44: ...44 11 2 Block Diagram 2 Board ...
Страница 47: ...47 12 PARTS LOCATION AND MECHANICAL PARTS LIST ...
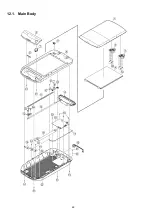
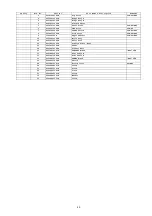
Страница 48: ...48 12 1 Main Body ...
Страница 50: ...50 12 2 Packing ...


