Owner’s Manual
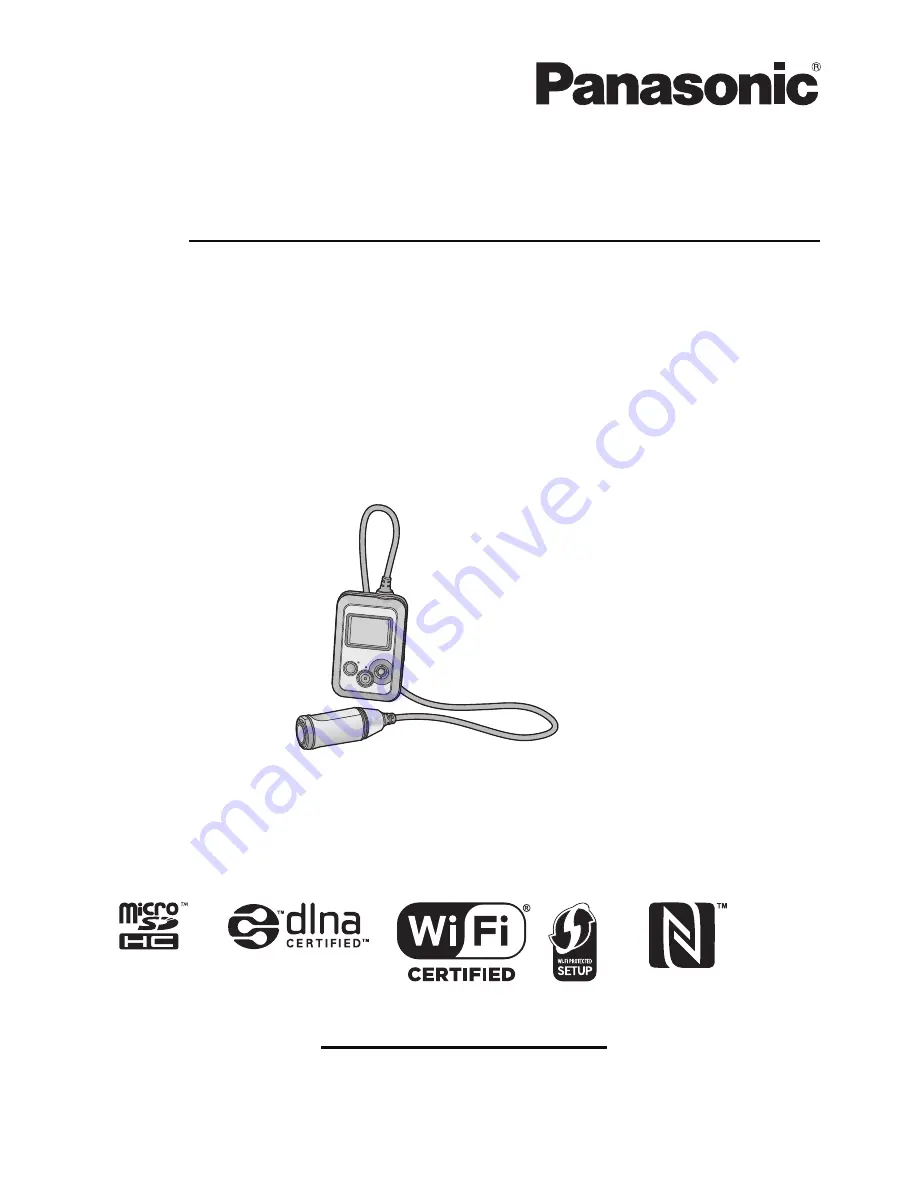
Wearable Camera
Model No.
HX-A500
Please read these instructions carefully before using this product, and save this manual for future use.
SQW0001
until 2014/5/12
Register online at www.panasonic.com/register
(U.S. customers only)
Страница 1: ...ual Wearable Camera Model No HX A500 Please read these instructions carefully before using this product and save this manual for future use SQW0001 Register online at www panasonic com register U S customers only ...
Страница 2: ...phone 38 Playing back on a TV 39 Playing back on a PC 39 Wi Fi Wi Fi function 40 Using Wi Fi modes 42 Changing the Wi Fi mode 42 Remote operation 43 Preparations before using remote operation 44 Using remote operation with a direct connection Smartphone Direct Connect 44 Using remote operation with a wireless access point connection Wireless Network Mode 46 Screen display during remote operations ...
Страница 3: ...he feature of HD Writer WE 2 0 75 Before Installing HD Writer WE 2 0 76 Operating environment for HD Writer WE 2 0 77 Installation 78 Starting HD Writer WE 2 0 79 Others Indications 80 Messages 82 About recovery 82 Troubleshooting 83 Cautions for use 86 Approximate recordable time 89 Approximate number of recordable pictures 90 Optional accessories 91 Requests when disposing of this unit 92 About ...
Страница 4: ...the inner side of the side cover around the rubber seal or connecting terminals when the side cover is opened or closed in places with sand or dust etc If you close the side cover with foreign objects adhering to it water may enter the inside Be very careful because doing so may cause malfunctions Do not leave this unit for a long period of time in places where temperature is very low at high alti...
Страница 5: ...er adhering to the unit remove it Be extremely careful to remove any sand etc that may adhere to the sides and corners of the rubber seal Wipe it off with a dry soft cloth if there is any liquid It may cause water leaks and malfunction if you use this unit with liquid adhered 4 Check for cracks and deformation of the rubber seal on the side cover The integrity of the rubber seals may decrease afte...
Страница 6: ...deteriorate the waterproof performance or cause failure due to deformation Do not use chemicals such as benzine thinner alcohol or cleanser soap or detergents 4 Confirm that there are no water droplets open the side cover and wipe off any water droplets or sand left inside using a soft dry cloth Water droplets may adhere to the card etc when the side cover is opened without thoroughly drying Also ...
Страница 7: ...ur own risk About the Image App Install the smartphone application Image App on your smartphone You can enjoy a variety of functions by setting up a Wi Fi connection between this unit and a smartphone l 9 For information about the installation of the Image App refer to page 56 About the clock setting Make sure to set date and time before recording l 17 Preparation Read this first Indemnity about r...
Страница 8: ...s manual microSD Card and microSDHC Card are referred to as the microSD card Smartphone and tablet computer are referred to as the smartphone Pages for reference are indicated by an arrow for example l 00 Smartphone operations are described as follows Cards that you can use with this unit microSD Memory Card and microSDHC Memory Card Tap Touch the screen lightly and release your finger Drag Move y...
Страница 9: ... 19 32 66 Wi Fi Connection with a smartphone Playback l 37 Deletion Copy l 37 38 Remote operation l 43 Wi Fi Connection with a wireless access point Live broadcasting Using the LUMIX CLUB and USTREAM services you can broadcast live motion pictures l 48 Playback on DLNA compatible devices You can play back the contents stored in this unit on the DLNA compatible TV l 54 A DLNA compatible devices XXX...
Страница 10: ...have recorded Rec Review l 29 j Using the lock function l 29 7 Recording start stop button l 27 8 NFC touch area l 44 46 9 Speaker 10 Camera l 24 11 Lens l 5 12 Mic 13 Camera main unit connection cable This cable is not removable 14 USB terminal l 11 15 Reset button RESET If this unit fails to operate correctly such as when this unit cannot be turned on off press the reset button by using a paper ...
Страница 11: ...val of 2 seconds approximately 1 second on 1 second off indicating that charging has begun It will turn off when the charging is completed Do not use any other USB cables except the supplied one Operation is not guaranteed with any other USB cables Do not heat or expose to flame Do not leave the unit including built in battery in a car exposed to direct sunlight for a long period of time with door...
Страница 12: ...in unit heats up after use or charging This is not a malfunction For information about charging with a mobile USB charger or an AC adaptor check the support site http panasonic jp support global cs e_cam index html This site is English only Charging time Pixels Frame rate Maximum continuous recordable time Actual recordable time 4 h 30 min 3840k2160 30p 1 h 20 min 40 min 1920k1080 60p 1 h 50 min 5...
Страница 13: ... try charging again If you are still unable to charge there may be a fault in this unit or the connecting device Flashing with approx 4 second period off for approx 2 seconds on for approx 2 seconds When the battery is over discharged or the temperature of the battery is too high or low It can be charged but it may take a few hours to complete the charging normally It will flash in approx 2 second...
Страница 14: ... microSDHC logo are not based on SD Memory Card Specifications Keep the Memory Card out of reach of children to prevent swallowing Preparation Recording to a card Card type Capacity microSD Card 512 MB 1 GB 2 GB microSDHC Card 4 GB 8 GB 16 GB 32 GB Recording settings Supported SD Speed Class Ratings When PIXELS FRAME RATE is set to 3840k2160 30p l 32 Class 10 or higher of the SD Speed Class Rating...
Страница 15: ...n will be disconnected j When you set up a Wi Fi connection between this unit and a smartphone and set this unit to Playback mode remotely with the smartphone l 37 j When you set up a Wi Fi connection between this unit and a DLNA compatible TV l 55 About the access lamp When the access lamp is lit do not j Remove the microSD card j Turn this unit off j Insert and remove the USB cable j Expose this...
Страница 16: ...ing use it turns off automatically after emitting a warning sound and displaying a message To use this unit again wait until it cools down This unit cannot be used until it cools down Preparation Turning this unit on off The power lamp is turned on To turn off this unit Hold down the power button until the power lamp goes off ...
Страница 17: ...lection 4 Press the recording start stop button to complete the setting When the unit is turned on for the first time a message asking you to set the date and time will appear Select YES and perform Steps 2 to 3 to set the date and time If the time display becomes the built in lithium battery needs to be charged When the battery of this unit is in a charged state the built in clock battery is also...
Страница 18: ...rtphone By installing Image App on a smartphone you can set menu items of this unit remotely from the smartphone 1 Install the Image App on your smartphone l 56 2 Set up a Wi Fi connection between this unit and the smartphone and perform remote operation l 43 3 On the Image App screen tap When a Wi Fi mode Smartphone Direct Connect Wireless Network Mode is active you cannot set menu items with thi...
Страница 19: ...ttery life if you perform no operation during a set period of time the LCD monitor turns off and this unit enters a standby state The following operations will activate this unit j Operate the joystick j Press the recording start stop button This will start stop recording If you set this item to OFF this unit does not enter a standby state If you start recording the LCD monitor will turn off appro...
Страница 20: ...at the start end of recording etc 2 Beeps for 4 times When an error occurs Check the sentence displayed on the screen l 82 Settings of this unit return to the default condition Wi Fi network settings will not be changed This item is not displayed in Playback mode This limitation applies to the Image App only Please be aware that if a microSD card is formatted then all the data recorded on the micr...
Страница 21: ...er number is updated and file number will start from 0001 l 74 To reset the folder number format the microSD card and then perform NUMBER RESET You can select the language on the screen display and the menu screen This item cannot be set in Image App FIRMWARE VERSION FIRMWARE UPGRADE For the latest update information check the support website below As of April 2014 http panasonic jp support global...
Страница 22: ...ength of the band Recording Before recording If a feeling of discomfort arises after a long period of use stop the use or adjust the size of the Head Mount Armband Case Headband to loosen them a little Please note that the parts may leave marks on your face and other body parts after use For the direction of the camera check the actual image on the LCD monitor A Camera unit B Main unit Fastening t...
Страница 23: ...amera unit can be stored in the camera pocket B and the camera main unit connection cable can be bundled with the band A When fastening to your arm remove the camera unit from the Armband Case When removing the camera main unit from the Armband Case avoid pulling the camera main unit connection cable Do not forcibly bend or pull the cable Be extra careful in low temperatures which cause the cable ...
Страница 24: ...t the direction as shown in the illustration and tighten the adjustment knob again 1 Insert the camera unit until it clicks into place Insert the camera unit so that the microphone faces inward 2 Fit the camera main unit connection cable in the cable holder Loosen the cable to make the shape of the Head Mount Assembling the Head Mount Attaching the camera unit to the Head Mount to wear A Lock leve...
Страница 25: ...nob rotate it towards 2 If the direction of the lens cannot be changed loosen the adjustment knob slightly and tighten it after adjusting the direction of the lens If the camera unit is shaky tighten the adjustment knob Attaching the Headband When recording images full of motion such as sports attach the Headband before putting on the Head Mount 1 Pass the Headband through the Headband holes Attac...
Страница 26: ...adjustment knob comes off attach it as indicated in the right figure We recommend you make a test recording to check the settings such as the ANGLE OF VIEW LEVEL SHOT IMAGE STABILIZATION and WHITE BALANCE before recording l 27 33 34 35 Put on this unit face forward and take the main unit out of the Armband Case to check the LCD monitor You can use Shooting guidelines l 36 as a guide for checking t...
Страница 27: ...n recording a motion picture Press the recording start stop button again to pause recording Motion Picture Recording Mode l 30 0h00m00s Recording time elapsed h is an abbreviation for hour m for minute and s for second Each time the unit is put into recording pause the counter display will be reset to 0h00m00s The elapsed recording time starts counting time as recording starts R 1h20m Approximate ...
Страница 28: ...min Each microSD card can save up to approximately 89100 files and approximately 900 folders When other motion pictures and still pictures have already been saved in the microSD card the capacity becomes lower Motion pictures are saved in separate folders according to the RECORDING MODE l 30 or PIXELS FRAME RATE l 32 settings Still pictures that have been taken one at a time and those taken in INT...
Страница 29: ...icture may be played back as a Rec Review image j Turning on off this unit j Inserting and removing the microSD card j Deleting the file containing the initial part of the last recorded motion picture that was automatically divided into more than one file due to its long length You cannot perform Rec Review in the following cases j During recording j When Wi Fi mode is active j When you have perfo...
Страница 30: ...cording l 27 Recording Changing the Recording Mode RECORD SETUP RECORDING MODE desired recording mode Recording Mode icon Recording method NORMAL SHOOTING Recording motion pictures SLOW MOTION This records motion pictures in slow motion by setting a high frame rate increasing the number of frames LOOP RECORDING No matter how long you record you can only record motion pictures for the last 1 hour t...
Страница 31: ...Once you start recording the motion picture will be recorded and divided approximately every 2 minutes When the recording time exceeds 1 hour approximate only the last 1 hour approximate part up to the end of the recording will be saved The part before the 1 hour part will be deleted During the recording flashes and the approximate remaining recordable time indication disappears The elapsed record...
Страница 32: ...g of 10 or higher When RECORDING MODE is set to SLOW MOTION l 30 Recording Recording functions of menus RECORD SETUP desired menu item Record Setup desired menu item RECORDING MODE PIXELS FRAME RATE 3840k2160 30p Records 4K motion pictures 1920k1080 60p 1920k1080 30p Records motion pictures in full high definition image quality 1280k720 60p 1280k720 30p Records motion pictures with an image qualit...
Страница 33: ...rinter or photo studio before printing You can switch the angle of view mode This item cannot be set in the following cases j During recording j When RECORDING MODE is set to SLOW MOTION j When PIXELS FRAME RATE is set to 3840k2160 30p If you set the ANGLE OF VIEW to STANDARD and set IMAGE STABILIZATION to ON the angle of view becomes narrower The options are not displayed as menu items on the Ima...
Страница 34: ...hen the tilt of the camera is large j When motion is continuous LEVEL SHOT cannot be set in the following cases j When RECORDING MODE is set to SLOW MOTION j When the PIXELS FRAME RATE is set to 3840k2160 30p 1920k1080 60p or 1280k720 60p j When ANGLE OF VIEW is set to WIDE j When COLOR NIGHT REC is set to ON This is for reducing camera shakes IMAGE STABILIZATION cannot be set in the following cas...
Страница 35: ...reset mode will be automatically set to User When you change the recording condition change the setting again 1 Press the joystick to select the menu 2 Fill the screen with a white subject select SET then press the joystick A message informing you that the White Balance has been set will be displayed and the setting will be saved Press the recording start stop button to complete the setting WHITE ...
Страница 36: ...PICTURE RECORDING This reduces noise of the wind picked up by the built in microphone This function s default setting is OFF It may not reduce noise of the wind sufficiently depending on the recording situation This function is not available in PICTURE RECORDING or when MICROPHONE is set to OFF You can check if the image is level on the recording screen of the Image App The function can also be us...
Страница 37: ... smartphone Delete or copy using Picture Share settings Set Trash Delete or Save to smartPH to the picture share tab tap and hold the thumbnail of the file you want to delete or copy and drag and drop the thumbnail to the tab For information on how to make the setting refer to Help in the Image App Copying motion picture files stored in this unit to a smartphone may not be possible depending on th...
Страница 38: ...otion pictures recorded in SLOW MOTION as Highlight Playback files Motion still pictures can be protected so that they are not deleted by mistake Even if you protect some motion still pictures formatting the microSD card will delete them This splits a motion picture into two and deletes the unnecessary part before or after the split point It may not be possible to divide and delete files with a sh...
Страница 39: ...supports 4K motion pictures When inserting an microSD card into the SD card slot of a TV always attach the microSD card to its dedicated adaptor Please also refer to the operating instructions for the TV To play back the files of motion pictures recorded with this unit on a PC use HD Writer WE 2 0 For details on HD Writer WE 2 0 refer to page 75 If you connect this unit and a PC you can copy motio...
Страница 40: ...crease in performance in both devices Do not connect to the wireless network you are not authorized to use When this unit utilises its Wi Fi function wireless networks will be searched automatically When this happens wireless networks that you are not authorized to use SSID may be displayed however do not attempt to connect to the network as it may be considered as unauthorized access SSID refers ...
Страница 41: ...otion pictures or still pictures we recommend you charge the battery fully When sending data on a mobile network or tethering high packet communication fees may be incurred depending on the details of your contract This unit may not connect to an access point depending on the radio wave condition When using the Wi Fi function do not cover the Wi Fi transmitter with your hand l 10 When the battery ...
Страница 42: ...ke the setting If you move the joystick left on the recording screen you can start up the Wi Fi mode you set in Wi Fi MODE Wi Fi MODE cannot be set in Image App Wi Fi Using Wi Fi modes Wi Fi function Available Wi Fi modes Description Remote operation Smartphone Direct Connect Wireless Network Mode You can perform recording and playback operations on your smartphone Live broadcasting LIVE CAST You ...
Страница 43: ...to a smartphone B When connecting to a wireless access point Refer to Help in the Image App menu about how to operate Wi Fi Remote operation You need to turn on the Wi Fi function of your smartphone Do not remove the microSD card during remote operations Caution Be sure to pay special attention to the privacy the Portrait rights etc of the subject when you use this function Use at your own risk Im...
Страница 44: ...d to Using remote operation with a wireless access point connection Wireless Network Mode l 46 Using remote operation with a direct connection Smartphone Direct Connect If the device is Android NFC compatible Set the NFC function of the smartphone to on 1 Start up the smartphone application Image App 2 Touch the smartphone on of this unit Touch the NFC mark while a message asking you to touch the ...
Страница 45: ...rarily depending on radio wave conditions An attempt to reconnect is made automatically when radio wave interference etc is eliminated Please note the following If you have been recording a motion picture or recording in the INTERVAL REC MODE the recording will continue even after the connection interruption To stop the recording operate this unit If Image App has been used in Playback mode if rec...
Страница 46: ... displayed on the smartphone screen If you touch the second smartphone when this unit has already been connected to the first one The remote operation with the first smartphone that has been connected to this unit will be cut off and the newly touched smartphone will be connected The connection cannot be established while this unit is recording or copying a file to the smartphone during remote ope...
Страница 47: ...ot Function button 4 Menu display 5 Playback mode selector 6 Recording mode selector 7 Recording start stop 8 Motion Picture Still Picture toggle button 9 Name of the connected device Playback screen 1 Camera function 2 Number of motion picture still picture scenes 3 Remaining battery power of this unit 4 Delete 5 Upload 6 Copy 7 Name of the connected device 8 Information display for the motion pi...
Страница 48: ...ive broadcasting If CLOCK SET l 17 is not set correctly live broadcasting is not possible Check your contract details carefully as smartphone and internet contract details may result in high communication charges being incurred or a limit placed on communication traffic Caution Be sure to pay special attention to the privacy the Portrait rights etc of the subject when you use this function Use at ...
Страница 49: ...cquire a LUMIX CLUB Login ID Password When you connect this unit to a wireless access point l 59 you can acquire a LUMIX CLUB Login ID Password with this unit l 68 4 Use linked services with LUMIX CLUB Log in to the LUMIX CLUB and register set up the USTREAM on WEB service link setup 5 Set up a Wi Fi connection between this unit and the wireless access point WPS Connection l 59 Searching for wirel...
Страница 50: ...t the scheduled broadcast date l 52 For other settings set them on the LUMIX CLUB On the LUMIX CLUB register the destination addresses of the e mail in advance 1 Press the joystick to display the LIVE CAST menu 2 Select Send E mail then press the joystick To start the live broadcast 1 Press the joystick to display the LIVE CAST menu 2 Select Start Live Cast then press the joystick The Wi Fi mode i...
Страница 51: ...ication for TVs or smartphones cancel the Password for the Program and restart the broadcast Image content may be leaked to third parties depending on the USTREAM image publication method settings Set the publication range and Password using USTREAM if required If a live broadcast motion picture is saved on the USTREAM side the file name will be the same as the channel name The live broadcast stop...
Страница 52: ...M then press the joystick 2 Select ON or OFF then press the joystick Items Contents E MAIL SETUP You can make the delivery setting of a broadcast notification e mail and the setting for the scheduled time and date of the broadcast indicated in the e mail SAVE VIDEO IN USTREAM Live motion pictures are saved on USTREAM IMAGE QUALITY This sets the image quality of motion pictures that will be broadca...
Страница 53: ...l appear as if the frame rate is low Operation cannot be guaranteed for all devices Even with a broadband line the recommended optimal speed may not be reached depending on your environment Narrowband lines such as analog modems cannot be used If the line for the smartphone is switched communication may be interrupted In that case connect again To set the image quality of a motion picture you simu...
Страница 54: ...E802 11b g n 2 Check if the TV is DLNA compatible 3 Set up a Wi Fi connection between this unit and the wireless access point WPS Connection l 59 Searching for wireless access points to set up a connection l 60 Setting up a connection manually l 62 This operation is not possible while this unit is recording When the Wi Fi connection is complete proceed to Playing back on a DLNA compatible TV Wi Fi...
Страница 55: ...nnot be saved on a DLNA compatible device Images or sound may be interrupted or the line may be disconnected When playing back on a TV the image being played back is not displayed on the Image App screen You cannot playback motion pictures recorded with PIXELS FRAME RATE set to any of the following settings The files may not be played back smoothly depending on your environment such as the network...
Страница 56: ...curred depending on the details of your contract Wi Fi Install the Image App About the Image App The Image App is an application provided by Panasonic For Android apps For iOS apps OS Android 2 3 3 or later iOS 5 0 or later Installation procedure 1 Connect your Android device to a network 2 Select Google Play Store 3 Enter Panasonic Image App into the search box 4 Select Panasonic Image App and in...
Страница 57: ... The displayed icon will change according to the Wi Fi mode Smartphone Direct Connect LIVE CAST Wireless Network Mode B The connection status icon When directly connected connected to Wi Fi not connected to Wi Fi The icon disappears when you turn off a Wi Fi mode When connected to wireless access point connected to Wi Fi not connected to Wi Fi The display will change as follows according to the ra...
Страница 58: ... points in Wireless Network Mode you can register only one access point 2 Acquire a Login ID and Password for the LUMIX CLUB in advance It may take approximately 60 seconds to synchronize the time of the smartphone with that of this unit If your device is Android you can tap to run an SSID search when setting wireless access point information You can also start up Wi Fi Easy Setup from the Image A...
Страница 59: ... select the menu When setting a connection destination in LIVE CAST When setting a connection destination in Wireless Network Mode 2 Select New then press the joystick To delete a wireless access point l 63 To change the search order of wireless access points l 63 3 Select WPS Connection then press the joystick 4 Set the wireless access point to waiting for WPS For further details please read the ...
Страница 60: ... then set the connection again Confirm Encryption key Password of the selected wireless access point if the network authentication is encrypted 1 Press the joystick to select the menu When setting a connection destination in LIVE CAST When setting a connection destination in Wireless Network Mode 2 Select New then press the joystick To delete a wireless access point l 63 To change the search order...
Страница 61: ...e activated allowing you to select an icon 2 Move the joystick left or right to select the icon of the desired entry method A a 1 then move the joystick up or down to change the character 3 Press the joystick to enter the character Repeat Steps 2 and 3 to enter characters To delete a character select and then press the joystick To change the cursor position perform the operation in Step 4 select t...
Страница 62: ...Manual Connection then press the joystick 4 Select Manual Setting then press the joystick 5 Select the entry field press the joystick then enter the SSID of the wireless access point to connect Confirm that Input SSID and select ENTER is displayed in the area F For details on how to enter characters refer to page 61 6 Select NEXT then press the joystick If an Encryption key Password is not set pro...
Страница 63: ...EST in LIVE CAST SETUP or WirelessNetworkModeSetup l 59 60 62 1 Move the joystick to select Delete then press the joystick When WirelessNetworkModeSetup is selected The message is displayed Select YES then press the joystick 2 When LIVE CAST SETUP is selected Select the wireless access point to be deleted then press the joystick The message is displayed Select YES then press the joystick To change...
Страница 64: ...heck if the setting for the 2 4 GHz band is enabled Make sure the wireless access point is registered in this unit l 59 The device may be unable to locate the wireless access point due to problems with the signal Refer to Setting up a connection manually l 62 WPS Connection Make sure the wireless access point is in the correct WPS standby mode Make sure the PIN code has been correctly input Search...
Страница 65: ...i settings on the smartphone The Wi Fi connection is disconnected immediately If there is a setting for avoiding poor connections in the Wi Fi setting menu of the Android device 4 0 or later version turn it off While this unit is connecting in Wireless Network Mode the Image App fails to find this unit Shut down the Image App then turn off the Wi Fi mode of this unit After that set the Wi Fi MODE ...
Страница 66: ...emote operation l 43 On the Image App screen tap and set the menu item For more information refer to the Help in the Image App menu Please refer to page 42 You can make the following settings of the LIVE CAST j SET CONNECT DEST l 59 60 62 j E MAIL SETUP l 52 j SAVE VIDEO IN USTREAM l 52 j IMAGE QUALITY l 53 Please refer to page 59 Please refer to page 58 Wi Fi How to Use the Wi Fi SETUP Menu Wi Fi...
Страница 67: ...nt 1 Press the joystick to select the menu 2 Select LIVE CAST or Wireless Network Mode then press the joystick 3 Select START then press the joystick The connection test starts 4 Check the connection test result select EXIT and press the joystick To perform a connection test for LIVE CAST you need to make other settings in advance l 49 68 CONNECTION TEST cannot be used in Image App You can display...
Страница 68: ...Acquire a Login ID on this unit Select SET CONNECT DEST in LIVE CAST SETUP l 59 60 62 1 Press the joystick to select the menu Connect to the network Select NEXT then press the joystick 2 Read through the LUMIX CLUB terms then press the joystick 3 Select Agree then press the joystick Select EXIT and press the joystick to cancel the process without acquiring a Login ID 4 Select NEXT and press the jo...
Страница 69: ... the PC 4 Select EXIT press the joystick to exit Register the Login ID of the smartphone Image App into this unit It is convenient to match the Login IDs for this unit and the smartphone Image App when using the Wi Fi function utilizing the LUMIX CLUB 1 Connect this unit to the smartphone 2 From the Image App menu set the common Login ID Check the terms of use for the LUMIX CLUB on this unit Check...
Страница 70: ...tion screen for deleting the LUMIX CLUB account will be displayed again Select NEXT and press the joystick 4 Press the joystick to exit Changes and other actions to Login IDs can only be made to the Login ID acquired with this unit When sending images to WEB services the WEB service being used must be registered with the LUMIX CLUB Registering multiple WEB services will send images to all services...
Страница 71: ...r Final Cut Pro X when using with Mac For details about iMovie or Final Cut Pro X please contact Apple Inc To connect this unit to a PC Refer to Charging the battery l 11 for how to connect this unit to a PC Turn on this unit before connecting When the power lamp and access lamp lights up the connection is complete When using HD Writer WE 2 0 connect after installing the software When performing r...
Страница 72: ...ed as standard in the OS For use with Windows For use with Mac With a PC Card reader function mass storage OS Windows 8 Windows 8 1 32 bit 64 bit Windows 7 32 bit 64 bit or SP1 Windows Vista 32 bit SP2 CPU 1 GHz or higher 32 bit k86 or 64 bit k64 processor including compatible CPU RAM Windows 7 Windows 8 Windows 8 1 1 GB or more 32 bit 2 GB or more 64 bit Windows Vista Home Basic 512 MB or more Wi...
Страница 73: ...der on the PC To disconnect USB cable safely Drag CAM_SD disk icon to the Trash and then disconnect the USB cable Do not delete the microSD card s folders Doing so may make the microSD card unusable in this unit When a file not supported by this unit has been recorded on a PC it will not be recognized by this unit Always use this unit to format microSD cards It is possible to play back still pictu...
Страница 74: ...h folder stores a maximum of 999 still pictures Intermittent recording A new folder is created for each recording S1000001 JPG etc 2 7 Motion picture files in MP4 format Each folder stores a maximum of 99 files S1000001 MP4 etc 2 3840k2160 30p 3 1920k1080 60p 4 1920k1080 30p 5 1280k720 60p 6 1280k720 30p 7 848k480 30p 8 Slow motion pictures MP4 format S1000001 MP4 etc 8 1 2 times normal speed 1920...
Страница 75: ...te correctly Do not start up HD Writer WE 2 0 and other software at the same time With a PC Using the HD Writer WE 2 0 Windows only What can be done with the HD Writer WE 2 0 Data type Copying data to a PC Motion picture and still picture Editing Editing motion picture data copied on an HDD of a PC Dividing Trimming Title Effect Transition BGM Delete partially Converting part of motion picture int...
Страница 76: ... to Licensee caused by Licensee s reverse engineering decompiling or disassembly of the Software Article 6 Indemnification The Software is provided AS IS without warranty of any kind either expressed or implied including but not limited to warranties of non infringement merchantability and or fitness for a particular purpose Further Panasonic does not warrant that the operation of the Software wil...
Страница 77: ...2 16 GHz or higher or AMD Athlon 64 X2 Dual Core 5200 or higher is recommended when using playback function Intel Core 2 Quad 2 6 GHz or higher is recommended when using editing function When using playback or editing function for 1080 60p Intel Core i7 2 8 GHz or higher is recommended When using playback or editing function for 4K motion pictures Intel Core i7 3 5 GHz or higher is recommended RAM...
Страница 78: ...t and notes Operation during the playback may become slow if the CPU or memory is not fulfilling the requirements of the operating environment Always use the most current driver for the video card Always make sure there is enough capacity on the HDD in the PC It may become inoperable or the operation may stop suddenly if the capacity gets low Installation When installing the software log on to you...
Страница 79: ... software log on as an Administrator or as user name for standard user account The software cannot be used with the user name for a guest account On the PC Select Start All Programs Panasonic HD Writer WE 2 0 HD Writer WE 2 0 For details on how to use the software applications read the PDF operating instructions of the software You will need Adobe Acrobat Reader 5 0 or later or Adobe Reader 7 0 or...
Страница 80: ...ute and s for second Remaining battery power l 12 B Microphone disabled l 36 Locked l 29 White Card recording possible status Green Recognizing the card R 1h20m Remaining time for motion picture recording l 27 R3000 Remaining number of still pictures l 27 C Pixels Frame rate l 32 Picture size l 33 Wind noise reduction l 36 WIDE STANDARD Angle of view l 33 Level Shot Function l 34 Image Stabilizer ...
Страница 81: ...connection to other devices Confirmatory indications Wi Fi connection status Wireless access point connection l 57 Wi Fi connection status Direct connection l 57 Wi Fi mode icon l 57 Accessing the card l 71 microSD card is not inserted or is incompatible ...
Страница 82: ...t be recognized by the unit If this message appears even though motion pictures and still pictures are recorded on an microSD card the card may be unstable Reinsert the microSD card then turn the unit off and then on again No wireless access point found Check the Wi Fi set up of your wireless access point and smartphone WPS Connection can establish a connection only between two devices this unit a...
Страница 83: ...ing Use a microSD card that can be used for motion picture recording l 14 The recordable time may have shortened due to the deterioration of the data writing speed or repeated recording and deletion Using this unit format the microSD card l 20 If you use a microSD card with a SD Speed Class Rating lower than Class 6 in SLOW MOTION l 31 recording may stop suddenly l 14 If you use a microSD card wit...
Страница 84: ...ng on this unit again Even if you connect this unit to a PC it does not recognize this unit as a card reader while a Wi Fi mode is running Move the joystick left to end the Wi Fi mode and re connect the supplied USB cable When the USB cable is disconnected an error message will appear on the PC To disconnect the USB cable safely double click the icon in the task tray and follow the instructions on...
Страница 85: ...ctual recording time l 32 This unit does not change to Playback mode When this unit is recording a motion picture Image App cannot change to Playback mode Files cannot be played back If a high quality motion picture is copied to a smartphone it may not be able to be played back on the smartphone l 32 This unit does not turn off even after closing Image App This unit can be turned off by tapping CA...
Страница 86: ...e PC and then wipe this unit with a soft dry cloth If this unit is very dirty dip a cloth in water and squeeze firmly and then wipe this unit with the damp cloth Next dry this unit with a dry cloth Use of benzine paint thinner alcohol or dishwashing liquid may alter the camera body or peel the surface finish Do not use these solvents When using a chemical dust cloth follow the instructions that ca...
Страница 87: ...an be used normally with this unit and computer Do not subject the microSD card to strong shocks bend it or drop it Data on the microSD card may be damaged or deleted due to electrical noise static electricity or malfunctions with this unit or the microSD card When the microSD card is being accessed when is displayed or the access lamp is lit do not perform the following j Remove the microSD card ...
Страница 88: ...this unit is a rechargeable lithium ion battery It is susceptible to humidity and temperature and the effect increases the more the temperature rises or falls If the operating time is very short even after the battery has been recharged the battery has worn out Consult with your dealer LCD monitor Extremely high precision technology is employed to produce the LCD Monitor screen The result is more ...
Страница 89: ...ers Approximate recordable time Pixels Frame rate Transfer rate VBR microSD card 4 GB 8 GB 16 GB 32 GB 3840k2160 30p Max 72 Mbps 7 min 14 min 28 min 55 min 1920k1080 60p Max 28 Mbps 19 min 40 min 1 h 20 min 2 h 40 min 1920k1080 30p Average 15 Mbps 35 min 1 h 10 min 2 h 20 min 4 h 40 min 1280k720 60p 1280k720 30p Average 9 Mbps 1 h 2 h 4 h 10 min 8 h 20 min 848k480 30p Average 4 5 Mbps 1 h 50 min 3...
Страница 90: ...f recordable pictures The number of recordable pictures depends on the subject being recorded Others Approximate number of recordable pictures Picture size Aspect ratio microSD card 4 GB 8 GB 16 GB 32 GB 16 3M 5376k3024 16 9 400 800 1600 3300 8 3M 3840k2160 750 1500 3000 6000 5 3M 3072k1728 1100 2200 4500 8500 ...
Страница 91: ... the back side of the Quick Shoe to tighten the camera screw clockwise Hold the Tripod Mount with your hand so that it will not rotate with the camera screw After tightening the camera screw fix the hinge 4 Attach the Quick Shoe to the camera platform Align on the Quick Shoe with on the camera platform and push the Quick Shoe diagonally until it clicks into place 5 Attach the camera unit to the Tr...
Страница 92: ...o not heat in microwaves or ovens etc Do not charge use or leave in hot places such as next to fires or in extremely hot weather Do not put into water This may cause leaking overheating fire or rupture If a leak should occur by no means touch the liquid with bare hands If the liquid gets on the body or clothes wash well with water If the liquid gets into your eyes there is a danger of blindness Do...
Страница 93: ... the circuit board on the front side button side of this unit 3 Pull out the flexible circuit board B and pull out the speaker connector C upwards 4 Remove the 4 screws indicated in the figure below and remove the heatsink D 5 Remove the connector E of the camera unit the built in battery connector F and the NFC flexible circuit board G and lift up the circuit board 6 Remove the battery by using a...
Страница 94: ...ification mark of the Wi Fi Alliance The Wi Fi Protected Setup Mark is a mark of the Wi Fi Alliance Wi Fi Wi Fi Protected Setup WPA and WPA2 are marks or registered marks of the Wi Fi Alliance The N Mark is a trademark or registered trademark of NFC Forum Inc in the United States and in other countries DLNA the DLNA Logo and DLNA CERTIFIED are trademarks service marks or certification marks of the...
Страница 95: ...Panasonic Corporation Web site http panasonic net ...