background image

- 103 -

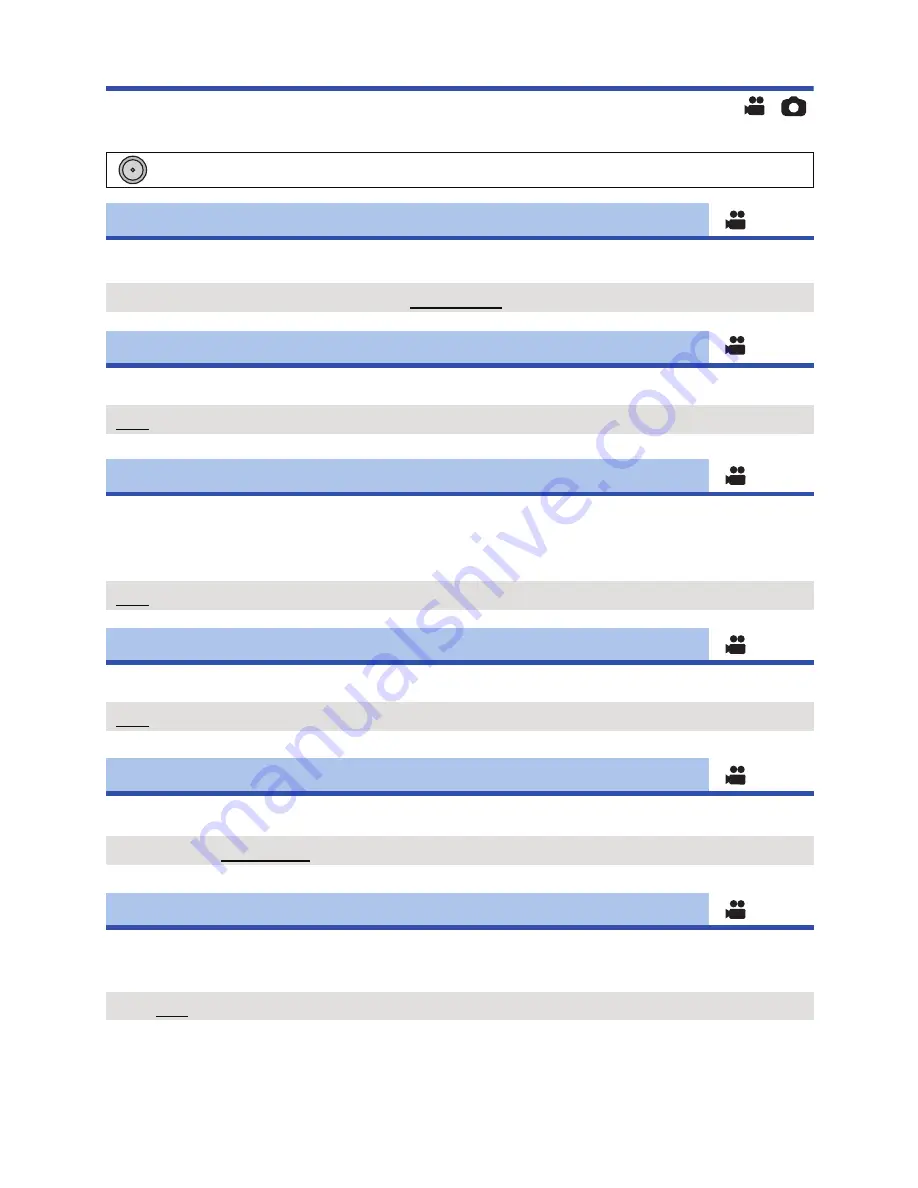
Recording Setup

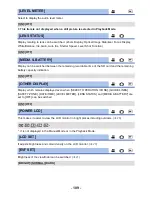
Menu items displayed are different depending on the position or setting of the mode switch.

Switch the picture quality and recording format of the motion pictures to record. (

l

54

)

You can set the relay recording and backup recording. (

l

55

)

A scene that moves slowly for long period of time is recorded frame by frame with an interval, and is 
recorded as a short time motion picture. (

l

57

)

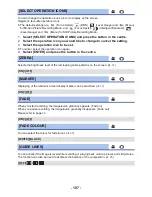
Switch to Manual Mode. (

l

39

)

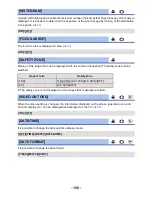
Image aspect ratio for the recording format [SA 576/50i] or [SX 576/50i] can be changed. (

l

57

)

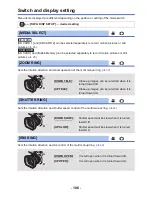
Set the maximum zoom ratio for the Motion Picture Recording Mode. (

l

58

)

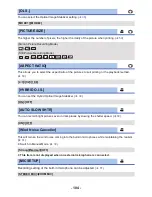
This allows recording of the pictures and sound to start approximately 3 seconds before the 
recording start/stop button is pressed. (

l

46

)

: [RECORD SETUP]

 # 

desired setting

[REC FORMAT]

[1080/50p]/[PH 1080/50i]/[HA 1080/50i]/[HG 1080/50i]/[HE 1080/50i]/[SA 576/50i]/[SX 576/50i]

[2 MEDIA FUNC.]

[OFF]/[RELAY]/[BACKUP]

[TIME LAPSE REC]

[OFF]/[1 SECOND]/[10 SECONDS]/[30 SECONDS]/[1 MINUTE]/[2 MINUTES]

[REC ASPECT]

[16:9]/[4:3]

[ZOOM MODE]

[i.Zoom OFF]/[i.Zoom 50

k

]/[D.Zoom 60

k

]/[D.Zoom 1500

k

]

[PRE-REC]

[ON]/[OFF]

MENU

Содержание HC-MDH2

Страница 1: ...Operating Instructions High Definition Video Camera Model No HC MDH2 HC MDH2M Please read these instructions carefully before using this product and save this manual for future use VQT5E10 ...

Страница 2: ... data due to static electricity electromagnetic waves breakage and failures back up the data to a PC or DVD disc l 96 Access lamp l 9 illuminates while the built in memory is being accessed initialisation recording playback deleting etc Do not perform the following operations when the lamp illuminates It may damage the built in memory or cause a malfunction in the unit j Turn the unit off remove t...

Страница 3: ...ding Mode Function that can be used for the Playback Mode Function that can be used for the Playback Mode motion pictures only Function that can be used for the Playback Mode still pictures only Scene s recorded in 1080 50p or 1080 50i AVCHD scene s Pages for reference are indicated by an arrow for example l 00 These operating instructions are designed for use with models and Pictures may be sligh...

Страница 4: ...Mode 31 Motion picture Still picture playback 33 Advanced Recording Using the zoom 36 Ring zoom 37 Zoom ratio during the Still Picture Recording Mode 37 Image Stabilizer Function 38 Manual recording 39 White Balance 41 Manual shutter speed iris adjustment 42 Recording with Manual Focus 43 Recording functions of operation icons 44 Operation icons 44 Recording functions of CAMERA SETUP menus 49 Reco...

Страница 5: ...ith a PC Connecting to a PC File transfer nonlinear editing 96 Operating environment mass storage 96 Connecting to a PC 98 About the PC display 100 Menu Using the Menu 101 Camera Setup 101 Recording Setup 103 Switch and display setting 106 Other Functions 112 Video Setup 117 Picture Setup 118 Copy 118 Others Indications 119 Messages 122 About recovery 122 Troubleshooting 123 Cautions for use 128 A...

Страница 6: ...epending on the microphone type In this case please switch to the battery for the power supply and the noise will stop 8 Photoshot button l 29 9 Zoom lever W T In Recording Mode l 36 Volume lever rVOLs Thumbnail display switch In Playback Mode l 34 35 10 Grip belt l 10 11 Status indicator l 18 12 Power switch l 18 13 Recording start stop button l 27 14 Charging lamp CHG l 13 15 DC input terminal D...

Страница 7: ...NCTION l 39 28 Mode switch l 18 29 Intelligent auto Manual Manual focus switch iA MANUAL FOCUS l 31 30 Cursor button 31 Optical Image Stabilizer button O I S l 38 32 Menu button MENU l 23 33 Eyepiece corrector lever l 21 34 Tripod receptacle Attaching a tripod with a screw length of 5 5 mm or more may damage the unit MENU MANUAL FOCUS 31 29 30 28 32 O I S 33 34 22 20 23 24 25 21 27 26 ...

Страница 8: ... 36 Eye cup attachment part l 10 37 Eye cup l 10 38 Accessory shoe 39 Viewfinder l 21 Extend the viewfinder before use 40 Speaker 41 Battery release button PUSH l 12 42 Battery holder l 12 43 Video output terminal VIDEO OUT l 75 44 Audio output terminal AUDIO OUT l 75 45 Component terminal Y PB CB PR CR l 75 35 36 37 39 38 40 42 41 43 44 45 ...

Страница 9: ...ot 2 left l 17 48 Access lamp card 2 l 17 49 Card slot 1 right l 17 50 Access lamp card 1 l 17 51 SD card cover l 17 52 Access lamp BUILT IN MEMORY 53 Card slot l 17 54 Access lamp SD card l 17 HC MDH2 46 47 48 49 50 HC MDH2M 51 53 54 52 ...

Страница 10: ...tch of the eye cup attachment part with the protrusion at the inside of the eye cup Attaching the lens cap Protect the lens surface with the lens cap while the unit is not used 1 2 Flip the belt cover and the belt 3 Adjust the length 4 5 Replace the belt A Notch B Protrusion Attach or remove it by pinching on it ...

Страница 11: ...ock ring Do not apply excessive force on the lock ring Make sure that the microphone is securely attached 2 Connect the plug to the external microphone terminal Check that the unit is turned off Connecting or removing the microphone while the unit is turned on may cause malfunction You can fasten the excess cable by tucking it into the cable holder When removing the microphone disconnect the plug ...

Страница 12: ...uately protected with internal protection to meet the requirements of appropriate safety standards There is a possibility that these battery packs may lead to fire or explosion Please be advised that we are not liable for any accident or failure occurring as a result of use of a counterfeit battery pack To ensure that safe products are used we would recommend that a genuine Panasonic battery pack ...

Страница 13: ... lamp is flashing at approximately 4 second intervals off for approx 2 seconds on for approx 2 seconds the battery is over discharged or the temperature of the battery is too high or low It can be charged but it may take a few hours to complete the charging normally When the charging lamp is flashing at approximately 0 5 second intervals off for approx 0 25 seconds on for approx 0 25 seconds the b...

Страница 14: ...peatedly starting stopping recording turning the unit on off moving the zoom lever etc The batteries heat up after use or charging This is not a malfunction Battery model number Voltage Capacity minimum Charging time Recording format Maximum continuous recordable time Actual recordable time Supplied battery 7 2 V 2900 mAh 4 h 1080 50p 5 h 25 min 5 h 10 min 3 h 20 min 3 h 10 min PH 1080 50i 5 h 45 ...

Страница 15: ...attery discharges then will flashes red If the unit is charged while it is turned on will be displayed on the screen will disappear after charging is complete As long as the charging lamp is flashing charging is not complete even after has disappeared For more details please refer to page 130 ...

Страница 16: ...nt is compatible with these Memory Cards An Eye Fi X2 series SD card is required to use functions related to Eye Fi l 93 We do not guarantee the operation of SD cards other than the ones above Further SD cards with a capacity of less than 32 MB cannot be used for motion picture recording 4 GB or more Memory Cards that do not have the SDHC logo or 48 GB or more Memory Cards that do not have the SDX...

Страница 17: ...the unit off j Insert and remove the USB cable j Expose the unit to vibrations or shock Performing the above while the lamp is on may result in damage to data SD card or this unit Do not expose the terminals of the SD card to water dirt or dust Do not place SD cards in the following areas j In direct sunlight j In very dusty or humid areas j Near a heater j Locations susceptible to significant dif...

Страница 18: ...activated set the power switch to OFF once and then to ON again l 114 Operate the mode switch to change the mode to or Preparation Turning the unit on off Preparation Selecting a mode Motion Picture Recording Mode l 27 Still Picture Recording Mode l 29 Playback Mode l 33 63 To turn off the unit Set the power switch to OFF while pressing the lock release button The status indicator goes off ...

Страница 19: ...nd release the touch screen to select icon or picture Touch the centre of the icon Touching the touch screen will not operate while you are touching another part of the touch screen Slide while touching Move your finger while pressing on the touch screen About the operation icons To operate the following icons using the cursor buttons select the desired icon using the cursor buttons and then press...

Страница 20: ...s brightness and colour density on the LCD monitor 1 Select the menu l 23 2 Select the desired setting items and press the button in the centre 3 Adjust settings using the cursor button right or left 4 Select ENTER and press the button in the centre Select EXIT then press the button in the centre or press the MENU button to complete the setting POWER LCD SW DISP SETUP POWER LCD desired setting Mak...

Страница 21: ...er 2 Adjust the focus by operating the eyepiece corrector lever Brightness of the viewfinder can be switched Select the menu l 23 Recording yourself Change the mode to Rotate the LCD monitor towards the lens side Displaying during the recording yourself can be switched by setting SELF SHOOT l 110 Only some indications will appear on the screen when the SELF SHOOT is set to MIRROR When appears retu...

Страница 22: ...attery If the time display becomes the built in lithium battery needs to be charged To recharge the built in lithium battery connect the AC adaptor or attach the battery to this unit Leave the unit as it is for approx 24 hours and the battery will maintain the date and time for approx 6 months The battery is still being recharged even if the unit is off The way that time is displayed can be change...

Страница 23: ...be displayed by using 4 Select the desired item then press the button in the centre to enter the setting 5 Select EXIT then press the button in the centre or press the MENU button to exit the menu setting About guide display After selecting and press the button in the centre selecting the submenus and items and press the button in the centre will cause function descriptions and settings confirmati...

Страница 24: ...Place the unit on your right shoulder and hold it firmly with both hands Recording from a high position Low angle recording For easier low angle recording the sub recording start stop button and the sub zoom lever can be used Basic Before recording ...

Страница 25: ...ards Please be aware that if a medium is formatted then all the data recorded on the medium will be erased and cannot be restored Back up important data on a PC DVD disc etc l 98 1 Select the menu 2 Select SD CARD 1 or SD CARD 2 and press the button in the centre Select SD CARD and press the button in the centre When formatting is complete select EXIT and press the button in the centre to exit the...

Страница 26: ...de to or 2 Select the menu l 23 3 Select the media you want to record motion pictures or still pictures on by using the cursor button and press the button in the centre The media is selected separately to motion pictures or still pictures is highlighted in yellow 4 Select ENTER and press the button in the centre Basic Selecting a media to record SW DISP SETUP MEDIA SELECT HC MDH2 HC MDH2M MENU HC ...

Страница 27: ... in the Motion Picture Recording Mode Basic Recording motion pictures SCN 0 00 00 Recording time elapsed Each time the unit is put into recording pause the counter display will be reset to 0 00 00 White Media where the motion picture is recorded l 26 R 1h20m Approximate remaining recordable time When the remaining time is less than 1 minute R 0h00m flashes red Recording format R 1h20m R 1h20m R 1h...

Страница 28: ...utton to start recording and pressing it again to pause recording become one scene Maximum number of recordable scenes Approx 3900 Maximum number of different dates Approx 900 l 72 When either of them reaches to the maximum limit more scenes cannot be recorded In the case of SD cards it is the maximum number of recordable scenes per card Please refer to page 133 about approximate recordable time ...

Страница 29: ...od is recommended when recording still pictures in dark places because the shutter speed becomes slow The still picture recording time may be long depending on the picture size The focus indication and the focus area may not be displayed depending on the recording conditions or the menu settings Basic Recording still pictures A Focus indication The white lamp flashes Focusing The green lamp lights...

Страница 30: ...hat motion picture recording takes preference over still picture recording If simultaneous recording is used while recording a motion picture the recordable time remaining will shorten If the unit is turned off or the mode switch operated the recordable time remaining may lengthen The still picture recording time may be long depending on the picture size Maximum number of recordable pictures that ...

Страница 31: ...Mode Mode Effect Scenery The whole landscape will be recorded vividly without whiting out the background sky which may be very bright 1 Spotlight Very bright object is recorded clearly 1 3 Low Light It can record very clearly even in a dark room or twilight 2 Macro This allows recording at very close proximity to the object of recording 1 2 Normal Normal In modes other than those described above t...

Страница 32: ...ffective range of Automatic White Balance adjustment on this unit 2 Blue sky 3 Cloudy sky rain 4 Sunlight 5 White fluorescent lamp 6 Halogen light bulb 7 Incandescent light bulb 8 Sunrise or sunset 9 Candlelight If the Automatic White Balance is not functioning normally adjust the White Balance manually l 41 Auto Focus The unit focuses automatically Auto Focus does not work correctly in the follow...

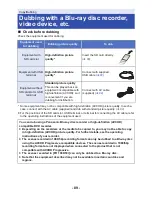
Страница 33: ...he centre Select ENTER and press the button in the centre 5 Select the scene or the still picture to be played back and press the button in the centre The recording format is displayed in the thumbnail display of the motion pictures etc Next previous page can be displayed by using Basic Motion picture Still picture playback PH PH HA PH HA HG HE SA SA 10 10 10 11 11 11 12 12 12 13 13 13 14 14 14 15...

Страница 34: ...DATE j TIME ZONE j DURATION j FORMAT 9 scenes display returns if the unit is turned off or the mode is changed By displaying in 1 scene recording date and time are displayed when playing back motion pictures and recording date and file number when playing back still pictures E Operation icon Operation icons and screen display will disappear when no operation is performed for a specific period of t...

Страница 35: ...sed on AVCHD Progressive AVCHD format Even if the devices used have compatible standards when playback of motion pictures recorded using another device is performed using this unit or when motion pictures recorded using this unit is played back in another device playback may not proceed normally or may not be possible Please check compatibility in the operating instruction of your device Still pic...

Страница 36: ...Advanced Recording Using the zoom Zoom lever Sub zoom lever T side Close up recording zoom in W side Wide angle recording zoom out T T W W T T W W W W 6 W T 6 W T A Zoom bar Maximum zoom ratio for recording motion pictures can be set with ZOOM MODE l 58 T W B Motion Picture Recording Mode i Zoom OFF White Still Picture Recording Mode Optical Zoom White C Motion Picture Recording Mode i Zoom Digita...

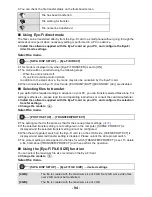
Страница 37: ...l Picture Recording Mode Extra Optical Zoom Extra Optical Zoom ratio varies depending on the setting of PICTURE SIZE and ASPECT RATIO l 59 60 If you take your finger off the zoom lever during zoom operation the operation sound may be recorded When returning the zoom lever to the original position move it quietly When the zoom magnification is at its maximum the subjects are focused at about 1 5 m ...

Страница 38: ...lizer Function RECORD SETUP HYBRID O I S ON or OFF RECORD SETUP O I S MODE1 or MODE2 MODE1 The function works all the time MODE2 The function works when the button is pressed We recommend using this mode when you are recording yourself or recording with a tripod in Still Picture Recording Mode Optical Image Stabilizer button Press the button to turn Optical Image Stabilizer on off Motion Picture R...

Страница 39: ...e desired item Selected item changes whenever the CAMERA FUNCTION button is pressed The selected ring operation icon is displayed in area C 2 Rotate the multi manual ring to select the setting When a manual icon is displayed operation using the multi manual ring is not possible Advanced Recording Manual recording MNL MANUAL FOCUS ZOOM ZOOM ZOOM A CAMERA FUNCTION button B Multi manual ring C Ring o...

Страница 40: ...the screen 2 Select the desired item to be set and press the button in the centre 3 Select an icon on the screen and adjust the setting to the desired level FOCUS WB SHTR IRIS A Manual icons Focus l 43 White Balance l 41 Manual Shutter Speed l 42 Iris Gain Adjustment l 42 FOCUS WB SHTR IRIS ...

Страница 41: ... the centre When the screen turns black instantly and the display stops flashing and then lights constantly the setting is complete If the display continues flashing the White Balance cannot be set In this case use other White Balance Modes When the display flashes the Manual White Balance previously adjusted is stored Whenever recording conditions change re set the White Balance When setting both...

Страница 42: ...ligent Auto Mode When setting both the shutter speed and the iris gain value set the shutter speed and then set the iris gain value When SHUTTER or IRIS is selected the selected shutter speed or iris gain value can be adjusted automatically by pressing and holding the CAMERA FUNCTION button Manual shutter speed adjustment When the shutter speed is set lower than 1 12 in the Still Picture Recording...

Страница 43: ...ch to FOCUS again or set the iA MANUAL FOCUS switch to Intelligent Auto Mode When using the manual icon 1 Select FOCUS and press the button in the centre 2 Select MF and press the button in the centre to change to Manual Focus MF appears on the screen 3 Adjust the focus by selecting and press the button in the centre To restore Auto Focus select AF and press the button in the centre in Step 2 or s...

Страница 44: ... Not displayed in Motion Picture Recording Mode 3 It is displayed only when a headphone is connected to the headphone output terminal MIC LEVEL l 62 is set to anything other than AUTO is displayed as the operation icon and adjustment of input level of the microphone is possible If you turn off the unit or change the mode to Backlight Compensation function is cancelled If you turn off the unit the ...

Страница 45: ... the recording stops To select the colour for fade in out The thumbnails of scenes recorded using fade in become black or white This brightens parts that are in shadow and difficult to see and suppresses white saturation in bright parts at the same time Both bright and dark parts can be recorded clearly If there are extremely dark or bright parts or the brightness is insufficient the effect may no...

Страница 46: ...the motion pictures displayed at the start of playback This brightens dark areas so the image can be recorded clearly If there are extremely dark parts or the brightness is insufficient the effect may not be clear This makes the image brighter to prevent darkening of a backlit subject You can check if the image is level while recording motion pictures and still pictures The function can also be us...

Страница 47: ...s possible to determine the exposure of the whole image by looking at the distribution in the graph Adjust the brightness using iris setting l 42 Displays the luminance level of the centre of the screen luminance display frame in It makes the adjustment of the brightness of the object easier by checking the luminance level of the object when recording same object in different surroundings Adjust t...

Страница 48: ...or when the LCD monitor is closed with the screen facing out this item is not displayed Even when the tilt is in the corrected state an error may occur In the following cases the electronic level may not be displayed correctly j When moving this unit j When pointing this unit up or down at an angle closer to perpendicular When LEVEL SHOT is set to ON this function cannot be set The menu can be dis...

Страница 49: ...j Colour and screen brightness may change under indoor lighting Advanced Recording Recording functions of CAMERA SETUP menus SCENE MODE CAMERA SETUP SCENE MODE desired setting OFF Cancel the setting 5Sports To make fast moving scenes less shaky with slow playback and pause of playback Portrait To make people stand out against the background Soft Skin To makes skin colours appear softer for a more ...

Страница 50: ...settings to the Intelligent Auto Mode and record Please refer to page 31 for details about the effect of each mode Scenery Spotlight 1 Low Light 1 Macro 2 Normal 1 Normal 2 1 In Motion Picture Recording Mode only 2 In Still Picture Recording Mode only Switch to Intelligent Auto Mode l 31 1 Select the menu 2 Select the desired setting items and press the button in the centre When adjusting the colo...

Страница 51: ...2 Select the desired setting items and press the button in the centre 3 Adjust settings using the cursor button right or left 4 Select ENTER and press the button in the centre Select EXIT and press the button in the centre or press the MENU button to complete the settings appears on the screen PICTURE ADJUST CAMERA SETUP PICTURE ADJUST SHARPNESS Sharpness of the edge COLOUR Depth of the colour of ...

Страница 52: ...ttach this unit by using Level Gauge l 48 and then use Level Shot Function This function allows you to record colour images in very low light situations Minimum required illumination approx 1 lx Switch to Manual Mode l 39 Select EXIT and press the button in the centre or press the MENU button to complete the settings Recorded scene is seen as if frames were missed If set in a bright place the scre...

Страница 53: ... 3 2 during the Still Picture Recording Mode and Tele Macro is set with the zoom magnification less than 21k the zoom magnification will automatically be set to 21k When the aspect ratio is 16 9 the zoom magnification will be 26k The Tele Macro function is automatically cancelled when the zoom magnification becomes lower than 26k in Motion Picture Recording Mode Tele Macro function is automaticall...

Страница 54: ... refer to page 133 for details about approximate recordable time When the unit is moved a lot or moved quickly or when a fast moving subject is recorded particularly when recording in HE 1080 50i or SX 576 50i mode mosaic type noise may appear at playback Advanced Recording Recording functions of RECORD SETUP menus REC FORMAT RECORD SETUP REC FORMAT desired setting 1080 50p Set the recording forma...

Страница 55: ...recorded using the RELAY SCENE COMBINE into the external drive l 87 If DELETE RELAY SCENE or RELAY INFO CANCEL is performed after RELAY SCENE COMBINE is performed Relay Recording will be available again If RELAY SCENE COMBINE is not performed and RELAY in 2 MEDIA FUNC is selected a message will be displayed You will be able to perform Relay Recording by selecting YES and press the button in the ce...

Страница 56: ... media of the motion picture If SD CARD has been selected as a recording destination for motion pictures in MEDIA SELECT l 26 the backup will be recorded on Built inMemory Relay recording After Relay Recording a recording destination for still pictures will also be switched to the other media Backup recording Backup recording will not be performed for still pictures When performing backup recordin...

Страница 57: ...d in the following cases j If you turn the unit off j If you change the mode The colour balance and focus may not be adjusted automatically depending on the light source or scene If so manually adjust those settings l 41 43 Image aspect ratio for the recording format SA 576 50i or SX 576 50i can be changed Set REC FORMAT to SA 576 50i or SX 576 50i l 54 When using the LCD monitor when the aspect r...

Страница 58: ...mage quality is degraded This function cannot be used in Still Picture Recording Mode ZOOM MODE RECORD SETUP ZOOM MODE desired setting i Zoom OFF Up to 26k i Zoom 50k This zoom function allows you to maintain high definition picture quality Up to 50k D Zoom 60k Digital zoom Up to 60k D Zoom 1500k Digital zoom Up to 1500k MENU ...

Страница 59: ...ording will become longer depending on the recording pixels Please refer to page 134 for details about the number of recordable pictures PICTURE SIZE RECORD SETUP PICTURE SIZE desired setting Picture size Aspect ratio Extra Optical Zoom l 37 4480k3360 4 3 2784k2088 640k480 50k 4752k3168 3 2 3456k2304 1728k1152 26 2k 6016k3384 16 9 26k 4096k2304 26k 1920k1080 28 9k RECORD SETUP PICTURE SIZE desired...

Страница 60: ...an record bright pictures even in dark places by slowing the shutter speed The shutter speed is set to 1 25 or more depending on the surrounding brightness This function cannot be used in Still Picture Recording Mode When the shutter speed becomes 1 25 the screen may be seen as if frames are missed and afterimages may appear ASPECT RATIO RECORD SETUP ASPECT RATIO desired setting 4 3 Aspect ratio o...

Страница 61: ...g of the built in microphone can be adjusted Wind Noise Canceller RECORD SETUP Wind Noise Canceller desired setting Strong When a strong wind is detected this option effectively reduces the wind noise by minimising the low pitched sound Normal This option extracts and reduces only the wind noise without deteriorating the sound quality OFF Cancel the setting MIC SETUP RECORD SETUP MIC SETUP desired...

Страница 62: ...volume will be different depending on the zoom rate The microphone input level meter shows the larger of the inputs from the 2 built in microphones You cannot record with the audio completely muted This function reduces the low pitched sound when using an external microphone Switch to Manual Mode l 39 This function can be set only when using an external microphone MIC LEVEL RECORD SETUP MIC LEVEL ...

Страница 63: ... the centre is for slow rewind playback Playback is slow while pressing the button in the centre Normal playback is restored when you select and press the button in the centre When Slow motion pictures are played back in reverse they will be shown continuously at approximately 2 3rd the speed of normal playback intervals of 0 5 seconds Frame by frame Playback With the playback paused select and pr...

Страница 64: ...s date of the still picture Quality will be different from the normal still picture Playback operation Playback display Operating steps Direct playback During Playback 1 Open the LCD monitor 2 Touch the direct playback bar or slide it while touching This operation can be performed only by touch operation The playback pauses temporarily and skips to the position touched or slid to while touching Pl...

Страница 65: ...elected date are played back repeatedly Resuming the previous playback If playback of a scene was stopped halfway the playback can be resumed from where it was stopped If playback of a motion picture is stopped appears on the thumbnail view of the stopped scene The memorised resume position is cleared if you turn off the unit or change the mode The setting of RESUME PLAY does not change VIDEO SETU...

Страница 66: ...est playback are inserted It will be played back with the date of last recording to change the settings refer to page 68 3 Select in the thumbnail view and press the button in the centre 4 Select the playback operation l 33 63 When the playback is finished or stopped the screen to select REPLAY SAVE l 71 SELECT AGAIN or EXIT is displayed Select the desired item and press the button in the centre P...

Страница 67: ...T SETUP Select ENTER and press the button in the centre When MUSIC SELECT is selected Select the desired sound and press the button in the centre When EFFECT SETUP is set to NONE you will be able to select NO MUSIC When NO MUSIC is selected the audio recorded at the time of shooting is played back To adjust the volume of the music during playback or viewing operate the volume lever or the sub volu...

Страница 68: ...SCENES is selected Select the scenes to be played back and press the button in the centre Up to 99 scenes can be selected in succession When the button in the centre is pressed the scene is selected indicated by To cancel the operation select the scene and press the button in the centre again 4 Select Enter ENTER and press the button in the centre Playing back with the settings changed SCENE SETUP...

Страница 69: ...reen and is displayed on the scenes added as favourite scenes 4 Select Return and press the button in the centre To clear the favourite scenes from the thumbnail display 1 Select Reset and press the button in the centre 2 Select RESET ALL or RESET SELECTED and press the button in the centre The check on all the favourite scenes will be cleared when RESET ALL is selected 3 When RESET SELECTED is se...

Страница 70: ...e Select Enter and press the button in the centre after entering the title Entering text A maximum of 18 characters can be entered 4 Select ENTER to end registration and press the button in the centre The date of the first scene of the Highlight Playback will be displayed as the date The entered title will be cleared when the unit is turned off or the Highlight Playback is finished APPROX 90 SEC A...

Страница 71: ...HA 1080 50i regardless of REC FORMAT PH 1080 50i HA 1080 50i HG 1080 50i HE 1080 50i of a scene The image quality remains the same 3 Select YES and press the button in the centre Playback operation is not possible while playing back the scenes to be saved 4 Select EXIT and press the button in the centre Select COPY or EXIT and press the button in the centre The Highlight Playback saved in the buil...

Страница 72: ...s returns if the unit is turned off or the mode is changed In cases such as those described below scenes and still pictures are grouped separately on the date list and 1 2 may be added after the date j When the number of scenes exceeds 99 j When the number of still pictures exceeds 999 j When REC FORMAT is changed j When TIME LAPSE REC is used j When REC ASPECT is changed j When NUMBER RESET is pe...

Страница 73: ...ress the button in the centre When the button in the centre is pressed the scene still picture is selected indicated by on the thumbnail To cancel the operation select the scene still picture and press the button in the centre again Up to 99 scenes can be selected to be deleted When SINGLE is selected in Step 1 Select the scene still picture to be deleted and press the button in the centre 3 When ...

Страница 74: ...ard by other products are deleted a still picture other than JPEG that cannot be played back on this unit may be erased Protecting scenes still pictures Scenes still pictures can be protected so that they are not deleted by mistake Even if you protect some scenes still pictures formatting the media will delete them Change the mode to 1 Select the menu If an Eye Fi card that has been set on the com...

Страница 75: ... terminals Image quality may vary with the connected terminals A High quality 1 HDMI terminal 2 Component terminal 3 Video terminal A HDMI cable commercially available Be sure to connect to the HDMI terminal Connecting with a HDMI cable l 77 Playback using VIERA Link l 78 B Component cable commercially available C AV cable supplied Picture quality 1 High definition images when connecting to HDMI t...

Страница 76: ... display the images correctly Check the TV setting If you set the option to 4 3 and connect this unit and the TV with the AV cable images may be displayed in a reduced size Example of images with a 16 9 aspect ratio on a regular TV 4 3 The screen is displayed this way when TV ASPECT is set to 4 3 and DOWN CONV is set to LETTERBOX l 115 If a wide screen TV is connected adjust the aspect setting on ...

Страница 77: ...ions for the TV Images may not be displayed on the television for several seconds in some cases such as when changing between scenes Connecting with the component cable Component output setting can be changed OTHER FUNCTION HDMI RESOLUTION desired setting AUTO 1080p 1080i 576p OTHER FUNCTION COMPONENT OUT desired setting 576i When connecting to the component terminal on the TV compatible with 576i...

Страница 78: ...hen this unit has been connected to a VIERA Link compatible device using a HDMI cable commercially available for automatic linked operations Not all operations are possible VIERA Link is a unique Panasonic function built on a HDMI control function using the standard HDMI CEC Consumer Electronics Control specification Linked operations with HDMI CEC compatible devices made by other companies are no...

Страница 79: ...r on link setting Depending on the HDMI terminal on the TV the input channel may not switch automatically In this case use the remote control for the TV to switch the input channel If you are unsure whether or not the TV and AV amplifier you are using are compatible with VIERA Link read the operating instructions for the devices Available linked operations between this unit and a Panasonic TV is d...

Страница 80: ...y divided to fit the space on the SD card If you copy by scene selection it is possible to copy matching the remaining capacity of the media If there is little or no remaining capacity in the SD card a confirmation message asking to copy after deleting all data on the SD card is displayed Be aware that deleted data cannot be restored Refer to page 81 for approximate time for copying 1 Change the m...

Страница 81: ... the following conditions the time it takes for copying may be longer j The number of recorded scenes is large j The temperature of the unit is high If some motion pictures or still pictures have already been recorded to the copy destination then the same date may be assigned or images may not display by date when the list by date is selected Motion pictures that have been recorded on another devi...

Страница 82: ...commended external drive B Recommended external drive commercially available 1 Connect this unit to the AC adaptor and change the mode to When the AC adaptor is not connected to this unit the external drive cannot be used 2 Set USB MODE to HOST l 110 3 Connect this unit to the external drive with the USB Connection Cable supplied with external drive Connect the USB Connection Cable to the HOST slo...

Страница 83: ... protection setting of the copied scenes or still pictures are cancelled The order in which the scenes were copied cannot be changed Simple copy Copies all scenes and still pictures recorded with this unit that have not been copied yet l 84 Copy selected files Allows you to select desired scenes still pictures and then copy l 85 Playback from External Drive Plays back scenes and still pictures sto...

Страница 84: ...and press the button in the centre you can switch the display between the SD card 1 SD card 2 and external drive If you select CHANGE MEDIA and press the button in the centre you can switch the display between the SD card built in memory and external drive Simple copy 1 Connect this unit to the external drive to prepare for copying l 82 2 Select Simple copy and press the button in the centre When ...

Страница 85: ...ounded by red Select the date and press the button in the centre again to cancel the operation Up to 99 scenes 99 dates can be selected continuously When the selected scenes include a scene recorded as the first portion of relay recording a message is displayed Selecting NEXT and pressing the button in the centre will recombine the relayed portions into one scene and copy it to the external drive ...

Страница 86: ... select icon and press the button in the centre 2 Select and press the button in the centre Disconnect the USB Connection Cable from this unit It is also possible to switch the media to play back by selecting the play mode select icon and press the button in the centre When the external drive is connected the external drive can be selected from the displayed media types l 33 If scenes on the exter...

Страница 87: ...ond media of relay recording C Range of Relay Recording D External drive 1 Insert SD cards containing relay recorded scenes into card slot 1 and card slot 2 Insert the SD card that was used for Relay Recording 2 Connect this unit to the external drive to prepare for playback l 82 3 Select Playback from External Drive and press the button in the centre 4 Select the menu 5 When the confirmation mess...

Страница 88: ...Y SCENE The relay recorded scene is deleted RELAY INFO CANCEL Relay information is deleted from the relay recorded scene EXIT Select this item to exit the relayed scene combining operation and return to the thumbnail screen Combining of the relay scene cannot be performed if the available space on the external drive is less than the volume of the relayed scene Use an external drive with sufficient...

Страница 89: ...SB terminal Standard picture quality This can be played back on equipment incompatible with high definition AVCHD so it is convenient if you are dubbing for distribution Connect with AV cable supplied l 92 You can dub using a Panasonic Blu ray disc recorder or high definition AVCHD compatible DVD recorder Depending on the recorders or the media to be copied to you may not be able to copy in high d...

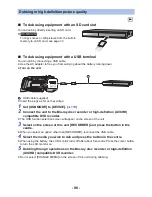
Страница 90: ... high definition AVCHD compatible DVD recorder The USB function selection screen will appear on the screen of the unit 3 Select on the screen of this unit RECORDER and press the button in the centre When you select an option other than RECORDER reconnect the USB cable 4 Select the media you wish to dub and press the button in the centre When using the battery the LCD monitor turns off after about ...

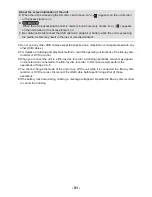
Страница 91: ...he unit while it is connected to a Blu ray disc recorder or DVD recorder Disconnect the USB cable before performing either of these operations If the battery runs down during dubbing a message will appear Operate the Blu ray disc recorder to cancel the dubbing About the screen indication of the unit When the unit is accessing the SD card card access icon appears on the unit screen or the access la...

Страница 92: ...display and function indication are not wanted cancel them before dubbing l 76 108 Dubbing in standard picture quality Change the video input on the video device and TV that this unit is connected to The channel set will differ depending on the terminal to which the unit is connected See the operating instructions of the video device for details Insert the plugs as far as they will go A AV cable s...

Страница 93: ...ANSFER to OFF The setting at the time of purchase is OFF Every time the Eye Fi card is removed from the unit this setting is set to OFF Eye Fi transfers are not available during motion picture recording Copy Dubbing Using the Eye Fi card The functions of the Eye Fi card including wireless transmission are not guaranteed to work on this product In the case of a malfunction of the card please contac...

Страница 94: ...supplied with the Eye Fi card on your PC and configure the selection transfer settings Change the mode to Select the menu The setting method is the same as that for the scene protect settings l 74 If the selected transfer setting is not configured on the computer SCENE PROTECT is displayed and the selected transfer setting cannot be configured When the write protect switch on the Eye Fi card is on...

Страница 95: ...Mode The Eye Fi setting can be checked while pausing the recording These are displayed only when Eye Fi DIRECT is used If the Eye Fi card is removed and then reinserted into the unit set functions related to Eye Fi again from the menu When using the Eye Fi card please be sure to unlock the write protect switch l 16 Before deleting the files please confirm they have been transferred to your PC and ...

Страница 96: ...tension cables j Operation on an upgraded OS j Operation on an OS other than the one pre installed This software is not compatible with Microsoft Windows 3 1 Windows 95 Windows 98 Windows 98SE Windows Me Windows NT and Windows 2000 This software is not guaranteed on Microsoft Windows XP The USB equipment operates with the driver installed as standard in the OS With a PC Connecting to a PC File tra...

Страница 97: ...ng instructions are fulfilled some PCs cannot be used The USB equipment operates with the driver installed as standard in the OS PC Mac OS Mac OS X 10 8 4 CPU Intel Core 2 Duo or better RAM 2 GB or more Interface USB port Other requirements Mouse or equivalent pointing device ...

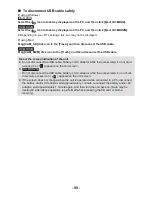
Страница 98: ... l 100 When you select an option other than PC reconnect the USB cable When using the battery the LCD monitor turns off after about 5 seconds Press the cursor button to turn the LCD monitor on Do not use any other USB cables except the supplied one Operation is not guaranteed with any other USB cables When performing reading writing between a PC and an SD card be aware that some SD card slots buil...

Страница 99: ...it Do not disconnect the USB cable battery or AC adaptor while the access lamp is on or card access icon appears on the unit screen Do not disconnect the USB cable battery or AC adaptor while the access lamp is on or built in memory access icon appears on the unit screen If the screen does not change when the unit is operated while connected to a PC disconnect the battery and or AC adaptor wait ap...

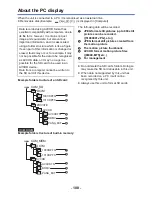
Страница 100: ...t supported by this unit has been recorded on a PC it will not be recognised by this unit Always use this unit to format SD cards Data recorded using AVCHD format has excellent compatibility with computers due to its file form however it contains not just image and sound data but also various important information and it is associated using a folder structure which is like a figure If even part of...

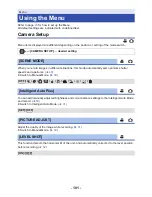
Страница 101: ... l 49 Switch to Manual Mode l 39 You can add manually adjusted brightness and colour balance settings to the Intelligent Auto Mode and record l 50 Switch to Intelligent Auto Mode l 31 Adjust the quality of the image while recording l 51 Switch to Manual Mode l 39 This function detects the horizontal tilt of the unit and automatically corrects it to the level position before recording l 52 Menu Usi...

Страница 102: ... l 46 Switch to Manual Mode l 39 This function allows you to record colour images in very low light situations Minimum required illumination approx 1 lx l 52 Switch to Manual Mode l 39 A more impressive image can be obtained by focusing on the object only in close up and shading off the background l 53 This makes the image brighter to prevent darkening of a backlit subject l 46 DRS ON OFF I EXPOSU...

Страница 103: ... Mode l 39 Image aspect ratio for the recording format SA 576 50i or SX 576 50i can be changed l 57 Set the maximum zoom ratio for the Motion Picture Recording Mode l 58 This allows recording of the pictures and sound to start approximately 3 seconds before the recording start stop button is pressed l 46 RECORD SETUP desired setting REC FORMAT 1080 50p PH 1080 50i HA 1080 50i HG 1080 50i HE 1080 5...

Страница 104: ...he shutter speed l 60 This will reduce the wind noise coming into the built in microphones while maintaining the realism l 61 Switch to Manual Mode l 39 This item is not displayed when an external microphone is connected Recording setting of the built in microphone can be adjusted l 61 O I S MODE1 MODE2 PICTURE SIZE Motion Picture Recording Mode Still Picture Recording Mode ASPECT RATIO 4 3 3 2 16...

Страница 105: ...om the built in microphones and the external microphone terminal can be adjusted l 62 This function reduces the low pitched sound when using an external microphone l 62 Switch to Manual Mode l 39 MIC LEVEL AUTO SET SET LOWCUT ON OFF ALC ALC ...

Страница 106: ...ion direction and shutter speed control of the multi manual ring l 42 Sets the rotation direction and iris control of the multi manual ring l 42 SW DISP SETUP desired setting MEDIA SELECT ZOOM RING DOWN TELE Close up images can be recorded when it is turned toward B UP TELE Close up images can be recorded when it is turned toward A SHUTTER RING DOWN SLOW Shutter speed will be slow when it is turne...

Страница 107: ...n icon again 4 Select ENTER and press the button in the centre Selects the brightness level of the left leaning zebra patterns on the screen l 47 Displaying of the luminance level display marker can be switched l 47 When you start recording the image audio gradually appears Fade in When you pause recording the image audio gradually disappears Fade out Please refer to page 45 You can select the col...

Страница 108: ...one can be switched The safety zone is not displayed on the images that is actually recorded When the menu setting is changed the information displayed on the screen operation icon and Counter display etc can be displayed not displayed on the TV l 76 It is possible to change the date and time display mode It is possible to change the date format HISTOGRAM ON OFF FOCUS ASSIST ON OFF SAFETY ZONE Asp...

Страница 109: ...apacity indication Display which remains displayed even when SELECT OPERATION ICONS GUIDE LINES SAFETY ZONE DATE TIME LEVEL METER LENS STATUS and MEDIA BATTERY are set to OFF can be switched This makes it easier to view the LCD monitor in bright places including outdoors l 20 It is not displayed in the Manual Mode or in the Playback Mode It adjusts brightness and colour density on the LCD monitor ...

Страница 110: ...ape of the USB cable s plug you intend to connect to the unit This item is displayed only when an Eye Fi card is inserted Please refer to page 93 This item is displayed only when an Eye Fi card is inserted Please refer to page 94 SELF SHOOT MIRROR NORMAL SUB REC BUTTON ON The sub recording start stop button is enabled OFF The sub recording start stop button is disabled SUB ZOOM OFF Sub zoom lever ...

Страница 111: ... is displayed only when an Eye Fi card is inserted Please refer to page 94 This item is displayed only when an Eye Fi card is inserted Please refer to page 95 Eye Fi FILE SIZE 4GB 2GB Eye Fi Power Management BOTH AC ...

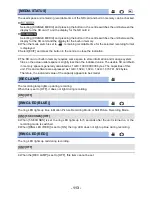
Страница 112: ...tre to exit the message screen Perform a physical formatting of the SD card when the SD card is to be disposed transferred l 131 Perform a physical formatting of the built in memory when this unit is to be disposed transferred l 129 Do not turn this unit off or remove the SD card while formatting Do not expose the unit to vibrations or shock OTHER FUNCTION desired setting FORMAT MEDIA SD CARD 1 SD...

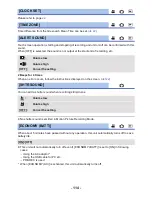
Страница 113: ...s slightly less than the indicated value The usable SD card built in memory space is generally calculated as 1 GB 1 000 000 000 bytes The capacities of this unit PCs and software are expressed as 1 GB 1 024k1 024k1 024 1 073 741 824 bytes Therefore the indicated value of the capacity appears to be smaller The recording lamp lights up during recording When this is set to OFF it does not light durin...

Страница 114: ... sound when recording still pictures No shutter sound is emitted in Motion Picture Recording Mode When about 5 minutes have passed without any operation this unit automatically turns off to save battery life This unit will not automatically turn off even if ECONOMY BATT is set to ON in following cases j Using the AC adaptor j Using the USB cable for PC etc j PRE REC is used When ECONOMY AC is acti...

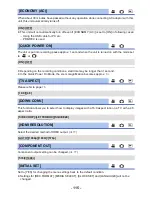
Страница 115: ... longer than 1 second In the Quick Power On Mode the zoom magnification becomes approx 1k Please refer to page 76 This function allows you to select how to display images with a 16 9 aspect ratio on a TV with a 4 3 aspect ratio Select the desired method of HDMI output l 77 Component output setting can be changed l 77 Set to YES for changing the menu settings back to the default condition Settings ...

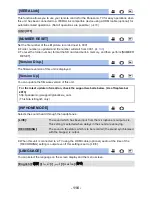
Страница 116: ...it Selects the sound heard through the headphones When this unit is connected to a TV using the HDMI cable optional audio at the time of the RECORDING setting is output even if this setting is set to LIVE You can select the language on the screen display and the menu screen VIERA Link ON OFF NUMBER RESET Version Disp Version Up For the latest update information check the support website below As o...

Страница 117: ...not deleted by mistake Even if you protect some scenes formatting the SD card will delete them l 74 Part that was recognised as clearly recorded is extracted from multiple scenes and it can be played back or stored in a short time with effects and music added l 66 Deletes a scene l 73 To cancel relay information When the relay information is cancelled combining of the relayed scenes will not be po...

Страница 118: ...at have not been copied yet l 84 Allows you to select desired scenes still pictures and then copy l 85 When a scene is relay recorded l 55 from either of the SD cards to the other the divided pieces can be recombined into one scene in an external drive l 87 When a scene is relay recorded l 55 from the built in memory to the SD card the divided pieces can be recombined into one scene in an external...

Страница 119: ...0 Elapsed recording time l 27 Remaining battery power l 15 Battery charging icon l 15 Built in memory recording possible status 2 White Card recording possible status 1 Green Recognising the card 1 White Card recording possible status 2 Green Recognising the card 2 MNL R 1h20m Remaining time for motion picture recording l 27 h is an abbreviation for hour and m for minute Relay Recording l 55 Backu...

Страница 120: ...at have different picture sizes from the sizes shown above MEGA OIS l 29 99 Marker l 47 White Balance l 41 FOCUS WB SHUTTER IRIS ZOOM Ring operation icons l 39 A 2 1 1 1080 50p SA SX 15 1M 5 8M 0 3M 15 1M 8M 2M 20 4M 9 4M 2 1M MEGA AWB C Backlight Compensation l 46 Tele Macro l 53 DRS l 45 Microphone Level l 62 Fade White Fade Black l 45 Colour Night View function l 52 Intelligent Exposure l 46 15...

Страница 121: ...00 0001 Still picture folder file name Transfer Protected motion pictures still pictures l 74 94 Recording format l 33 Eye Fi transfer status l 93 50p PH HA HG HE SA SX External Drive Playback l 86 Accessing the card l 91 99 Accessing the built in memory l 91 99 2 Time display The built in battery is low l 22 Warning for recording of yourself l 21 SD card is not inserted or is incompatible SD card...

Страница 122: ...ails repeatedly format a media on the unit Please be aware that if a media is formatted then all the data recorded on the media will be erased If the thumbnail information is recovered displaying the thumbnails may become slower Others Messages PERIODICALLY MAKE BACK UP OF DATA IN BUILT IN MEMORY We recommend backing up important recorded motion pictures and still pictures periodically to a PC DVD...

Страница 123: ...n out and needs to be replaced This unit is turned off automatically If the unit turns off when you turn off the power to the TV using the TV remote control the VIERA Link is at work If you are not using the VIERA Link set VIERA Link to OFF l 78 This unit cannot be operated though it is turned on This unit does not operate normally Remove the battery or AC adaptor wait about 1 minute and then reco...

Страница 124: ... 2 set it to Manual adjustment mode l 41 Colour or brightness of the image changes or you may see horizontal bars in the image The LCD monitor flickers indoors Colour or brightness of the image may change or you may see horizontal bars in the image when the object is recorded under fluorescent light mercury light or sodium light etc but this is not a malfunction In Motion Picture Recording Mode re...

Страница 125: ...Card that you inserted Refer to the operating instructions of the device for details When connected by the USB cable this unit is not detected by the other devices When connected to other devices using only the battery reconnect using the AC adaptor VIERA Link does not work Setting on this unit Connect with a HDMI cable commercially available l 78 Press the MENU button then select OTHER FUNCTION V...

Страница 126: ...e supplied USB cable again after restarting the PC and turning on this unit again When the USB cable is disconnected an error message will appear on the PC To disconnect the USB cable safely double click the icon in the task tray and follow the instructions on the screen Others Problem Check points If the SD card is inserted in this unit it is not recognised If the SD card is formatted on a PC it ...

Страница 127: ...a moment even when none of the following conditions are applicable A continuous recording of motion picture data that exceeds 4 GB may momentarily stop at every 4 GB of data when played back with another device Principal reasons for not playing back smoothly When REC FORMAT is changed When the scenes were recorded on different dates When scenes lasting under 3 seconds have been recorded When PRE R...

Страница 128: ...s in contact with the unit for a long time When you use the unit in a sandy or dusty place such as a beach do not let sand or fine dust get into the body and terminals of the unit Also keep the unit away from sea water Sand or dust may damage the unit Care should be taken when inserting and removing a card If sea water splashes onto the unit wipe off the water with a well wrung cloth Then wipe the...

Страница 129: ... look after the data in your built in memory carefully Panasonic will not be held responsible in the unlikely case that private data is divulged The battery used in this unit is a rechargeable lithium ion battery It is susceptible to humidity and temperature and the effect increases the more the temperature rises or falls In cold areas the full charge indication may not appear or the low battery i...

Страница 130: ...r discharged or the temperature of the battery is too high or low It can be charged but it may take a few hours to complete the charging normally Once normal charging starts the charging lamp lights up green However depending on the conditions of use even when normal charging is taking place the charging lamp may keep flashing in approx 4 second intervals until charging is completed Flashing with ...

Страница 131: ...nd then follow the on screen instructions The customer is responsible for the management of the data in the SD card When the LCD screen is dirty or condensation has occurred please wipe it using a soft cloth such as eyeglass cleaner Do not touch the LCD monitor with your fingernails or rub or press with strong force It may become hard to see or hard to recognise the touch when the LCD protection s...

Страница 132: ... and or other countries Microsoft product screen shot s reprinted with permission from Microsoft Corporation IBM and PC AT are registered trademarks of International Business Machines Corporation of the U S Intel and Intel Core are trademarks of Intel Corporation in the U S and or other countries Mac and Mac OS are trademarks of Apple Inc registered in the U S and other countries Eye Fi is a trade...

Страница 133: ...g with a lot of action is recorded or recording of short scene is repeated Use time in the row of 4 GB in above table as a guideline for the time that can be copied onto one DVD disc 4 7 GB Others Recording formats approximate recordable time Recording format 1080 50p PH 1080 50i HA 1080 50i HG 1080 50i HE 1080 50i Picture size Frame rate 1920k1080 50p 1920k1080 50i 1920k1080 50i 1920k1080 50i 192...

Страница 134: ...city for copyright protection and management and the capacity which can be used on the unit a PC etc Others Approximate number of recordable pictures Picture size 6016k3384 4096k2304 1920k1080 Aspect ratio 16 9 SD card 4 GB 300 650 3200 16 GB 1300 2700 12500 64 GB 5000 10500 52000 Built in memory 32 GB 2700 5000 25000 Picture size 4480k3360 2784k2088 640k480 Aspect ratio 4 3 SD card 4 GB 400 1000 ...

Страница 135: ...ls Others Optional accessories Attaching the Wide Conversion Lens Filter Kit Be careful about the following When 2 lens accessories such as the ND filter and Wide Conversion Lens are fitted and the zoom lever is pressed toward the W side the 4 corners of an image will be darkened Vignetting Attaching the lens cap of the Filter Kit VW LF49N optional When the Filter Kit VW LF49N optional is used pro...

Страница 136: ...Panasonic Corporation Web site http panasonic net ...

Отзывы: