background image

Table of Contents

For Your Safety ........................................................................................7

For Your Safety ...............................................................................................................7

For Users .........................................................................................................................7

Safety Information (For United Kingdom Only) .........................................................10

Precautions ...................................................................................................................10

Usage ......................................................................................................11

Included Accessories ..................................................................................................11

Names and Uses of the Parts ......................................................................................12

Connecting External Components .............................................................................15

Installing the elite Panaboard software ......................................................................17

Setting the Projector ....................................................................................................18

Setting Your System (Calibration) ..............................................................................19

Starting the elite Panaboard software and Performing Calibration ........................20

Uninstalling the elite Panaboard software .................................................................21

Viewing the Electronic Documentation ......................................................................22

Appendix .................................................................................................23

Daily Care ......................................................................................................................23

Cleaning the elite Panaboard .........................................................................................23

Replacing the Battery in the Electronic Pen ...................................................................23

Replacing the Penpoint of the Electronic Pen ................................................................24

Troubleshooting ...........................................................................................................25

Specifications ...............................................................................................................27

Optional Devices and Accessories .................................................................................28

Installation Manual .................................................................................29

Installation Manual (for qualified service personnel) ...............................................29

For Your Safety .............................................................................................................29

Notice .............................................................................................................................29

Included Accessories ..................................................................................................31

Wall Mounting Construction .......................................................................................33

Checking the Wall ..........................................................................................................33

Installing the Wall Mounting Plates ................................................................................34

Wall Types and Installation Procedures .........................................................................35

Stand Assembly (Sold Separately) .............................................................................37

Included Parts ................................................................................................................37

Assembly Instructions ....................................................................................................38

Assembly Instructions .................................................................................................41

Preparing for Removing the elite Panaboard from Its Packaging ..................................41

Assembling the elite Panaboard .....................................................................................42

Confirming the elite Panaboard Operation ................................................................46

Confirming the Interactive Features ...............................................................................46

Repackaging .................................................................................................................47

6

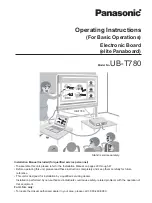
Operating Instructions (For Basic Operations)

Содержание ELITE PANABOARD UB-T780

Страница 1: ...es Deutsch Diese Bedienungsanleitung liegt in folgenden Sprachen vor Español En estas instrucciones de funcionamiento se incluyen los siguientes idiomas Spanish Español German Deutsch English Operating Instructions For Basic Operations Electronic Board elite Panaboard Model No UB T780 Stand is sold separately ...

Страница 2: ......

Страница 3: ...hrough 47 Before operating this unit please read these instructions completely and keep them carefully for future reference This unit is designed for installation by a qualified servicing dealer Installation performed by non authorized individuals could cause safety related problems with the operation of this equipment For U S A only To locate the closest authorized dealer in your area please call...

Страница 4: ...ntents of the screen on your computer and retrieve it for later use Usage Scenarios For Education Create an effective learning environment by projecting a variety of educational software onto the elite Panaboard and with the electronic pen directly manipulate the software and write and draw on the screen With several tools at your disposal for aiding in explanations such as illustration and marker...

Страница 5: ...al see Viewing the Electronic Documentation page 22 Abbreviations Windows 2000 refers to the Microsoft Windows 2000 operating system Windows XP refers to the Microsoft Windows XP operating system Windows Vista refers to the Microsoft Windows Vista operating system Trademarks Microsoft Windows Windows Vista DirectX and PowerPoint are either registered trademarks or trademarks of Microsoft Corporati...

Страница 6: ...evice or any of its optional storage device is adversely effected by operational errors static electricity electrical noise vibration dust or when the power has been cut off due to mal function repair or inadvertently the memory contents may be lost or changed Before operating the system make a point of reading the precautionary notes in the Operating Instructions and the help information and obse...

Страница 7: ...e for accidents or injuries caused by but not limited to the following 1 Altering the device or improper installation construction 2 Using the device for purposes beyond its intended use 3 Earthquake fire flood tidal wave hurricane lightning or other natural phenomena 4 Natural aging of the building or similar phenomena For FRG Users For Germany Only Note Machine noise information regulation 3 GPS...

Страница 8: ...tery in the Electronic Pen 23 Replacing the Penpoint of the Electronic Pen 24 Troubleshooting 25 Specifications 27 Optional Devices and Accessories 28 Installation Manual 29 Installation Manual for qualified service personnel 29 For Your Safety 29 Notice 29 Included Accessories 31 Wall Mounting Construction 33 Checking the Wall 33 Installing the Wall Mounting Plates 34 Wall Types and Installation ...

Страница 9: ...ar the product and easi ly accessible To ensure safe operation the power cord supplied must be inserted into a standard three prong AC outlet which is effectively grounded earthed through the normal wiring The fact that the equipment operates sat isfactorily does not imply that the power point is grounded earthed and that the installation is completely safe For your safety if in any doubt about th...

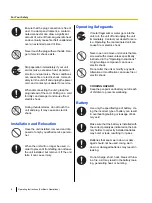
Страница 10: ...t can cause injury Operating Safeguards If metal fragments or water gets into the unit turn the unit off and unplug the unit immediately Contact your dealer for serv ice Operating the contaminated unit can cause fire or electric shock Never open or remove unit covers that are screwed with screws unless specifically instructed in the Operating Instructions A high voltage component can cause electri...

Страница 11: ...k To prevent fire or shock hazard do not ex pose this unit to rain or any type of mois ture When moving the unit be sure to unplug the power cord from the AC outlet If the unit is moved with the power cord attach ed it can cause damage to the cord which could result in fire or electric shock After installing or moving the unit lock the casters and set the fall prevention exten sion legs Locking th...

Страница 12: ... mains lead of this appliance may not correspond with the coloured markings identifying the terminals in your plug proceed as follows The wire which is coloured Green and Yellow must be connected to the terminal in the plug which is marked with the letter E or by the Earth symbol or coloured Green or Green and Yellow The wire which is coloured Blue must be connected to the terminal in the plug whi...

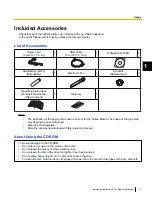
Страница 13: ...ower cord shown above is for the United States The shape of the plug may vary depending on country area Stand is sold separately Store the extra penpoint along with this operating manual About Using the CD ROM To prevent damage to the CD ROM Do not touch or write on the surface of the disc Do not leave the disc out of the protective case Do not leave the disc in the direct sunlight or near heat so...

Страница 14: ...mputer screen using a projector Power Switch Pen Tray Push the center of the door to open the pen tray which can hold up to 2 electronic pens Status LEDs Left Power LED green Lights green when the power is on Right Error LED red Lights red when an error occurs USB Port Directly connect a computer using a USB cable included Rear View AC Inlet Power Cord 12 Operating Instructions For Basic Operation...

Страница 15: ...ecting the electronic pen s position Pen Button Performs the same function as a right click with a mouse Battery Cover Notice Use the electronic pen by holding it at a right angle to the screen board Holding it at an angle can cause its position to be read incorrectly Do not use multiple pens at the same time This can result in erroneous operation Do not push the penpoint while holding the pen clo...

Страница 16: ...ry cover When replacing the cover follow the procedure in reverse 2 Insert exchange the battery and replace the cover Make sure to use a AAA alkaline battery and ensure that and face the correct direc tions 14 Operating Instructions For Basic Operations Usage ...

Страница 17: ...nal stand plug the power cord into the AC inlet and secure the cord as shown in the illustrations below When attaching the power cord down ward When attaching the power cord along the lower side of the elite Panaboard About Grounding If you cannot connect the grounding line contact your dealer The cost of installing a grounding connection is not included in the price of the elite Panaboard The inc...

Страница 18: ... Panaboard where it is directly exposed to sunlight near a stove near to a heating cooling vent or exposed to strong winds Do not use the elite Panaboard in a location less than 10 C 50 F or in a location subject to extreme changes in temperature Note If you use the elite Panaboard under the conditions above there is a risk that the elite Panaboard will not operate correctly Moving the elite Panab...

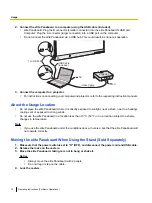
Страница 19: ...stall elite Panaboard 5 If you agree to the terms in the License Agreement click Yes In Windows Vista if the User Account Control window is displayed click Continue to continue with the installation 6 When the following screen is displayed confirm that the USB cable is not connected to your computer or the elite Panaboard and click OK If the USB cable is connected to the elite Panaboard disconnect...

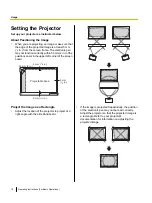
Страница 20: ...t corner of the screen board Projectable Area 5 mm 1 4 in 5 mm 1 4 in 50 mm 2 in 5 mm 1 4 in Project the Image as a Rectangle Adjust the location of the projector to project at a right angle with the elite Panaboard If the image is projected trapezoidally the position of the electronic pen may not be read correctly Adjust the projector so that the projected image is a rectangle Refer to your proje...

Страница 21: ... the elite Panaboard project an image onto the screen board and use the elite Panaboard software installed on your computer to perform calibration After Calibration Do Not Move the elite Panaboard or the Pro jector The position of projected image and electronic pen will become misaligned in the following cases requiring you to re calibrate their positions The location of the projector changed The ...

Страница 22: ...ss the electronic pen at a right angle to the screen board When you push down on the penpoint the electronic pen will make a buzzing sound When the position of the indicated point has been determined correctly calibration will automatically move to the next point When calibration has finished normally a completion dialog box will be displayed 5 Click OK If the elite Panaboard and projector are fix...

Страница 23: ...m the menu Uninstalling the elite Panaboard software If it is necessary to uninstall the elite Panaboard software follow the procedure below 1 Turn on your computer and start Windows Log into an account with Administrator privileges 2 Select Add or Remove Programs from the Control Panel In Windows 2000 select Add Remove Programs In Windows Vista select Uninstall a program 3 Select Panasonic elite ...

Страница 24: ...s For Software from the Start menu Start All Programs Panasonic elite Panaboard Operating Instructions for Software The electronic documentation will be displayed Note To view the electronic documentation you must have Adobe Reader installed on your computer If your computer is connected to the Internet you can download Adobe Reader from Adobe s web site 22 Operating Instructions For Basic Operati...

Страница 25: ...enzene or abrasive chemicals to clean Doing so can result in discoloration Replacing the Battery in the Electronic Pen When the charge in the battery in the electronic pen is low the message The pen battery is low Replace the battery soon will be displayed on the computer screen Continued use of the electronic pen can lead to poor performance Replace the battery as soon as possible See Inserting E...

Страница 26: ...lectronic pen becomes worn a hole will appear in the penpoint Continuing to use the electronic pen in this condition can cause damage to the screen or unsatisfactory operation so replace the penpoint with a new one 24 Operating Instructions For Basic Operations Appendix ...

Страница 27: ...tion again 20 Drawn lines and comments are not completely dis played or are displayed in the wrong location You are holding the electronic pen at an angle You are operating the elite Panaboard in direct sunlight or other strong lighting Infrared controllers e g a television remote control are being used and pointed towards the position sensor There is a wall or ceiling close to the sides of the el...

Страница 28: ...ce the electronic pen s battery with a new one 14 23 Marks written with a white board marker cannot be erased Because the elite Panaboard is designed exclusively for projector images you cannot erase the marks with a standard eraser Use a commercially available melamine foam eraser to erase 23 26 Operating Instructions For Basic Operations Appendix ...

Страница 29: ...th 1175 mm 1692 mm 3 ft 10 3 8 in 5 ft 6 3 4 in Interactive Features Effective Area Height Width 1165 mm 1502 mm 3 ft 10 in 4 ft 11 1 4 in Project the image so that it is at least 5 mm 1 4 in from the screen frame The electronic pen may not function correctly within 50 mm 2 in of the position sensor in the upper left corner of the screen board Projectable Area 5 mm 1 4 in 5 mm 1 4 in 50 mm 2 in 5 ...

Страница 30: ...onal Devices and Accessories Optional Device Stand KX B061 Accessories Electronic Pen UE 608025 To purchase separately sold items contact your dealer 28 Operating Instructions For Basic Operations Appendix ...

Страница 31: ...p erators to a specific operating proce dure that must not be performed These symbols are used to alert op erators to a specific operating proce dure that must be emphasized in order to operate the unit safely Notice WARNING Safety check must be done by qualified service personnel after installing this op tion Be sure to disconnect the power cord while installing the unit Otherwise it may cause el...

Страница 32: ... lbs Do not attach the electronic board to mor tared walls Accidental electric leakage from the wall mounting plate bolts to metal laths or wire laths can cause heat smoke or a fire Confirm the bolts of the unit are certainly caught by the wall mounting plate by pull ing the unit after hanging the unit on the wall mounting plate if the unit is mounted on a wall Be sure to put on a glove to avoid e...

Страница 33: ...Operating Instructions For Software Drivers Application software Cable Holder 1 For power cord Wall Mounting Plate Left 1 Wall Mounting Plate Right 1 Battery LR03 AAA alkaline bat tery 1 For electronic pen Electronic Pen 1 Penpoint Replacement 2 For electronic pen Cable Tie 1 Fastener for power cord when mounted on a wall Operating Instructions 1 Operating Instructions For Basic Operations include...

Страница 34: ...tice Screws 8 count for wall mounting are not included Please purchase screws with a size of M6 appropriate for your type of wall page 35 32 Operating Instructions For Basic Operations Installation Manual ...

Страница 35: ...moke or fire I Necessary Tools and Parts not included with the elite Panaboard Drill Screwdriver Measuring tape Level 8 screws M6 size II Before Starting 1 Make sure that the wall is strong enough to support the elite Panaboard Rated strength greater than 1324 N 135 kgf Notice If necessary reinforce the wall so that it is strong enough to support the elite Panaboard 2 Make sure that the location i...

Страница 36: ...epresents the outer edge of the elite Panaboard 3 Drill 8 holes for the wall mounting plates Drill holes that are appropriate for the screws you are using 4 Install the wall mounting plates using the 4 screws 2 screws are used for each wall mounting plate The remaining 4 screws are used after installing the elite Panaboard on the wall 40 mm 1 5 8 in 982 mm 3 ft 2 3 4 in 30 mm 1 1 8 in 44 mm 1 3 4 ...

Страница 37: ...pending on the wall s structure Three available options are listed below Other methods may be necessary depending on the wall Metal or Concrete walls Stud plugs not included are needed Drill bit Metal or concrete wall Stud plug Wall mounting plate Bolt Insert a stud plug in the hole Drill eight holes in the wall For the correct hole size refer to the instruc tions for the particular stud plugs use...

Страница 38: ...he arms expand pull the wall mount ing plate out until the arms of the split wing toggle grip firmly into the wall Tighten the bolt until the wall mounting plate is securely fixed into the wall Wooden walls Wood screws not included are needed Wall mounting plate Wood screw Wooden wall Insert the wood screw through the hole in the wall mounting plate and tighten until the wall mounting plate is sec...

Страница 39: ...Beam 2 Side Bar A 2 Side Bar B 1 Screw M6 45 mm 1 3 4 in 10 Two wing Bolt M5 12 mm 1 2 in 2 Support Bracket 2 Fall prevention Extension Leg 4 Screw M6 60 mm 2 3 8 in 4 Nut 4 Wrench 1 1 Washer 10 1 The included wrench is necessary for tightening and loosening the screw so keep it in a safe location Operating Instructions For Basic Operations 37 1 Installation Manual ...

Страница 40: ...fore assembly be sure to lock the casters Locking the casters Push this side Assembly Instructions 1 Assemble the fall prevention extension legs 38 Operating Instructions For Basic Operations Installation Manual ...

Страница 41: ...e front Locking caster side rear Locking caster side rear Notice Do not over tighten the screw Doing so can warp the support beams Assemble the stand so that the locking casters are on the rear side Operating Instructions For Basic Operations 39 1 Installation Manual ...

Страница 42: ...folding back the fall prevention extension legs release the lock as follows 1 2 1 1 2 4 Mount the elite Panaboard See Assembling the elite Panaboard For Mounting on a Stand Sold Separately page 44 40 Operating Instructions For Basic Operations Installation Manual ...

Страница 43: ...le 1 CD ROM 1 Cable Holder 1 Wall Mounting Plate Right Left 1 Battery 1 Electronic Pen 1 Penpoint 2 Cable Tie 1 Operating Instructions 1 Warranty 1 Notice When handling the screen board hold it by the edge frame and not the screen board itself Holding the screen board can result in damage The packing materials in the shipping box are necessary for repackaging so keep them in a safe place Operating...

Страница 44: ... cable tie fastening hole on the lower frame cover 3 Pull the loose end of the cable tie to tighten it and install the power cord depending on the location of the outlet as illustrated in the following diagrams When attaching the power cord downward Fasten the power cord with the cable tie When attaching the power cord along the lower side of the elite Panaboard Fasten the power cord with the cabl...

Страница 45: ...ards the rear Latches Board Attachment 7 Fasten to the wall Using the remaining 4 screws securely fasten the lower portion of the board attachment to the wall 8 Reattach the lower frame cover Attach the lower frame cover to the lower side of the elite Panaboard and tighten both left and right screws so that the cover does not protrude Notice Take care not to injure yourself on the board attachment...

Страница 46: ... result in discoloration Do not wipe the screen board with a dry cloth Doing so can cause static electricity build up 10 Confirm that the elite Panaboard can operate See Confirming the elite Panaboard Operation page 46 For Mounting on a Stand Sold Sep arately 1 Attach the power cord Connect the power cord to the elite Panaboard before installing on the stand Power Cord 2 Depending on the location ...

Страница 47: ...and securely insert them at the desired height Torque greater than 98 N m 10 kgf cm 9 lbf in elite Panaboard Height Screw Position 100 mm 4 in Highest Standard 2nd from top 100 mm 4 in 2nd from bottom 200 mm 7 7 8 in Lowest 5 Wipe the screen board surface Gently wipe the screen board surface with a soft moist cloth Notice Do not use thinner benzene or abrasive chemicals to clean Doing so can resul...

Страница 48: ... operating correctly If a projector is not available confirm operation using only the elite Panaboard and computer When the elite Panaboard software starts the calibration screen is displayed on the computer screen Perform tentative calibration by pressing the 4 points on the elite Panaboard with the electronic pen as shown in the illustration below For precise adjustment it is necessary to use a ...

Страница 49: ...arately page 44 in reverse Package the unit as depicted in the diagram in Preparing for Removing the elite Panaboard from Its Packaging page 41 Notice When handling the screen board hold it by the frame and not the screen board itself Holding the screen board can result in the damage Operating Instructions For Basic Operations 47 1 Installation Manual ...

Страница 50: ...le for incorrect disposal of this waste in accordance with national legislation For business users in the European Union If you wish to discard electrical and electronic equipment please contact your dealer or supplier for further information Information on Disposal in other Countries outside the European Union This symbol is only valid in the European Union If you wish to discard this product ple...

Страница 51: ...es poner en funcionamiento esta unidad lea completamente estas instrucciones y guárdelas cuidadosamente para consultarlas en el futuro Esta unidad está diseñada para que la instale un distribuidor de asistencia técnica cualificado La instalación realizada por individuos no autorizados podría derivar en problemas de seguridad con el funcionamiento de este equipo Sólo para EE UU Para localizar el di...

Страница 52: ...de su ordenador y recuperarlo para un uso posterior Situaciones de uso Para educación Cree un entorno de aprendizaje eficaz mediante la proyección de una variedad de software educativo en la elite Panaboard y con el lápiz electrónico manipule directamente el software escriba y dibuje sobre la pantalla Con las herramientas que tiene a su disposición para apoyar sus explicaciones como las herramient...

Страница 53: ...oard software en su ordenador Para obte ner información detallada sobre la visualización del manual con sulte Visualización de la documentación electrónica página 24 Abreviaturas Windows 2000 se refiere al sistema operativo Microsoft Windows 2000 Windows XP se refiere al sistema operativo Microsoft Windows XP Windows Vista se refiere al sistema operativo Microsoft Windows Vista Marcas comerciales ...

Страница 54: ...rizados de este equipo anularía la autoridad del usuario para poner en funcionamiento este dispositivo Advertencia sobre el almacenamiento de datos Cuando el dispositivo de almacenamiento del sistema o cualquier dispositivo de almacenamiento op cional se ve afectado negativamente por errores operativos electricidad estática ruido eléctrico vibración y polvo o cuando se interrumpe el suministro elé...

Страница 55: ...td no es responsable de los accidentes o lesiones causados por pero no limitados a lo siguiente 1 Alteración del dispositivo o realización incorrecta de la instalación 2 Uso del dispositivo para propósitos que van más a allá de su uso previsto 3 Terremotos incendios inundaciones maremotos huracanes tormentas eléctricas o cualquier otro fenómeno natural 4 Envejecimiento natural de la construcción o...

Страница 56: ...titución de la punta del lápiz electrónico 26 Solución de problemas 27 Especificaciones 29 Dispositivos opcionales y accesorios 30 Manual de instalación 31 Manual de instalación para el personal de servicio cualificado 31 Para su seguridad 31 Aviso 31 Accesorios incluidos 33 Estructura del montaje de pared 35 Comprobación de la pared 35 Instalación de las placas para montaje en la pared 36 Tipos d...

Страница 57: ...cificada puede que la uni dad o el enchufe emitan humo o resulten calientes al tacto Cuando utilice este producto la toma de corriente debe estar cerca del producto y debe ser de fácil acceso Para garantizar un funcionamiento segu ro se debe insertar el cable de alimenta ción en una toma de CA estándar de tres clavijas correctamente conectada a tierra con toma de tierra mediante un cableado normal...

Страница 58: ... y provocar un incendio o una descarga eléctrica Durante tormentas no toque la unidad ni el enchufe Se puede producir una des carga eléctrica Instalación y reubicación Únicamente el personal de servicio cuali ficado debe instalar desmontar o dese char la unidad Cuando ya no vaya a utilizar más la uni dad y para evitar que ésta se caiga no la deje instalada desinstálela Si la unidad se cae podría h...

Страница 59: ...ción durante un pe riodo de tiempo largo el material aislante degradado puede provocar una descarga eléctrica una fuga de corriente o un in cendio La unidad sólo debe utilizarse con el cable de alimentación que se suministra con ella Instalación y reubicación No coloque la unidad en un lugar en el que no esté estable No coloque la unidad en un entorno ca liente húmedo o polvoriento La exposi ción ...

Страница 60: ...l enchufe hasta conseguir una cubierta de recambio Se puede adquirir una cubierta de recambio a través del distribuidor local de Panasonic Si el enchufe moldeado no es adecuado para la toma de corriente de su casa se debe extraer el fusible cortar el enchufe y desecharlo de forma segura Existe un riesgo de descarga eléctrica grave si se inserta el enchufe cortado en cualquier toma de corriente de ...

Страница 61: ...serve siempre las precauciones que se indica a continuación Si el lápiz electrónico deja de funcionar porque la pila se ha agotado retírela inmediatamente y deséchela según lo establecido por las normativas locales Dejar una pila gastada dentro del lápiz electrónico puede provocar fugas Acerca del desecho de la pila Após o uso as pilhas baterias contidas neste produto poderão ser dispostas em lixo...

Страница 62: ...ba es para Estados Unidos La forma del enchufe puede variar dependiendo del país zona El pie se vende por separado Guarde la punta del lápiz adicional junto con este manual de instrucciones Acerca del uso del CD ROM Para evitar daños en el CD ROM No toque la superficie del disco ni escriba en ella No deje el disco fuera de la caja protectora No deje el disco expuesto a la luz solar directa ni cerc...

Страница 63: ... 2 lápices electrónicos LED de estado Izquierdo LED de alimentación verde Se ilumina en verde cuando la alimentación está encendida Derecho LED de error rojo Se ilumina en rojo cuando se produce un error Puerto USB Conecte directamente un ordenador mediante un cable USB incluido Vista trasera Entrada de CA Cable de alimentación Aviso La elite Panaboard se ha diseñado exclusivamente para proyectar ...

Страница 64: ... el lápiz electrónico sosteniéndolo en ángulo recto con respecto a la pantalla de la pizarra Si lo sostiene formando un ángulo es posible que su posición no se lea correctamente No utilice varios lápices al mismo tiempo Esto puede dar lugar a un funcionamiento erróneo No presione la punta del lápiz electrónico mientras lo sostiene cerca de la elite Panaboard De lo contrario puede causar un comport...

Страница 65: ...l volver a colocar la tapa siga el procedimiento in verso 2 Introduzca cambie las pilas y vuelva a colo car la tapa Asegúrese de utilizar pilas alcalinas AAA y de que los símbolos y están en la posición correcta Instrucciones de funcionamiento para las funciones básicas 15 2 Uso ...

Страница 66: ... cable de alimentación a la entrada de CA y asegure el cable como se muestra en las siguientes ilustraciones Acoplamiento del cable de alimentación hacia abajo Acoplamiento del cable de alimentación a lo largo de la parte lateral inferior de la elite Panaboard Acerca de la conexión a tierra Si no puede conectar el cable de conexión a tierra póngase en contacto con el distribuidor El coste de la in...

Страница 67: ...nde esté expuesta a la luz solar directa próxima a una estufa o a un conducto de ventilación de aire frío o caliente ni expuesta a corrientes de aire fuertes No utilice la elite Panaboard en lugares con una temperatura inferior a 10 C o sujetos a cambios bruscos de temperatura Nota Si utiliza la elite Panaboard en las condiciones mencionadas existe el riesgo de que no funcione correctamente Despla...

Страница 68: ...4 Bloquee las ruedecitas 18 Instrucciones de funcionamiento para las funciones básicas Uso ...

Страница 69: ...clic en Siguiente 4 Haga clic en Instalar elite Panaboard 5 Si acepta los términos del Contrato de licencia haga clic en Sí Si aparece la ventana Control de cuentas de usuario en Windows Vista haga clic en Continuar para continuar con la instalación 6 Cuando aparezca la siguiente pantalla confirme que el cable USB no está conectado al ordenador ni a la elite Panaboard y haga clic en Aceptar Si el ...

Страница 70: ...te una imagen asegúrese de que el borde de la imagen proyectada está como mínimo a 5 mm del marco de la pantalla Puede que el lápiz electrónico no funcione correctamente a menos de 50 mm del sensor de posición de la esquina superior izquierda de la pantalla de la pizarra Área de proyección 5 mm 5 mm 50 mm 5 mm 20 Instrucciones de funcionamiento para las funciones básicas Uso ...

Страница 71: ...olución adecuada Ajuste las resoluciones del ordenador y del proyector a la configuración más adecuada Si no se ajusta correctamente la resolución la imagen se verá con dificultad En concreto si la resolución del proyector es inferior a la del ordenador las líneas finas aparecerán cortadas o rotas Consulte la documentación del proyector para obtener información acerca del ajuste de la resolución N...

Страница 72: ...á utilizando la elite Panaboard instalada sobre un pie tenga en cuenta que cabe la posibilidad de golpear accidentalmente la elite Panaboard o presionar demasiado fuerte con el lápiz electrónico Al hacer esto se puede desplazar la posición del pie lo que podría dar lugar a la desalineación de la imagen proyectada y la posición del lápiz electrónico Asegúrese de bloquear las ruedecitas del pie cuan...

Страница 73: ...e el elite Panaboard software Una vez se haya completado la calibración aparecerá el icono en el área de notificación y se mostrará automáticamente la paleta de herramientas de dibujo de escritorio Desktop Drawing Tool Desktop Drawing Tool Podrá utilizar el elite Panaboard software Nota Para obtener información detallada acerca del uso del elite Panaboard software consulte la ayuda o el manual ele...

Страница 74: ...ada la desinstalación reinicie el ordenador Visualización de la docu mentación electrónica Siga el procedimiento que se indica a continuación para ver la documentación electrónica de Instrucciones de funcionamiento para el software 1 Encienda el ordenador e inicie Windows 2 Abra las Instrucciones de funcionamiento para el software desde el menú Inicio Inicio Todos los programas Panasonic elite Pan...

Страница 75: ...solventes benceno ni productos químicos abrasivos para limpiar Si lo hace puede dar lugar a que se decolore Sustitución de la pila del lápiz electrónico Cuando la carga de la pila del lápiz electrónico sea baja aparecerá el mensaje Pilas del lápiz con poca carga Reemplácelas pronto en la pantalla del ordenador El uso continuado del lápiz electrónico puede dar lugar a un bajo rendimiento Cambie las...

Страница 76: ...nico aparecerá un agujero en la misma Si continúa utilizando el lápiz electrónico en estas condiciones podría dañarse la pantalla o producirse un funcionamiento incorrecto por lo que debe reemplazar la punta por una nueva 26 Instrucciones de funcionamiento para las funciones básicas Apéndice ...

Страница 77: ...conectado correctamente La posición del lápiz elec trónico no es correcta La imagen proyectada está desalineada Realice la calibración de nuevo 22 Las líneas y los comenta rios dibujados no se ven completamente o aparecen en una ubicación incorrec ta Está sosteniendo el lápiz electrónico en ángulo La elite Panaboard está expuesta a la luz solar directa o a otro tipo de iluminación intensa Se están...

Страница 78: ... dedo Aparece el mensaje Pilas del lápiz con poca carga Reemplácelas pronto en la pantalla del ordenador Sustituya las pilas del lápiz electrónico por unas nuevas 15 25 Las marcas escritas con un rotulador de pizarra blanca no se pueden borrar Debido a que la elite Panaboard está diseñada exclusivamente pa ra proyectar imágenes las marcas no se pueden borrar con un borrador tradicional Utilice un ...

Страница 79: ...a 1 175 mm 1 692 mm Funciones in teractivas Zona útil Altura Anchura 1 165 mm 1 502 mm Proyecte la imagen de modo que se encuentre como míni mo a 5 mm del marco de la pantalla Puede que el lápiz electrónico no funcione correctamente a menos de 50 mm del sensor de posición de la esquina superior izquierda de la pantalla de la pizarra Área de proyección 5 mm 5 mm 50 mm 5 mm Alimentación del lápiz el...

Страница 80: ...os Dispositivo opcional Pie KX B061 Accesorios Lápiz electrónico UE 608025 Para adquirir elementos que se venden por separado póngase en contacto con el distribuidor 30 Instrucciones de funcionamiento para las funciones básicas Apéndice ...

Страница 81: ...ico que no se debe realizar Estos tipos de símbolos se usan para alertar a los operadores de un proce dimiento de funcionamiento específi co que se debe destacar para trabajar con la unidad de forma segura Aviso ADVERTENCIA El personal cualificado debe realizar una inspección de seguridad tras la instalación de esta opción Asegúrese de desconectar el cable de ali mentación durante la instalación d...

Страница 82: ...s de argamasa La fuga eléctrica acci dental procedente de los pernos de la placa para montaje en la pared a los listo nes metálicos o alámbricos puede produ cir un calentamiento humo o un incendio Confirme que los pernos de la unidad es tán bien sujetos por la placa para montaje en la pared para ello tire de la unidad una vez colgada en la placa para montaje si se va a montar la unidad en una pare...

Страница 83: ...n al orde nador CD ROM 1 Instrucciones de funcio namiento para el softwa re Controladores Software de aplicación Soporte del cable 1 Para el cable de alimen tación Placa para montaje en la pared izquierda 1 Placa para montaje en la pared derecha 1 Pilas pilas alcalinas AAA LR03 1 Para el lápiz electrónico Lápiz electrónico 1 Punta del lápiz Recambio 2 Para el lápiz electrónico Brida 1 Afianzador d...

Страница 84: ...ones básicas incluye el manual de ins talación Garantía 1 Puede que no se incluya dependiendo del país zo na Aviso No se incluyen los tornillos un total de 8 para el montaje en la pared Compre tornillos de tamaño M6 adecuados para su tipo de pared página 37 34 Instrucciones de funcionamiento para las funciones básicas Manual de instalación ...

Страница 85: ...nto humo o incendio I Herramientas y piezas necesarias no incluidas con la elite Panaboard Taladro destornillador cinta métrica nivel 8 tornillos tamaño M6 II Antes de empezar 1 Asegúrese de que la pared es lo suficientemente resistente para soportar el peso de la elite Panaboard Resistencia estimada superior a 1 324 N 135 kgf Aviso Si es necesario refuerce la pared de forma que sea lo suficientem...

Страница 86: ... línea punteada de la ilustración representa el borde exterior de la elite Panaboard 3 Taladre 8 orificios para las placas para montaje en la pared Taladre unos orificios que sean apropiados para los tornillos que está utilizando 4 Instale las placas para montaje en la pared utilizando los 4 tornillos Se utilizan 2 tornillos para cada placa para montaje en la pared Los 4 tornillos restantes se uti...

Страница 87: ...montaje en la pared variará dependiendo de la estructura de la pared Las tres opciones disponibles se enumeran a continuación Es posible que se necesiten otros métodos dependiendo de la pared Paredes de metal o de hormigón Se necesitan tacos no incluidos Broca Pared de metal o de hormigón Taco Placa para el montaje en la pared Perno Inserte un taco en el orificio Taladre ocho orificios en la pared...

Страница 88: ...a el montaje en la pared hasta que los brazos del fiador atra vesado se fijen firmemente a la pared Apriete el perno hasta que la placa para el montaje en la pared quede firmemente fijada a la pared Paredes de madera Se necesitan tornillos para madera no incluidos Placa para el montaje en la pared Tornillo para madera Pared de madera Inserte el tornillo para madera a través del orificio de la plac...

Страница 89: ...lateral A 2 Barra lateral B 1 Tornillo M6 45 mm 10 Perno de mariposa M5 12 mm 2 Ménsula de soporte 2 Pata extensible para evitar caídas 4 Tornillo M6 60 mm 4 Tuerca 4 Llave de tuercas 1 1 Arandela 10 1 La llave de tuercas incluida es necesaria para apretar y aflojar el tornillo por lo que debe guardarla en un lugar seguro Instrucciones de funcionamiento para las funciones básicas 39 2 Manual de in...

Страница 90: ...s ruedecitas antes del montaje Bloqueo de las ruedecitas Presione este lado Instrucciones de montaje 1 Monte las patas extensibles para evitar caídas 40 Instrucciones de funcionamiento para las funciones básicas Manual de instalación ...

Страница 91: ...o de las ruedecitas traseras Bloqueo de las ruedecitas traseras Aviso No apriete excesivamente el tornillo De lo contrario se pueden deformar las vigas de soporte Monte el pie de forma que las ruedecitas de bloqueo queden en la parte trasera Instrucciones de funcionamiento para las funciones básicas 41 2 Manual de instalación ...

Страница 92: ...extensibles para evitar caídas retire el bloqueo como se indica a continuación 1 2 1 1 2 4 Monte la elite Panaboard Consulte Montaje de la elite Panaboard Para el montaje sobre un pie se vende por separado página 46 42 Instrucciones de funcionamiento para las funciones básicas Manual de instalación ...

Страница 93: ...el montaje en la pared derecha izquierda 1 Pila 1 Lápiz electrónico 1 Punta del lápiz 2 Brida 1 Instrucciones de funcionamiento 1 Garantía 1 Aviso Cuando manipule la pantalla de la pizarra sujétela por el marco del borde y no por la pantalla en sí De lo contrario se pueden producir daños en la pantalla de la pizarra Los materiales de embalaje de la caja de transporte son necesarios para volver a e...

Страница 94: ...e la brida de la cubierta del marco inferior 3 Tire del extremo suelto de la brida para apretarlo y coloque el cable de alimentación en función de la ubicación de la toma de corriente como se ilustra en los siguientes diagramas Acoplamiento del cable de alimentación hacia abajo Asegure el cable de alimentación con la brida Acoplamiento del cable de alimentación a lo largo de la parte lateral infer...

Страница 95: ...tivo de sujeción de la pizarra empujándolos hacia la parte trasera Tornillos de fijación Dispositivo de sujeción de la pizarra 7 Fíjela a la pared Mediante los 4 tornillos restantes fije bien a la pared la parte inferior del dispositivo de sujeción de la pizarra 8 Vuelva a colocar la cubierta del marco inferior Coloque la cubierta del marco inferior en el lado inferior de la elite Panaboard y apri...

Страница 96: ...so No utilice disolventes benceno ni productos químicos abrasivos para limpiar Si lo hace puede dar lugar a que se decolore No limpie la pantalla de la pizarra con un paño seco Esto puede dar lugar a una acumulación de electricidad estática 10 Confirme que la elite Panaboard funciona Consulte Confirmación del funcionamiento de la elite Panaboard página 49 Para el montaje sobre un pie se ven de por...

Страница 97: ...ble incluido para organizar el cable de alimentación y el cable USB Al instalar la elite Panaboard en el pie puede ajustar su altura a 4 niveles diferentes Al cambiar la altura extraiga los tornillos izquierdo y derecho de la parte posterior de la elite Panaboard e insértelos bien a la altura deseada Par de torsión superior a 98 N m 10 kgf cm Altura de la elite Pana board Posición del tornillo 100...

Страница 98: ... químicos abrasivos para limpiar Si lo hace puede dar lugar a que se decolore No limpie la pantalla de la pizarra con un paño seco Esto puede dar lugar a una acumulación de electricidad estática 6 Confirme que la elite Panaboard funciona Consulte Confirmación del funcionamiento de la elite Panaboard página 49 48 Instrucciones de funcionamiento para las funciones básicas Manual de instalación ...

Страница 99: ... instale el software y conecte el cable USB incluido 2 Confirme que las funciones interactivas están funcionando correctamente Si no hay un proyector disponible confirme el funcionamiento únicamente mediante la elite Panaboard y el ordenador Cuando se inicia el elite Panaboard software aparece la pantalla de calibración en la pantalla del ordenador Realice una calibración de prueba mediante la pre...

Страница 100: ...d Para el montaje en la pared página 44 Para el montaje sobre un pie se vende por separado página 46 en orden inverso Embale la unidad como se muestra en el diagrama de Preparación para sacar la elite Panaboard de su embalaje página 43 Aviso Cuando manipule la pantalla de la pizarra sujétela por el marco y no por la pantalla en sí De lo contrario se pueden producir daños en la pantalla de la pizar...

Страница 101: ...Instrucciones de funcionamiento para las funciones básicas 51 2 Notas ...

Страница 102: ...ercano De acuerdo con la legislación nacional podrían aplicarse multas por la eliminación incorrecta de estos desechos Para empresas de la Unión Europea Si desea desechar equipos eléctricos y electrónicos póngase en contacto con su distribuidor o proveedor para que le informe detalladamente Información sobre la eliminación en otros países no pertenecientes a la Unión Europea Este símbolo sólo es v...

Страница 103: ...ese Bedienungsanleitung vor der Inbetriebnahme vollständig durch und bewahren Sie sie anschließend für sofortige Bezugnahme griffbereit auf Dieses Gerät muss vom qualifizierten Fachpersonal eines Vertragshändlers installiert werden Wird die Installation von nicht autorisierten Personen ausgeführt könnte dies zu sicherheitstechnischen Problemen beim Betrieb des Geräts führen Nur USA Informationen z...

Страница 104: ...ter speichern und zur späteren Verwendung wieder aufrufen Verwendungsbeispiele Für Schulungszwecke Richten Sie eine effektive Schulungsumgebung ein indem Sie verschiedene Schulungssoftware Anwendungen auf das elite Panaboard projizieren und die Software mit dem elektronischen Stift direkt bedienen und auf dem Bildschirm schreiben und zeichnen Mit verschiedenen Werkzeugen die Sie bei der Erläuterun...

Страница 105: ...ben Einzelheiten zur Anzeige des Handbuchs finden Sie unter Anzeigen der elektronischen Dokumentation Seite 24 Abkürzungen Windows 2000 bezieht sich auf das Betriebssystem Microsoft Windows 2000 Windows XP bezieht sich auf das Betriebssystem Microsoft Windows XP Windows Vista bezieht sich auf das Betriebssystem Microsoft Windows Vista Marken Microsoft Windows Windows Vista DirectX und PowerPoint s...

Страница 106: ...stemspeichergerät oder ein anderes optionales Speichergerät von Betriebsfehlern stati scher Elektrizität elektrischem Rauschen Vibrationen Staub oder durch Unterbrechung der Stromzu fuhr aufgrund einer Fehlfunktion einer Reparatur oder einer Unachtsamkeit nachteilig beeinflusst wird kann der Speicherinhalt verloren gehen oder verändert werden Lesen Sie vor der Verwendung des Systems die Vorsorgehi...

Страница 107: ...ions Co Ltd ist nicht verantwortlich für Unfälle oder Verletzungen die einschließlich jedoch nicht ausschließlich durch folgende Umstände verursacht werden 1 Veränderungen am Gerät oder unsachgemäße Montage 2 Verwenden des Geräts zu Zwecken die nicht dem beabsichtigten Einsatzbereich entsprechen 3 Erdbeben Feuer Überschwemmungen Flutwellen Wirbelstürme Blitzeinschlag oder andere Naturereignisse 4 ...

Страница 108: ...rsetzen der Batterie im elektronischen Stift 25 Ersetzen der Stiftspitze im elektronischen Stift 26 Fehlerbehebung 27 Technische Daten 29 Optionale Geräte und optionales Zubehör 30 Installationsanleitung 31 Installationsanleitung für qualifizierte Service Mitarbeiter 31 Für Ihre Sicherheit 31 Hinweis 31 Mitgeliefertes Zubehör 33 Wandmontage 35 Überprüfen der Wand 35 Befestigung der Wandmontagehalt...

Страница 109: ...ie ein Kabel mit einer nicht spezifizierten Stromstärke verwenden kann das Gerät oder der Stecker Rauch abgeben oder sich stark erhitzen Beim Verwenden dieses Produkts sollten Sie eine Stromquelle in der Nähe des Ge rätes verwenden die leicht zugänglich ist Zum sicheren Betrieb muss das mitgelie ferte Netzkabel an eine Standardsteckdo se angeschlossen werden die durch die normalen Leitungen ausrei...

Страница 110: ...nnen Beschädigun gen entstehen die einen Brand oder elekt rischen Schlag verursachen können Berühren Sie das Gerät und den Stecker nicht während eines Gewitters Dadurch kann ein elektrischer Schlag verursacht werden Aufstellung und Transport Lassen Sie Installation Entfernen und Entsorgung des Geräts nur durch qualifi zierte Service Mitarbeiter durchführen Wenn das Gerät nicht mehr verwendet wird ...

Страница 111: ...ng Wenn das Gerät über einen längeren Zeit raum nicht verwendet wird schalten Sie es aus und ziehen Sie den Netzstecker heraus Wenn ein angeschlossenes Gerät über einen längeren Zeitraum nicht ver wendet wird kann eine beschädigte Iso lierung einen elektrischen Schlag Leck strom oder Brand verursachen Das Gerät sollte nur zusammen mit dem beiliegenden Netzkabel betrieben wer den Aufstellung und Tr...

Страница 112: ...em ASTA Zeichen oder dem BSI Zeichen gekennzeichnet ist Wenn die Sicherungsabdeckung des Steckers entfernt werden kann müssen Sie nach dem Ersetzen der Sicherung die Abdeckung wieder anbringen Der Stecker darf nicht ohne Sicherungsabdeckung verwendet werden Ein Ersatz für die Sicherungsabdeckung ist bei Ihrem lokalen Panasonic Händler erhältlich Falls der Formstecker nicht an Ihre Netzsteckdose an...

Страница 113: ...uch stets die folgenden Vorsichtsmaßnahmen zu beachten Wenn der elektronische Stift nicht mehr arbeitet weil die Batterie erschöpft ist diese unverzüglich gegen eine frische Batterie auswechseln und die alten Batterie vorschriftsmäßig entsorgen Wenn eine erschöpfte Batterie im Elektronischen Stift bleibt kann es zum Auflaufen der Batterie kommen Entsorgung der Batterie Após o uso as pilhas bateria...

Страница 114: ... je nach Land oder Region abweichen Der Ständer ist separat erhältlich Bewahren Sie die extra Stiftspitze zusammen mit dieser Bedienungsanleitung auf Verwenden der CD ROM Verhindern von Schäden an der CD ROM Berühren Sie die Oberfläche der Disc nicht und schreiben Sie nicht darauf Bewahren Sie die Disc immer in der Schutzhülle auf Setzen Sie die Disc nicht direktem Sonnenlicht oder Hitzequellen au...

Страница 115: ...en das bis zu zwei elektronische Stifte aufnehmen kann Status LED Anzeigen Links LED Stromzufuhr grün Leuchtet grün bei eingeschaltetem Gerät Rechts LED Fehleranzeige rot Leuchtet rot beim Auftreten eines Fehlers USB Anschluss Schließen Sie einen Computer direkt mit einem USB Kabel enthalten an Rückansicht Netzeingang Netzkabel Hinweis Das elite Panaboard wurde ausschließlich für Projektorbilder e...

Страница 116: ...kung Hinweis Zum Verwenden des elektronischen Stifts halten Sie diesen im rechten Winkel zur Bildschirmtafel Wenn Sie ihn in einem Winkel halten wird seine Position u U nicht korrekt gelesen Es können nicht mehrere Stifte gleichzeitig verwendet werden Dies kann zu Fehlern bei der Verwendung führen Drücken Sie nicht auf die Stiftspitze wenn Sie den Stift nahe an das elite Panaboard halten Dies kann...

Страница 117: ... führen Sie die Schritte in umgekehrter Reihenfolge durch 2 Legen Sie die Batterie ein bzw tauschen Sie sie aus und bringen Sie die Abdeckung wieder an Stellen Sie sicher dass Sie eine Alkaline Bat terie des Typs AAA verwenden und achten Sie darauf dass und in die richtige Richtung zeigen Bedienungsanleitung Für Grundfunktionen 15 3 Verwendung ...

Страница 118: ...ional erhältlichen Ständer verwenden stecken Sie das Netzkabel in den Netzeingang und sichern Sie das Kabel wie in den folgenden Abbildungen gezeigt Netzkabelführung nach unten Netzkabelführung entlang der Unterseite des elite Pana board Das Erden Wenn Sie die Erdungsleitung nicht anschließen können wenden Sie sich an Ihren Händler Die Installationskosten für eine Erdungsleitung sind im Preis für ...

Страница 119: ...entsprechenden Bedienungsanleitungen Verwendungsort Stellen Sie das elite Panaboard niemals ins direkte Sonnenlicht neben einen Heizofen oder ein Heiz oder Kühlgerät oder an einen Ort an dem es starkem Wind ausgesetzt ist Verwenden Sie das elite Panaboard niemals in einem Raum mit einer Raumtemperatur unter 10 C oder in einem Raum mit großen Temperaturschwankungen Hinweise Wenn Sie das elite Panab...

Страница 120: ... nirgends anzustoßen oder zu erschüttern Hinweis Verschieben Sie das elite Panaboard immer mit 2 Personen Lassen Sie das Kabel nicht auf dem Boden schleifen und treten Sie nicht darauf 4 Verriegeln Sie die Laufrollen 18 Bedienungsanleitung Für Grundfunktionen Verwendung ...

Страница 121: ...nicht angezeigt wird wählen Sie im Explorer das CD ROM Laufwerk aus und doppelklicken Sie auf Menu exe Wenn das Autoplay Dialogfenster unter Windows Vista angezeigt wird klicken Sie auf Menu exe ausführen 3 Klicken Sie nach der Anzeige des Willkommen Bildschirms auf Weiter 4 Klicken Sie auf elite Panaboard install 5 Wenn Sie den Bedingungen der Lizenzvereinbarung zustimmen klicken Sie auf Ja Wenn ...

Страница 122: ...aboard werden folgende Elemente angezeigt elite Panaboard software elite Panaboard book Bedienungsanleitung für Grundfunktionen Bedienungsanleitung für Software Einstellen des Projektors Richten Sie Ihren Projektor wie folgt ein Positionieren des Bildes Beim Projizieren eines Bildes sollte das projizierte Bild mindestens 5 mm vom Bildschirmrahmen entfernt sein Der elektronische Stift funktioniert ...

Страница 123: ...en Sie für die Auflösung des Computers und des Projektors eine geeignete Einstellung Wenn die Auflösung nicht korrekt eingestellt ist wird das Bild nicht optimal angezeigt Dies ist vor allem dann der Fall wenn die Auflösung des Projektors geringer als die des Computers ist Linien können dann unterbrochen dargestellt werden Informationen zum Einstellen der Auflösung finden Sie in der Dokumentation ...

Страница 124: ... Sie das elite Panaboard auf einem Ständer aufgebaut haben vermeiden Sie unabsichtliche Berührungen der Tafel oder zu starken Druck mit dem elektronischen Druck bei der Bedienung Dadurch kann die Position des Ständers verschoben werden was zu einer Fehlausrichtung zwischen der Position des projizierten Bilds und der Position des elektronischen Stifts führt Achten Sie beim Betrieb des elite Panaboa...

Страница 125: ... dem nächsten Starten der elite Panaboard software zu überspringen Wenn die Kalibrierung beendet wurde erscheint im Meldungsbereich das Symbol und die Desktop Palette mit den Zeichenwerkzeugen wird automatisch angezeigt Desktop Werkzeugleiste Sie können die elite Panaboard software jetzt verwenden Hinweise Ausführlichere Informationen über die Verwendung der elite Panaboard software finden Sie im ...

Страница 126: ...Starten Sie nach Abschluss der Deinstallation Ihren Computer neu Anzeigen der elektron ischen Dokumentation Zum Anzeigen der elektronischen Dokumentation Bedienungsanleitung Für Software gehen Sie folgendermaßen vor 1 Schalten Sie Ihren Computer ein und starten Sie Windows 2 Öffnen Sie Bedienungsanleitung Für Software über das Start Menü Start Alle Programme Panasonic elite Panaboard Bedienungsanl...

Страница 127: ...che Reinigungsmittel mit Scheuerwirkung verwenden Dies kann eine Verfärbung verursachen Ersetzen der Batterie im elekt ronischen Stift Wenn die Batterie im elektronischen Stift nur noch schwach ist wird die Meldung Schwache Batterie Überprüfen Sie die Stiftbatterie auf dem Computer Bildschirm angezeigt Wenn Sie den elektronischen Stift weiterverwenden ist die Funktionsfähigkeit u U nicht mehr einw...

Страница 128: ...tifts abnutzt erscheint in der Stiftspitze ein Loch Wenn Sie den elektronischen Stift in diesem Zustand weiterverwenden kann dies zur Beschädigung der Tafel oder unbefriedigender Leistung führen ersetzen Sie deshalb die Stiftspitze durch eine neue 26 Bedienungsanleitung Für Grundfunktionen Anhang ...

Страница 129: ... angeschlossen ist Die Position des elektron ischen Stifts ist nicht kor rekt Das projizierte Bild ist nicht korrekt ausgerichtet Wiederholen Sie die Kalibrierung 22 Gezeichnete Linien und Kommentare werden nicht vollständig oder an der fal schen Stelle angezeigt Sie halten den elektronischen Stift in einem Winkel Das elite Panaboard ist direktem Sonnenlicht oder einer ande ren starken Lichtquelle...

Страница 130: ...Stiftspitze mit dem Finger Die Meldung Schwache Batterie Überprüfen Sie die Stiftbatterie wird auf dem Computer Bildschirm ange zeigt Setzen Sie eine neue Batterie in den elektronischen Stift ein 15 25 Mit einem Filzstift geschrie bene Markierungen können nicht abgewischt werden Da das elite Panaboard ausschließlich für Projektorbilder entworfen wurde können Sie die Markierungen nicht mit einem no...

Страница 131: ... Interaktive Funktionen Nutzfläche Höhe Breite 1 165 mm 1 502 mm Projektion des Bildes mit mindestens 5 mm Abstand vom Bildschirmrahmen Der elektronische Stift funktioniert unter Umständen nicht korrekt wenn er weniger als 50 mm vom Positionssensor in der oberen linken Bildschirmecke ent fernt ist Projektionsbereich 5 mm 5 mm 50 mm 5 mm Stromversorgung elektron ischer Stift LR03 Alkaline Trockenba...

Страница 132: ...nd optionales Zubehör Optionales Gerät Ständer KX B061 Zubehör Elektronischer Stift UE 608025 Um separat erhältliche Artikel zu erwerben wenden Sie sich an Ihren Händler 30 Bedienungsanleitung Für Grundfunktionen Anhang ...

Страница 133: ...zifische Bedienverfahren hin die vermieden werden müssen Diese Symbole weisen Bediener auf spezifische Bedienverfahren hin die betont werden müssen um das Gerät sicher zu betreiben Hinweis WARNUNG Die Sicherheitsprüfung muss nach der In stallation von einem qualifizierten Service Mitarbeiter durchgeführt werden Stellen Sie sicher dass das Netzkabel bei der Installation des Gerätes herausgezo gen i...

Страница 134: ...e elektronische Schreibtafel darf nicht an einer Mörtelwand montiert werden An dernfalls besteht die Gefahr dass elektri sche Ableitung von den Schrauben der Wandmontagehalterung an Metallleisten oder Draht im Innern der Wand gelangt und zu Hitze Rauch oder Brandentwick lung führt Stellen Sie sicher dass die Schrauben des Gerätes sicher in die Wandmontage halterung einrasten indem Sie nach der Wan...

Страница 135: ... ROM 1 Bedienungsanleitung Für Software Treiber Anwendungssoftware Kabelhalter 1 Für Netzkabel Wandmontagehalterung links 1 Wandmontagehalterung rechts 1 Batterie LR03 Alkaline Batterie des Typs AAA 1 Für elektronischen Stift Elektronischer Stift 1 Stiftspitze Ersatz 2 Für elektronischen Stift Kabelbinder 1 Zum Befestigen des Netzkabels bei Wand montage Bedienungsanleitung 1 Bedienungsanleitung Fü...

Страница 136: ...d oder Regi on möglicherweise nicht im Lieferumfang enthal ten Hinweis Schrauben 8 Stück für die Wandmontage sind nicht enthalten Kaufen Sie Schrauben der Größe M6 die für Ihren Wandtyp geeignet sind Seite 37 34 Bedienungsanleitung Für Grundfunktionen Installationsanleitung ...

Страница 137: ...zu Hitze Rauch oder Brandentwicklung führt I Erforderliche Werkzeuge und Teile nicht im Lieferumfang des elite Panaboard enthalten Bohrer Schraubendreher Maßband Wasserwaage 8 Schrauben M6 II Bevor Sie beginnen 1 Stellen Sie sicher dass das Tragvermögen der Wand für das Gewicht des elite Panaboard ausreicht Nennfestigkeit mehr als 1 324 N 135 kgf Hinweis Verstärken Sie bei Bedarf die Wand soweit d...

Страница 138: ... mm 725 mm Hinweise Die gepunktete Linie in der Abbildung steht für die Außenkante des elite Panaboard 3 8 Löcher für die Wandmontagehalterungen bohren Bohren Sie passende Löcher für die verwendeten Schrauben 4 Die Wandmontagehalterungen mit den 4 Schrauben befestigen Für jede Wandmontagehalterung werden 2 Schrauben verwendet Die verbleibenden 4 Schrauben werden nach der Wandmontage des elite Pana...

Страница 139: ...ehalterungen an der Wand befestigt werden hängt von der Wandstruktur ab Nachfolgend sind drei Möglichkeiten aufgeführt Abhängig von der Wand sind u U andere Methoden erforderlich Metall oder Betonwände Stiftbolzen nicht im Lieferumfang enthalten werden benö tigt Bohrerspitze Metall oder Betonwand Stiftbolzen Wandmontagehalterung Schraube Einen Stiftbolzen in das Loch einsetzen Acht Löcher in die W...

Страница 140: ... die Arme ausgebreitet haben die Wandmontagehalterung herausziehen bis die Arme der Spaltflügel Steckfassung fest in der Wand verankert sind Die Schraube anziehen bis die Wandmon tagehalterung sicher an der Wand befestigt ist Holzwände Holzschrauben nicht im Lieferumfang enthalten werden be nötigt Wandmontagehalterung Holzschraube Holzwand Die Holzschraube in das Loch der Wand montagehalterung ein...

Страница 141: ... Halteschiene 2 Seitenstab A 2 Seitenstab B 1 Schraube M6 45 mm 10 Flügelschraube M5 12 mm 2 Stützhalterung 2 Kippschutzschiene 4 Schraube M6 60 mm 4 Mutter 4 Sechskantschlüssel 1 1 Unterlegscheibe 10 1 Der mitgelieferte Sechskantschlüssel wird zum Anziehen und Lösen der Schraube benötigt bitte heben Sie ihn sorgfältig auf Bedienungsanleitung Für Grundfunktionen 39 3 Installationsanleitung ...

Страница 142: ...em Zusammenbau darauf die Laufrollen zu verriegeln Verriegeln der Laufrollen auf diese Seite drücken Zusammenbauanleitung 1 Die Kippschutzschienen zusammenbauen 40 Bedienungsanleitung Für Grundfunktionen Installationsanleitung ...

Страница 143: ...kseite Seitliches Verriegeln der Laufrollen Rückseite Hinweis Die Schrauben nicht zu fest anziehen Andernfalls können die Halteschienen verformt werden Bauen Sie den Ständer so zusammen dass sich die Laufrollen mit Verriegelungen auf der Rückseite befinden Bedienungsanleitung Für Grundfunktionen 41 3 Installationsanleitung ...

Страница 144: ...schutzschienen wieder einzuklappen die Verriegelung wie folgt lösen 1 2 1 1 2 4 Montage des elite Panaboard Siehe Zusammenbau des elite Panaboard Zur Montage auf einem Ständer separat erhältlich Seite 46 42 Bedienungsanleitung Für Grundfunktionen Installationsanleitung ...

Страница 145: ...B Kabel 1 CD ROM 1 Kabelhalter 1 Wandmontagehalterung rechts links 1 Batterie 1 Elektronischer Stift 1 Stiftspitze 2 Kabelbinder 1 Bedienungsanleitung 1 Garantie 1 Hinweis Halten Sie die Bildschirmtafel beim Herausnehmen am Rahmen fest nicht an der Bildschirmtafel selbst Die Bildschirmtafel kann dadurch beschädigt werden Das Verpackungsmaterial im Verpackungskarton ist zur Wiederverpackung notwend...

Страница 146: ...Vertiefung zur Befestigung des Kabels an der Unterseite der Rahmenabdeckung ein 3 Ziehen Sie am Ende des Kabelbinders um diesen festzuziehen und bringen Sie das Netzkabel je nach Position der Steckdose an wie in den folgenden Abbildungen gezeigt Netzkabelführung nach unten Befestigen Sie das Netzkabel mit dem Kabelbinder Netzkabelführung entlang der Unterseite des elite Panaboard Befestigen Sie da...

Страница 147: ...ungen von der Tafelaufhängung indem Sie diese nach hinten drücken Arretierungen Tafelaufhängung 7 An der Wand befestigen Befestigen Sie den unteren Teil der Tafel mit den übrigen 4 Schrauben an der Wand 8 Bringen Sie die untere Rahmenabdeckung wieder an Befestigen Sie die untere Rahmenabdeckung an der Unterseite des elite Panaboard und ziehen Sie die linken und rechten Schrauben soweit an dass die...

Страница 148: ...Hinweis Zur Reinigung auf keinen Fall Verdünner Benzin oder chemische Reinigungsmittel mit Scheuerwirkung verwenden Dies kann eine Verfärbung verursachen Die Bildschirmtafel nicht mit einem trockenen Tuch abreiben Dadurch kann sich statische Elektrizität aufbauen 10 Stellen Sie sicher dass das elite Panaboard einwandfrei funktionieren kann Siehe Überprüfen Sie das elite Panaboard auf einwandfreie ...

Страница 149: ...Kabelhalter zur Führung von Netzkabel und USB Kabel Bei der Installation des elite Panaboard auf dem Ständer kann die Höhe auf 4 verschiedene Stufen eingestellt werden Zum Ändern der Höhe die Schrauben links und rechts auf der Rückseite des elite Panaboard lösen und sie in der gewünschten Höhe wieder einschrauben Anzugsmoment größer als 98 N m 10 kgf cm elite Panaboard Höhe Schraubenposition 100 m...

Страница 150: ...ngsmittel mit Scheuerwirkung verwenden Dies kann eine Verfärbung verursachen Die Bildschirmtafel nicht mit einem trockenen Tuch abreiben Dadurch kann sich statische Elektrizität aufbauen 6 Stellen Sie sicher dass das elite Panaboard einwandfrei funktionieren kann Siehe Überprüfen Sie das elite Panaboard auf einwandfreie Funktion Seite 49 48 Bedienungsanleitung Für Grundfunktionen Installationsanle...

Страница 151: ...abel an 2 Überprüfen Sie ob die interaktiven Funktionen einwandfrei funktionieren Wenn kein Projektor zur Verfügung steht überprüfen Sie den Betrieb nur mit dem elite Panaboard und dem Computer Beim Starten der elite Panaboard software wird der Kalibrierungsbildschirm angezeigt Führen Sie probeweise eine Kalibrierung durch indem Sie mit dem elektronischen Stift auf die 4 Punkte des elite Panaboard...

Страница 152: ...dmontage Seite 44 Zur Montage auf einem Ständer separat erhältlich Seite 46 in umgekehrter Reihenfolge durch Verpacken Sie das Gerät wie in der Abbildung unter Vorbereitungen zur Entnahme des elite Panaboard aus der Verpackung Seite 43 gezeigt Hinweis Halten Sie die Bildschirmtafel stets am Rahmen fest nicht an der Bildschirmtafel selbst Die Bildschirmtafel kann dadurch beschädigt werden 50 Bedien...

Страница 153: ...Bedienungsanleitung Für Grundfunktionen 51 3 Notizen ...

Страница 154: ...hrer Lebensdauer ergeben könnten Genauere Informationen zur nächstgelegenen Sammelstelle bzw Recyclinghof erhalten Sie bei Ihrer Gemeindeverwaltung Für Geschäftskunden in der Europäischen Union Bitte treten Sie mit Ihrem Händler oder Lieferanten in Kontakt wenn Sie elektrische und elektronische Geräte entsorgen möchten Er hält weitere Informationen für sie bereit Informationen zur Entsorgung in Lä...

Страница 155: ...луатацией этого аппарата прочитайте пожалуйста эту инструкцию полностью и аккуратно сохраняйте ее для справок в будущем Конструкция этого устройства предполагает установку квалифицированным техником по обслуживанию Выполнение установки неавторизованными лицами может стать причиной неисправностей связанных с безопасностью эксплуатации оборудования Информационный центр Panasonic Для звонков из Москв...

Страница 156: ...извлекать их для дальнейшего использования Сценарии использования Для обучения Создавайте эффективную среду обучения проецируя разнообразное образовательное программное обеспечение на доску elite Panaboard и с помощью электронной ручки управляйте программным обеспечением рисуйте и чертите на экране Располагая несколькими инструментами для добавления объяснений например инструментами иллюстрировани...

Страница 157: ...ard Software Подробнее о про смотре руководства см в разделе см Просмотр электронной документации стр 25 Сокращения Windows 2000 означает операционную систему Microsoft Windows 2000 Windows XP означает операционную Microsoft Windows XP Windows Vista означает операционную Microsoft Windows Vista Товарные знаки Microsoft Windows Windows Vista DirectX и PowerPoint являются зарегистрированными товарны...

Страница 158: ...ния лишают пользователя права на эксплуатацию этого устройства Предупреждение о сохранении данных Если системное запоминающее устройство или любое из дополнительных запоминающих ус тройств подвергаются неблагоприятному воздействию ошибок управления статического элек тричества электрических помех вибрации пыли или же если электропитание отключается вследствие неисправности ремонта или неосторожност...

Страница 159: ...перационных систем Отказ от ответственности Компания Panasonic Communications Co Ltd не несет ответственности за несчастные случаи или травмы вызванные среди прочего следующим 1 Модификацией устройства или неправильной конструкцией установки 2 Использованием устройства в целях отличных от его прямого назначения 3 Землетрясением пожаром наводнением приливной волной ураганом молнией или другими прир...

Страница 160: ...ктронной ручке 26 Замена наконечника электронной ручки 27 Устранение неисправностей 28 Технические характеристики 30 Дополнительные устройства и принадлежности 31 Руководство по установке 32 Руководство по установке для квалифицированного специалиста по техническому обслуживанию 32 Для вашей безопасности 32 Замечание 33 Прилагаемые принадлежности 35 Настенная установка 37 Проверка стены 37 Установ...

Страница 161: ...тку переменного тока с соответствующим напряжением Использование сетевого шнура на ко тором не указаны требования по номи нальному току может привести к по явлению дыма или нагреванию устрой ства и вилки При эксплуатации аппарата сетевая розетка должна находиться рядом с ус тройством и быть легко доступной Для обеспечения безопасной работы сетевой шнур поставляемый с устрой ством следует вставлять...

Страница 162: ...те устройство и отсоедините се тевой шнур после чего обратитесь к вашему дилеру для проведения техни ческого осмотра При отсоединении устройства бери тесь за вилку а не за шнур Если с усилием тянуть за шнур это может при вести к его повреждению воспламене нию или к поражению электрическим током Не прикасайтесь к устройству и вилке во время грозы Это может привести к поражению электрическим током У...

Страница 163: ...ты например изоляционной лен той При непосредственном контакте батареи с другими батареями может произойти утечка воспламенение или взрыв Не паяйте батарею так как это может привести к утечке выделению тепла или взрыву ОСТОРОЖНО Электропитание Если устройство не используется дли тельное время выключите его и отсое дините от сети электропитания Если неиспользуемое устройство оставлено подключенным ...

Страница 164: ...следует перемещать вдвоем Несоблюдение этого требова ния может привести к падению устрой ства и травме Меры предосторожности при эк сплуатации При падении или повреждении устрой ства выключите устройство и отсоеди ните сетевой шнур Несоблюдение это го требования может привести к воспламенению или к поражению элек трическим током Не опирайтесь на экран или крышку нижнюю даже если устройство смон ти...

Страница 165: ...тевом шнуре окрашены в соответствии с коди ровкой ниже Зеленый и жел тый земля Синий нейтраль Коричневый под напряже нием Если цвета проводов в сетевом шнуре устройства не соответствуют цветовой маркировке обозначающей контакты вилки выполните следующее Провод с желтой и зеленой маркировкой должен быть подсоединен к разъему вилки маркированному буквой E символом заземления или цветами зеленым или ...

Страница 166: ...rijen geleverd Wanneer deze leeg ziju moet u ze niet weggooien maar inleveren als KCA Для Нидерландов Niet weggooien maar inleveren als KCA NL NL Для Тайваня 12 Инструкция по эксплуатации основные функции Для вашей безопасности ...

Страница 167: ...тевой шнур предназначенный для США Форма вилки зависит от страны региона Стойка приобретается отдельно Храните дополнительный наконечник электронной ручки вместе с этой инструкцией по эксплуатации Об использовании компакт диска Как избежать повреждения компакт диска Не прикасайтесь к поверхности диска и не пишите на нем Не оставляйте диск без защитного футляра Не оставляйте диск на прямом солнечно...

Страница 168: ...икатор питания зеленый Горит зеленым светом когда питание включено Правый светодиодный индикатор ошибки красный Горит красным светом при возникновении ошибки Порт USB Используется для прямого подключения компьютера с помощью кабеля USB прилагается Вид сзади Разъем переменного тока Сетевой шнур Примечание Доска elite Panaboard предназначена только для проецирования изображений с помощью проектора Н...

Страница 169: ...ыши Крышка отсека батареи Примечание Держите электронную ручку под прямым углом к поверхности экрана Если держать ручку под углом ее положение может считываться неправильно Не используйте несколько ручек одновременно Это может приводить к неправильной работе Держа электронную ручку рядом с доской elite Panaboard не нажимайте на наконечник электронной ручки Это может привести к неправильной работе ...

Страница 170: ... от сека При установке крышки выполните процедуру в обратном порядке 2 Вставьте замените батарею и установите крышку Используйте только щелочную батарею ти па AAA и проверяйте правильность распо ложения и 16 Инструкция по эксплуатации основные функции Использование ...

Страница 171: ...йка поставляется дополнительно вставьте сетевой шнур в розетку переменного тока и закрепите шнур как это показано на иллюстрациях ниже При подсоединении сетевого шнура в нижней части При подсоединении сетевого шнура вдоль нижней стороны доски elite Panaboard О заземлении Если линию заземления подсоединить не удается обратитесь к вашему дилеру Стоимость подсоединения линии заземления не включена в ...

Страница 172: ...Не устанавливайте доску elite Panaboard на прямом солнечном свету вблизи печей вентиляционных отверстий систем обогрева охлаждения или в ветреных местах Не используйте доску elite Panaboard при температуре ниже 10 C а также в местах подверженных резким перепадам температуры Примечание При эксплуатации доски elite Panaboard в подобных условиях имеется опасность того что доска elite Panaboard будет ...

Страница 173: ... Не волочите кабель и не наступайте на него 4 Заблокируйте ролики Инструкция по эксплуатации основные функции 19 4 Использование ...

Страница 174: ...ся выберите устройство чтения компакт дисков в Проводнике Windows и дважды щелкните Menu exe Если в операционной системе Windows Vista отображается диалоговое окно Autoplay щелкните выполнить Menu exe 3 После отображения экрана приветствия нажмите кнопку Далее 4 Щелкните Установить elite Panaboard 5 Если вы принимаете условия лицензионного соглашения нажмите кнопку Да Если в операционной системе W...

Страница 175: ...aboard software elite Panaboard book Инструкция по эксплуатации основные функции Инструкция по эксплуатации программного обеспечения Установка проектора Установите проектор выполнив инструкции ниже О позиционировании изображения При проецировании изображения убедитесь в том что отступ проецируемого изображения от рамки экрана составляет не менее 5 мм Электронная ручка может работать неправильно на...

Страница 176: ...см документацию к проектору Установите правильное разрешение Установите оптимальные разрешения компьютера и проектора Если разрешение установлено неправильно изображение будет плохо видно В частности если разрешение проектора ниже разрешения компьютера тонкие линии могут воспроизводиться с разрывами О настройке разрешения см документацию к проектору Не смотрите непосредственно на лампу проектора П...

Страница 177: ...ктора или компьютера Если доска elite Panaboard установлена на стойке старайтесь не задевать доску elite Panaboard и не нажимать на нее слишком сильно электронной ручкой При этом можно сдвинуть стойку что вызовет несовмещение положений проецируемого изображения и электронной ручки При использовании доски elite Panaboard обязательно заблокируйте ролики стойки поскольку перемещение стойки может вызв...

Страница 178: ... OK чтобы пропускать калибровку при последующих запусках elite Panaboard software По завершении калибровки в области указаний появляется значок после чего автоматически отображается палитра Инструменты рисования Инструменты рисования Теперь можно использовать elite Panaboard software Примечание Подробнее об использовании elite Panaboard software см прилагаемое электронное руководство или оперативн...

Страница 179: ...е компьютер Просмотр электронной документации Для просмотра электронной документации Инструкция по эксплуатации программное обеспечение выполните следующие действия 1 Включите компьютер и запустите Windows 2 В меню Пуск откройте Инструкция по эксплуатации программное обеспечение Пуск Программы Panasonic elite Panaboard Инструкция по эксплуатации для программного обеспечения Отображается электронна...

Страница 180: ...коплению статического электричества Для очистки не используйте разбавитель бензол или абразивные химикаты Это может привести к обесцвечиванию Замена батареи в электрон ной ручке Когда батарея в электронной ручке разряжается на экране компьютера отображается сообщение Батарейка ручки разряжена Немедленно замените батарейку Дальнейшее использование электронной ручки может привести к ухудшению работы...

Страница 181: ...ручки изнашивается в нем появляется отверстие Дальнейшее использование электронной ручки в таком состоянии может привести к повреждению экрана или неправильной работе поэтому наконечник следует заменить новым Инструкция по эксплуатации основные функции 27 4 Приложение ...

Страница 182: ...e Panaboard находится в рабочем со стоянии и кабель USB подсоединен правильно Неправильное положение электронной ручки Проецируемое изображение не совмещено Выполните калибровку еще раз 23 Вставляемые линии и комментарии отобра жаются не полностью или отображаются не в том месте Вы держите электронную ручку под углом к доске Доска elite Panaboard эксплуатируется на прямом солнеч ном свету или при ...

Страница 183: ...ектронной ручки На экране компьютера от ображается сообщение Батарейка ручки разря жена Немедленно заме ните батарейку Замените батарею электронной ручки новой 16 26 Не удается удалить по метки сделанные марке ром для белой доски Доска elite Panaboard предназначена только для изображений с проектора и пометки невозможно удалить стандартной сти рающей щеткой Применяйте имеющуюся в продаже меламинов...

Страница 184: ...оверхности экрана Высота Ширина 1 175 мм 1 692 мм Интерактив ные возмож ности Эффективная область Высота Ширина 1 165 мм 1 502 мм Проецируйте изображение с отступом от рамки экрана не менее 5 мм Электронная ручка может работать не правильно на расстоянии 50 мм от датчика положения в левом верхнем углу поверхности экрана Область проецирования 5 мм 5 мм 50 мм 5 мм Электропитание электронной ручки LR...

Страница 185: ...и принадлежности Дополнительное устройство Стойка KX B061 Принадлежности Электронная ручка UE 608025 Отдельно продаваемые элементы можно приобрести через вашего дилера Инструкция по эксплуатации основные функции 31 4 Приложение ...

Страница 186: ...д началом использования устройства В руководстве по установке используются следующие графические обозначения ПРЕДУПРЕЖДЕНИЕ Означает потен циальную опас ность которая мо жет привести к тяже лой травме или смерти ОСТОРОЖНО Означает опас ность которая мо жет привести к не значительной трав ме или поврежде нию аппарата Эти обозначения используются для предупреждения операторов о том что указанную опе...

Страница 187: ...ования может привести к воспла менению поражению электрическим током или к травме Необходимо ознакомиться с инструк цией по эксплуатации а также с содер жанием бирок на корпусе раме и от дельных частях устройства Не модифицируйте устройство и не из меняйте установку Установка модифи цированного устройства может приве сти к воспламенению поражению электрическим или травме Установка перемещение и ут...

Страница 188: ...ску на стены с армированной штукатуркой Случайная утечка тока через болты на стенной крепежной пластины на метал лическую или проводную сетку под штукатурку может привести к нагрева нию задымлению или воспламенению Если устройство монтируется на стене убедитесь что винты устройства на дежно удерживаются настенной кре пежной пластиной потянув устройство на себя после установки на крепежной пластине...

Страница 189: ...кт диск 1 Инструкция по эксплуа тации программное обеспечение Драйверы Прикладное программ ное обеспечение Держатель кабеля 1 Для сетевого шнура Настенная крепежная пласти на левая 1 Настенная крепежная пласти на правая 1 Батарея щелочная батарея LR03 тип AAA 1 Для электронной ручки Электронная ручка 1 Наконечник электронной руч ки сменный 2 Для электронной ручки Кабельная стяжка 1 Приспособление ...

Страница 190: ...и включает в себя руко водство по установке Гарантия 1 В некоторых странах регионах может не вхо дить в комплект постав ки Примечание Винты 8 шт для установки на стене не прилагаются Приобретите винты размером M6 в соответствии с типом стены стр 39 36 Инструкция по эксплуатации основные функции Руководство по установке ...

Страница 191: ...ести к нагреванию задымлению или воспламенению I Необходимые инструменты и части не входят в комплект поставки доски elite Panaboard Дрель отвертка рулетка уровень 8 винтов размер M6 II Перед началом установки 1 Убедитесь что стена достаточно прочная и выдержит доску elite Panaboard Расчетная прочность больше чем 1 324 Н 135 кгф Примечание При необходимости укрепите стену чтобы она смогла выдержат...

Страница 192: ... Panaboard 3 Просверлите 8 отверстий для настенных крепежных пластин Диаметр отверстий должен соответствовать размеру используемых винтов 4 С помощью 4 винтов установите настенные крепежные пластины Для каждой настенной крепежной пластины используются 2 винта Остальные 4 винта используются после установки доски elite Panaboard на стене 40 мм 982 мм 30 мм 44 мм 813 мм Винты 8 шт не входят в комплек...

Страница 193: ...ры стены Ниже даны три возможных варианта В зависимости от стены могут потребоваться и другие способы Металлические или бетонные стены Потребуются дюбели не входят в комплект поставки Сверло с наконечником Металлическая или бетонная стена Дюбель Настенная крепежная пластина Болт Вставьте дюбель в отверстие Просверлите в стене восемь отверстий Нужный размер отверстий см в инструк ции по применению ...

Страница 194: ...движения распорок тяните на стенную крепежную пластину на себя до тех пор пока распорки не закрепятся в стене Затяните винт для обеспечения надежно го крепления настенной крепежной пла стины на стене Деревянные стены Потребуются шурупы для дерева не входят в комплект поставки Настенная крепежная пластина Шуруп Деревянная стена Вставьте шуруп в отверстие настенной крепежной пластины и туго затяните...

Страница 195: ...ание стойки 2 Опора 2 Боковая штанга А 2 Боковая штанга В 1 Винт M6 45 мм 10 Винт барашек M5 12 мм 2 Держатель опоры 2 Складные ножки для устойчивости 4 Винт M6 60 мм 4 Гайка 4 Ключ 1 1 Шайба 10 1 Прилагаемый ключ требуется для затягивания и ослабления винта поэтому держите его в доступном месте Инструкция по эксплуатации основные функции 41 4 Руководство по установке ...

Страница 196: ...ред сборкой обязательно заблокируйте ролики Блокировка роликов нажмите в эту сторону Инструкции по сборке 1 Соберите складные ножки для устойчивости 42 Инструкция по эксплуатации основные функции Руководство по установке ...

Страница 197: ...перед Блокировка роликов вид сзади Блокировка роликов вид сзади Примечание Не затягивайте винты слишком сильно Этим можно деформировать опоры Соберите стойку таким образом чтобы блокирующие ролики находились сзади Инструкция по эксплуатации основные функции 43 4 Руководство по установке ...

Страница 198: ... складные ножки для устойчивости разблокируйте как показано ниже 1 2 1 1 2 4 Установите доску elite Panaboard См Сборка доски elite Panaboard Для установки на стойке приобретается отдельно стр 48 44 Инструкция по эксплуатации основные функции Руководство по установке ...

Страница 199: ... диск 1 Держатель кабеля 1 Настенная крепежная пластина правая левая 1 Батарея 1 Электронная ручка 1 Наконечник электронной ручки 2 Кабельная стяжка 1 Инструкция по эксплуатации 1 Гарантия 1 Примечание Извлекая экран держите его за края рамки а не за саму поверхность экрана Держась за поверхность экрана можно повредить ее Упаковочные материалы из упаковочной коробки в дальнейшем могут потребоватьс...

Страница 200: ... отверстие кабельной стяжки на нижней крышке рамки 3 Вытяните свободный конец кабельной стяжки чтобы затянуть его и установите сетевой шнур в зависимости от расположения сетевой розетки как это показано на следующих рисунках При подсоединении сетевого шнура в нижней части Закрепите сетевой шнур кабельной стяжкой При подсоединении сетевого шнура вдоль нижней стороны доски elite Panaboard Закрепите ...

Страница 201: ... 6 Удалите 4 заглушки из крепления доски протолкнув их назад Заглушки Крепление доски 7 Прикрепите к стене Оставшимися 4 винтами плотно прикрепите нижнюю часть крепления доски к стене 8 Установите на место нижнюю крышку рамки Прикрепите нижнюю крышку рамки к нижней стороне доски elite Panaboard и затяните левый и правый винты таким образом чтобы крышка была заподлицо с рамкой Инструкция по эксплуа...

Страница 202: ... абразивные химикаты Это может привести к обесцвечиванию Не протирайте поверхность экрана сухой тканью Это может привести к накоплению статического электричества 10 Проверьте работоспособность доски elite Panaboard См Проверка работы доски elite Panaboard стр 50 Для установки на стойке приоб ретается отдельно 1 Подсоедините сетевой шнур Перед установкой на стойке подсоедините сетевой шнур к доске ...

Страница 203: ...ввинтите их на нужной высоте Вращающий момент больше чем 98 Н м 10 кгф см Высота доски elite Panaboard Положение винта 100 мм Самое высокое Стандартная 2 й сверху 100 мм 2 й снизу 200 мм Самое нижнее 5 Протрите поверхность экрана Осторожно протрите поверхность экрана мягкой влажной тканью Примечание Для очистки не используйте разбавитель бензол или абразивные химикаты Это может привести к обесцвеч...

Страница 204: ...ерьте правильность работы интерактивных функций Если проектор отсутствует проверьте правильность работы пользуясь только доской elite Panaboard и компьютером После запуска elite Panaboard software на экране компьютера отображается экран калибровки Выполните пробную калибровку нажимая электронной ручкой в 4 точках доски elite Panaboard как показано на рисунке ниже Для более точной регулировки необх...

Страница 205: ...приобретается отдельно стр 48 в обратном порядке Упакуйте устройство в соответствии с рисунком в разделе Подготовка к извлечению доски elite Panaboard из упаковки стр 45 Примечание Извлекая экран держите его за рамку а не за саму поверхность экрана Держась за поверхность экрана можно повредить ее Инструкция по эксплуатации основные функции 51 4 Руководство по установке ...

Страница 206: ... Corporation в Северной Америке One Panasonic Way Secaucus New Jersey 07094 Panasonic Canada Inc 5770 Ambler Drive Mississauga Ontario L4W 2T3 Matsushita Electric Industrial Co Ltd http panasonic net Panasonic Business Systems U K Подразделение компании Panasonic U K Ltd Willoughby Road Bracknell Berkshire RG12 8FP Panasonic Marketing Europe GmbH Hagenauer Strasse 43 65203 Wiesbaden Germany For in...

Страница 207: ......
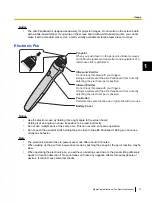
Страница 208: ... Ontario L4W 2T3 Matsushita Electric Industrial Co Ltd http panasonic net Panasonic Business Systems U K A Division of Panasonic U K Ltd Willoughby Road Bracknell Berkshire RG12 8FP Panasonic Marketing Europe GmbH Hagenauer Strasse 43 65203 Wiesbaden Germany For information of Compliance with EU relevant Regulatory Directives Contact to Authorised Representative Panasonic Testing Centre Panasonic ...

Отзывы: