background image

My Phone Menu          

23

My Media

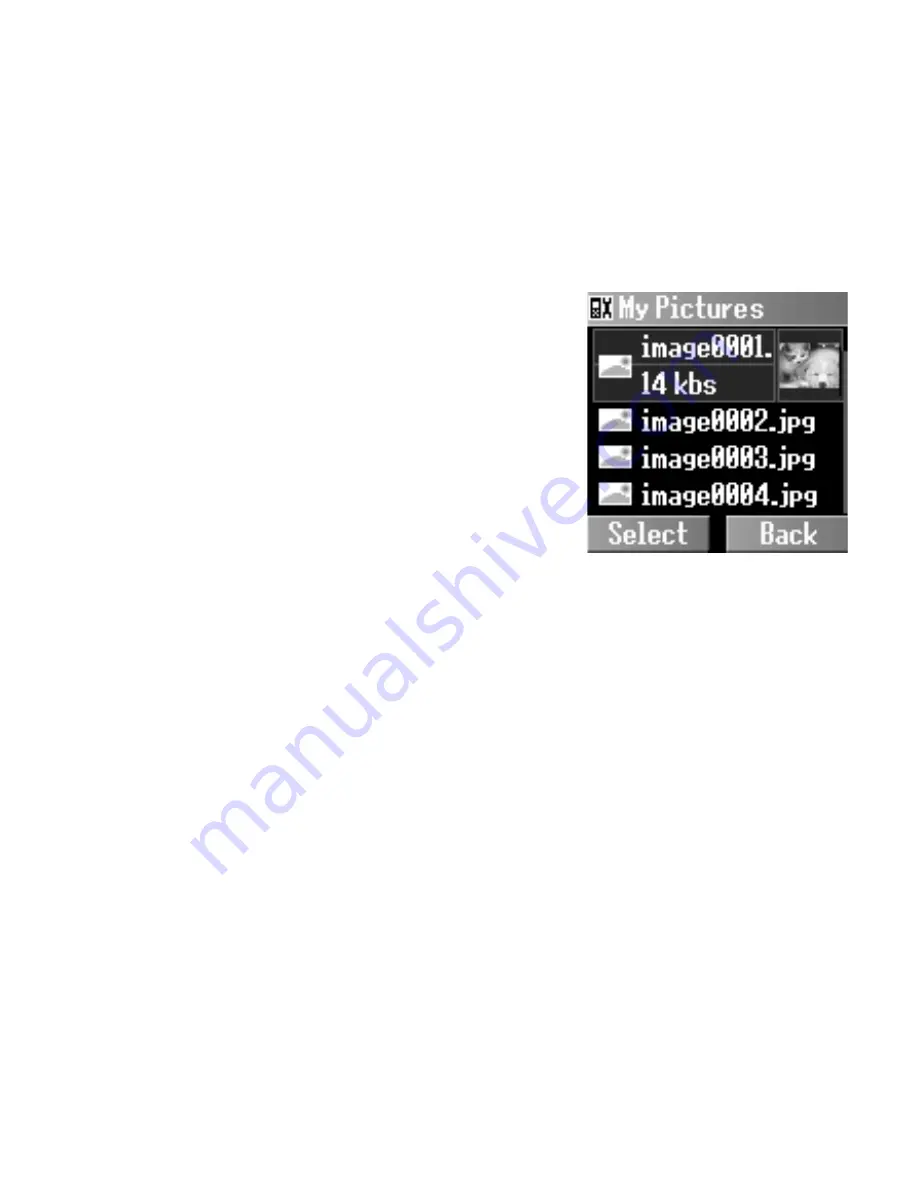
My Pictures

Pictures taken by the built-in camera or images downloaded 
from the Internet are stored in the My Pictures folder.
From 

My Phone

1.

4


My Media


A

(Select)

2.

4


My Pictures


A

(Select) 

3.

4

 required picture 

A

(Select)

4.

4

 required option 

A

(Select)

The following options are 
available after selecting the picture:

- View
- Send via MMS
- Set as wallpaper
- Rename
- Copy
- Cut
- Paste
- Delete
- Delete all

Содержание EB-X300

Страница 1: ...Operating Instructions Part 1 Digital Cellular Phone Before operating this handset please read these instructions parts 1 and 2 completely Mobile Phone ...

Страница 2: ...ontacts Menu 39 Browsing the Contacts list 40 Creating a Contacts list 44 Groups 46 SDN 46 Information number 47 Memory status 47 My Numbers 48 Hotkey dial 49 My Contacts 49 Games Menu 50 Puddleland 50 Quadball 51 Exode 51 Browser Menu 52 Server settings 53 Starting the Browser 54 Bookmarks 55 Push setting 56 Connectivity 57 Camera Menu 58 Your camera 59 Taking a picture 60 Camera settings 63 Reco...

Страница 3: ... number 98 Deleting the records 99 Applications Menu 100 Calendar 101 Scheduler 103 Notes 105 Clock 106 Calculator 109 Currency 110 Melody composer 111 Phone Menu 112 Accessory 113 CD ROM 113 Troubleshooting 114 Important Error Messages 116 Glossary of Terms 118 Index 120 ...

Страница 4: ...ion Key Scroll move through menus Right Soft Key Cancel Exit Perform functions indicated in the lower right hand corner of the display Power End Key Press and hold to switch the phone on off Silent Mode Key Press and hold to switch the Silent Mode on off Charging Connector Personal Hands free Connector Asterisk Key Press and hold to activate the Browser Send Key Answer make a call Left Soft Key Pe...

Страница 5: ...ne of the keys from to for Hotkey dialling or for voice message setting In text entry mode enter text numbers and characters Press and hold to enter a international access code or P extension number code To dial an extension number dial the phone number first press and hold to add a P then enter the extension number C Send Key Make a call or answer a call In idle mode press to check the last diall...

Страница 6: ...erence call Call transfer End Split Contacts list Messages menu Call status Put the call on hold or resume while connected to a calling party Swap among calls while connected to two or more calling parties 1 Increase the volume 5 Decrease the volume C Display the last dialled records list Answer another call If a phone number is entered hold the active call and call the number Send DTMF Press and ...

Страница 7: ...TE All screen images in this manual are simulated NOTE Some services described in this manual are network dependent or may only be available on a subscription basis Some functions are SIM dependent For more information contact your service provider Status icons Right Soft Key Selection Area Left Soft Key Selection Area Wallpaper ...

Страница 8: ... signal strength No CPHS Indicate the received signal strength and Line 1 is enabled The SIM supports CPHS Indicate the received signal strength and Line 2 is enabled The SIM supports CPHS Registered to a non home network roaming Call Diverts is on Auto key lock is enabled Message area is full Unread message is stored Voice mail indicator voice mail has been received Alarm is set All tones or ring...

Страница 9: ...tched off and the charger is disconnected from the phone Fitting the battery Remove the battery compartment cover Insert the battery ensuring the 3 gold contacts align with the 3 gold pins in the phone Removing the battery Push and hold the release latch towards the top of the phone then lift the battery out ...

Страница 10: ... scrolling see Battery level indicator on page 8 It is recommended to charge the battery for a minimum of 4 hours before first use When charging is complete disconnect the charger from the outlet before removing the plug from the phone NOTE DO NOT force the connector as this may damage the phone and or the charger If the battery has been deeply discharged it may take several minutes before the Bat...

Страница 11: ...the warning tone Fully recharge the battery See Charging the battery on page 7 Calls can be made and received while the phone is charging Symbols used in this manual Phone Status While charging Charging complete Phone on Phone off Symbols Meaning 154 Press Navigation Key in the direction indicated by the arrow A Press Left Soft Key Press Right Soft Key Press Numeric Keys C Press Send Key D Press P...

Страница 12: ...nsure that the signal strength meter shows network coverage is available in the current area To make a call start in idle mode Standard dialling 1 Enter the area code and phone number C The dialled number is displayed 2 When the other party answers talk into the microphone Contacts dialling 1 Contacts 2 4 required phone number C Earpiece volume During a call press 4 to adjust the earpiece volume ...

Страница 13: ...ed Enter the emergency number 112 C OR SOS Emergency call A Yes Ending a call To hang up D The duration of the call will be displayed If Max cost is on the remaining units will be displayed For setting Max cost please refer to page 90 NOTE Many countries regions include an initial 0 in the area code This should in most cases be omitted when dialling international numbers If you have difficulties m...

Страница 14: ... 37 Rejecting an incoming call Press D Ring volume From My Phone 1 4 Sounds Volume A Select 2 4 required ringtone A Select 3 4 adjust the volume level A OK One click mute on incoming call To set the ringtone and the vibration off Mute To answer the call when Mute is enabled A Reply To reject the call when Mute is enabled Reject ...

Страница 15: ...During a call 1 A Menu 2 4 Hands free or Hand held A Select Contacts list You can access the Contacts list that is stored in the SIM or in your phone During a call 1 A Menu 2 4 Contacts list A Select Messages You can create check or send a message while on a call Please refer to Creating an MMS message on page 73 or Creating an SMS message on page 79 During a call 1 A Menu 2 4 Messages A Select ...

Страница 16: ...o resume Retrieve Making a second call During a call 1 Enter the second phone number or select a phone number from the Con tacts list see Contacts list on page 12 2 C The first call is put on hold NOTE Hold is network dependent NOTE Making a second call is network dependent ...

Страница 17: ...ence call you must be connected to more than one call In a conference call you can talk with up to 5 parties During a call 1 A Menu 2 4 Conference A Select Call transfer Call transfer connects your calling party to the other party on hold then disconnects your line leaving the two callers in the conversation During a call 1 A Menu 2 4 Call transfer A Select NOTE Call waiting must be on see Call wa...

Страница 18: ...4 Split A Select Call status Call status allows you to disconnect the line or put a call on hold with the active party You can also activate a call that is put on hold During a call 1 A Menu 2 4 Call status A Select 3 4 required active call A Select 4 A End to disconnect the line OR Hold to put the call on hold To resume Back You can activate the required inactive call by pressing A Join in step 3...

Страница 19: ...ce mail messages A phone number may be stored in the Contacts together with a DTMF sequence allowing the number to be dialled upon recall and the DTMF sequence to be sent automatically To send DTMF during a call Enter digits or Pause dial Using pauses allows you to send DTMF automatically 1 Enter the phone number 2 Press and hold until a P is displayed at the end of the phone number entered 3 Ente...

Страница 20: ...xt mode Numeric T9 T9abc T9Abc T9ABC Input language English Multi tap Input mode indicator abc Abc or ABC 0 9 Space 0 _ 0 1 1 A B C 2 a b c 2 A B C 2 Ä a b c 2 ä à ç 2 D E F 3 d e f 3 D E F 3 É d e f 3 é è 3 G H I 4 g h i 4 G H I 4 g h i 4 ì 4 J K L 5 j k l 5 J K L 5 j k l 5 5 M N O 6 m n o 6 M N O 6 Ö Ñ m n o 6 ö ñ ò 6 P Q R S 7 p q r s 7 P Q R S 7 p q r s 7 ß 7 T U V 8 t u v 8 T U V 8 Ü t u v 8 ...

Страница 21: ...quired number of key presses Press a key once for any letter you require on that key The desired letter may not be displayed Continue pressing other keys until the end of a word is reached then check that the word has been typed correctly before continuing on to the next word If the combination of letters typed has produced a word which is not the one you require press A repeatedly until the corre...

Страница 22: ...in the internal dictionary it should be entered using the Multi tap mode Other text modes Multi tap mode abc Abc or ABC Each time a key is pressed in quick succession the next character available on that key is displayed Releasing the key or pressing another key enters the character displayed The cursor moves to the next position In T9 Abc or Multi tap Abc mode the first entered letter in a senten...

Страница 23: ... their own dedicated buttons on the keypad In idle mode 1 A Menu The main menu display has 9 menu options see Exploring the Menus on page 21 2 4 required menu A Select To go back to the Menu display D or repeatedly until the Menu display returns NOTE Menu display contents are dependent on your SIM ...

Страница 24: ...ivity 57 Contacts Browse 40 Create 44 Groups 46 SDN 46 Information number 47 Memory status 47 My Numbers 48 Hotkey dial 49 My Contacts 49 Camera Camera Camera Preview mode 60 Still Picture mode 60 Video Video Preview mode 67 Still Picture mode 67 Records Last dialled 98 Answered 98 Unanswered 98 Delete records 99 Messages Create 73 79 Inbox 75 80 Outbox 77 81 User Messages 81 Memory status 82 Sett...

Страница 25: ...ngtones 27 Keytone 27 Warning tone 27 Shutter sound 28 Wallpaper 28 Greeting 29 Animation 29 Contrast 29 Brightness 30 Colour themes 30 Hide network name 30 Display Sounds My Media T9 input 31 Display Languages 31 Language Alerts Ring only 32 None 32 Ring Vibrate 32 Vibrate only 32 Ring once 32 Profiles Normal 33 Quiet 33 Outdoors 33 Headset 33 Meeting 33 Customer 33 37 37 37 38 38 ...

Страница 26: ...e Internet are stored in the My Pictures folder From My Phone 1 4 My Media A Select 2 4 My Pictures A Select 3 4 required picture A Select 4 4 required option A Select The following options are available after selecting the picture View Send via MMS Set as wallpaper Rename Copy Cut Paste Delete Delete all ...

Страница 27: ... after selecting the sound Send via MMS Set as ringtone Rename Copy Cut Paste Delete Delete all My Videos Video clips recorded by the built in video recorder are stored in the My Videos folder From My Phone 1 4 My Media A Select 2 4 My Videos A Select 3 4 required video A Select 4 4 required option A Select The following options are available after selecting the video clip View Send via MMS Rename...

Страница 28: ...y Media A Select 2 4 My Pictures My Sounds or My Videos A Select 3 4 required file A Select 4 4 Copy A Select 5 Back 6 4 User 1 User 2 User 3 or User 4 A Select 7 A Select Paste A Select Memory status From My Phone 1 4 My Media A Select 2 4 Memory status A Select The available memory space and used memory space are displayed ...

Страница 29: ... You can change the volume of the following events Other call Contacts call Alarm Messages Cell Broadcast Group 1 10 From My Phone 1 4 Sounds A Select 2 4 Volume A Select 3 4 required events A Select 4 4 adjust the volume level A OK ...

Страница 30: ... 4 required event A Select 4 4 Embedded melody Downloaded melody or Composed melody A Select 5 4 required ringtone A Select Keytone The keytone is the sound you hear when you press a key From My Phone 1 4 Sounds A Select 2 4 Keytone A Select 3 4 Off Tone 1 Tone 2 or Tone 3 A Select Warning tone The warning tone informs you of low battery From My Phone 1 4 Sounds A Select 2 4 Warning tone A Select ...

Страница 31: ... sound A Select 3 4 Shutter sound 1 2 or 3 A Select Display Wallpaper You can change the wallpaper on the idle display From My Phone 1 4 Display A Select 2 4 Wallpaper A Select 3 4 Default image Download image A Select 4 4 required wallpaper A Options 5 4 Select A Select In step 3 select Off to show no wallpaper on the idle display ...

Страница 32: ...dit 3 Enter the greeting A OK 4 A On Off Animation You can change the animation that is displayed when the phone is switched on From My Phone 1 4 Display A Select 2 4 Animation A Select 3 4 Animation 1 or Animation 2 A Select Contrast You can adjust the contrast of the display From My Phone 1 4 Display A Select 2 4 Contrast A Select 3 4 adjust the contrast A OK ...

Страница 33: ...imum High Medium or Low A Select Colour themes You can change the colour themes on the display From My Phone 1 4 Display A Select 2 4 Colour themes A Change 3 4 required colour theme A Select Hide network name You can hide the network name which is shown in Idle mode From My Phone 1 4 Display A Select 2 4 Hide network name A Select On Off ...

Страница 34: ... number of key presses From My Phone 1 4 Language A Select 2 4 T9 input A Select 3 4 required input type A Change On Off Display Languages It is possible to change the display language on your phone From My Phone 1 4 Language A Select 2 4 Display Languages A Select 3 4 required language A Select ...

Страница 35: ...one to ring and or vibrate when you receive a call or message From My Phone 1 4 Alerts A Select 2 4 required alert A Select The following options are available when a call or message is received Ring only None Ring Vibrate Vibrate only Ring once ...

Страница 36: ...or use in different environments From My Phone 1 4 Profiles A Select 2 4 required profile A Options 3 4 Activate A Select The following profiles are available Normal Suitable for everyday settings Quiet Ringtone for formal occasions Outdoors For noisy environments Headset Ringing with vibration when it is difficult to hear the ringtone Meeting For meetings Customer For business settings ...

Страница 37: ...warning tone and or brightness Alerts From My Phone 1 4 Profiles A Select 2 4 required profile A Options 3 4 Change settings A Select 4 4 Alerts A Select 5 4 required alert A Select The following options are available when a call or message is received Ring only None Ring Vibrate Vibrate only Ring once ...

Страница 38: ... Select 6 4 adjust the volume level A OK You can change the ring volume of the following events See Sounds on page 26 for details Other call Contacts call Alarm Messages Cell Broadcast Group 1 10 Keytone From My Phone 1 4 Profiles A Select 2 4 required profile A Options 3 4 Change settings A Select 4 4 Keytone A Select 5 4 Off Tone 1 Tone 2 or Tone 3 A Select ...

Страница 39: ...t 2 4 required profile A Options 3 4 Change settings A Select 4 4 Warning tone A Select On Off Brightness From My Phone 1 4 Profiles A Select 2 4 required profile A Options 3 4 Change settings A Select 4 4 Brightness A Select 5 4 Maximum High Medium or Low A Select ...

Страница 40: ...ny key answer Calls can be answered by pressing any key except D From My Phone 4 Any key answer A Change On Off Auto key lock The Auto key lock is used to prevent any keys from being pressed accidentally e g when the phone is being carried This function automatically turns on shortly after the phone returns to Idle mode From My Phone 4 Auto key lock A Change On Off ...

Страница 41: ...enu so that you can access the menu directly from Idle mode From My Phone 1 4 Shortcuts A Select 2 4 required menu A Change On Off Defaults All personal settings are returned to their factory default settings From My Phone 1 4 Defaults A Select 2 Restore default settings A Yes or No ...

Страница 42: ...cts Menu Information number is SIM dependent Contacts SDN SIM 40 Phone 40 SIM 44 Phone 44 Group 1 10 46 Groups Create Browse 46 My Numbers My Contacts Hotkey dial Memory status Information number SIM 49 Phone 49 47 47 48 49 ...

Страница 43: ... Select 2 4 required contact entry View OR Enter a letter to find a contact beginning with the specific letter A Options 4 View A Select Editing the Contacts list From Contacts 1 4 Browse SIM or Phone A Select 2 4 required contact entry A Options 3 4 Edit A Select 4 Enter the name 5 5 Enter the phone number 5 6 Change required location 5 7 Change required record number A Save ...

Страница 44: ... Deleting all Contacts entries From Contacts 1 4 Browse SIM or Phone A Select 2 A Options 3 4 Delete all A Select 4 Delete all entries A Yes or No Copying the Contacts entries to your SIM Phone From Contacts 1 4 Browse SIM or Phone A Select 2 4 required contact entry A Options 3 4 Copy to Phone or Copy to SIM A Select 4 Copy entry to phone or Copy entry to SIM card A Yes or No ...

Страница 45: ...ct 4 Copy all entries to phone or Copy all entries to SIM card A Yes or No Sending as SMS From Contacts 1 4 Browse SIM or Phone A Select 2 4 required contact entry A Options 3 4 Send SMS A Select 4 Enter text A Options 5 4 required option A Select The following options are available Send Save Save send Picture sound Format User Messages Please see Creating an SMS message on page 79 for details ...

Страница 46: ... Select 6 A Options 7 4 required option A Select The following options are available when adding a required item to your MMS message Insert picture Insert text Insert video Insert sound Insert page The following options are available after completing your MMS message Send Store Delete items Info Page timing Preview page Preview MMS Please see MMS Options on page 74 for details ...

Страница 47: ...st in step 4 Storing a Contacts entry in your phone From Contacts 1 4 Create A Select 2 4 Phone A Select 3 Enter the name 5 4 Enter the phone number 5 5 Enter the office phone number 5 6 Enter the mobile phone number 5 7 Enter the E mail address 5 8 Enter notes 5 9 Change required group 5 10 A Options 4 Change A Select 4 required caller ID A Select 5 11 A Options 4 Change A Select 4 required melod...

Страница 48: ...r SIM When this function is on only the Fixed dial numbers can be dialled and any attempt to call any other number will fail From Contacts 1 4 Create A Select 2 4 SIM A Select 3 Enter the name 5 4 Enter the phone number 5 5 Change FDN 5 6 Change required record number A Save 7 Enter your PIN2 A OK To activate the Fixed dial function see page 95 for details When the Fixed dial function is enabled o...

Страница 49: ...lable SDN The SDN is a number provided by your network operator These numbers are stored in the GSM based SIM You can view the list of SDNs or call the required SDN From Contacts 1 4 SDN A Select 2 4 required SDN A Select to call the number OR View to view the details View View the Contacts entries in the selected group Set ringtone Set the required ringtone Set image Set the required icon to iden...

Страница 50: ...quired information number A Select Memory status Memory status shows how many locations are available in the Contacts list From Contacts 4 Memory status A Select Maximum memory capacity ADN 255 locations SIM dependent FDN 50 locations SIM dependent Phone 500 locations ADN Abbreviated Dialling Number is used for quick access to frequently dialled numbers NOTE Information number is SIM dependent ...

Страница 51: ...ns 3 4 Edit A Select 4 Enter the phone number 5 5 Enter the name A Save After storing My Numbers entries you can view the entries by pressing View The following options are available by pressing A Options in step 2 when you select the required entry View View the selected My Numbers entry Edit Edit the selected My Numbers entry Delete Delete the selected My Numbers entry ...

Страница 52: ...on hotkey setting A Yes or No 5 4 required Hotkey A On Off You must assign a required Contacts entry a Hotkey before switching the Hotkey on off Using the Hotkey dial In idle mode Press and hold a numeric key My Contacts You can select SIM or Phone so that the Contacts list directly accessed from Idle mode is set to the SIM or Phone Contacts list From Contacts 1 4 My Contacts A Select 2 4 SIM or P...

Страница 53: ...d spitting them out Even the monsters are adorable But don t be mistaken by the brilliant and lovable characters This is a challenging platform game where you need to keep on your toes if you want to stay ahead To start the game Press 4 to select START then press A Key operation or C move left or D move right 5 or down 1 or jump A swallow and spit out Quit or pause Games Puddleland Exode Quadball ...

Страница 54: ...t the game Key operation or C left or D right or 1 rotate left or 5 rotate right A or quickly down or paused Exode The ball bounces off the walls and the bar that you control You pick up different objects that fall down when you destroy the bricks To start the game Press A or to start the game Key operation C or left D or right A start or paused ...

Страница 55: ...wser Menu Browser Menu Start browser Browser Bookmarks Settings Connectivity CSD settings 57 GPRS settings 57 GPRS info 57 Push setting Always all 56 Always none 56 Always this specific SMS centre 56 54 53 55 ...

Страница 56: ...ith your network settings From Browser 1 4 Settings A Select 2 4 required server Edit Five server settings can be set up in the phone If you find your server s name under the settings option select the server and Edit If no settings are present contact your network service provider for these settings You can edit the following settings Server name IP address IP port Homepage Linger time Connection...

Страница 57: ...llow the instructions on the display While browsing a home page press C The menus below will be displayed To end the Browser press and hold D Home Jump to the home page which is pre defined in Settings Bookmarks Select one of your bookmarks and jump to the page or bookmark the page Save Items Save items in the currently displayed page Reload Reload and update the currently displayed page Go To URL...

Страница 58: ...he page Adding the Bookmark from the Browser menu From Browser 1 4 Bookmarks A Select 2 4 required empty bookmark A Options 3 4 Edit A Select 4 Enter the title and URL A Save To bookmark Panasonic Box Enter http wap panasonicbox com in step 4 then press A Save NOTE Panasonic Box is network dependent ...

Страница 59: ...ect 2 4 required bookmark A Options 3 4 Launch A Select You can press Launch in step 2 after selecting the required bookmark Push setting You can set the push setting to decide how you want to receive push messages sent by your service provider From Browser 1 4 Push setting A Select 2 4 Always all Always none or Always this specific SMS centre A Select NOTE This service is network dependent or may...

Страница 60: ...required setting A Select 4 Edit the required information A Save You can edit the following after selecting the required connection setting CSD settings Server name Call type ISDN Analogue Dial number Login name Password GPRS settings Server name GPRS APN Login name Password Authentication Activate Deactivate GPRS info You can also select the GPRS info in step 2 to view the memory and duration of ...

Страница 61: ...Play 68 Viewfinder 68 Send via MMS 68 View videos 69 Camera Camera Preview mode Video 67 Self timer 63 Twilight 63 Close up mode 64 Image size 64 Brightness 65 Quality 65 Special effects 65 Frame 66 Anti flicker 66 Defaults 66 Still Picture mode Viewfinder 61 Send via MMS 62 Set as wallpaper 62 View pictures 62 ...

Страница 62: ...a Preview mode is not on even with the Lens Cover open press to turn the Camera Preview mode on LCD Lens Cover Slide the cover halfway down to turn the Camera Preview mode on When the cover is in the uppermost position the Camera Preview mode is off When the cover is slid all the way down the LCD pops open Camera Lens Self portrait Mirror ...

Страница 63: ...era menu slide the Lens Cover halfway down to launch the Camera Preview mode You can also turn the Camera Preview mode on by pressing the Shutter Key if the Camera Preview mode is not on even with the Lens Cover open Still Picture mode In Camera Preview mode press the Shutter Key to take a picture The display then turns into the Still Picture mode In Camera Preview mode Press the Shutter Key to ta...

Страница 64: ...to activate the camera function menu Self timer Twilight Close up mode Image Size Brightness Quality Effect and Frame When the menu appears on the display press to activate the required function Press to display the camera function icons Self timer Twilight Close up mode Image Size Brightness and Quality When the icons appear on the display press to activate the required function Press to activate...

Страница 65: ...ltimedia files 4 A Options 5 4 Send A Select 6 4 enter the required information A Options 7 4 Send A Select Setting the picture as Wallpaper In Still Picture mode 1 A Options 2 4 Set as wallpaper A Select Viewing the stored picture In Still Picture mode 1 A Options 2 4 View pictures A Select 3 4 required picture A Select ...

Страница 66: ...ting for 10 seconds In Camera Preview mode 1 A Options 2 4 Self timer A Select 3 4 On or Off A Select Twilight You can turn the Twilight mode on when taking a picture in low light conditions In Camera Preview mode 1 A Options 2 4 Twilight A Select 3 4 On or Off A Select ...

Страница 67: ...ptions 2 4 Close up mode A Select 3 4 On or Off A Select Image size You can make your picture larger or smaller In Camera Preview mode 1 A Options 2 4 Image size A Select 3 4 required image size A Select The following image sizes are available 128 96 pixels 640 480 pixels 352 288 pixels 320 240 pixels 176 144 pixels 160 120 pixels ...

Страница 68: ... image quality of your picture In Camera Preview mode 1 A Options 2 4 Quality A Select 3 4 Fine Normal or Economy A Select Fine produces a large file with a high resolution while Economy produces a small file with a low resolution Special effects You can change your picture s colours In Camera Preview mode 1 A Options 2 4 Special effects A Select 3 4 Normal Mono Sepia or Bluish A Select ...

Страница 69: ...t appears on the screen by changing the anti flicker setting When the display flickers you can change Anti flicker to 50 Hz or 60 Hz Choosing 50 Hz or 60 Hz is country dependent In Camera Preview mode 1 A Options 2 4 Anti flicker A Select 3 4 50 Hz or 60 Hz A Select When taking a picture flickers may appear in certain environments Defaults All personal settings can be returned to their factory def...

Страница 70: ...llowed by the Right Soft Key Still Picture mode In Video Preview mode press the Shutter Key to record a video clip When filming is complete the display then turns into the Still Picture mode To switch the Camera Preview mode to the Video Preview mode press Key functions in Video Preview mode Quality In Video Preview mode 1 A Options 2 4 Quality A Select 3 4 Fine Normal or Economy A Select Defaults...

Страница 71: ...ed images may distort when shooting moving objects especially in a fast moving environment Playing the video clip In Still Picture mode 1 A Options 2 4 Play A Select Viewfinder In Still Picture mode 1 A Options 2 4 Viewfinder A Select Sending the video clip via MMS In Still Picture mode 1 A Options 2 4 Send via MMS A Select 3 Insert to add multimedia files 4 A Options 5 4 Send A Select 6 4 enter t...

Страница 72: ...Camera Menu 69 Viewing the stored video clips In Still Picture mode 1 A Options 2 4 View videos A Select 3 4 required video clip A Select ...

Страница 73: ...s Cell Broadcast Create MMS 73 SMS 79 Outbox Memory status Settings Inbox MMS 75 SMS 80 MMS 77 SMS 81 MMS 82 SMS 82 Auto display 83 Read Messages 83 Message List 83 Topic list 84 Languages 85 MMS 71 SMS 78 81 Connectivity CSD settings 82 GPRS settings 82 ...

Страница 74: ...ver s name under the settings option select the server and Edit If no settings are present contact your network service provider for these settings You can edit the following settings Server name IP address IP port MMSC address Linger time Connection CSD or GPRS CSD settings GPRS settings NOTE Your network operator may have pre installed this number Do not change this number as it may cause failur...

Страница 75: ...4 Receive options A Select 4 4 required receive option A Select Delivery report Decide whether or not you want confirmation that your message has been delivered Select On or Off Own address Choose whether or not to let the recipient see your address Select Show or Hide Validity period Set the duration that your message is stored at the message centre Select 1 hour 12 hours 1 day 1 week or Maximum ...

Страница 76: ...elect 2 4 MMS A Select 3 Insert 4 4 required insert option A Select The following options are available to select the required multimedia file Insert picture Insert text Insert video Insert sound Insert page Normal Select Auto retrieve Auto reject or Auto defer Anonymous sender Select Auto retrieve or Auto reject Advertisements Select Auto retrieve or Auto reject Delivery report Select Permit or R...

Страница 77: ...en select the recipient s phone number Press A Options once more to send the message Store Store the completed MMS message Press A OK to confirm that the message has been saved Delete items Delete the selected text picture sound and or video clip Info Show the page timing the type of image and or attached sound files the message size the image size and the resolution Page timing Set the time inter...

Страница 78: ...ect 6 A Options 7 4 Send A Select 8 Enter the phone number OR A Options 4 Contacts list A Select to select the phone number 9 A Options Send A Select Receiving an MMS message From Messages 1 4 Inbox A Select 2 4 MMS A Select 3 4 Waiting A Select 4 4 required MMS message Download to receive the MMS message OR 3 4 Received A Select 4 4 required MMS message View ...

Страница 79: ...ed MMS message Delete Delete the selected MMS message Delete all Delete all MMS messages View Reply Reply to the selected MMS message Reply all Reply to all MMS messages Forward Forward the selected MMS message Call Make a call to the sender of the MMS message Delete Delete the selected MMS message Info Show the page timing the type of image and or sound files attached including the message size E...

Страница 80: ...ages list in the Outbox The following options are available by pressing A Options when viewing the sent message in the Outbox Options A View View the selected MMS message Delete Delete the selected MMS message Delete all Delete all MMS messages View View the selected MMS message Forward Forward the selected MMS message Delete Delete the selected MMS message Info Show the page timing the type of im...

Страница 81: ...tings in step 3 Protocol Select the protocol type which specifies the format your SMS message is converted to Select Standard text Fax X 400 Paging ERMES or E mail Validity period Set the validity period that the SMS message is stored at the Message centre Select 1 hour 12 hours 1 day 1 week or Maximum Delivery report Choose whether you want to receive a confirmation when your SMS message has been...

Страница 82: ...umber of pages used in the message Send Send your SMS message Press A Options to recall the Contacts list then select the recipient Save Save your SMS message in the Outbox Save send Save your SMS message then send the message Picture sound Attach sound and or a picture Format Edit your SMS message by inserting new lines changing the font face and or font colour User Messages Select the pre define...

Страница 83: ...w to deal with the incoming SMS message View View the selected SMS message Delete Delete the selected SMS message Reply Reply to the selected SMS messages Forward Forward the selected SMS message Edit Edit or add text add pictures and or sounds Delete all Delete all SMS messages Extract number Save the phone number embedded in the SMS message Hyperlink Jump to the URL embedded in the SMS message ...

Страница 84: ...e From Messages 1 4 User Messages A Select 2 4 required message A Select 3 Edit the message A Options 4 4 Save send or Save A Select You can edit the pre defined messages except the first 5 messages View View the selected SMS message Delete Delete the selected SMS message Forward Forward the selected SMS message Edit Edit or add text add pictures and or sounds Delete all Delete all SMS message Ext...

Страница 85: ...he used memory space and the maximum memory capacity of SMS MMS max 2888 kb SMS max 250 spaces SIM dependent Connectivity From Messages 1 4 Connectivity A Select 2 4 CSD settings or GPRS settings A Select 3 4 required setting A Select 4 4 edit the required information A Save To set the CSD settings or GPRS settings see page 57 for details NOTE This function is SIM dependent ...

Страница 86: ...the latest information message is displayed on your phone automatically From Messages 1 4 Cell Broadcast A Select 2 4 Auto display A Change On Off Receiving messages To receive messages you must turn the Read Messages on From Messages 1 4 Cell Broadcast A Select 2 4 Read Messages A Change On Off Reading a Cell Broadcast message From Messages 1 4 Cell Broadcast A Select 2 4 Message List A Select 3 ...

Страница 87: ...ect 4 Add topics A Select 5 4 required topic A Select OR You can delete the required topic in step 4 1 4 required topic A Options 2 4 Delete A Select User defined topic You can add your favourite topics to the user defined topic list From Messages 1 4 Cell Broadcast A Select 2 4 Topic list A Select 3 4 User defined A Select 4 4 New entry A Options 5 Enter message ID A OK 6 Enter name A OK ...

Страница 88: ...lect 2 4 Languages A Select 3 A Options 4 4 Insert or Add to end A Select 5 4 required language A Select OR You can remove a language in step 4 1 4 required language A Options 2 4 Delete A Select Insert adds a required language above the language you select whereas Add to end adds the language to the end of the list ...

Страница 89: ...settings 89 Line 90 Call Service Call Diverts Network Auto network 97 New network 97 Network List 97 Band Select 97 Security Call bar 92 Codes 93 Fixed dial 95 SIM lock 96 STK SIM Tool Kit is SIM dependent Line is SIM dependent All voice calls 91 Not reachable 91 No reply 91 Busy 91 Status check 91 Cancel all 91 ...

Страница 90: ...e received Activate this function before making a multi party conference call From Phone Menu 1 4 Call Service A Select 2 4 Call waiting A Select 3 4 Set Clear or Status check A Select Last call Display the duration of the last call All voice calls Display the total duration and the units of all the voice calls Cost left Display the remaining units NOTE Time Charge is SIM dependent NOTE Call waiti...

Страница 91: ...lect 3 To confirm Withhold for all calls select Yes or No Caller s ID This function allows you to display the caller s name and or number on your display From Phone Menu 1 4 Call Service A Select 2 4 Caller s ID A Select NOTE When checking the status the phone must be registered to a network NOTE Withhold ID is network dependent NOTE When checking the status the phone must be registered to a netwo...

Страница 92: ...racters A Save Personal rate You can set your personal rate From Phone Menu 1 4 Call Service A Select 2 4 Charge settings A Select 3 4 Personal rate A Select The current setting is displayed 4 4 A Edit 5 Enter the PIN2 code A OK 6 4 enter your personal rate A Save NOTE The duration of one unit may vary between peak and off peak times Call charges can be calculated accordingly However the actual ta...

Страница 93: ... In idle mode the cost of the last dialled call is displayed on your phone automatically From Phone Menu 1 4 Call Service A Select 2 4 Charge settings A Select 3 4 Auto display A Change On Off Line Your phone has two phone lines if your SIM supports CPHS and Alternate Line Service From Phone Menu 1 4 Call Service A Select 2 4 Line A Select 3 4 Line 1 or Line 2 A Select NOTE This function is SIM de...

Страница 94: ...he divert icon is displayed When updating or checking the status of call diverts the phone must be registered to a network O P Voice calls can be diverted to voice mailbox or to a number that you specify All voice calls Divert all incoming voice calls Not reachable When you are not in a coverage area divert incoming voice calls No reply If you do not answer the phone divert incoming voice calls Bu...

Страница 95: ...A Select 4 4 Set Clear or Check status A Select 5 Enter the required password A Select All outgoing All outgoing calls are barred Outgo int l International outgoing calls are barred Out int l home International outgoing calls except to your home country are barred All incoming All incoming calls are barred When roaming All international incoming calls when roaming outside the home PLMN are barred ...

Страница 96: ...enu 1 4 Security A Select 2 4 Codes A Select 3 4 PIN Control A Change 4 Enter the PIN number A OK 5 A Change set to either enable or disable the PIN 6 OK NOTE Your phonecode must be 6 to 12 digits You are advised to write down your phonecode If the phonecode is entered incorrectly 10 times the phone will cease to operate permanently If you change the phonecode from the second time on you must ente...

Страница 97: ...enter the PUK code for your PIN enter 05 You will then be prompted to enter the PUK code Follow the on screen instructions To enter the PUK2 code for your PIN2 enter 052 You will then be prompted to enter the PUK2 code Follow the on screen instructions If the PUK PUK2 code is entered incorrectly 10 times the phone will cease to operate permanently All information stored in the SIM will be lost and...

Страница 98: ...4 Fixed dial A Select 3 Enter the PIN2 code A OK 4 A Change 5 OK When the fixed dial is on any manually dialled phone numbers must be the same as the numbers in the fixed dial store otherwise the call cannot be made A phone number may be stored edited or deleted In this case you will be prompted for your PIN2 code NOTE If the PIN2 code is entered incorrectly 3 times the PIN2 will be blocked To unb...

Страница 99: ...3 Enter the phonecode A OK 4 A Change to set the SIM lock on off 5 OK NOTE Your phonecode must be 6 to 12 digits You are advised to write down your phonecode If the phonecode is entered incorrectly 10 times the phone will cease to operate permanently If you change the phonecode from the second time on you must enter the previous phonecode first then enter the new phonecode twice NOTE This function...

Страница 100: ... new network automatically in order to maintain optimum network availability Set Auto network On or Off New network Manually select a network that is available in your current location Network List The network list is used when the Auto network is on The location numbers in the Network List show the search priority Band Select Choose a network band 900 1800 900 1900 900 1800 or 1900 MHz NOTE This ...

Страница 101: ... If an incoming call with Caller s ID is not answered the number will be stored in Unanswered max 20 From Records 1 4 Last dialled Answered or Unanswered A Select OR In idle mode C to view the last dialled numbers directly 2 4 required phone number you wish to redial C The following options are available when you select the required number Store Delete Delete all Records Last dialled Answered Unan...

Страница 102: ...rom Records 1 4 Delete records A Select 2 4 Delete last dialled A Select Delete dialled calls is displayed 3 A Yes or No You can select one of the following options in step 2 Delete last dialled Delete answered Delete unanswered Delete all ...

Страница 103: ...pplications Menu Scheduler Calendar Phone Menu Settings 106 Alarm 107 Power on time 108 Power off time 108 Notes Calculator Currency Rate setting 110 Rate compute 110 101 103 112 Melody composer Clock 105 109 111 Applications ...

Страница 104: ...plications 1 4 Calendar A Select 2 Press keys 1 5 and to move the cursor and to the desired day A Options OR You can select the Week format to create a reminder A Options 4 Week A Select Press keys to move the cursor to the desired day A Options 3 4 Agenda A Select 4 4 New entry A Select 5 Change Memo Call or Meeting 5 6 Enter the description 5 Month format Week Year Day Month Year Day Month Week ...

Страница 105: ...ue by using the keys 1 5 and OR When Week format is selected A Options 4 Week A Select The time line marked in blue corresponds to a period of time that you have set as an agenda Select a day marked with the blue bar by using the keys and When the cursor reaches the scheduled day press 1 or 5 to show what time the event starts and ends NOTE Ensure that Calendar settings will not contravene any reg...

Страница 106: ...r Creating a schedule From Applications 1 4 Scheduler A Select 2 4 New entry A Select 3 Change Memo Call or Meeting 5 4 Enter the description 5 5 Change Activate or Deactivate 5 6 Change Once Daily Weekly Monthly or Annually 5 7 Enter the start date 5 8 Enter the start time 5 9 Enter the end date 5 10 Enter the end time A Save NOTE Ensure that Scheduler settings will not contravene any regulations...

Страница 107: ... Applications 1 4 Scheduler A Select 2 4 required entry A Options 3 4 Edit A Select To edit the schedule please see step 3 10 in Creating a schedule on page 103 for details Deleting schedule entries From Applications 1 4 Scheduler A Select 2 4 required entry A Options 3 4 Delete or Delete all A Select 4 Delete entry or Do you want to delete all A Yes or No ...

Страница 108: ...You can view the maximum number of entries and the remaining number of entries available Notes You can enter text to remind yourself of special events From Applications 1 4 Notes A Select 2 4 New entry A Select 3 Enter text 4 A Options Save Insert new line Clear text or Send A Select You can send your note as an SMS message ...

Страница 109: ...hen travelling abroad your home time can be changed to your destination time From Applications 1 4 Clock A Select 2 4 Settings A Select 3 4 Time zone A Select 4 4 required region A Select Daylight saving is displayed 5 A Yes or No 6 Set this city to local A OK Time date You can set the time and date to be shown on the display when in Idle mode From Applications 1 4 Clock A Select 2 4 Settings A Se...

Страница 110: ... desired display format for the time From Applications 1 4 Clock A Select 2 4 Settings A Select 3 4 Time format A Change 4 4 12 hours or 24 hours A Select Alarm You can set the alarm to sound or vibrate when the set time is reached From Applications 1 4 Clock A Select 2 4 Alarm A Select 3 A Options 4 Edit A Select 4 Enter the time 24 hour clock 5 5 Change 4 select a day of the week A Change Back 5...

Страница 111: ...ed time using the power on off time feature From Applications 1 4 Clock A Select 2 4 Power on time or Power off time A Change 3 Change On or Off 5 4 Enter the time 24 hour clock A Save NOTE Ensure that Alarm settings will not contravene any regulations by switching on automatically when in an aircraft medical facility etc see Introduction in Operating Instruction Part 2 NOTE Ensure that Power on t...

Страница 112: ...s From Applications 1 4 Calculator A Select 2 Enter a number max 8 digits If a decimal point is required press If a minus sign is needed press 3 4 select the arithmetic operation 4 Enter a number max 8 digits If 4 is used to select another arithmetic operation an intermediate calculation will be performed and the result will be displayed 5 A to calculate ...

Страница 113: ... Rate setting A Select 3 Enter the conversion rate next to the red arrow A Compute 4 A Save You can change the base currency by pressing 4 If a decimal point is required press Rate compute From Applications 1 4 Currency A Select 2 4 Rate compute A Select 3 Enter the amount of your home currency to convert into the foreign currency A Convert You can also enter the amount of the foreign currency to ...

Страница 114: ...ons 6 4 Save A Select Using the following table as a reference enter notes from the choice of low middle and high rests and duration of each to generate your composition Main Track and Sub Tracks are played together when you play the composed music Before you save the composed melody you can change the tempo and or the instrument to play the melody Key Func C D E F G A Key Func B Repeat Dotted not...

Страница 115: ...osed melody 1 A Options 4 Tempo A Select 2 4 required tempo A Select Selecting the instrument To select the instrument to play the composed melody 1 A Options 4 Instrument A Select 2 4 required instrument A Select Phone Menu This menu is available under the Applications Menu if your SIM card provides STK services To use this menu please refer to Phone Menu on page 86 ...

Страница 116: ...ormation please refer to the documentation on the CD ROM or to the Panasonic website www panasonicmobile com Future enhancements to X300 Handset Manager 1 Log onto www panasonicmobile com 2 Select your region and language 3 Select Support Support Software 4 Click Handset Manager X300 5 Follow the instructions to download the PC software upgrade Installing the Software The software is compatible wi...

Страница 117: ...The battery is not attached to the phone or when the battery has been deeply discharged the phone will take a short time until the battery level indicator appears Leave the phone charging the battery for a few minutes before the battery level indicator appears and you attempt to switch the phone on Battery fails to charge The battery is not attached to the phone Ensure the battery is fitted to the...

Страница 118: ...be made from Fixed Dial Store Check whether your SIM supports Fixed dial Check if the Fixed dial is switched on Check whether the phone number is stored in Fixed Dial Calls cannot be received The phone is not switched on Switch the phone on Incoming calls are barred Disable incoming call barring The phone is not registered to a network Move to a coverage area and operate your phone after it has re...

Страница 119: ...correctly three times in a row To unblock it please enter PUK2 New PIN not accepted Your new PIN code is not accepted Please try again New PIN2 not accepted Your new PIN2 code is not accepted Please try again Incorrect entry You entered your PIN or PIN2 code incorrectly Enter the code correctly Entries do not match When you change your password you must enter the new password twice to confirm The ...

Страница 120: ... is full If you continue data may be lost Please delete old records SIM service not supported The SIM function you selected is not supported by the service provider Please contact your service provider Unregistered SIM card Your SIM card is not registered to your service provider Please contact your service provider Authentication failure Your SIM card is not registered with your service provider ...

Страница 121: ...his service allows sending receiving messages consisting of text sounds images and video clips Network Operator The organisation responsible for operating a GSM network Password Used for the control of Call bar Supplied by your service provider PIN Personal Identification Number used for SIM card security Supplied by your service provider If the PIN is entered incorrectly 3 times the PIN will be b...

Страница 122: ...GPRS network SIM Subscriber Identity Module A small smart card which stores unique subscriber and user entered information such as Contacts entries and SMS messages Supplied by your service provider SMS Short Message Service A basic mail system used for cellular phones This service allows sending receiving of short text messages WAP Wireless Application Protocol The communication standard which en...

Страница 123: ... call 13 Mute 11 Rejecting 11 Using Contacts list 12 Call bar 92 Call Diverts 91 Call Service 87 Call status 15 Call transfer 14 Call waiting 87 Caller s ID 88 Camera 58 Camera Preview mode 60 Key functions 61 Still Picture mode 60 Camera Lens 1 59 Camera Menu 58 Camera settings 63 Anti flicker 66 Brightness 65 Close up mode 64 Defaults 66 Frame 66 Image size 64 Quality 65 Special effects 65 Twili...

Страница 124: ...erisk Key 1 Left Soft Key 1 Navigation Key 1 Power End Key 1 Right Soft Key 1 Send Key 1 Silent Mode Key 1 Key functions 2 Keytone 27 35 L Language 31 Display Languages 31 Lens Cover 1 59 Line 90 M Max cost 90 Melody composer 111 Memory status 25 47 82 Menu Display 20 Menus 21 Message centre 78 Messages Menu 70 MMS 71 Configuring 71 Creating 73 Receiving 75 Sending 43 75 Settings 71 Viewing 77 MMS...

Страница 125: ...1 59 Shutter sound 28 SIM 7 Fitting and removing 7 SIM lock 96 SMS 78 Creating 79 Receiving 80 Sending 42 Settings 78 Viewing 81 Sounds 26 My Sounds 24 Split call 15 Status icons 5 Symbols 8 T T9 input 31 T9 Text input 18 Text entry 17 Text entry mode change 18 Time Charge 87 Troubleshooting 114 U User Messages 81 V Video 67 Defaults 67 Key functions 67 My Videos 24 Playing 68 Quality 67 Recording...

Отзывы: