background image

7

RQT8

68

5

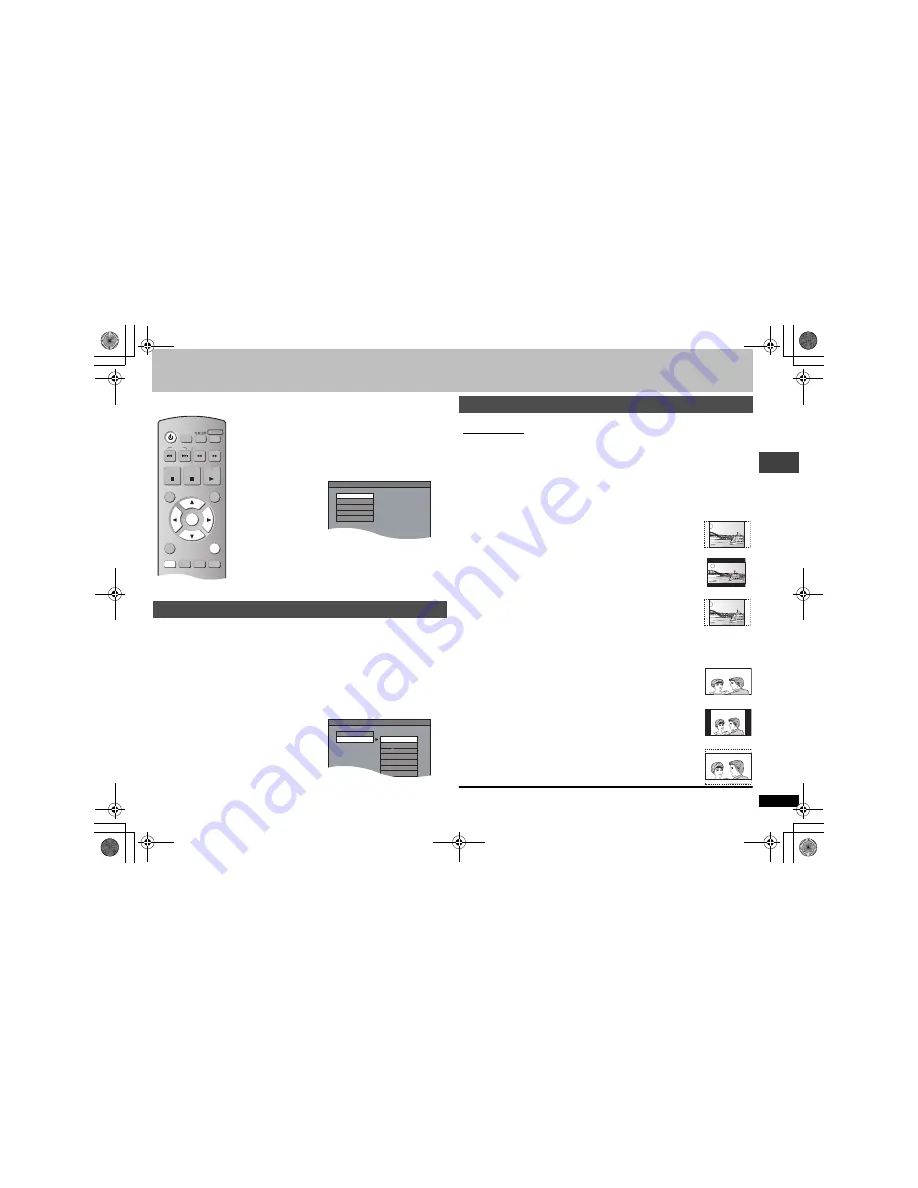
STEP 3 

Setting up the unit

Changing the unit’s setting to suit your television.

Preparation

Turn on the television and select the appropriate video input on 
the television to suit the connections for the player.

1

Press [

Í

] to turn on the unit.

2

Press [SETUP] to display “MAIN” menu. 

Choose the preferred language for these menus and the on-screen 
messages (Default setting is “ENGLISH”).

3

Press [

3 4

] to select “DISPLAY” tab and press [ENTER].

4

Press [

3 4

] to select “LANGUAGE” and press [ENTER].

5

Press [

3 4

] to select the language and press [ENTER].

Select the TV type and how to show images (Default setting is 
“4:3PAN&SCAN”).

3

Press [

3 4

] to select “VIDEO” tab and press [ENTER].

4

Press [

3 4

] to select “TV ASPECT” and press [ENTER].

5

Press [

3 4

] to select the item and press [ENTER].

To select how to show images made for 16:9 aspect screens on a 4:3 aspect 
television.

4:3PAN&SCAN

:

The sides of the picture are cut off so it fills the screen (unless 
prohibited by the disc).

4:3LETTERBOX

Picture is shown in the letterbox style.

4:3ZOOM

:

If you select 4:3 PAN & SCAN and there is no effect, select this and the 
image will display in 4:3 PAN &SCAN.

To select how to show images made for 4:3 aspect screens on a 16:9 aspect 
television.

16:9NORMAL

:

The picture is displayed as a horizontally stretched 16:9 image.

16:9SHRINK

:

The picture is displayed as a 4:3 ratio image in the center of the screen.

16:9ZOOM

:

The picture is adjusted horizontally to display a full screen image in 16:9 
aspect ratio.

Press [RETURN] to go back to the previous screen.

Press [SETUP] to exit the screen.

Selecting menu language

ENTER

MENU

TOP MENU

FUNCTIONS

RETURN

ZOOM REPLAY

QUICK

SETUP

SLOW/SEARCH

PLAY

STOP

SKIP

PAUSE

QUICK OSD

MODE

PLAY

M. SKIP

㪭㪠

㪭㪠㪛㪜

㪛㪜㪦

㪛㪠㪪㪚

㪛㪠㪪㪚

㪘㪬

㪘㪬㪛㪠㪦


㪛㪠㪪㪧㪣㪘㪰

㪛㪠㪪㪧㪣㪘㪰


㩷 㪤㪘㪠㪥

㪤㪘㪠㪥


㪦㪫㪟㪜㪩㪪

㪦㪫㪟㪜㪩㪪


㪝㪩㪘㪥㪚㪘㪠㪪

㪝㪩㪘㪥㪚㪘㪠㪪

㪧㪦㪣㪪㪢㪠

㪪㪭㪜㪥㪪㪢㪘

㪪㪭㪜㪥㪪㪢㪘

㪥㪜㪛㪜㪩㪣㪘㪥㪛㪪

㪥㪜㪛㪜㪩㪣㪘㪥㪛㪪

㪠㪫㪘㪣㪠㪘㪥㪦

㪠㪫㪘㪣㪠㪘㪥㪦

㪜㪪㪧㪘㪥㪦㪣

㪜㪪㪧㪘㪥㪦㪣

㪛㪜㪬㪫㪪㪚㪟

㪛㪜㪬㪫㪪㪚㪟

㪜㪥㪞㪣㪠㪪㪟

㪜㪥㪞㪣㪠㪪㪟

㪣㪘㪥㪞㪬㪘㪞㪜

㪣㪘㪥㪞㪬㪘㪞㪜

㪪㪜㪫㪫㪠㪥㪞㩷㪪㪫㪘㪫㪜


㩷 㪛㪠㪪㪧㪣㪘㪰㪄㪣㪘㪥㪞㪬㪘㪞㪜

㪛㪠㪪㪧㪣㪘㪰㪄㪣㪘㪥㪞㪬㪘㪞㪜


e.g. 

[The\United\Kingdom]

Selecting aspect ratio

Setting 

up the un

it

RQT8685-2B.fm  Page 7  Tuesday, April 25, 2006  9:05 AM

Содержание DVD-K32

Страница 1: ...ing the play sequences 11 Program play Random play 11 Using On Screen Menus 12 On Screen Menu 1 12 On Screen Menu 2 13 Changing the player settings 14 Troubleshooting guide 16 Maintenance 18 Specifications 18 Tips for making data discs 19 Index Back cover Note EB on the packaging indicates the United Kingdom DVD S32 is only for the United Kingdom Australia N Z and Unit with PX printed on the outer...

Страница 2: ...location of the fuse differ according to the type of AC mains plug figures A and B Confirm the AC mains plug fitted and follow the instructions below Illustrations may differ from actual AC mains plug 1 Open the fuse cover with a screwdriver 2 Replace the fuse and close or attach the fuse cover Fuse cover Figure A Figure B Figure A Figure B Fuse 5 ampere Fuse 5 ampere Accessories Use numbers when ...

Страница 3: ...qualified persons Extend operating life by disconnecting the unit from the power source if it is not to be used for a long time Placement Voltage AC mains lead protection Foreign matter Service CAUTION THIS PRODUCT UTILIZES A LASER USE OF CONTROLS OR ADJUSTMENTS OR PERFORMANCE OF PROCEDURES OTHER THAN THOSE SPECIFIED HEREIN MAY RESULT IN HAZARDOUS RADIATION EXPOSURE DO NOT OPEN COVERS AND DO NOT R...

Страница 4: ... recorders or DVD video cameras using DVD Video Format 3 Recorded using a format different from DVD Video Format therefore some functions cannot be used 4 A process that allows play on compatible equipment To play a disc that is displayed as Necessary on this unit the disc must first be finalized on the device it was recorded on 5 Closing the session will also work Handling precautions Do not atta...

Страница 5: ... white plugs should also be connected 2 Australia and N Z included Unit with PX printed on the outer packaging included Asia included The United Kingdom not included You can connect the audio cable to the 2 channel audio input terminals of an analog amplifier or system component to enjoy stereo sound Audio video cable 2 Not used Television Back of the unit Unit with PX printed on the outer packagi...

Страница 6: ...according to the area EARTH SIGNAL To the ground terminal Ground the unit by connecting a copper wire to the screw on the back of the unit and the ground terminal to prevent static electricity buildup caused by the karaoke microphone STEP 2 The remote control Batteries Insert so the poles i and j match those in the remote control Do not use rechargeable type batteries Do not mix old and new batter...

Страница 7: ... the disc 4 3LETTERBOX Picture is shown in the letterbox style 4 3ZOOM If you select 4 3 PAN SCAN and there is no effect select this and the image will display in 4 3 PAN SCAN To select how to show images made for 4 3 aspect screens on a 16 9 aspect television 16 9NORMAL The picture is displayed as a horizontally stretched 16 9 image 16 9SHRINK The picture is displayed as a 4 3 ratio image in the ...

Страница 8: ...n iR iRW Pause Stop 1Power ON 2Open the disc tray 3Load the disc 4Start play Remote control sensor Load double sided discs so the label for the side you want to play is facing up Skip Press 9 to skip chapters or tracks Stop The position is memorized when flashes on the display Press 1 PLAY to resume Resume play Press to clear the position Search during play Slow motion during pause Up to 5 steps P...

Страница 9: ...s RETURN to go back to the previous screen Press MENU to display exit the screen Select the picture in thumbnails menu JPEG 1 While pictures are being displayed press MENU to display the thumbnails 2 To select a picture in a group Press 3421 to select the picture and press ENTER Press 2 1 several times to go to the next page or previous page if any To select a picture in other groups 1 Press 3 to ...

Страница 10: ...back number Press 3 4 to change current elapsed play time Play mode Normal Play PRG Program Play RND Random Play Playback condition Current position M SKIP CM SKIP QUICK REPLAY ZOOM e g VCD Enjoying Karaoke DVD K32 only To turn on or off of vocal 1 Press FUNCTIONS several times to display the On Screen Menu as below 2 Press 2 1 to select 3 Press 3 4 to turn on or off of vocal Depending on the type...

Страница 11: ... ENTER The whole program is also cleared when the unit is turned off or the disc tray is opened To exit the program screen Press PLAY MODE several times 1 While stopped press PLAY MODE several times to select OOO RANDOM When playing a disc with both MP3 and JPEG recorded select MUSIC RANDOM for MP3 or PICTURE RANDOM for JPEG pictures 2 MP3 JPEG Only when the disc has a group folder Press 3 4 to se...

Страница 12: ...with subtitles Press 3 4 to select the subtitle language or OFF On iR iRW a subtitle number may be shown for subtitles that are not displayed Angle DVD V with multiple angles Press 3 4 to select the angle Repeat Only when the elapsed play time can be displayed JPEG you can use even if there is no elapsed time display 1 Press 3 4 to select an item to be repeated 2 A B repeat only Press ENTER at the...

Страница 13: ...rded in the center channel Press 3 4 to select ON ON OFF The United Kingdom Australia and N Z Transfer Mode If you have set VIDEO OUT I P to PROGRESSIVE page 14 VIDEO tab press 3 4 to select the method of conversion for progressive output to suit the type of material When the tray is opened the setting will return to AUTO or AUTO1 When playing PAL discs AUTO Automatically detects the film and vide...

Страница 14: ...assword with 3 4 and 1 then press ENTER If VERIFY is displayed please verify the password and insert it again SETTING STATE Display the current setting of the items below TV ASPECT Choose the setting to suit your television and preference page 7 Selecting aspect ratio 4 3PAN SCAN 4 3LETTERBOX 4 3ZOOM 16 9NORMAL 16 9SHRINK 16 9ZOOM TV TYPE Select to suit the type of television STANDARD CRT LCD PROJ...

Страница 15: ...To change the slideshow timing 1 SEC to 15 SEC in 1 unit 15 SEC to 60 SEC in 5 unit 60 SEC to 180 SEC in 30 unit 3 SEC is the factory preset FL DIMMER Changes the brightness of the unit s display BRIGHT DIM AUTO The display is dimmed but brightens only when you perform some operations AUTO POWER OFF ON The unit switches to standby mode after about 30 minutes in the stop mode OFF DEFAULTS This retu...

Страница 16: ...ke time to begin when an MP3 track has still picture data Even after the track starts the correct play time will not be displayed however this is normal The program play function do not work These functions do not work with some DVD Videos Menu doesn t appear VCD with playback control Press twice and then press 1 PLAY Play doesn t start If a disc contains CD DA and other formats proper playback ma...

Страница 17: ...You cannot record DVDs if the recording equipment cannot handle signals with a sampling frequency of 48 kHz Make the following settings Advanced Surround OFF 13 DOWN SAMPLING ON 15 DOLBY DIGITAL MPEG 3 PCM 15 DTS OFF 15 noPLAy You inserted a disc the unit cannot play insert one it can 4 You inserted a blank disc You inserted a disc that has not been finalized 4 U11 The disc may be dirty 18 You hav...

Страница 18: ...5 576 i Y output level 1 Vp p 75 PB output level 0 7 Vp p 75 PR output level 0 7 Vp p 75 Output terminal Pin jack Y green PB blue PR red 1 system RGB video output The United Kingdom R output level 0 7 Vp p 75 G output level 0 7 Vp p 75 B output level 0 7 Vp p 75 Output terminal AV Audio output Output level 2 Vrms 1 kHz 0 dB Output terminal The United Kingdom Pin jack AV Others Pin jack Number of t...

Страница 19: ...f Digital Theater Systems Inc This product incorporates copyright protection technology that is protected by method claims of certain U S patents and other intellectual property rights owned by Macrovision Corporation and other rights owners Use of this copyright protection technology must be authorized by Macrovision Corporation and is intended for home and other limited viewing uses only unless ...

Страница 20: ...at 12 Resume play 8 SSetup 14 Soundtrack 12 Subtitle 12 ZZoom 10 13 The United Kingdom Asia Australia and N Z Matsushita Electric Industrial Co Ltd Web Site http panasonic net Unit with PX printed on the outer packaging p Matsushita Electric Industrial Co Ltd Corporate Management Division for the Americas Sales Office for North America Tokyo Panasonic Sales Section 32nd Floor World Trade Center 4 ...

Отзывы: