background image

VQT4N50 (ENG)

18

Sequence of operations

Press camera [ON/OFF] button.

The clock is not set when the camera is 
shipped. Set the date and time before 
using the camera.

Press the shutter button halfway to 
focus and then press it fully to take 
the picture.

Selecting the Recording Mode

Press [MODE] to select the Recording Mode.

: Take pictures with automatic settings.

: Take pictures with your own settings.

: Record while checking the image effect.

: This mode is optimal for taking pictures of sporting events, etc.

: This mode is optimal for taking pictures that show the snow as white as possible at 

a ski resort or a snow-covered mountain.

: This mode is optimal for taking pictures to 3 m (10 feet) underwater and at the 

beach.

: This mode is optimal for taking pictures at depths of 3 m (10 feet) to 7 m (23 feet).

: This mode allows you to take panorama pictures.

: Take pictures according to scene.

DMC-FT25&TS25P-VQT4N50_eng.book  18 ページ  2012年11月15日 木曜日 午前10時44分

Содержание DMC-TS25R

Страница 1: ...www panasonic com register U S customers only More detailed instructions on the operation of this camera are contained in Owner s Manual for advanced features PDF format in the supplied CD ROM Install...

Страница 2: ...Owner s Manual Carefully observe copyright laws Recording of pre recorded tapes or discs or other published or broadcast material for purposes other than your own private use may infringe copyright la...

Страница 3: ...expose accessories battery pack battery charger AC adaptor SD memory card and etc to rain moisture dripping or splashing Use only the recommended accessories Do not remove covers Do not repair this u...

Страница 4: ...en the equipment and receiver Connect the equipment into an outlet on a circuit different from that to which the receiver is connected Consult the dealer or an experienced radio TV technician for help...

Страница 5: ...i and j with metal objects Do not disassemble remodel heat or throw into fire If any electrolyte should come into contact with your hands or clothes wash it off thoroughly with water If any electroly...

Страница 6: ...y adversely affect this unit disturbing the pictures and or sound If this unit is adversely affected by electromagnetic equipment and stops functioning properly turn this unit off and remove the batte...

Страница 7: ...mera 10 Names and Functions of Main Parts 15 Charging the Battery 16 Inserting and Removing the Card optional the Battery 17 Sequence of operations 18 Reading the Owner s Manual PDF format 20 Installi...

Страница 8: ...minutes to 2 hours with the side door open when the temperature of the camera gets close to the ambient temperature Contact Panasonic if the fogging does not disappear Conditions in which inner side o...

Страница 9: ...dvanced features Install on your PC before use 5 Hand Strap Supplied accessories are not waterproof SD Memory Card SDHC Memory Card and SDXC Memory Card are indicated as card in the text The card is o...

Страница 10: ...s Panasonic s test method is based on the above MIL STD 810F Method 516 5 Shock However the drop height was changed from 122 cm 4 feet to 150 cm 5 feet dropping onto 3 cm 0 1 feet thick plyboard This...

Страница 11: ...t ski resorts or high altitudes or where the temperature may exceed 40 C 104 oF such as inside cars in strong sunlight close to a heater on boats or on the beach Waterproof performance may become degr...

Страница 12: ...the side door The integrity of the rubber seals may decrease after about 1 year with use and age To avoid permanently damaging the camera the seals should be replaced once each year Please contact Pan...

Страница 13: ...d After use at the seaside or underwater soak the unit in fresh water pooled in a shallow container for 10 minutes or less If the zoom button or camera ON OFF button do not press smoothly it may be ca...

Страница 14: ...draining water in gaps in the camera ON OFF button and zoom button etc Do not dry the camera with hot air from dryer or similar Waterproof performance will deteriorate due to deformation Do not use c...

Страница 15: ...Q MENU button Delete Cancel button 17 DISP button 18 MENU SET button 19 Cursor buttons 20 Speaker Be careful not to cover the speaker with your finger Doing so may make sound difficult to hear 21 Trip...

Страница 16: ...rs 10 oC to 30 oC 50 oF to 86 oF About batteries that you can use with this unit The battery that can be used with this unit is DMW BCK7PP Attach the battery paying attention to the direction of the b...

Страница 17: ...entation insert all the way until you hear a locking sound and then check that it is locked by lever C Pull the lever C in the direction of the arrow to remove the battery Card Push it securely all th...

Страница 18: ...th automatic settings Take pictures with your own settings Record while checking the image effect This mode is optimal for taking pictures of sporting events etc This mode is optimal for taking pictur...

Страница 19: ...sly is displayed on the screen Setting the Menu Press MENU SET to display the menu screen to change the recording function camera settings and other settings Playing Back Pictures Press Press 2 or 1 t...

Страница 20: ...ied Click the Owner s Manual Select the desired language and then click Owner s Manual to install A To return to the install menu Double click the Owner s Manual shortcut icon on the desktop When the...

Страница 21: ...information such as the operating environment or operating method refer to the Owner s Manual for advanced features PDF file or the operating instructions for the respective software programs Insert t...

Страница 22: ...ide to F5 7 Tele Image stabilizer Optical method Focus range Normal 50 cm 1 6 feet Wide 1 m 3 3 feet Tele to Macro Intelligent auto Motion picture 5 cm 0 16 feet Wide 1 m 3 3 feet Tele to Scene Mode T...

Страница 23: ...imensions excluding the projecting parts Approx 103 7 mm W k58 3 mm H k19 7 mm D 4 08q W k2 3q H k0 77q D Mass weight Approx 144 g 0 317 lb with card and battery Approx 125 g 0 275 lb excluding card a...

Страница 24: ...a new set is used to pass the drop orientation test within a total of 5 devices Panasonic s test method is based on the above MIL STD 810F Method 516 5 Shock However the drop height was changed from 1...

Страница 25: ...only be used with the designated Panasonic DC Coupler optional The AC adaptor optional cannot be used by itself NOTE Accessories and or model numbers may vary between countries Consult your local deal...

Страница 26: ...Ave S Kent WA 98032 Ship To Mr Mrs Ms First Last Street Address City State Zip Phone Day Night 4 Shipping information UPS delivery requires complete street address Please photocopy this form when pla...

Страница 27: ...th new or refurbished parts b replace it with a new or a refurbished equivalent value product or c refund your purchase price The decision to repair replace or refund will be made by the warrantor Dur...

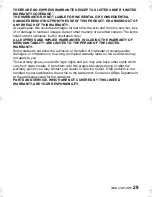
Страница 28: ...IR IS NEEDED DURING THE WARRANTY PERIOD THE PURCHASER WILL BE REQUIRED TO FURNISH A SALES RECEIPT PROOF OF PURCHASE INDICATING DATE OF PURCHASE AMOUNT PAID AND PLACE OF PURCHASE CUSTOMER WILL BE CHARG...

Страница 29: ...OF MERCHANTABILITY ARE LIMITED TO THE PERIOD OF THE LIMITED WARRANTY Some states do not allow the exclusion or limitation of incidental or consequential damages or limitations on how long an implied w...

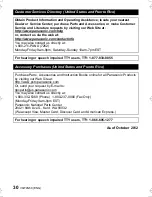
Страница 30: ...day Friday 9am 9pm Saturday Sunday 10am 7pm EST For hearing or speech impaired TTY users TTY 1 877 833 8855 Accessory Purchases United States and Puerto Rico Purchase Parts Accessories and Instruction...

Страница 31: ...stered trademarks or trademarks of the manufacturers who developed the system or product concerned This product is licensed under the AVC patent portfolio license for the personal and non commercial u...

Отзывы: