Panasonic Diga DMR-EX93C Скачать руководство пользователя страница 6

6

VQT2J40

HDD (Hard disk drive) handling care

The HDD is a high precision recording instrument and because of its long recording capability and high speed operation it is a very special device 

that is easily susceptible to damage.

As a basic rule, save important content to a disc as backup.

The HDD is a device that is not built to withstand vibration/shock or dust

Depending on the setup environment and handling of the HDD some content may become damaged and play and recording may no longer be 

possible. Especially during operation, do not subject the unit to any vibration, shock, or remove the AC mains lead from the household mains 

socket. In the event of a power failure during recording or play, the content may be damaged.

The HDD is a temporary storage device

The HDD is not an everlasting storage device for recorded content. Use the HDD as a temporary storage place for one-off viewing, editing, or 

copying. It is recommended to save the recorded content on a disc or to keep the original data or CDs that they were copied from.

Immediately save (backup) all content as soon as you feel there may be a problem with the HDD

If there is an irregularity within the HDD, repetitive strange sounds or problems with picture (block noise, etc.) may result. Using the HDD in this 

condition may worsen the problem and in the worst case the HDD may no longer be usable. As soon as you notice this type of problem, copy all 

content to disc and request service. Recorded content (data) on a HDD that has become unusable is unrecoverable.

When the unit is turned on or off, there may be an unexpected sound. This does not indicate a problem with this unit.

HDD recording time remaining

This unit records using a VBR (Variable bit rate) data compression system to vary recorded data segments to match video data segments which 

may cause differences in the displayed amount of time and space remaining for recording. 

If the remaining amount of time is insufficient, delete any unwanted titles to create enough space before you start recording. (Deleting a Playlist 

(Video) will not increase the amount of time.)

The precision parts in this unit are readily affected by the 

environment, especially temperature, humidity, and dust. 

Cigarette smoke also can cause malfunction or breakdown.
To clean this unit, wipe with a soft, dry cloth.

Never use alcohol, paint thinner or benzine to clean this unit.

Before using chemically treated cloth, carefully read the 

instructions that came with the cloth.

Observe the following points to ensure continued listening and 

viewing with pleasure.

Dust and dirt may adhere to the unit’s lens over time, making it 

impossible to record or play discs. 

Use the 

DVD lens cleaner

 (not supplied)


about once every year, 

depending on frequency of use and the operating environment. 

Carefully read the lens cleaner’s instructions before use.

Do not obstruct the rear panel’s internal cooling fan.

Setup precautions

Do not place in an enclosed area where the rear cooling fan 

and the cooling vents on the side are covered up.

Place the unit on a surface that is flat and not subject to 

vibration or impact.

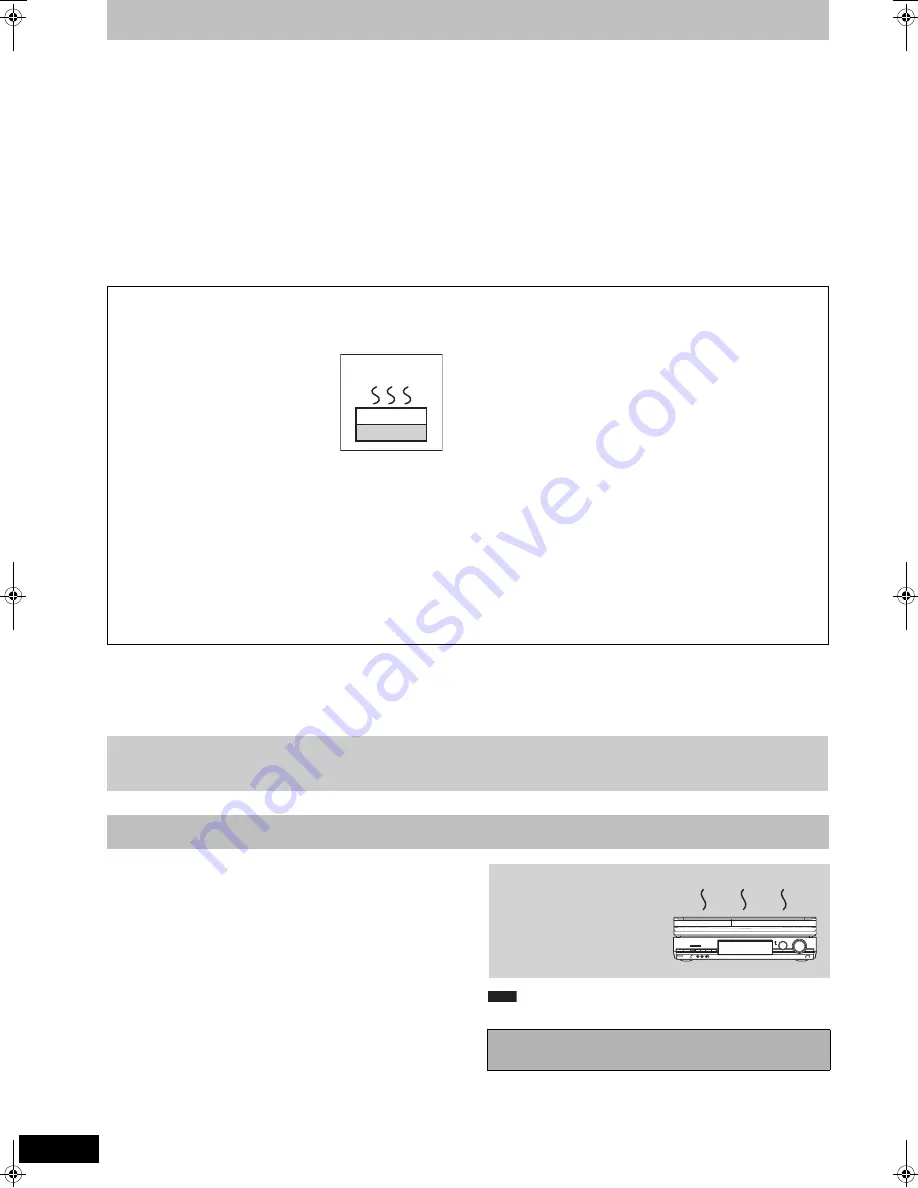
Do not place on anything that 

generates heat like a video cassette 

recorder, etc.

Do not place in an area often subject to 

temperature changes.

Place in an area where condensation 

does not occur. Condensation is a 

phenomenon where moisture forms on a 

cold surface when there is an extreme 

change in temperature. Condensation may cause internal 

damage to the unit.

Conditions where condensation may occur

– When there is an extreme change in temperature (moving from 

a very hot location to a very cold location, or vice versa, or 

when subjected to an air conditioner or when cooled air directly 

impacts the unit). When the HDD (warms during operation) is 

subjected to cold air, condensation may form on the inside of 

the HDD and may cause damage to the HDD heads, etc.

– When there is high humidity or a lot of steam in the room.

– During the rainy season.

In the above situation, 

without turning the unit on

, let the unit 

adjust to the room temperature and wait 2–3 hours until 

condensation is gone.

Cigarette smoke etc. causes malfunction or 
breakdown

The unit may breakdown if cigarette smoke or bug spray/vapor, 

etc. gets inside the unit.

While operating

Do not move the unit or subject to vibration or impact. (The HDD 

may become damaged.)

Do not remove the AC mains lead from the household mains 

socket, or flip the power breaker switch.

While the unit is on, the HDD is rotating at high speed. Sound or 

movement due to rotation is normal.

When moving the unit

1

Turn the unit off. (Wait until “BYE” disappears from the display.)

2

Remove the AC mains lead from the household mains socket.

3

Move only after the unit has come to a complete stop (approx. 

2 minutes) in order to avoid subjecting to vibration and shock. 

(Even after turning the unit off, the HDD continues operating for 

a short time.)

Indemnity concerning recorded content

Panasonic does not accept any responsibility for damages directly or indirectly due to any type of problems that result in loss of recording or 

edited content (data), and does not guarantee any content if recording or editing does not work properly. Likewise, the above also applies in a 

case where any type of repair is made to the unit (including any other non-HDD related component).

Unit care

This unit

VCR

DO NOT

Before moving the unit, ensure the disc tray is empty.

Failure to do so will risk severely damaging the disc and the 

unit.

Do not place the unit on 

amplifiers or equipment 

that may become hot.

The heat can damage the unit.

DO NOT


Note

DMREX93C-VQT2J40_eng.book  6 ページ  2010年4月26日 月曜日 午後12時2分

Содержание Diga DMR-EX93C

Страница 1: ...digital CATV broadcasts DVB C DVB T indicates features applicable to digital terrestrial broadcasts DVB T Analogue indicates features applicable to analogue broadcasts About descriptions in these operating instructions Pages to be referred to are indicated as TV Guide Types TV Guide is displayed with the provided data from broadcast stations For digital terrestrial broadcasts DVB T or Analogue bro...

Страница 2: ...T IN CABINET OR IN ANOTHER CONFINED SPACE ENSURE THE UNIT IS WELL VENTILATED TO PREVENT RISK OF ELECTRIC SHOCK OR FIRE HAZARD DUE TO OVERHEATING ENSURE THAT CURTAINS AND ANY OTHER MATERIALS DO NOT OBSTRUCT THE VENTILATION VENTS DO NOT OBSTRUCT THE UNIT S VENTILATION OPENINGS WITH NEWSPAPERS TABLECLOTHS CURTAINS AND SIMILAR ITEMS DO NOT PLACE SOURCES OF NAKED FLAMES SUCH AS LIGHTED CANDLES ON THE U...

Страница 3: ...DD 36 To play the title from the beginning HDD 36 Playing music 37 To play music CD 37 To play music recorded on HDD 37 Useful functions during music play 37 Playing DivX Music files and still pictures JPEG 38 Showing the menu screen 38 Playing DivX video contents 38 Playing Music files 39 Playing still pictures 40 Start Slideshow 40 Useful functions during still picture play 41 Linked operations ...

Страница 4: ...s 75 Channel select Change pages in the TV Guide system 18 32 A Show SHOWVIEW screen 32 B Input select AV1 AV2 AV3 or DV 27 28 C Show Timer Recording screen 29 D Exit the menu screen E Show the TV Guide screen 22 32 F Show FUNCTION MENU 44 By using the FUNCTION MENU you may access the main functions Playback Recording etc quickly and easily G Return to previous screen H Create chapter 35 I Skip ap...

Страница 5: ...Copy View Others Drive Select Remain 30 00 SP HDD 1 2 Select a function Selectable items are displayed on the right Select an item Press OK Press OK 1 Playback Select when you wish to playback the contents The DIRECT NAVIGATOR screen or menu screen etc will be displayed Video 20 36 DivX 38 Picture 40 Music 37 39 Top Menu 20 Menu 20 2 Recording Select the recording method The TV Guide Timer Recordi...

Страница 6: ...aner not supplied about once every year depending on frequency of use and the operating environment Carefully read the lens cleaner s instructions before use Do not obstruct the rear panel s internal cooling fan Setup precautions Do not place in an enclosed area where the rear cooling fan and the cooling vents on the side are covered up Place the unit on a surface that is flat and not subject to v...

Страница 7: ...t need to insert CAM Proceed to STEP 2 8 The recording might be prohibited by broadcasters Be sure to insert the CAM horizontally into the slot Do not insert the CAM and Smart Card upside down For more details see the manual of the CAM and Smart Card or consult the dealer The Common Interface supports the modules according to DVB Specification and CI Plus Specification Unplug the AC mains lead bef...

Страница 8: ... 3 2 1 2 AV To the terrestrial aerial Television s rear panel Aerial cable CATV coaxial cable This unit s rear panel To household mains socket AC 220 to 240 V 50 Hz Fully wired 21 pin Scart cable AC mains lead supplied Connect only after all other connections are complete AV2 Input setting in the Setup menu 73 Required setting 21 pin Scart cable Cooling fan Connecting a terminal other than the 21 ...

Страница 9: ...ng cable Audio cannot be output Connecting to a TV with an HDMI High Definition Multimedia Interface cable Regarding VIERA Link HDAVI ControlTM function When connecting with a Panasonic TV VIERA or a receiver equipped with the HDAVI Control function linked operations would be possible 42 Linked operations with the TV VIERA Link HDAVI ControlTM Q Link Non HDMI compliant cables cannot be utilised It...

Страница 10: ...ds Depending on the type of TV or the connected terminal it may take time to display the screen 3 When RF OUT Aerial Signal is set to Off in the Setup menu 74 If the TV aspect setting screen appears on the television Press 3 4 to select the TV aspect and press OK 16 9 When connected to a 16 9 widescreen television Pan Scan When connected to a 4 3 aspect television side picture is trimmed for 16 9 ...

Страница 11: ... externally connected digital satellite receiver or digital set top boxes It is possible to record analogue broadcasts using Manual recording even without changing the TV Guide Type and vice versa 29 32 1 While stopped Press FUNCTION MENU 2 Press 3 4 to select Others and press OK 3 Press 3 4 to select Setup and press OK 4 Press 3 4 to select Others and press 1 5 Press 3 4 to select TV Guide Type a...

Страница 12: ...ect Common Interface and press OK The features that appear on the screen are dependent on the contents of the inserted CAM and Smart Card Follow the on screen instructions On screen operation guide may not correspond to the remote control buttons To return to the previous screen Press RETURN To exit the screen Press EXIT For more information about TV service please contact your service provider PI...

Страница 13: ...rding copying times for different discs under different recording modes see Recording modes and approximate recording copying times 25 Formatting and or recording initializing constraints may prevent you from playing or recording certain discs Please see specifications 88 for compatible disc versions and recording speeds Recording M 1 and or M 2 for bilingual broadcasts 24 55 Data that can be reco...

Страница 14: ...tly 2 Select NTSC in TV System 72 When playing back a disc or title recorded on the HDD ensure that you match the TV System setting to the disc or title PAL or NTSC 72 Play only discs Disc type Logo Standard symbol Uses DVD Video DVD V High quality movie and music discs DVD RW DVD Video Recording format RW VR DVD RW video recorded on another DVD recorder You can play copyright protected titles if ...

Страница 15: ...can be used USB memories that support bulk only transfer CBI Control Bulk Interrupt is not supported Digital Cameras which require additional programme installation when connected to a PC are not supported MTP Media Transport Protocol device is not supported A multi port USB card reader is not supported Format FAT16 and FAT32 file systems are supported UDF NTFS exFAT file system is not supported D...

Страница 16: ...t version Certified to the DivX Home Theater Profile V3 0 Video Number of stream Up to 1 Codec DIV3 DIV4 DIVX DX50 16 k 16 to 720 k 576 25 fps 16 k 16 to 720 k 480 30 fps Aspect Ratio 10 11 40 33 16 11 12 11 1 1 Audio Number of stream Up to 8 Format MP3 MPEG Dolby Digital Multi channel Dolby Digital is possible MPEG multi is 2 ch conversion Bitrate 16 kbps to 320 kbps MP3 MPEG 32 kbps to 448 kbps ...

Страница 17: ...the label side of the disc only with a soft oil based felt pen Do not use ballpoint pens or other hard writing implements Do not use record cleaning sprays benzine thinner static electricity prevention liquids or any other solvent Do not use scratch proof protectors or covers Do not expose the terminals of the card to water garbage or other strange things Do not drop stack or impact discs Do not p...

Страница 18: ...ulti Video Alphabetical sorting of the created Favourites is not possible in the Channel List The Channel List is not displayed while recording except with High Speed Copy Timer Recordings of Multi Video channels always record the main channel Locked is displayed on the preview screen when selecting the programme on which Child Lock works When Subtitle appears in digital channel information 19 Pre...

Страница 19: ...ing Teletext conveniently Reveal hidden data Displays the hidden messages e g quiz page answers Press the Red button Press the Red button again to hide messages Change the screen size You can change the Teletext screen size Press the Green button Each press of the Green button changes the display View temporarily a TV programme while the Teletext screen is being displayed Press the Yellow button P...

Страница 20: ... it may take time for the menu screen pictures sound etc to start The producer of the disc can control how discs are played So you may not always be able to control play as described in these operating instructions Read the disc s instructions carefully When a menu screen appears on the television DVD V Press 3 4 2 1 to select the item and press OK Some items can also be selected using the numbere...

Страница 21: ...s displayed in the upper right corner of the screen If a programme to record has subtitle or multiple audio you can record with subtitle or selected audio To record with subtitle Before start recording press STTL to show the subtitle If the programme has multiple subtitle select the desired language 19 Subtitle cannot be switched after recording To record with the selected audio Before start recor...

Страница 22: ...rding when recording has already begun 30 To release the unit from recording standby 29 Notes on timer recording 30 Change TV Guide Type for Digital broadcasts or Analogue broadcasts 74 This function is only for recording on HDD You cannot record TV programmes directly to the disc Record them on HDD and then copy them to discs 24 Using the TV Guide system to make timer recordings DIRECT TV REC EXT...

Страница 23: ...le for recording RW V RW Available recording space increases only when the last recorded title is deleted R R DL R R DL Available space does not increase even after the contents are deleted DIRECT TV REC EXT LINK REC MODE CHAPTER REC 10s MANUAL SKIP 60s STOP PAUSE PLAY x1 3 INPUT SELECT 0 9 8 7 6 5 4 3 2 1 CH CH PAGE SLOW SEARCH VOL AV DRIVE SELECT TV STATUS EXIT OPTION RETURN DELETE OK D I R E C ...

Страница 24: ...ng on the disc max speed may vary In the following cases high speed mode does not work R R DL RW Titles recorded in EP mode and FR recordings 5 hours or longer mode R R DL RW Titles recorded in 16 9 aspect R R DL RW V Titles recorded in 16 9 aspect using EP mode or FR recordings 5 hours or longer mode R RW V R DL R R DL It is necessary to finalise them 66 You can then play them as a commercially s...

Страница 25: ...mation screen is displayed Format the disc to use it However all the recorded contents are deleted Press 2 1 to select Yes and press OK To format a disc Deleting all the contents Format 65 R R DL RW V R R DL The following screen appears when you have not processed the disc for play on other equipment To finalise the disc Press REC on the main unit You cannot stop this process once you have started...

Страница 26: ...r play stops 1 Press 2 Press 2 1 to select Stop Recording and press OK You can also change the drive and play while recording Press DRIVE SELECT to select the DVD drive 1 Press DIRECT NAVIGATOR during recording 2 Press 3 4 2 1 to select a title and press OK There is no sound output while searching forward or backward To stop play Press To exit the DIRECT NAVIGATOR screen Press DIRECT NAVIGATOR To ...

Страница 27: ...DRIVE SELECT to select the HDD or DVD drive If you selected the DVD drive insert a disc 17 3 Press EXT LINK The unit turns off and EXT L lights on the unit s display to indicate timer recording standby has been activated To cancel the external control Press EXT LINK to stop recording or to cancel linked timer recording standby In order to prevent accidental operation press EXT LINK to cancel the s...

Страница 28: ...2 1 Turn on the DV equipment and pause play at the point you want recording to start The following screen appears When the screen is not displayed After performing step 1 1 Press DRIVE SELECT to select the HDD or DVD drive 2 Press FUNCTION MENU 3 Press 3 4 to select Others and press OK 4 Press 3 4 to select DV Auto Rec and press OK Go to step 3 below 2 Press 2 1 to select Rec to HDD or Rec to DVD ...

Страница 29: ...ing list You cannot cancel timer recording standby mode as long as even one timer icon F remains in the timer recording list Press the Red button again to activate timer recording standby To resolve overlapping Press 3 4 to select the programme with and press OK If the Overlapped Timer Recording screen appears 30 If the on screen instructions do not appear change or delete the overlapped programme...

Страница 30: ... list sorted by programme type etc While the TV Guide list is displayed 1 If you use the TV Guide for Digital broadcast Press the Yellow or Blue button If you use the TV Guide for Analogue broadcast Press the Blue button 2 Press 3 4 2 1 to select the desired item 3 Press OK A list appears with all programmes of the selected item Digital broadcast only When you select the Landscape view the unit di...

Страница 31: ...elected press the Red button to select VIDEO 2 Press 3 4 2 1 to select the title 3 Press OPTION If the option menu appears press 3 4 to select TV Guide Explorer and press OK 4 Press 3 4 to select Find Titles and press OK 5 Press Set When searching using a word other than the title name enter a different word 45 Entering text 6 Press 3 4 to select Simplified Search or Detailed Search and press OK R...

Страница 32: ... e g To view a programme list for another day Jump ahead 24 hours Press the Green button to jump ahead by one day Jump back 24 hours Press the Red button You can only jump back to the current date Past information cannot be viewed To browse through the TV Guide list Press W X CH To see programme information Programmes with the symbol Press STATUS Additional information programme name programme dur...

Страница 33: ... priority during midnight The GUIDE Plus data is downloaded at 2 50 AM every day It takes approximately 2 hours to complete data download If the GUIDE Plus data download at 2 50 AM and a timer recording overlap you can select which will be given priority On Data Download Timer recording does not start or is interrupted for data download Off Timer programming GUIDE Plus data will not be downloaded ...

Страница 34: ... minutes is displayed on a series recording item in the timer recording list if there will be no episode of the series for the next 8 days We recommend you delete the item after you confirm the last episode of the series is recorded 1 During play or while stopped press DIRECT NAVIGATOR When VIDEO is not selected press the Red button to select VIDEO 2 Press 3 4 2 1 to select the title 3 Press OPTIO...

Страница 35: ...igit number e g 5 0 5 15 1 5 This works only when stopped the screen on the right is displayed on the television with some discs VCD with playback control If you press the numbered buttons while stopped the above screen is displayed on the television you can cancel PBC Elapsed play time appears on the unit s display Quick View HDD RAM Press and hold 1 PLAY a1 3 Play speed is quicker than normal Pr...

Страница 36: ...ease and press OK When a group of titles has been selected all the titles in the group are released When a title in a group has been selected the title is released from the group Regarding the group name The name of the first title in the group is used as the group name To change the group name 1 Press 3 4 2 1 to select the group and press OPTION 2 Press 3 4 to select Edit and press OK 3 Press 3 4...

Страница 37: ... 5 0 0 5 115 1 1 5 15 0 1 5 e g 5 0 0 0 5 115 0 1 1 5 15 0 0 1 5 1115 1 1 1 5 CD OK RETURN SELECT Play Music Copy Music P O W E R E D B Y Note Useful functions during music play Stop Press The stopped position is memorized Resume play function Press 1 PLAY to restart from this position If is pressed several times the position is cleared Discs The position is cleared if the tray is opened or the un...

Страница 38: ...spect through the TV Successive play is not possible Playback is not possible if recording is performed on the HDD drive or the DVD drive 1 While the file list is displayed Press 1 while a title is highlighted to display the tree screen 2 Press 3 4 to select a folder and press OK The file list for the folder appears To return to the previous screen Press RETURN Showing the menu screen 1 Press 3 4 ...

Страница 39: ... Files are treated as tracks and folders are treated as groups 2 Press 3 4 to select the track and press OK Play starts on the selected track 0 indicates the track currently playing You can also select the track with the numbered buttons To stop playing Press To show other pages Press 9 To exit the screen Press DIRECT NAVIGATOR 1 While the file list is displayed Press 1 while a track is highlighte...

Страница 40: ...es one by one at a constant interval with favourite music 1 While the Album View Playlist Picture screen is displayed Press 3 4 2 1 to select the album 2 Press 1 PLAY You can also start Slideshow by pressing OPTION and press 3 4 to select Start Slideshow and then press OK To select multiple albums for starting Slideshow 1 Press 3 4 2 1 to select the album 2 Press A check mark appears Press again t...

Страница 41: ...AVIGATOR screen While playing 1 Press OPTION 2 Press 3 4 to select Zoom in and press OK To return the picture to its original size press 3 4 to select Zoom out in step 2 and press OK When zooming in the picture may be cut off The enlargement information will not be stored The Zoom in Zoom out function is only available for still pictures smaller than 640 a 480 pixels While playing Press STATUS twi...

Страница 42: ...he unit will not be set to standby mode at the same time when recording copying finalising etc When this unit is connected to an HDAVI Control compatible Panasonic receiver with an HDMI cable the receiver will also turn off This function allows you to immediately start recording the programme that you are viewing on the TV Depending on the TV type connected with this unit this function may not wor...

Страница 43: ...iscs using the Control Panel below and display the Top Menu for DVD Video Using the Control Panel Using the Control Panel you can operate search backward search forward stop etc with the TV remote control Select Control Panel and press OK in step 2 above The Control Panel is displayed right When playing a title or DVD Video etc 3 Pause 4 Stop 2 Search backward 1 Search forward OK Play EXIT Exit th...

Страница 44: ...ected before starting saving At least 1 hour up to 8 hours of TV programmes can be temporarily saved on the HDD This may vary depending on the HDD free space Operation during Pause Live TV The Pause Live TV function automatically stops when a timer recording starts The Pause Live TV function does not work when the clock is not set while recording while timer recording while EXT LINK recording etc ...

Страница 45: ... music step 3 Artist CD MP3 WMA HDD Select Enter Artist Name 51 Editing music step 3 Disc Select Disc Name 65 Providing a name for a disc step 1 Favourite 1 4 Press the Red button 67 To change the name of a Favourite in the Favourite column step 2 _ Enter Title Name 1 2 3 4 5 A B C a D E F d G H I N O g J K L j M m 6 7 8 9 0 b c e f h i k l n _ o Space Add to List Delete P Q R S p T U V t W X Y Z ...

Страница 46: ...on and press OK You can go back to Title View To return to the previous screen Press RETURN To exit the screen Press DIRECT NAVIGATOR Chapter Each section between the division points becomes a chapter HDD RAM You can change the order of chapters and create a Playlist Video 48 Chapter Creation in the Setup menu 70 Automatic Detects changes special mute points like the start and the end of the progr...

Страница 47: ...Press OK at the point you want to divide the title 2Press 3 4 to select Finish and press OK 3Press 2 1 to select Divide and press OK To confirm the division point Press 3 4 to select Preview and press OK The unit plays 10 seconds before and after the division point To change the division point Restart play and press 3 4 to select Divide then press OK at the point where you want to divide the title...

Страница 48: ... and press OK Press 3 to select other source titles Repeat steps 6 7 to add other chapters 8 Press RETURN All the selected scenes become the Playlist Video To return to the previous screen Press RETURN To exit the screen Press EXIT You can arrange the chapters 46 to create a Playlist Video Copying 54 a Playlist Video will create a title Playlists Video are not recorded separately so this doesn t u...

Страница 49: ... Create Properties Edit Chapter View PICTURE Delete Refer to Playlist Video operations right Playlists Chapter View 01 12 10 SUN 0 11 001 002 HDD 0 19 36 0 10 24 VIDEO Chapter View screen Move Chapter Create Chapter Combine Chapters Delete Chapter Playlist View Add Chapter Refer to Chapter operations right Playlist Video operations Delete HDD RAM Press 2 1 to select Delete and press OK Once delete...

Страница 50: ...SD R JPEG Press 2 1 to select Delete and press OK Once deleted the recorded contents are lost and cannot be restored Make certain before proceeding When deleting an album files other than the still picture files inside the album will also be deleted This does not apply to folders under the album concerned R Available space does not increase even after pictures are deleted Change Date HDD RAM You c...

Страница 51: ...e item is deleted To return to the previous screen Press RETURN To exit the screen Press EXIT Editing music 1Press 3 4 to select the album and press OK 2Press 3 4 to select the track and press OPTION Album and track operation After performing steps 1 3 above Delete Album Delete Track Press 2 1 to select Delete and press OK Once deleted the recorded contents are lost and cannot be restored Make cer...

Страница 52: ... specified for each Playlist Picture 53 All the selected pictures become a Playlist Picture To return to the previous screen Press RETURN To exit the screen Press EXIT You can arrange favourite still pictures in albums stored on HDD to create a Playlist Picture Copying 59 a Playlist Picture will create an album Background Music cannot be copied Playlists Picture are not recorded separately so this...

Страница 53: ...d Pictures Move Pictures Delete Pictures Playlist View Still picture operations right You can go back to Playlist View Picture Playlist Picture operations Start Slideshow 40 Start Slideshow Steps 1 2 You cannot select multiple Playlists Picture or all Playlists Picture Slideshow Settings 41 Slideshow Settings Slideshow Settings are retained only for the specified Playlist Picture Music CD CD DA is...

Страница 54: ...s unit copying with a 6X Speed DVD RW disc will be performed at the same speed as with a 4X Speed DVD RW disc takes 4 In this unit copying with a 16X Speed R disc will be performed at the same speed as with a 8X Speed R disc takes When recording or playing while copying the unit may not use the maximum recording speed Depending on the condition of the disc the unit may not copy using the maximum s...

Страница 55: ...reen Press RETURN To stop copying 56 COPY Navigator Copying list icons and functions 57 To check the properties of a title and sort COPY Navigator 1 Press 3 4 to select the title and press OPTION 2 Press 3 4 to select Properties or Sort and press OK Properties The name recording date channel etc of the selected title are shown Sort All Titles screen only Press 3 4 to select the item and press OK T...

Страница 56: ...R 8X R 8X or RW 4X the sound of the disc rotating becomes louder than normal If you want copy to perform more quietly select Normal Silent in DVD Speed for High Speed Copy in the Setup menu 70 8 Press 2 1 to select Yes and press OK to start copying HDD R R DL RW V R R DL Press 2 1 to select Copy Finalise or Copy Only and press OK If Copy Finalise is selected After finalising the discs become play ...

Страница 57: ... to the HDD continues for the set time even after the content being played finishes Set a few minutes longer than the source title in order to include the operation time before play begins You can also set the recording time with the numbered buttons 2 Press 3 4 to select Start Copying and press OK 3 Press 2 1 to select Yes and press OK to start copying The disc top menu is displayed Disc play aut...

Страница 58: ...EG2 format which have been taken by a Panasonic digital video camera with HDD etc can be copied from the camera s HDD to this unit s HDD or DVD RAM All the recordings on the same date become a title You cannot playback SD Video in the camera s HDD with this unit You must copy the files to the HDD or a DVD RAM You cannot playback or record while copying SD Video Copying Video MPEG2 from an SD card ...

Страница 59: ...ess OK 3 Press 3 4 to select PICTURE and press OK Recording Mode is automatically set to High Speed 4 Press 2 to confirm 6 Register still pictures for copy If you are going to copy a registered list without making any changes to it step 7 You can register still pictures still picture folders or Playlists Picture Individual still pictures and folders Playlists Picture cannot be registered on the sa...

Страница 60: ... folder or Playlist Picture After performing step 6 2 59 To register individual still pictures 1 HDD HDD R JPEG RAM SD Press the Green button to select PICTURE Press the Blue button to select Playlists 2 Press 3 4 2 1 to select Folder and press OK 3 Press 3 4 to select the folder or Playlists Picture and press OK You can also select folders with the numbered buttons Individual still pictures of di...

Страница 61: ...cording Press and hold RETURN for 3 seconds If the recording is cancelled then no tracks on the CD will be recorded To return to the previous screen Press RETURN While recording no other operations can be performed Timer recordings will not proceed Tracks recorded on the HDD cannot be transferred to a disc USB memory or SD card CDs which have SCMS Serial Copy Management System restrictions cannot ...

Страница 62: ...u select all necessary items Press again to cancel 2 Press OK Delete Delete the selected items Press 2 1 to select Yes and press OK To cancel all registered copying settings and lists After performing steps 1 2 61 Copying music from a USB memory or CD R CD RW DVD R DVD R DL 1 Press 3 4 to select Cancel All and press OK 2 Press 2 1 to select Yes and press OK To update the database with information ...

Страница 63: ... using interlace Progressive Select when the disc contents were recorded using progressive PBC Playback control 89 VCD Indicates whether menu play playback control is on or off Disc Play Picture Sound Soundtrack Subtitles 1 Audio channel Off L R Digital 2 0 ch Other Menu Item Setting Signal type k kHz b bit ch channel Sampling frequency Number of bits Number of channels ENG FRA DEU ITA ESP NLD SVE...

Страница 64: ...e original language is available in a broadcast Position 1 5 The higher the setting the lower the on screen menu moves Status messages 13 50 XP 18 53 50 11 10 T1 0 05 14 XP T2 0 00 10 XP Remain Play 15 05 13 Live 15 10 46 REC PLAY 1 DVB ABC L R DVD REC HDD Selected drive status type of disc or USB memory Channel information Recording or play status input channel Selected audio type Available recor...

Страница 65: ...uipment after creating top menu R Once a name is provided to a disc it is not possible to record still images to that disc To return to the previous screen Press RETURN To exit the screen Press EXIT HDD RAM RW V RW RW VR R R DL New disc only SD Preparation Press DRIVE SELECT to select the HDD DVD or SD drive SD Release protection 17 After performing steps 1 3 64 Common procedures 1 Press 3 4 to se...

Страница 66: ...tion of the recording Visit Panasonic s homepage for more information about DVDs http www panasonic europe com RW RW discs contain no Top Menu data Top Menu is a convenient function We recommend you create the menu before playing a RW disc on other equipment You cannot use the Top Menu for playing on this unit Make selections from Top Menu and Auto Play Select left before creating top menu Prepara...

Страница 67: ...ect the new position of the channel and press the Green button Repeat the steps 2 3 to move other channels 4 Press OK to save the Favourite To delete channels on a Favourite 1 Press 1 2 Press 3 4 to select the channel in the Favourite column and press the Yellow button Repeat this step to delete other channels Press the Blue button to delete all the channels from the Favourite 3 Press OK to save t...

Страница 68: ...display will change from grey to red Reduce the signal amplification at your aerial When the signal is weak adjust the aerial reception with DVB Manual Tuning in the Setup menu left check that the current digital broadcast channel is correctly broadcasting DVB C Network Name The network name which is stored in the transport stream list for the current DVB service is displayed If there is no networ...

Страница 69: ...d equipment Title Page Auto Off Multi Audio Multi Audio alternative English German Italian French Spanish Turkish Czech Slovak Hungarian Polish Russian Original Subtitles Subtitles alternative English German Italian French Spanish Turkish Czech Slovak Hungarian Polish Russian Original The language specified as Original by the broadcast channel On If this service is available for the broadcasts sub...

Страница 70: ...d copy does not work for the titles recorded in 16 9 even if they were recorded with Rec for High Speed Copy set to On Chapter Creation Set the automatic Chapter Creation method 46 Automatic 5 minutes Off No chapter start points are set Rec for High Speed Copy You can copy recorded titles from the HDD to DVD R DVD R DL DVD RW DVD Video format R R DL and RW using high speed mode However aspect etc ...

Страница 71: ...gnal Select Bitstream if the connected equipment decodes the signal Select PCM if this unit decodes the signal and outputs it as 2 channels Not making the proper settings may result in noise Bitstream When connected to equipment with a built in MPEG decoder PCM When connected to equipment without a built in MPEG decoder Audio Mode for XP Recording Choose the audio type when recording or copying wi...

Страница 72: ...mally does not need to be changed However if you are concerned about output picture quality it may be improved by changing the setting To enjoy High Quality Video up converted to 1080p you need to connect the unit directly to 1080p compatible HDTV If this unit is connected to an HDTV through other equipment it must also be 1080p compatible 576i 480i 576p 480p 720p 1080i 1080p When setting video ou...

Страница 73: ... together for more than 5 seconds on the remote control Disc Picture Note Clock This unit usually obtains time and date information from digital broadcasts and automatically corrects the time several times a day However if the time is not set correctly use the settings listed in the method below 1 Press 3 4 to select Off of Automatic and press OK 2 Press 2 1 to select the item you want to change T...

Страница 74: ...in progress SW DL appears on the unit s display You cannot operate the unit until the update is complete Removing the AC mains lead while the update is in progress may damage the unit TV Guide download will take approximately 60 minutes While the TV Guide download is in progress GUIDE appears on the unit s display The TV Guide download can be interrupted by switching on the unit TV Guide Download ...

Страница 75: ...also displayed on the Digital Channel Information 19 when the CAM software can be upgraded immediately To execute CAM software upgrade push the Red button while the digital channel information is displayed and follow the instructions on the screen Operations such as view playback or record cannot be performed while upgrading the CAM Any buttons on the remote control or the unit cannot be used whil...

Страница 76: ...connected equipment You cannot use DTS Digital Surround decoders not suited to DVD Connect to terminals of the same colour Connecting a television with AUDIO VIDEO Connecting a VCR with AUDIO VIDEO RF IN RF OUT L AUDIO VIDEO L R OUT AUDIO IN R L VIDEO IN This unit s rear panel Audio Video cable Television s rear panel R L AUDIO OUT VIDEO OUT This unit s front panel Audio Video cable VCR s rear pan...

Страница 77: ...ACE COMMON INTERFACE 1 3 AV VHF UHF RF IN VHF UHF RF IN AV 6 RF OUT 7 5 2 AV AV 4 To the terrestrial aerial RF coaxial cable This unit s rear panel To household mains socket AC 220 to 240 V 50 Hz AC mains lead supplied Connect only after all other connections are complete 21 pin Scart cable RF coaxial cable supplied Cooling fan Connecting a terminal other than the 21 pin Scart terminal 9 76 Televi...

Страница 78: ...atibility with this unit This unit plays CD R CD RW discs which have been recorded in one of the following standards CD DA Video CD SVCD conforming to IEC62107 DivX MP3 WMA and still pictures JPEG 14 16 You cannot write to a CD R or CD RW with this unit Can I record from a commercially purchased video cassette or DVD Most commercially sold video cassettes and DVD are copy protected therefore recor...

Страница 79: ...he TV Guide data will be lost Clock setting will be erased and timer recording will not work What happens if my postal code changes e g if I move TV Guide data may not be downloaded correctly Change Post Code in the Setup menu for DVB T or change the postal code in the GUIDE Plus setup menu for Analogue If necessary perform a full Auto Setup Saved TV Guide data may be lost 33 67 74 Analogue Why is...

Страница 80: ...W R R DL or RW 65 Unable to format This disc is not formatted properly Format it using DVD Management in FUNCTION MENU Not enough space on HDD Space of 4 hours in SP mode is necessary Maximum number of titles is recorded on HDD Please delete unwanted titles R DL R DL It is not possible to copy when there is not enough free space on the HDD or when the total number of the recorded titles on the HDD...

Страница 81: ... a disc the unit cannot play or record on 13 14 You tried to operate with a non compatible USB memory 15 F74 The HDMI connection could not be authenticated due to a transfer malfunction Consult the dealer where the unit was purchased F75 The HDMI connection could not be authenticated due to an internal data malfunction Consult the dealer where the unit was purchased U50 A short circuit was detecte...

Страница 82: ...by If the unit doesn t switch to standby press and hold Í I on the main unit for about 3 seconds The unit is forcibly switched to standby 2 While the unit is off press and hold and CH W on the main unit at the same time for about 5 seconds Remove the disc Television reception worsens or becomes impossible after connecting the unit This can occur because the signals are being divided between the un...

Страница 83: ... connected with an HDMI cable When Rec for High Speed Copy is set to On you can only record either the main or secondary audio of a bilingual broadcast If you do not intend to copy the title to a DVD R DVD R DL DVD RW DVD Video format R R DL or RW set Rec for High Speed Copy in the Setup menu to Off 70 Cannot switch audio You cannot switch the audio in the following cases When a DVD R DVD R DL DVD...

Страница 84: ... correct It is recommended to modify the start and end times to allow a margin of a few minutes or set Start Recording Time and Finish Recording Time in the Setup menu 29 70 Timer recording does not stop even when is pressed When using the linked timer recording with external equipment press EXT LINK EXT L disappears 27 If you start recording immediately after turning on the unit while Power Save ...

Страница 85: ...hen audio is other than Dolby Digital This does not work when recording is in XP or FR mode Time Slip Manual Skip etc does not work These functions do not work with finalised discs Time Slip does not work when the unit s TV System settings are different from the title recorded on the disc 72 The resume play function does not work Memorized position on the disc is cancelled when press several times...

Страница 86: ...USB memories connected using a USB extension cable or a USB hub may not be recognized by this unit Some USB memories cannot be used with this unit 15 If inserted during playback recording or copying etc the USB memory may not be recognized by this unit The TV Guide System does not receive any data This unit can only display either the TV Guide for the digital broadcasts or for the analogue broadca...

Страница 87: ...ymbol rate information VIERA Link doesn t work Check the HDMI cable connection Check that HDMI is displayed on the front display when the power for the main unit is set to On Make sure that VIERA Link is set to On 72 Check the HDAVI Control settings on the connected device Some functions may not work if depending on the version of HDAVI Control of the connected equipment This unit supports HDAVI C...

Страница 88: ... 1 Vp p 75 S Video out PAL NTSC AV1 21 pin 1 Vp p 75 RGB out PAL NTSC AV1 21 pin 0 7 Vp p 75 Television system RF converter output Not provided Active Antenna output 5 V switched 50 mA max over current protected SD Card Slot SD Memory Card slot 1 pc Compatible media SD Memory Card 4 SDHC Memory Card 4 MultiMediaCard Format FAT12 FAT16 5 In case of SD Memory Card MultiMediaCard FAT32 5 In case of S...

Страница 89: ... record or edit However finalised DVD RW can be formatted for recording again Folder This is a place on the hard disk disc or SD card where groups of data are stored together In the case of this unit it refers to the place where still pictures JPEG and MPEG2 are stored Formatting Formatting is the process of making media such as DVD RAM recordable on recording equipment You can format DVD RAM DVD ...

Страница 90: ...aged Poor connection and lead damage can cause fire or electric shock Do not pull bend or place heavy items on the lead Grasp the plug firmly when unplugging the lead Pulling the AC mains lead can cause electric shock Do not handle the plug with wet hands This can cause electric shock Foreign matter Do not let metal objects fall inside the unit This can cause electric shock or malfunction Do not l...

Страница 91: ...cense Agreement Gracenote Proprietary Legends CD DVD Blu ray Disc and music and video related data from Gracenote Inc copyright 2000 to present Gracenote Gracenote Software copyright 2000 to present Gracenote One or more patents owned by Gracenote apply to this product and service See the Gracenote website for a non exhaustive list of applicable Gracenote patents Gracenote CDDB MusicID MediaVOCS t...

Страница 92: ... Speed Copy 70 HOLD function 75 Initialize 74 JPEG 16 40 41 89 Language Code list 80 Disc menu 70 On screen 71 Soundtrack 63 70 Subtitle 63 70 Linked timer recordings with external equipment digital satellite receiver EXT LINK 27 73 LPCM 71 89 Manual Skip 35 Menu DivX 38 39 Music 39 Setup 67 Mode Recording 25 Still Mode 70 Music 16 Copy 61 Play 37 39 Music on HDD Copy 61 Edit 51 Play 37 Name Album...

Отзывы: