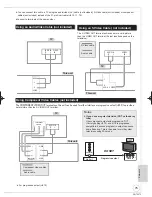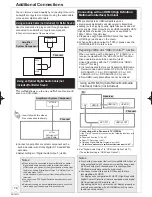
background image

61

RQT9272

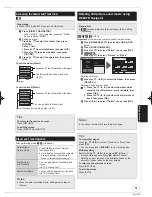
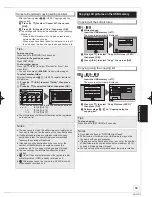
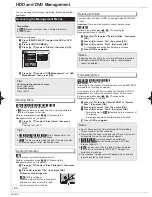
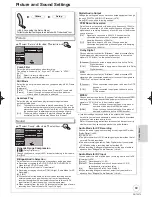
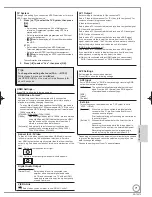
To update Gracenote

® 

Database

To update the database with information on CDs that were 
recently released, follow the instructions below.

Preparing the update data

  Visit the following website.

 http://panasonic.net/pavc/support/gn/

  Download the data to your USB memory.


 USB memory 1 GB or larger is required.


 Refer to the instruction on the website for more 

information.

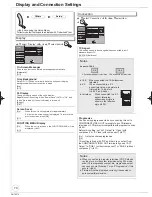
Updating the database on this unit

  Turn on this unit.

  Insert the USB memory (  77).


The menu is automatically displayed.

 Press [

] to select “Update CD database on 

HDD”, then press [OK].

 Press [

] to select “Update”, then press [OK].


Updating takes up to 20 minutes.


Do not disconnect the USB memory and the AC 
mains lead while updating.


Once started, you cannot cancel updating. A message 
appears when updating is 

fi

 nished.

 Press [OK].

Notes

 Timer recordings do not start while updating.

 Updating overwrites the internal database forcibly 

regardless of whether the data in the USB memory is the 
latest or not. Make sure you download the latest version 
from the website.

 Some of the CD title information in the database may be 

deleted after updating the database.

 No name will be assigned after copying a CD to HDD if 

the CD title information of the CD is not registered in the 

database. Even if the CD title information of that CD is 
added to the database by updating later, the information 
will not be assigned to the track/album already copied on 
the HDD. (The names will be still blank.)

 Depending on the situation of Panasonic or Gracenote, 

upgrading the Gracenote

®

 Database and providing it 

through the Web may be discontinued without notice.

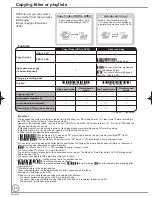
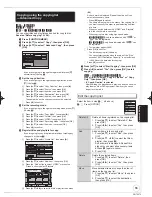
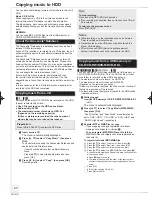
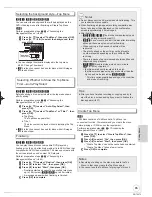
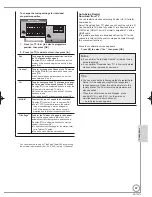
To register on a folder by folder basis

 Press [

] to select “Create List”, then press [

].

 Press [

] to select “Track/Folder”, then press [OK].

 Press [

] to select “Folder”, then press [OK].

 Press [

] to select “New item”, then press [OK].

 Press [

] to select the folder, then press [

].

A check mark is displayed. Repeat this step until you select 
all necessary items.

Press [

] again to cancel.

The items will be copied in the order of the copying list. If 

you want to specify the order, repeat selecting one item at 
a time.

 Press [OK].

To edit the copying list (  below)

 Press [

] to con

fi

 rm.

 Press [

] to select “Start Copying”, then press 

[OK].

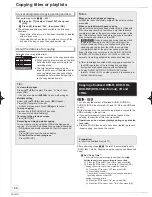
For individual 

fi

 les only

When specifying an existing folder as the copying destination

 Press [

] to select “Folder”, then press [OK].

 Press [

] to select the folder, then press [OK].

When creating a new folder as the copying destination

 Press [

] to select “Yes”, then press [OK].

  Enter the folder name (  72, Entering Text).

 Press [

] to select “Yes”, then press [OK].

Tips

To stop copying

Press and hold [RETURN] for 3 seconds.

To return to the previous screen

Press [RETURN].

Notes

 The sequence in which the MP3/WMA files are registered on 

the copy list may not be the same at the copy destination.

 If MP3/WMA files are already contained inside the copy 

destination folder, the new MP3/WMA files are recorded 
following the existing MP3/WMA files.

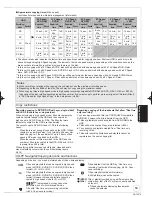
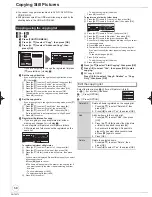
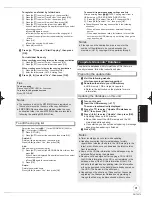
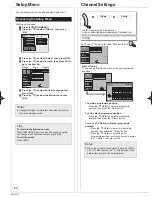
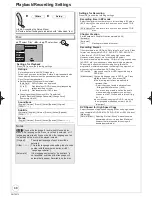
To edit the copying list

Select the item in step 

 (for a MP3/WMA 

fi

 le) (  60) or 

 (for a folder) (  above).

 Press [OPTION].

 Press [

] to select the operation, then press [OK].

Delete All:

Delete all items registered on the copying list.
Press [

] to select “Yes”, then press [OK].

Add:

Add new items to the copying list.

 Press [

] to select the MP3/WMA 

fi

 le 

fi

 le or folder, then 

press [

].

  A check mark is displayed. Repeat this step until you select 

all necessary items.


Press [

] again to cancel selection.

 Press [OK].

Delete:

Delete the selected items.
Press [

] to select “Yes”, then press [OK].

Notes

 If the space on the destination drive runs out or the 

number of files/folders to be copied exceeds the 

maximum (  19), copying will stop partway through.

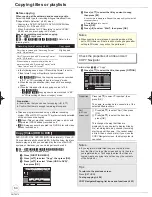
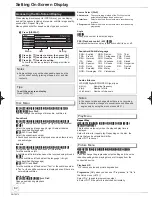
To cancel all registered copying settings and lists

After performing steps 

 (  60, Copying music from a 

USB memory or CD-R/CD-RW/DVD-R/DVD-R DL)

 Press [

] to select “Cancel All”, then press [OK].

 Press [

] to select “Yes”, then press [OK].

 The settings and lists may be cancelled in the following 

situations.
– When a 

fi

 le has been recorded or deleted at the copy 

source

– When steps have been taken, for instance, to turn off the 

unit, remove the USB memory, open the tray, change the 
copy direction, etc.

Advanced Editing

DMR-EH59EM.indb   61

DMR-EH59EM.indb   61

2009/01/09   9:30:22

2009/01/09   9:30:22

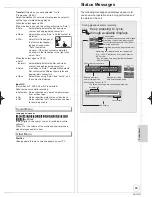
Содержание Diga DMR-EH59EM

Страница 1: ...lease keep this manual for future reference Operating Instructions DVD Recorder Model No DMR EH59EM Web Site http www panasonic europe com EM RQT9272 B Quick Start Guide P8 15 Region number supported by this unit Region numbers are allocated to DVD Recorders and DVD Video according to where they are sold The region number of this unit is 2 The unit will play DVDs marked with labels containing 2 or...

Страница 2: ...inal 12 Deep Colour 92 Convenient Functions T ti a T D s You can enjoy linked operations with the TV and receiver by using VIERA Link or Q Link Linked operations with the TV VIERA Link HDAVI Control Q Link 42 VIERA VIERA remote control DIGA You can set the Timer Recordings on Digital STB Satellite Receiver when it is connected to this unit with SCART cable EXT LINK 29 Linked timer recordings with ...

Страница 3: ...KEEP DRY Before use Remove the connector cover How to replace the fuse The location of the fuse differ according to the type of AC mains plug figures A and B Confirm the AC mains plug fitted and follow the instructions below Illustrations may differ from actual AC mains plug 1 Open the fuse cover with a screwdriver Fuse cover Figure A Figure B 2 Replace the fuse and close or attach the fuse cover ...

Страница 4: ...a fire Do not use a DC power source Check the source carefully when setting the unit up on a ship or other place where DC is used AC mains lead protection Ensure the AC mains lead is connected correctly and not damaged Poor connection and lead damage can cause fire or electric shock Do not pull bend or place heavy items on the lead Grasp the plug firmly when unplugging the lead Pulling the AC main...

Страница 5: ... not included for Better Sound 76 Using an Optical Digital Audio Cable not included for Better Sound 76 Connecting with an HDMI High Definition Multimedia Interface Terminal 76 Media Handling Disc USB Memory 77 Inserting Discs 77 Inserting Removing the USB memory 77 Disc Care 77 Additional Connections 74 Reference Troubleshooting Guide 82 When Other Panasonic Products Respond to this Remote Contro...

Страница 6: ...usceptible to damage As a basic rule save important content to a disc as backup The HDD is a device that is not built to withstand vibration shock or dust Depending on the setup environment and handling of the HDD some content may become damaged and play and recording may no longer be possible Especially during operation do not subject the unit to any vibration shock or remove the AC mains lead fr...

Страница 7: ...an damage the unit Select a position with good ventilation when installing the unit Do not block the cooling fan on the rear of the unit DVD lens cleaner RP CL720E Before moving the unit ensure the disc tray is empty Failure to do so will risk severely damaging the disc and the unit DO NOT Remote Control Information Unit Care Manufactured under license from Dolby Laboratories Dolby and the double ...

Страница 8: ... settings Select audio 36 Recording function REC Start recording 22 REC MODE Change recording mode 22 EXT LINK Linked timer recordings with external equipment 29 DIRECT TV REC Direct TV recording 27 Transmission window TV operations 73 Channel select 20 22 Show the VIDEO Plus screen 15 23 Input select Tuner AV1 AV2 AV3 DV 20 29 30 Show status messages 63 Exit the menu screen Show timer recording l...

Страница 9: ... 3 5 7 9 11 13 15 17 19 2 4 6 8 10 12 14 16 18 20 21 DMR EH59EM K VQ7AA01002 R SER NO RF RF IN IN RF RF OUT OUT AV1 TV AC IN AUDIO VIDEO VIDEO S L R R B Y P P COMPONENT COMPONENT VIDEO VIDEO OUT OUT OUT OUT PCM BITSTREAM PCM BITSTREAM DIGITAL AUDIO OUT DIGITAL AUDIO OUT OPTICAL AV2 EXT Quick Start Guide STEP 1 Disc indicator This indicator lights up when a disc that is supported by this unit is in...

Страница 10: ...ing AC mains lead included Connect only after all other connections are complete Basic Connection AV1 TV RF IN AV RF IN HDMI AV OUT HDMI IN RF OUT 1 2 3 This unit TV You can enjoy high quality picture by adding the HDMI cable connection 12 The RF coaxial cable cannot be used for showing pictures from the unit The unit must be connected using another method e g 21 pin Scart cable to show pictures f...

Страница 11: ...AERIAL RF IN AV2 EXT RF OUT RF IN DISH INPUT RF OUT AV AV TV AV VCR AV HDMI IN HDMI IN HDMI OUT HDMI AV OUT HDMI cable 1 2 3 4 5 6 You can enjoy high quality picture by adding the HDMI cable connection 12 The RF coaxial cable cannot be used for showing pictures from the unit The unit must be connected using another method e g 21 pin Scart cable to show pictures from the unit on the television set ...

Страница 12: ... Interface Cable not included Notes If connecting to equipment that is only compatible with 2 channel audio output audio with 3 channels or more will be down mixed 92 and output as 2 channels even if connecting with an HDMI cable some discs cannot be down mixed You cannot connect this unit to DVI devices that are incompatible with HDCP For display units compatible with HDCP High Bandwidth Digital ...

Страница 13: ...ithout Quick Start function and AV2 loop through in standby Off With Quick Start function and AV2 loop through in standby OK RETURN SELECT On Off Power Save Function to select On or Off then OK On It will go into the Power Save mode when the unit is in standby mode Off It is possible to start quickly from the standby mode Quick Start mode The features of the power save function when the unit is in...

Страница 14: ...he Owner ID information on TV Press and hold on the main unit for more than 5 seconds The PIN number is not displayed After 30 seconds this menu automatically disappears With the unit stopped F U N C T I O N M E N U to select Others then OK to select Setup then OK to select Others then to select Clock then OK to select Off of Automatic then OK to select the item you want to change The items change...

Страница 15: ...e Stop Start No Date HDD DVD Channel Drive space 01 AV2 23 4 WED 19 00 20 00 HDD SP OK NewTimer Programme The AV2 input corresponding to the PlusCode number is memorised Repeat steps above until you have set dummy timer recordings for each of the digital satellite stations that you will make VIDEO Plus recordings from to select each programme that you have just set then DELETE The programme is del...

Страница 16: ...e unit is switching layers Second recordable layer Inner section of the disc DVD R DL R DL When switching layers Video and audio may momentarily cut Outer section of the disc First recordable layer Playback direction The available space Title 1 Title 2 Can do Cannot do Recording Modes and Durations 26 HDD and Disc Handling Notes RAM will show an increase in available space whenever a title has bee...

Страница 17: ...ed on HDD for the type of connected TV 1 If your television is not equipped to handle PAL 525 60 signals the picture will not be shown correctly 2 Select NTSC in TV System 71 When playing back a disc or title recorded on the HDD ensure that you match the TV System setting to the disc or title PAL or NTSC 71 TV type Disc Titles recorded on HDD Yes No Multi system TV PAL NTSC PAL TV PAL NTSC 1 PAL60...

Страница 18: ...not supported Digital Cameras which require additional programme installation when connected to a PC are not supported MTP Media Transport Protocol device is not supported A multi port USB card reader is not supported Format FAT16 and FAT32 file systems are supported UDF NTFS exFAT file system is not supported Depending on the sector size some files may not work Only the first partition on USB mem...

Страница 19: ...on Technology Industries Association JEITA R R DL CD Compatible formats ISO9660 level 1 or 2 except for extended formats and Joliet This unit is compatible with multi session border except for DVD R DL however reading or play of the disc may take time if there are a lot of sessions Operation may take time to complete when there are many files tracks and or folders groups or albums some files track...

Страница 20: ...to turn the unit on SELECT INPUT to select the AV2 Select a channel on the connected equipment Watching Television Programmes Watching Television Programmes Preparation Turn on the television and select the appropriate video input to suit the connections to this unit to turn the unit on 2a CH to select desired channel 2b Enter channels directly with the numbered buttons e g 5 0 5 or 5 OK 15 1 5 No...

Страница 21: ...st Subtitles Trailer DVDTOPMENU DVD V to select an item then OK You can sometimes use the numbered buttons to select an item VCD Press the numbered buttons to select an item e g 5 0 5 15 1 5 HDD RAM R R DL RW V R R DL RW DVD V RW VR VCD CD to turn the unit on DRIVE SELECT to select the HDD or DVD drive If you selected the DVD drive OPEN CLOSE to open the tray Button located on front of the unit In...

Страница 22: ...RECTTV REC EXT LINK REC MODE REC CREATE CHAPTER RETURN PLAY x1 3 PAUSE STOP SLOW SEARCH SKIP CH SELECT INPUT 0 9 8 7 6 5 4 3 2 1 AV A A TV DRIVE SELECT DELETE MANUALSKIP AUDIO DISPLAY VIDEO Plus EXIT TIME SLIP OK OPTION PROG CHECK F U N C T I O N M E N U D I R E C T N A V A I G A T A O R CH VOL Recording Television Programmes Elapsed recording time Tips RAM RW V R RW To use a new disc formatting i...

Страница 23: ...Input PlusCode Number 0 9 and press OK VIDEO Plus Record 1 58 SP DVD 30 24 SP Remain HDD WED 23 04 08 12 53 00 The VIDEO Plus screen appears Enter the PlusCode number with the numbered buttons Press to move back to correct a digit OK Confirm the programme start and end time by TV magazine etc and correct if necessary using then OK No Channel BBC 1 15 01 Timer icon The settings are stored and the t...

Страница 24: ...RN OPTION Previous Next 11 10 Dolphines Chantal Show 2 FUNCTION MENU OK RETURN Playback Recording Delete Copy Others Drive Select Remain 30 00 SP HDD Video Picture Music to select the title then PAUSE A check mark is displayed Repeat this step until you select all necessary items Press again to cancel OK to select Delete then OK Tips To return to the previous screen Press RETURN To view other page...

Страница 25: ...s set to Video format R RW V The original aspect used for the source programme will also be used with the recording However in the following case programme will be recorded in 4 3 R RW V Programme recorded using EP or FR recordings 5 hours or longer recording modes will be recorded in 4 3 aspect HDD RAM When Recording Format is set to VR format The programme will be recorded in the original aspect...

Страница 26: ...icult When you want to record a long programme with the best picture quality possible HDD When you want to record a title to HDD so that it can then be copied to fit one 4 7 GB disc perfectly You do not need to edit the recorded title or change the recording mode when copying to fit the disc space e g Recording a 90 minutes programme to 4 7 GB DVD RAM disc If you select XP mode the programme will ...

Страница 27: ...e HDD RAM R RW V R RW This function allows specifying the length of recording time up to 4 hours Notes This function does not work during timer recording or Flexible Recording Recording stops and the set time is cleared if you press STOP The unit turns off automatically after recording finished During recording On the main unit only repeatedly until the desired time is reached The recording time a...

Страница 28: ...ress OK Notes During playing while you are recording you cannot edit or delete titles HDD RAM R RW V R RW The unit sets the best possible picture quality that fits the programme within the remaining disc space The recording mode becomes FR mode Refer to FR Flexible recording mode 26 Flexible Recording Notes You cannot record more than 8 hours Tips To exit the screen Press EXIT To stop recording pa...

Страница 29: ...T LINK The unit turns off and EXT L lights on the unit s display to indicate timer recording standby has been activated While the unit is in EXT LINK standby mode or recording most operations on this unit are prohibited OPEN CLOSE l etc When you operate press EXT LINK to cancel EXT LINK standby mode or recording The unit turns on and EXT L disappears Tips To cancel the external control Press EXT L...

Страница 30: ...ing Press Using Flexible Recording 28 you can record the content of a video cassette approx 1 8 hours to a 4 7 GB disc with the best possible quality of recording without wasting disc space DV Auto Rec Rec to HDD Rec to DVD Cancel DV unit is connected Record from the DV unit OK RETURN SELECT Turn on the DV equipment and pause play at the point you want to start recording DV Auto Rec screen may app...

Страница 31: ...from digital satellite receiver by RGB signals Preparation Make sure you connect the AV2 input terminal of this unit to VCR Scart terminal of a SKY Digital STB digital receiver with a 21 pin scart cable 11 Set AV2 Input to RGB Video or RGB 71 Set your Sky Digital STB to output RGB signals Follow the steps indicated for Manual timer recordings left Notes After setting the Personal Planner programme...

Страница 32: ...ecord because there is no more space left the number of possible titles has reached its maximum Relief Timer programmes that will be relief recorded to the HDD 2a DELETE to delete You cannot delete programmes that are currently recording 2b OK to modify the programme to make changes then OK Notes Recording stops and the timer programme is deleted Daily and weekly timer programmes remain and timer ...

Страница 33: ... at the beginning of the later programmes Programme Programme Recorded Recorded Not recorded Making timer recordings on the television e g of digital broadcasts Relief Recording When the recording drive is DVD and there is not enough remaining blank space recording automatically switches to the HDD If there is no disc in the tray or the disc cannot be recorded on or when timer recording starts whi...

Страница 34: ...ction is convenient when searching for one title to playback from many titles Press OPTION Press to select Sort then press OK Press to select the item then press OK If you select an item other than No The DIRECT NAVIGATOR screen will reappear after playback of the selected title has finished You cannot play titles continuously Skip and Time Slip will only function with the title currently being pl...

Страница 35: ... playback While paused OK Each press shows the next or previous frame Press and hold to advance or reverse frame by frame in succession Press PLAY to restart normal playback Notes If continued for approx 5 minutes slow motion play pauses automatically except DVD V VCD VCD allow slow motion in the forward direction only HDD RAM R R DL RW V R R DL This function does not work with finalised discs RW ...

Страница 36: ...ress to select item then press OK R R DL CD USB ABOUT DIVX VIDEO DivX is a digital video format created by DivX Inc This is an official DivX Certified device that plays DivX video You can play DivX video contents recorded with a computer onto DVD R DVD R DL CD R CD RW and USB memory R R DL CD USB Playing DivX video contents Show DivX Menu screen CD DivX OK RETURN DivX Menu No Title Name Tree Page ...

Страница 37: ...emaining number of plays is displayed You cannot play this content when the number of remaining plays is zero Rental Expired is displayed When playing this content The number of remaining plays is reduced by one if you press you press you press DIRECT NAVIGATOR you press or etc and arrive at another content or the start of the content being played timer recording starts on the HDD you press DRIVE ...

Страница 38: ...een right DIRECT NAVIGATOR Album View Slideshow Previous Page 01 01 Next OK RETURN OPTION Press OK to show pictures HDD 001 002 Total 5 Total 3 Date 11 12 2006 Date 11 12 2006 MUSIC PICTURE VIDEO to select the album then OK DIRECT NAVIGATOR Picture JPEG View Previous Page 001 001 Next 0001 Album Name 103__DVD 0002 0003 0004 0005 0006 0007 0008 0009 OK RETURN OPTION HDD PICTURE Slideshow e g HDD to...

Страница 39: ...e opposite rotation in step then press OK Rotation information will not be stored R R DL CD USB Still pictures When disc or album is protected When played on other equipment When copying pictures When changing date Rotate Pictures While playing a picture OPTION Rotate LEFT Rotate RIGHT OK RETURN to select Rotate RIGHT or Rotate LEFT then OK Zoom While playing a picture OPTION To zoom in Zoom in Ro...

Страница 40: ...an also select the track with the numbered buttons e g 5 0 5 15 1 5 To play music CD Tips To exit the screen Press DIRECT NAVIGATOR Playback continues Operations during play Stop Press The stopped position is memorized Press PLAY to restart from this position If is pressed several times the position is cleared The position is cleared if the unit is turned off Pause Press Press again or PLAY to res...

Страница 41: ...hing Pause Live TV You can pause the TV programme you are watching using this unit s tuner and resume later by temporarily saving it on the HDD This is useful when you have to briefly stop watching TV to run an errand If you stop Pause Live TV function then the TV programme temporarily saved on the HDD will be deleted Operations during Pause Live TV Search Press Pause Press Press PLAY to restart Q...

Страница 42: ...r Save set to Off 72 Quick Start mode this unit turns to Power Save states 13 when Power off link works so it is possible to reduce the power consumption while this unit is in standby mode Standby Power Save setting is required to be activated on the TV When turning this unit on or off without using Power off link function this unit will not turn to Power Save states Direct TV Recording VIERA Link...

Страница 43: ...want to operate with the TV remote control then press OK This function is available with the TV that supports HDAVI Control 2 or later Using the FUNCTION MENU window to operate this unit VIERA Link This function is available with the TV that supports HDAVI Control 2 or later By using the TV remote control you can play discs using the Control Panel below and display the Top Menu for DVD Video Press...

Страница 44: ...es each time you edit their contents We recommend that you edit on the HDD and then copy to disc Tips To exit the menu screens Press DIRECT NAVIGATOR To view other pages Press to select Previous or Next then press OK You can also press to view other pages Multiple editing Only Delete Set up Protection Cancel Protection Select with then press Repeat A check mark appears Press again to cancel Notes ...

Страница 45: ...K Tips For quicker editing Use Search 35 or Time Slip 35 to find the desired point To skip to the start or end of a title press start or end For better precision use Slow motion 35 and Frame by Frame 35 Notes Divided titles retain the name of the original A short amount of video and audio just before and after the division point get cut out You cannot divide a title when the resulting parts are to...

Страница 46: ...en press OK Press to select Combine then press OK The selected chapter gets combined with the next chapter HDD RAM When creating chapters in your favourite scenes you can easily reach the head of scene using SKIP or play on Chapter View Properties Edit Chapter View Table Display Create Group Release Grouping Album View Delete Refer to Chapter Operations right You can go back to the Title View Comb...

Страница 47: ...o step Press to select the source chapter you want to add to a playlist then press OK Press to cancel Press OPTION to select Create Chapter then press OK if you want to create a new chapter in the source title 46 Press to select the position to insert the chapter then press OK Press repeatedly to return to step if you want to add additional source titles Chapters are registered to the playlist Rep...

Страница 48: ...ress OPTION to display the menu list You can go back to the Playlist View Move Chapter Create Chapter Combine Chapters Delete Chapter Playlist View Add Chapter Refer to Chapter Operations right Chapter Operations Add Chapter Press to select Add Chapter then press OK 47 Creating Playlists Move Chapter Press to select Move Chapter then press OK Press to select the position to insert the chapter then...

Страница 49: ... to copy is selected Press to select the picture then press OK If Copy all pictures is selected All the still pictures in the album will be copied Press to select No to finish copying then press OK If you want to continue copying select Yes and repeat steps Only when you select Create Album Press to select Yes or No then press OK If Yes is selected You can give a name for the album 72 Entering Tex...

Страница 50: ...n other equipment Copy to DVD Copy to HDD HDD RAM Perform steps of Accessing the Album still picture Picture View 49 Press to select Copy to DVD or Copy to HDD then press OK 5a For copy to DVD RAM or HDD Press to select Start then press OK 5b For copy to DVD R Press to select Copy Finalise or Copy Only then press OK Notes Use blank discs or unfinalized discs on which JPEG images are recorded to DV...

Страница 51: ...DRIVE SELECT to select the HDD or DVD drive Press FUNCTION MENU Press to select Delete then press OK HDD RAM Press to select Picture or Music DELETE Navigator Album View Previous Page 01 01 Next OK RETURN OPTION Press OK to show pictures MUSIC HDD PICTURE VIDEO 001 002 1 1 06 Total 5 2 1 06 Total 3 Select FUNCTION MENU OK RETURN Playback Recording Delete Copy Others Drive Select Remain 30 00 SP HD...

Страница 52: ... If you select a recording mode with better picture quality than the original the picture quality does not improve However it does prevent against degradation of picture quality R DL You cannot copy in EP or FR recordings 5 hours or longer mode 3 You cannot select Top Menu or Auto Play Select If you want to set auto play select or the background colour select Top Menu or Auto Play Select in DVD Ma...

Страница 53: ...ng to it the equivalent of up to 4 hours of free space in SP mode is needed on the HDD When the number of titles recorded to the HDD and the number of titles to be copied to the DVD R DL and R DL is greater than 499 in total When playing a title recorded on both layers video and audio may momentarily cut out when the unit is switching layers 16 Regarding copying of the broadcasts that allow One ti...

Страница 54: ...hen press OK Press to select the item then press OK This changes the way that titles are displayed You can select to display titles by No recording date day channel recording start time and title name You cannot select a title if it has a check mark If you close the COPY Navigator screen the display order is cancelled Before copying When copying a title with main and secondary audio Select the aud...

Страница 55: ...07 BBC 1 10 10 FRI 008 0 30 XP BBC 1 11 10 SAT OK RETURN OPTION Previous Next Playlists VIDEO Select Press to select the title or playlist then press A check mark is displayed Repeat this step until you select all necessary items Press again to cancel The items will be copied in the order of the copying list If you want to specify the order repeat selecting one item at a time When you switch betwe...

Страница 56: ...time Press to select Copy Time then press Press to select Time Setting then press OK Setting the unit to copy all the content on the disc Press to select Off then press OK Press to confirm Copy will continue until there is not enough available recording space on the HDD Setting the copying time Press to select On then press OK Press to select Copy Time then press OK Copying titles or playlists Tip...

Страница 57: ...point Notes The screen on the right is recorded at the beginning The content is recorded as 1 title from the start of copy to the end If play does not begin automatically or if the top menu does not display automatically press PLAY to start Even if you copy a high quality video audio DVD the original picture and audio quality cannot be exactly replicated If you want to copy a title from a finalise...

Страница 58: ...pecify the order repeat selecting one item at a time To show other pages 59 To select another folder 59 Press OK to confirm Copying Still Pictures Copy HDD DVD 1 2 3 Source Destination Cancel All Copy Direction Copy Mode Create List HDD DVD PICTURE High Speed 0 FUNCTION MENU OK RETURN Playback Recording Delete Copy Others Drive Select Remain 30 00 SP HDD Video HDD to DVD Advanced Copy Edit the cop...

Страница 59: ...on Copying using the copying list Notes The sequence in which the still pictures are registered on the copy list may not be the same at the copy destination If still pictures are already contained inside the copy destination folder the new still pictures are recorded following the existing still pictures If the space on the destination drive runs out or the number of files folders to be copied exc...

Страница 60: ...will be reduced Tips To stop recording Press and hold RETURN for 3 seconds If the recording is cancelled then no tracks on the CD will be recorded To return to the previous screen Press RETURN Copying music from a USB memory or CD R CD RW DVD R DVD R DL R R DL CD USB MP3 WMA HDD You can copy MP3 or WMA files recorded on USB memory or CD R CD RW DVD R DVD R DL to the HDD by file or folder One folde...

Страница 61: ...o cancel The items will be copied in the order of the copying list If you want to specify the order repeat selecting one item at a time Press OK To edit the copying list below Press to confirm Press to select Start Copying then press OK For individual files only When specifying an existing folder as the copying destination Press to select Folder then press OK Press to select the folder then press ...

Страница 62: ...Notes You cannot make a change when there is no recording Some discs allow changes to soundtracks subtitles and angles only by using the disc s menus 21 When playing discs except for JPEG discs you can display and set the options including disc audio subtitle image quality sound effect Repeat Play etc Menu options will differ based on disc type and contents Setting On Screen Display HDD RAM R R DL...

Страница 63: ... converts it Video Select when using Auto1 and Auto2 and the content is distorted Input NR Only when AV1 AV2 AV3 or DV is selected Reduces the noise while recording Automatic Noise reduction only works on picture input from a video tape On Noise reduction works for any video input Off Noise reduction is off Select when you want to record input as is During playback and or recording STATUS Keep pre...

Страница 64: ...erformed RW V RW VR You can format only as DVD Video format on this unit RAM The disc cannot be formatted if the write protect tab left is switched to PROTECT Release the protection to continue The message Unable to format appears when trying to format discs the unit cannot use You can delete all titles on HDD or the single sided DVD RAM at once Important Once deleted contents cannot be recovered ...

Страница 65: ...ss OK to complete Notes Do not disconnect the AC mains lead while finalising This can render the disc unusable When finalising a high speed recording compatible disc it may take longer than displayed on the confirmation screen approximately 4 times longer After finalising R R DL R R DL The disc becomes play only and you can no longer record or edit it RW V You can record and edit the disc after fo...

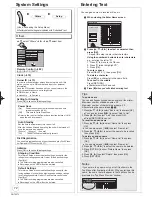
Страница 66: ... Accessing the Setup Menu All factory default settings are indicated with Underlined text Others Setup Tuning select Tuning select item OK Setup Disc Picture Sound Display Connection Tuning Manual Tuning Auto Setup Restart Others Download from TV RETURN TAB SELECT Manual Tuning You can add or delete channels or change programme positions Setup Manual Tuning Auto Setup Restart Download from TV Disc...

Страница 67: ...itle Page To enter the Teletext title page for a channel Entering title page number allows the unit to automatically record programme and channels Press or numbered buttons to enter the number then press OK To find the correct title page for the station refer to its Teletext TV guide The unit s clock must be set correctly Auto Setup Restart Download from TV You can restart auto channel setting if ...

Страница 68: ...ed to DVD R DVD R DL DVD RW DVD Video format R R DL and RW using high speed mode However screen aspect etc is restricted below We recommend turning the setting VR format if high speed copy to DVD R etc is not necessary when recording a programme This setting is effective when recording from a television programme or external equipment including DV equipment or when copying from a finalised DVD Vid...

Страница 69: ... can select the kind of audio when recording from the unit s DV IN terminal 30 Stereo 1 Records audio L1 R1 Stereo 2 Records added audio such as narration L2 R2 subsequent to original recording Mix Records both Stereo 1 and Stereo 2 When recording bilingual broadcast select the type of audio in advance from Bilingual Audio Selection left Picture select Picture select item OK Setup Picture Sound Di...

Страница 70: ...MI Settings AV1 Output RGB 2 AV2 Settings PAL TV System RETURN TAB SELECT TV Aspect This setting needs to be changed when connected to a 4 3 standard aspect TV 16 9 4 3 Letterbox Notes Aspect 4 3 16 9 4 3 16 9 4 3 standard aspect television 16 9 widescreen television 16 9 When connected to a 16 9 widescreen television 4 3 When connected to a 4 3 aspect television side picture is trimmed for 16 9 p...

Страница 71: ...s unit is connected to an amplifier with an optical digital audio cable 76 and connected to a TV with an HDMI cable and you want to enjoy the highest quality of audio from discs VIERA Link On Off Select when you do not want to use HDAVI Control AV2 Settings Set to match the connected equipment Press OK to show the following settings AV2 Input Set to RGB Video or RGB when receiving or recording RGB...

Страница 72: ...ng Others RETURN SELECT TAB Disc Clock Remote Control DVD 1 Owner ID Setting for Standby DivX Registration Initialize You can give names to recorded titles etc When viewing the Enter Name screen _ Enter Name 1 2 3 4 5 A B C a D E F d G H I N O g J K L j M m 6 7 8 9 0 b c e f h i k l n _ o Space P Q R S p T U V t W X Y Z w q r s u v x y z OK RETURN SELECT 1 2 3 4 5 6 7 8 9 0 Top Menu Preview Add to...

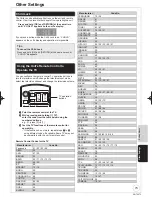
Страница 73: ...codes if available Some TVs may not be compatible with the unit s remote control TV operation buttons Remote Control Codes for the TV Manufacturer Code No Panasonic 01 02 03 04 AIWA 35 AKAI 27 30 BEJING 33 BEKO 05 71 72 73 74 BENQ 58 59 BP 09 BRANDT 10 15 BUSH 05 CENTREX 66 CHANGHONG 69 CURTIS 05 DAEWOO 64 65 DESMET 05 DUAL 05 ELEMIS 05 Manufacturer Code No FERGUSON 10 34 FINLUX 61 FISHER 21 FUJIT...

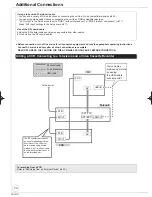
Страница 74: ...as far away as possible from other cables Do not roll up the RF coaxial cables RF IN AV RF IN RF IN HDMI OUT HDMI IN RF OUT RF OUT AV This unit TV VCR HDMI cable 21 pin Scart cable RF coaxial cable AV1 TV AV2 EXT You can enjoy high quality picture by adding the HDMI cable connection 12 To the aerial Before connection turn off the mains for all connected equipment and read the appropriate operating...

Страница 75: ...d instead of the 21 pin Scart cable 10 11 74 COMPONENT VIDEO OUT Progressive output COMPONENT VIDEO IN CRT DO NOT Using an Audio Video Cable not included Using an S Video Cable not included The S VIDEO OUT terminal achieves a more vivid picture than the VIDEO OUT terminal Actual results depend on the television AUDIO IN VIDEO IN R L AUDIO VIDEO This unit TV L R Connect to terminals of the same col...

Страница 76: ...ALIN DIGITALAUDIOOUT PCM BITSTREAM Insert fully with this side up Do not bend cable sharply AUDIO IN R L AUDIO VIDEO This unit Amplifier or System Component L R Connect an amplifier or system component with a built in decoder with Dolby Digital DTS and MPEG decoders Adjust settings in Digital Audio Output 69 Additional Connections Connecting with a Panasonic TV VIERA If the 21 pin Scart cable is c...

Страница 77: ...mage to the unit Cracked discs Discs with exposed adhesive from removed stickers or labels such as may occur with rental discs or improperly cared for discs that were previously labeled or re labeled Disc Care RAM Use cartridges to protect them from scratches and dirt Media Handling Disc USB Memory Press OPEN CLOSE to open the tray Insert a disc Cartridge disc Press OPEN CLOSE to close tray Insert...

Страница 78: ... up to 300 folders groups and 3000 files tracks on a disc with MP3 WMA or still picture 17 19 You cannot write to a CD R or CD RW with the unit Setup Page How can I enjoy High Quality Video up converted to 1080p Connect the unit to 1080p compatible HDTV using an HDMI cable Set HDMI Video Format in the Setup menu to 1080p 12 71 What equipment is necessary to play multi channel surround sound You ca...

Страница 79: ... As long as the recording equipment is compatible with 48 kHz sampling frequency 69 You cannot record MP3 or WMA signals Can I switch to bilingual broadcast during recording With HDD and DVD RAM you can Just press AUDIO When Recording Format is set to VR format With DVD R DVD RW DVD Video format R RW you cannot Change before recording with Bilingual Audio Selection in the Setup menu 69 USB Page Wh...

Страница 80: ... SP LP and the numbers are examples Available space on the HDD or disc The example SP 35 50 is displayed when less than 100 hours areavailable and the example LP 151h is displayed when over 100 hoursare available SP and LP are recording modes 35 50 means 35 hours 50 minutes and 151h means 151 hours UNSUPPORT You have inserted a disc the unit cannot play or record onto 16 17 You tried to operate wi...

Страница 81: ... ensure that the Destination Capacity is not exceeded 55 58 This is a non recordable disc The disc may be dirty or scratched The unit cannot record on the disc you inserted Insert a DVD RAM or unfinalised DVD R DVD RW DVD Video format R or RW disc 16 Unable to format The disc may be incompatible or of poor quality 16 17 This disc is not formatted properly Format it using DVD Management in FUNCTION...

Страница 82: ...ndicator appears on the unit s display Change the code on the remote control to match the code displayed for the main unit step To Reset This Unit To reset the unit s settings To reset the ratings level settings To restore the unit if it freezes With the unit stopped Press OPEN CLOSE to open the disc tray Press DRIVE SELECT to select the DVD drive On the main unit Press and hold REC and x1 3 for a...

Страница 83: ...oes not indicate a problem with the unit Regular disc rotating sound Poor reception due to atmospheric conditions Image disturbance during search Periodic interruptions to the reception due to digital satellite broadcasting breaks Operations are slow to respond when Power Save is set to On Operations are not working due to a poor quality disc Try again using a Panasonic disc The unit freezing due ...

Страница 84: ...s carrying out the recovery process The disc may be defective Do the following to eject the disc Try another disc 1 Press I on the main unit to switch to standby mode If the unit doesn t switch to standby mode reset the unit 82 To restore the unit if it freezes 2 While the unit is turned off press and hold and CH on the main unit at the same time for about 5 seconds Ejection may take extra time de...

Страница 85: ...ake sure that VIERA Link is set to On 71 Check the HDAVI Control settings on the connected device Some functions may not work depending on the version of HDAVI Control of the connected equipment This unit supports HDAVI Control 4 functions If the connection for the equipment connected with an HDMI cable was changed or if there was a power failure or the plug was removed from the household mains so...

Страница 86: ...rm the timer recording is going to work properly turn the unit on The 4 3 aspect ratio picture expands left and right Screen size is wrong Use the TV to change the aspect If your TV does not have that function set Progressive in the Picture menu to Off 62 If you connect an HDMI cable set Aspect for 4 3 Video in the Setup menu to 16 9 71 Check the settings for TV Aspect in the Setup menu 70 It may ...

Страница 87: ...2 74 76 Try connecting an alternative cable Cannot switch audio You have used a digital connection Set Dolby Digital to PCM or connect using audio cables analogue connection 69 76 There are discs whose audio cannot be changed due to how the disc was created You cannot switch the audio in the following cases When a DVD R DVD R DL DVD RW DVD Video format R R DL or RW disc is in the disc tray while D...

Страница 88: ...ot played Ensure the DVD Video region number for the disc is correct and the disc is not defective You have set a ratings level to limit DVD Video play Change this setting Cover 68 Alternative soundtrack and subtitles cannot be selected The languages are not recorded on the disc You may not be able to use the on screen menus to change the soundtrack and subtitles on some discs Use the disc s menus...

Страница 89: ...o format R R DL and RW discs recorded on this unit may not be recordable on other Panasonic DVD Recorders This unit cannot record NTSC signals to discs that already have PAL signal recordings However both types of programmes can be recorded onto the HDD Play of discs recorded with both PAL and NTSC on another unit is not guaranteed 71 Some broadcasts are copyright protected 16 25 92 Timer recordin...

Страница 90: ...pect R R DL RW V If recorded in 16 9 aspect using EP mode or FR recordings 5 hours or longer mode R R DL RW Titles recorded on other Panasonic DVD recorders with Recording Format Rec for High Speed Copy set to Video format On and then copied to the HDD on this unit may not copy to R R DL or RW discs with high speed copy When copying it takes a long time even in high speed mode Use a disc that is c...

Страница 91: ...lan 6765 Gujarati 7185 Lingala 7678 Rhaeto Romance 8277 Tatar 8484 Cannot edit You may not be able to edit on the HDD if there is no available space Delete any unwanted titles to create empty space 24 44 64 Cannot format The disc is dirty Wipe with a damp cloth and then wipe dry 77 Disc may be defective or of poor quality You tried formatting a disc that is not compatible with the unit 64 Cannot c...

Страница 92: ...t makes play of a recorded CD R CD RW DVD R etc possible on equipment that can play such media You can finalise DVD R DVD R DL DVD RW DVD Video format R and R DL on the unit After finalising the disc becomes play only and you can no longer record or edit However finalised DVD RW can be formatted to become recordable Folder This is a place on the hard disk or disc where groups of data are stored to...

Страница 93: ...e and the Powered by Gracenote logo are trademarks of Gracenote Gracenote End User License Agreement USE OF THIS PRODUCT IMPLIES ACCEPTANCE OF THE TERMS BELOW This application or device contains software from Gracenote Inc of Emeryville California Gracenote The software from Gracenote the Gracenote Software enables this application to perform disc and or file identification and obtain music relate...

Страница 94: ...rid VBR Video In PAL NTSC AV1 AV2 21 pin AV3 pin jack 1 Vp p 75 termination S Video In PAL NTSC AV2 21 pin AV3 S terminal 1 Vp p 75 termination RGB In PAL AV2 21pin 0 7 Vp p PAL 75 termination Video Out PAL NTSC AV1 AV2 21 pin Video Out pin jack 1 Vp p 75 termination S Video Out PAL NTSC AV1 21 pin S Video Out S terminal 1 Vp p 75 termination RGB Out PAL NTSC AV1 21 pin 0 7 Vp p PAL 75 termination...

Страница 95: ... IN HAZARDOUS RADIATION EXPOSURE DO NOT OPEN COVERS AND DO NOT REPAIR YOURSELF REFER SERVICING TO QUALIFIED PERSONNEL CAUTION DO NOT INSTALL OR PLACE THIS UNIT IN A BOOKCASE BUILT IN CABINET OR IN ANOTHER CONFINED SPACE ENSURE THE UNIT IS WELL VENTILATED TO PREVENT RISK OF ELECTRIC SHOCK OR FIRE HAZARD DUE TO OVERHEATING ENSURE THAT CURTAINS AND ANY OTHER MATERIALS DO NOT OBSTRUCT THE VENTILATION ...

Страница 96: ...26 FUNCTION MENU Window 41 Gracenote database 60 HDAVI Control 12 42 43 71 76 HDMI 12 71 76 High Speed Copy 25 Initialize 72 JPEG 19 38 39 92 Language Code list 91 Disc menu 68 Soundtrack 62 68 Subtitle 62 68 Linked timer recordings with external equipment SKY Digital STB satellite receiver Ext Link 29 71 LPCM 69 92 Manual Skip 35 Menu DivX 36 37 MP3 37 Setup 66 WMA 37 Mode Recording 26 Still Mode...

Отзывы: