background image

Channel Preset

Categor

y Setting

Up to 6 channels can be preset in XM1, XM2, and XM3 respec-
tively.
Preset channels can be simply called up by pressing 

[1]

to

[6]

.

1

Select a channel.

2

Hold down 

[1]

to

[6]

for more than 2 sec-

onds.

(blinks once)

Notes:

¡

New channels overwrite existing saved channels.

¡

Because preset memory setting is performed with service
IDs in each channel, a channel may switch to another that
has been stored under the same service ID when calling up
a preset channel. However, broadcasting contents are the
same as what the stored channel provides.

Category On/Off

1

Hold down 

[BAND]

to switch category

mode ON or OFF.

The following functions are available when the category mode
is active.

¡

Enables category switching.

¡

Enables channel selection only within the category selected
by category switching.

Category Selection

1

Press

[

}

]

or

[

{

]

to display the category

name.

2

Press

[

}

]

or

[

{

]

while the category name

is displayed. Seeking will start.

XM Satellite Radio indicator

Channel

Preset Number

Band

Display change

Press

[DISP]

to change the display.

XM Satellite Radio Source Display

Band/channel

Channel name

Artist name

Song name

Category name

Clock time

Содержание CQC1301U - AUTO RADIO/CD DECK

Страница 1: ...E SCROLL RANDOM SCAN REPEAT SQ P U S H S E L T U N E T R A C K FOLDER DISC BAND 1 2 3 4 5 6 PWR CLOCK VOL SRC DISP APM D M D M CQ C1401U TEXT Only for CQ C1401U Please read these instructions including Limited Warranty and Customer Services Directory carefully before using this product and keep this manual for future reference English ...

Страница 2: ...ATION OF THE ELECTRICAL SAFETY SYSTEM RESULTING IN DAMAGE TO THE VEHICLE AND PERSONAL INJURY OR DEATH Never use safety related components for installation grounding and other such functions Do not use safety related vehicle components fuel tank brake suspension steering wheel pedals airbag etc for wiring or fix ing the product or its accessories Installing the product on the air bag cover or in a ...

Страница 3: ...rts will cause the interior of the unit to over heat and will result in fire or other damage Do not install the product where it is exposed to strong vibrations or is unstable Avoid slanted or strongly curved surfaces for installation If the installation is not stable the unit may fall down while driving and this can lead to an accident or injury Installation Angle The product should be installed ...

Страница 4: ...1 877 833 8855 Accessory Purchases Purchase Parts Accessories and Instruction Books online for all Panasonic Products by visiting our Web Site at http www pasc panasonic com or send your request by E mail to npcparts panasonic com You may also contact us directly at 1 800 332 5368 Phone 1 800 237 9080 Fax Only Monday Friday 9 am to 8 pm EST Panasonic Services Company 20421 84th Avenue South Kent W...

Страница 5: ...ther than CD DA data or MP3 WMA Video CD etc Be sure to observe the instructions of the CD R RW disc for handling it Recording MP3 WMA files on a CD media You are recommended to minimize the chances of mak ing a disc that contains both CD DA files and MP3 WMA files If CD DA files are on the same disc as MP3 or WMA files the songs may not play in the intended order or some songs may not play at all...

Страница 6: ...ber of files 999 Maximum number of files in one folder 255 Maximum depth of trees 8 Maximum number of folders 255 Root folder is includ ed Notes This unit counts the number of folders irrespective of the presence or absence of MP3 WMA file If the selected folder does not contain any MP3 WMA files the nearest MP3 WMA files in the order of playback will be played Playback order may be different from...

Страница 7: ...ur Hours set sets the hour ahead sets the hour back 4 Press DISP CLOCK Minutes blinks 5 Adjust the minute Minutes set sets the minute ahead sets the minute back 6 Press DISP CLOCK Complete Notes ADJUST is displayed before adjusting the clock Hold down or to change numbers rapidly Clock Display at Power Off Press DISP to change the display Clock Setting Display off Clock display ACC ON Battery Inst...

Страница 8: ...t down for more than 2 seconds toggles category mode on off in the XM Satellite Radio source CQ C1401U SRC SOURCE selects a source POWER toggles power on off MUTE toggles mute on off DISP Display switches the information on display and exits the audio menu VOL volume adjusts the volume and selects the value in the audio menu etc 0 to 9 selects a preset station channel 1 to 6 presets the current st...

Страница 9: ...pes at the touch of button in accordance with your listening music type Press SQ to select the sound type as follows Note Settings of SQ bass and treble are influenced one another If such an influence causes distortion to the audio signal readjust bass treble or volume MUTE toggles mute on off Remote Control Sensor VOL Volume SRC Source selects a source PWR Power toggles power on off SQ Sound Qual...

Страница 10: ... Hold it down for more than 2 seconds DISP Display switches the information on the display SRC Source selects a source 1 to 6 selects a preset station in the radio source and presets the current station Hold it down for more than 2 seconds Operation Flow 1 Press SRC to select the radio source 2 Press BAND to select a band 3 Select a station Frequency adjustment TUNE Lower TUNE Higher Note Hold dow...

Страница 11: ...est receiving conditions are received for 5 seconds each after presetting the stations SCAN To stop scanning press one of the buttons from 1 to 6 Note New stations overwrite existing saved stations Manual station preset 1 Tune into a station 2 Hold down one of the preset buttons from 1 to 6 for more than 2 seconds blinks once Note New stations overwrite existing saved stations lights while receivi...

Страница 12: ...off once and turn it on again then press u Eject Do not insert foreign objects into the disc slot CQ C1401U MUTE SCROLL RANDOM SCAN REPEAT SQ P U S H S E L T U N E T R A C K FOLDER DISC BAND 1 2 3 4 5 6 PWR CLOCK VOL SRC DISP APM D M D M BAND 3 4 5 6 SRC DISP Disc slot takes a disc in with the printed side facing up Notes The power will be turned on automatically when a disc is loaded A disc which...

Страница 13: ...sequence Hold down 5 SCAN for more than 2 sec onds Hold down again to cancel Display change Press DISP to change the display Player Source Display CD DA mode display Track number Play time Play Mode indicators MP3 WMA mode display Folder number lights when folder random repeat scan is on File number Play Mode indicators CD Changer mode display CQ C1401U Track number Disc number Play time Play Mode...

Страница 14: ...in the audio menu 2 seconds in Main volume adjust ment the display returns to the regular mode 2 Press VOL PUSH SEL to select a mode to be adjusted 3 Turn VOL clockwise or counterclock wise to adjust Setting Range 0 to 40 Default 18 q Up w Down Setting Range 12 dB to 12 dB by 2 dB Default 0 dB q Increased w Decreased Setting Range 12 dB to 12 dB by 2 dB Default 0 dB q Increased w Decreased Setting...

Страница 15: ...ired to sign up to become an XM Satellite Radio sub scriber After checking your XM Satellite Radio ID sign up on the XM s website or by calling them 1 Check of XM Satellite Radio ID Write down the ID indicated on the lower right of your XM receiver XMD1000 Check the ID shown by tuning your XM Radio to chan nel 0 Refer to Channel adjustment RADIO ID display 2 Activate the XM Satellite Radio Select ...

Страница 16: ...nnel However broadcasting contents are the same as what the stored channel provides Category On Off 1 Hold down BAND to switch category mode ON or OFF The following functions are available when the category mode is active Enables category switching Enables channel selection only within the category selected by category switching Category Selection 1 Press or to display the category name 2 Press or...

Страница 17: ...se it to water or excessive moisture Do not remove the face plate while driving your car Do not place the face plate on the dashboard or nearby areas where the temperature rises high Do not touch the contacts on the face plate and the main unit since this may result in poor electrical contact If dirt or other foreign substances get on the contacts wipe them off with a clean and dry cloth Face Plat...

Страница 18: ...y The disc is dirty or is upside down Check the disc The disc is ejected automatically The disc has scratches Check the disc No operation by some cause If normal operation is not restored con sult your dealer or the nearest Servicenter to ask for repairs Cannot read the file Check the file A WMA file can be copyrighted The file protected by copyright is not playable No disc is in the CD Changer ma...

Страница 19: ... re install an installed unit if applica ble travel to and from the sevicer and loss of media data or other mem ory contents The items listed are not exclusive but are for illustration only ALL EXPRESS AND IMPLIED WARRANTIES INCLUDING THE WARRANTY OF MERCHANTABILITY ARE LIMITED TO THE PERIOD OF THE LIMITED WARRANTY Some states do not allow the exclusion or limitation of incidental or con sequentia...

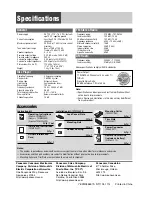
Страница 20: ...DISP General Power supply DC 12 V 11 V 16 V DC test volt age 14 4 V negative ground Current consumption Less than 2 2 A CD mode 0 5 W 4 channels Maximum power output 50 W x 4 at 1 kHz volume control maximum Tone adjustment range Bass 12 dB at 100 Hz Treble 12 dB at 10 kHz Speaker impedance 4 8 Ω Pre amp output voltage 2 5 V CD mode 1 kHz 0 dB Pre amp output impedance 200 Ω Subwoofer output voltage...

Страница 21: ......

Страница 22: ......

Страница 23: ......

Страница 24: ......

Отзывы: