background image

Содержание CN-DV2000EN

Страница 1: ...VD SPIELER CN DV2000EN DVD DVD dulaw qe ice Be OM ad e OIGITAL IS OSG Please read these instructions carefully before using this product and save this manual for future use ese Bedienungsanieitung vor...

Страница 2: ...fety When Driving Keep the volume level low enough to be aware of road and traffic conditions When Car Washing Do not expose the product to water or excessive moisture This could cause electrical shor...

Страница 3: ...g System is a position detecting system utilizing the signals from GPS satellites deployed by the U S Defense Department The CN DV2000EN Mobile Navigation System has the following spe cial features De...

Страница 4: ...nt Position 40 Marking Any Point on the Map we 40 Changing a Marked Point Icon 41 Renaming a Marked Point rt 42 Deleting a Marked Point 43 Setup Menu 44 Basic Setup Menu Operations 44 Map 45 Route see...

Страница 5: ...eines Namens Aenpagened 130 Loschen eines markierten Punktes 134 132 132 133 Set up Meni _ Inhalt des Setup mentis karte Route 135 System Praferenzen 137 Zustandsinformationen 139 Uberprtifen der gep...

Страница 6: ...nic and its suppliers and licencors maqke no guarantees representations or warranties of any kind express or implied arising by law or otherwise including but not limited to content quality accuracy c...

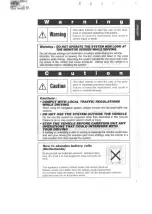
Страница 7: ...MPLY WITH LOCAL TRAFFIC REGULATIONS WHILE DRIVING When using the navigation system always comply with the local traffic reg ulations DO NOT USE THE SYSTEM OUTSIDE THE VEHICLE Do not use the system for...

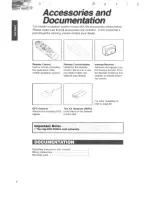
Страница 8: ...or the Remote Receives the signals from the operations of the Control Mount it in a loca the Remote Control Point mobile navigation system _tion where it does not the Remote Control at this obstruct y...

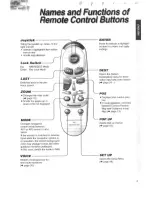
Страница 9: ...the map scale page 15 Scrolls the pages up or down of the list displayed POS Displays your current posi tion In route guidance switches between Current Position Map and Guidance mode Map page 13 POP U...

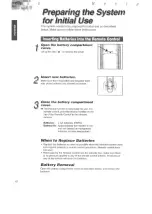
Страница 10: ...point the infrared emitter on the top of the Remote Control to the infrared receiver Batteries 2 AA batteries R6PU Battery life Approximately five months in nor mal use based on manganese batteries a...

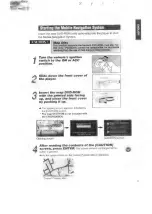
Страница 11: ...ACC 1 Turn the vehicle s ignition position Slide down the front cover of 2 the player Insert the map DVD ROM with the printed side facing up and close the front cover by pushing it up The opening scr...

Страница 12: ...rt driving until the opening screen closes The map displayed when you first turn on the player will show a different area from where your vehicle is currently located The map display will change to yo...

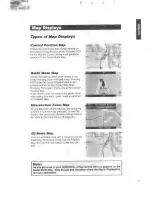
Страница 13: ...nt Position Map if you deviate from the route in the guide mode after setting that route guide mode is switched to 2D Mode Map Intersection Zoom Map As you approach an intersection the upcoming juncti...

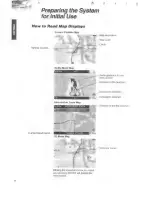
Страница 14: ...Map fam Map orientation Vehicle position Arrow guidance for the next junction Distance to the next turn Destination direction _ Destination distance Distance to the the next turn Current Road Name Cr...

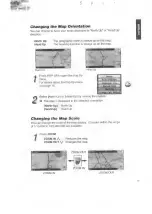
Страница 15: ...the Pop Up menu see page 16 wepear 1 Press POP UP to open the Pop Up Select North Up or Head Up by moving the joystick The map is displayed in the selected orientation North Up North Up Head Up Head U...

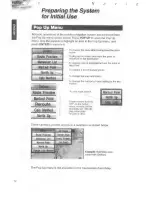
Страница 16: ...nt of departure to the destination To display a list of destinations from the point of departure To register a list of marked points To change the map orientation To change the method of route setting...

Страница 17: ...Check Informatior pax Cena ey Speed Fase acs Oe Perform the following operations and confirm that the 4 lights on the car illus tration come on Turn on the sidelights Side Light lamp on Pull the side...

Страница 18: ...stance deviations automatically based on GPS data To be able to use the system effectively in the following cases make sure to carry out the procedure described below c 2 i Before initial use After a...

Страница 19: ...driving until the opening screen closes Drive at an average speed of at least 20 km per hour in the open area is good The mobile navigation system uses GPS data for distance correction Make sure that...

Страница 20: ...n the Set Up Menu Information Sot Up Menu Information 7 menu select GPS and press ENTER The GPS Information menu opens with the following information Satellite number Latitude and longitude of the cur...

Страница 21: ...nu will cause the message WARNING to be displayed Ay Press ENTER Ps 2 The warning is inhibited and you Oo can operate the system When the display returns to the Current Position Map after the operatio...

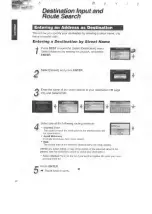
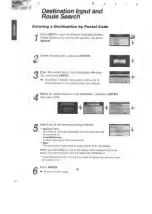
Страница 22: ...ries hotels airport etc History Recent destinations Destinations stored in your point memory Destinations selected directly from the map display To input a destination selected from addresses intersec...

Страница 23: ...4 Select the desired street name from the The street name is registered Example Entering a street name If Hamburg Hamburg for example is shown on the list display Hamburg indicates the name of a stree...

Страница 24: ...he street closest to your destination page 23 and Select END Shortest Time The route to reach the destination in the shortest time will be searched for Avoid Motorway Exclude motorways from route sear...

Страница 25: ...ame of your destination city page 23 Shortest Time The route to reach the destination in the shortest time will be searched for Avoid Motorway Exclude motorways from route search Map The vicinal area...

Страница 26: ...Select the street closest to your destination and press ENTER and select END A Shortest Time The route to reach the destination in the shortest time will be searched for Avoid Motorway Exclude motorw...

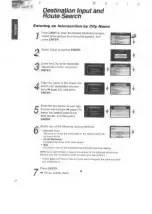
Страница 27: ...ross Street from the list and then press 4 Enter the first letters of your destination intersection page 23 ENTER Shortest Time The route to reach the destination in the shortest time will be searched...

Страница 28: ...f your des tination intersection page 23 select the target Cross Street from the list and then press ENTER 1 Shortest Time The route to reach the destination in the shortest time will be searched for...

Страница 29: ...item is not available Select your destination from the list on the Select POI menu and press ENTER Select any of the following routing methods Shortest Time The route to reach the destination in the s...

Страница 30: ...ithin the city where you currently are Select your destination from the list on the Select POI menu and 4 press ENTER Shortest Time The route to reach the destination in the shortest time will be sear...

Страница 31: ...laces in the selected category within 10 km from the current position Select your destination from the list on the Select 4 POI menu and press ENTER Select any of the following routing methods Shortes...

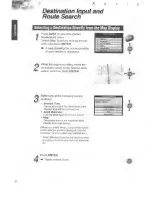
Страница 32: ...destination in the shortest time will be searched for Avoid Motorway Exclude motorways from route search Map The vicinal area of the selected street directly from map display 3 Select any of the follo...

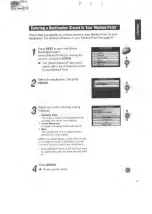
Страница 33: ...open the Select Select the destination and press 2 ENTER methods Shortest Time The route to reach the destination in the shortest time will be searched for Avoid Motorway Exclude motorways from route...

Страница 34: ...desired desti nation and then press ENTER Select any of the following routing methods Shortest Time The route to reach the destination in the shortest time will be searched for Avoid Motorway Exclude...

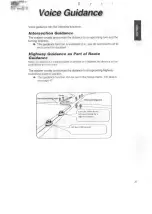
Страница 35: ...et it and cannot be disabled Highway Guidance as Part of Route Guidance When you approach a branching point or junction on a highway the distance to that point will be given by voice The system vocall...

Страница 36: ...A map display allows you to preview the all the way of your route 1 Press POP UP repeat fy Select Route Preview by moving the 2 joystick and press ENTER A map showing the all the way of your route is...

Страница 37: ...joystick and press ENTER Up to three routes including the current one are displayed Select a route by moving the joystick and press ENTER 3 Select Alt Route and press ENTER A search is made for a rou...

Страница 38: ...arch Confirm that all streets you want to avoid are displayed in gray and then select End 4 Select the streets you want to avoid A search is made for a route that takes you to multiple destinations or...

Страница 39: ...for the third and subsequent via points adding a via point between your current location and the first via point and between the sec ond via point and the destination Press ENTER 5 The Select Destinat...

Страница 40: ...Any Point on the Map 4 Place the crosshairs cursor on the Crrer a ae 1 point you want to mark on the map Eel i my a and press POP UP f 2 Select Marked Point by moving the joystick and press ENTER Name...

Страница 41: ...t Edit Marked Point by moving to change and press ENTER The User PO Information menu for the selected marked point opens 3 Select the name whose icon you want 4 Select Icon and press ENTER 5 Select an...

Страница 42: ...information 4 and press ENTER The User PO Information menu ie for the selected marked point AHRENFELD HAMBURG opens Select Name and press ENTER Input Name rates AAA 5 eetefe fetal mem wht2 Ban ane ea...

Страница 43: ...stor 1 Press SET UP Select Edit and press ENTER 2 A list of marked points is displayed press ENTER The User POI Information menu for the selected marked point opens 3 Select the point you want to del...

Страница 44: ...the Setup menu 3 tes G 1 1 Press SET UP Menu select the menu you want to set by moving the joystick and press ENTER The parameters that can be set on each menu are described in detail on the fol lowi...

Страница 45: ...e driving Auto Day is automatically switched to Night when the headlights are turned on Default setting Auto Color Lets you choose one of the following three background colors for map displays Green B...

Страница 46: ...proach the intersection On Intersection Zoom in Map is displayed Off Intersection Zoom in Map is not displayed Default setting On POI Icon This lets you specify to have icons displayed on the map for...

Страница 47: ...features Merge Highway junctions Advisory Tunnels toligates etc Branch Highway branching points Default setting On Detour Km This lets you specify the distance for a route that detours the originally...

Страница 48: ...another route search made to guide you back to your origi nal route after having deviated from it On To search Off Not to search Default setting On Route Guidance This lets you delete all set routes f...

Страница 49: ...nable the beep produced when operating the buttons on the remote control On Beep sounds Off No Beep sounds Default setting On Voice Feedback Voice guidance will be repeated On Voice Feedback enabled O...

Страница 50: ...distances shown Set Up Menu System in meters or miles tS anneal taper Metric Meters ot _ Imperial mile Default setting Metric DST Summer Time This lets you activate daylight saving time On Daylight sa...

Страница 51: ...ile navi gation system is properly wired to the vehicle GPS Receiving This lets you check the reception status of GPS signals Version This lets you check the mapping software ver sion of your mobile n...

Страница 52: ...ed automatically at the location of a marked point or not Here you can move the current vehicle position indicator to any point on the map display Important Note Normally this operation is not necessa...

Страница 53: ...r in the following places In tunnels Among high rise Under elevated roads In wooded areas buildings If you have a roof carrier on your vehicle install the GPS antenna away from the roof carri er The G...

Страница 54: ...h a speed sensor it enables the system to display the current vehicle position even in locations where GPS sig nals may be blocked Positioning Accuracy In the following situations your vehicle positio...

Страница 55: ...f a new road or other reasons A cm may also show roads that permit one way traffic only for example There may be cases where the route remains unchanged after another search A congested route may be s...

Страница 56: ...ned route may continue even after you have deviated from that route e g turned too early The Intersection Zoom Map may not always agree with the actual shape of the intersec tion For certain shapes of...

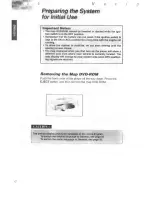
Страница 57: ...using the optional connection cable For connecting procedure and other details refer to the separate installation manual and the operating instructions of your audio system 1 Eject the map DVD ROM and...

Страница 58: ...ubtitle languages available on the disc Multi angle Allows you to view multi angle recorded images from different angles The number in the mark shows the number of angles available on the disc Powerfu...

Страница 59: ...hapter2 Std Video CD A video CD is video material using a CD Compact Disc as storage medium The CD ROM contains compressed video data divided by con tents into numbered tracks You can specify a track...

Страница 60: ...ovies and videos play on which DVD players The world is divided into regions from 1 to 6 A DVD with the Region No 2 A DVD marked ALL will play anywhere in the world Individual Property Rights This pro...

Страница 61: ...tle Chapternumber input Changes the angle Title Chapter number input Title Chapter number input Title Chapter number input Title Chapter number input Title Chapter number input Title Chapter number in...

Страница 62: ...ining multiple Passion s ove titles or a video CD provided with Playback Control the Title menu shown on the right appears Proceed as follows to start playback The Title menu is displayed different fo...

Страница 63: ...pid Reverse Press SEARCH Rapid Advance or SEARCH 4 Rapid Reverse Search Speed Two search speeds are available Pressing once 1 5 times as fast as the playback speed Pressing twice 10 times as fast as t...

Страница 64: ...s follows each time TITLE CHAPTER is pressed DVD Videos Title Number Input Screen Example Title No input mode Chapter No input mode regular play Video CDs Track No input mode regular play Enter the Ti...

Страница 65: ...mber of the title currently being played 3 Chapter Track Shows the number of the chapter track currently being played 4 Time Shows the time that has elapsed since the start of playback After resuming...

Страница 66: ...rrently selected subtitle language is displayed SUBTITLE 7 the number of the desired subti 2 Keep pressing SUBTITLE until m tle language is displayed the indication on the package With some DVDs the s...

Страница 67: ...number of the desired soundtrack language is dis played 2 Keep pressing AUDIO until i ATTENTION The number of audio soundtrack languages available varies foraitfer ent DVDs check the indication on the...

Страница 68: ...GLE during play The number of the cur rently selected angle is displayed ANGLE the number of the desired 2 Keep pressing ANGLE until angle is displayed foriferent dace checkthe ease me vs a viinstruct...

Страница 69: ...other than the five above Enter the corre sponding Language Code page 74 with the numeric buttons The setting is applied and the display returns to the Set Up Mode menu Subtitle Language This lets you...

Страница 70: ...than the five above Enter the corre sponding Language Code page 74 with the numeric buttons The setting is applied and the display returns to the Set Up Mode menu V Aspect This lets you select the ap...

Страница 71: ...playing a 16 9 aspect DVD video the outer parts of the picture will be cut off as shown on the right Letterbox When playing a 16 9 aspect DVD video a black band will appear at the right and left of t...

Страница 72: ...OFF Not displayed Select ON or OFF and press ENTER The setting is applied and the display returns to the Set Up Mode menu Audio Output Level This lets you set the audio output level Default setting 3...

Страница 73: ...nabled OFF Disabled 3 Select ON or OFF and press ENTER The setting is applied and the display returns to the Set Up Mode menu Choose the appropriate type for your monitor Default setting Type 1 4 Pres...

Страница 74: ...talian Hebrew Japanese Yiddish Javanese Georgian Kazakh Greenlandic Cambodian Kannada Korean Kashmiri Kurdish Kirghiz Latin Lingala Laothian Lithuanian Latvian Lettish Malagasy Maori Macedonian Malaya...

Страница 75: ...he infered receiver The light sensor is improp erly wired Your car position has changed while was ACC OFF Car transported by ferry Car turned on a turntable at a car parking facility Car moved by a to...

Страница 76: ...Beep was set improperly during monitor setup Map disc is wet due to con densation scratches or dirts Turn the beep on Check if distance compen sation has been completed See page 86 Read the manual an...

Страница 77: ...ns were performed Input Destination Change your destination and route and repeat route search Insert the specified map disc Check the map disc Check if the map disc is wet due to condensation scratche...

Страница 78: ...de down and when the disc cannot be played with this player Eject the disc and check it Appears on the display when the DVD disc with region No other than 02 is played Confirm the disc on which the re...

Страница 79: ...2 hours to allow the player to dry This player cannot play discs other than DVDs Video CDs and CDs The disc may be dirty and may require cleaning Ensure that the disc is inserted with the label side...

Страница 80: ...ot be selected by switching the audio soundtrack subtitle language Try selecting it from the DVD menu if one is available This function is dependent on software availability Even if a disc has a numbe...

Страница 81: ...anguages Text is limited The disc does not contains multiple viewing angles You haven t come to a scene which permits angle change Stop the vehicle is set the Read the manual for TV oper terminal then...

Страница 82: ...ure to do so may result in damage to the unit 3 Connect the power cord after all other connections are made 4 Be sure to connect the YELLOW lead to the positive terminal of the battery or to the fuse...

Страница 83: ...e main unit on its side or upside down This may cause malfunctions Cm 10 Install the main unit in horizontal position t The permissible tilt is within 10 side to side and within 30 front to back Withi...

Страница 84: ...g tabs out with a screwdriver Mounting Tab Dashboard 1 Mounting Collar Screwdriver 2 Attach Mounting Plates 16 ES Mounting Hole Secure Mounting Plates 16 on both sides of the unit with a screwdriver U...

Страница 85: ...Screw 3mm Optional Od 2 _ 6 Hex Nut 2 Rear Support 5 Mounting Bolt Strap 1 Mounting Collar 5 Mounting Bolt 1 Mounting Collar 4 INstall Trim Plate 5 5 After installation reconnect the 19 Trim Plate neg...

Страница 86: ...3m Light green SPEED c CAUTION Ask the shop where the Engine Control Computer Unit ecu Do not cut excess length of cord Bundle itand fasten with tape Connecting the Cut hore Reverse Cord ied tetuanpn...

Страница 87: ...stem se To monor vdeo pst weuowy bs AGA Junction Cabla option ELS TES monitor auto wns ACA Plug For connection to AUX input a connector of tuner a he Video Control Cord VIDEO CONT to use the CY VM1200...

Страница 88: ...Installation inside the Vehicle Dashboard or Rear Tray Recommended Install the antenna in horizontal position on the dashboard or in the center of the rear tray near the rear window Install the anten...

Страница 89: ...s and GPS reception after installation and wiring HSITINA Connection Check Press SET UP Select Wiring Check Select Information and and press ENTER press ENTER GPS Check GPS Information Press SET UP Se...

Страница 90: ...n screen DVD video PAL 1 0 Vp p 75 ohms RCA pin jack DVD video PAL M 1 0 Vp p 75 ohms RCA pin jack DVD video Analog audio output Stereo 2ch 1 5Vrms 1kHz OdB Audio signal Frequency response 20Hz 20kHz...

Отзывы: