background image

25

Main Menu 

(continued)

 About WFM

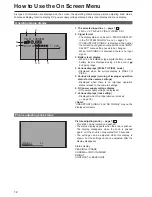
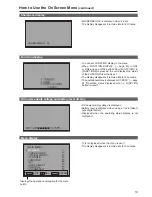
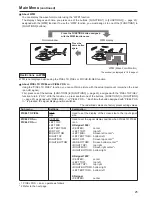
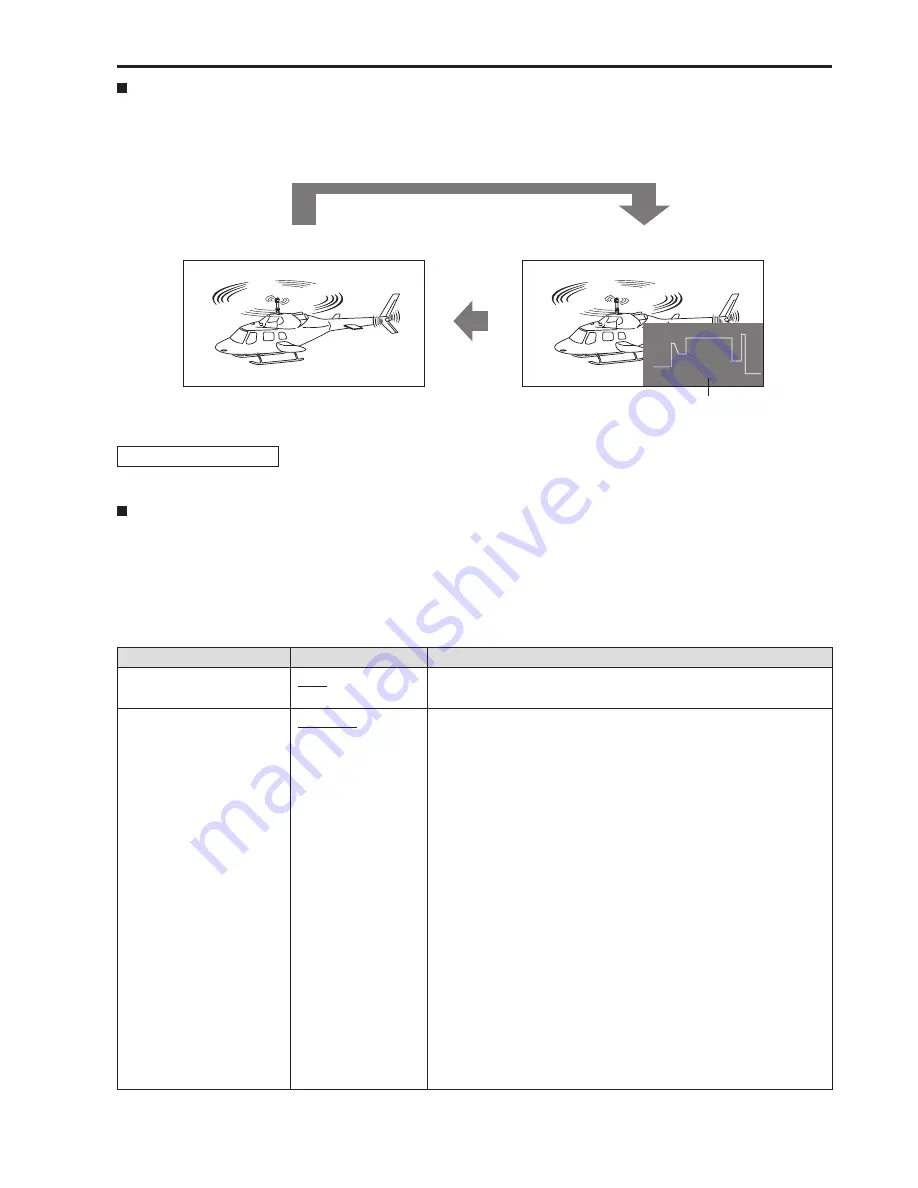
    You can display the wave form monitor using the “WFM” function.
     The display changes each time you press one of the buttons, [FUNCTION1] to [FUNCTION3] (

 page 23), 

assigned with the [WFM] function (To use the “WFM” function, you must assign it to one of the [FUNCTION1] to 
[FUNCTION3] buttons).

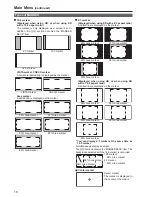
Press the FUNCTION button assigned 
with the WFM function once.

Normal window

WFM display

Press the 
same button 
again.

WFM (Wave Form Monitor)

The window is displayed in 16:9 aspect.

WFM is not displayed while using the PIXEL TO PIXEL or FOCUS-IN-RED function.

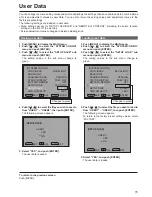
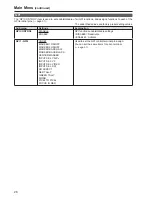
  About PIXEL TO PIXEL and PIXEL POS. +/–

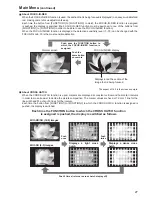
     Using the “PIXEL TO PIXEL” function, you can confirm a picture with the actual pixel count (only when the input 

is an HD signal).

     First, press one of the buttons, [FUNCTION1] to [FUNCTION3] (

 page 23), assigned with the “PIXEL TO PIXEL” 

function to turn it “ON”. With the function on, press another one of the buttons, [FUNCTION1] to [FUNCTION3] 
(

 page 23), assigned with “PIXEL POS. +” or “PIXEL POS. –”. Each time the button assigned with “PIXEL POS. 

+/–” is pressed, the signal display position switches.

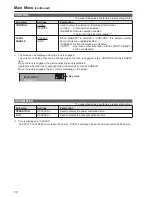
Restrictions on WFM

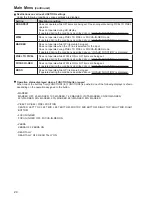
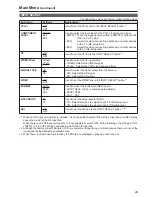
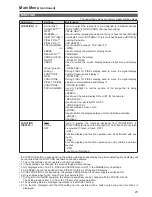
The underlined values are factory preset setting values.

Sub menu

Settings

Explanation

PIXEL TO PIXEL

OFF
ON

Used to set the display of the screen size to the input signal 
size.

PIXEL POS.+

1

PIXEL POS.–

1

CENTER
LEFT TOP
LEFT MID
LEFT BOTTOM
MID TOP
MID BOTTOM
RIGHT TOP
RIGHT MID
RIGHT BOTTOM

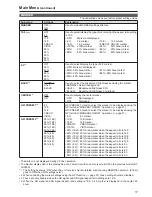
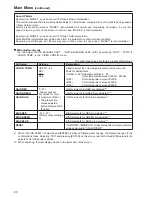
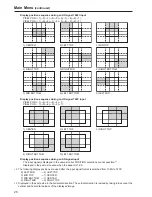
Used to set the signal display position when PIXEL TO PIXEL 
is on.

HD signal 1080i

<CENTER>       center
<LEFT TOP>      top left
<LEFT MID>      Screen left center*

2

<LEFT BOTTOM>   bottom left
<MID TOP>       Screen top center*

2

<MID BOTTOM>      Screen bottom center*

2

<RIGHT TOP>     top right
<RIGHT MID>     Screen right center*

2

<RIGHT BOTTOM> bottom right

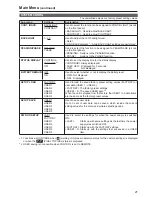
HD signal 720P

<CENTER>       center
<LEFT TOP>      top left
<RIGHT TOP>     top right
<RIGHT BOTTOM> bottom right
<LEFT BOTTOM>   bottom left

SD signal

<CENTER>       center

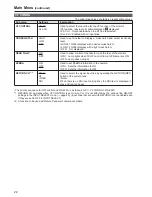
1   PIXEL POS. + and – operate as follows.

2   Refer to the next page.
Содержание BT-LT80W

Страница 1: ...Panasonic Broadcast BT LT80W Menu Information ...

Страница 2: ...s displayed using a block count and percentage 4 Various displays PIXEL TO PIXEL mode Displayed when the picture display is PIXEL TO PIXEL 5 Various displays warning of improper operation status for the camera settings Displayed when there is an improper operation status relative to the camera settings 6 DC power supply voltage display DC power supply voltage is displayed 7 Various displays lock s...

Страница 3: ...enu When FUNCTION DISPLAY page 23 is ON1 or ON2 and one of the buttons from FUNCTION1 to FUNCTION3 is pressed the unit displays the status of the FUNCTION item that is set The display disappears if remains idle for 2 seconds Theoperationalstatusisdisplayedin XXXXX page 24 Operation status displayed when a FUNCTION button is used DC power supply voltage and battery level display DC power supply vol...

Страница 4: ... 4 3 MENU EXIT SEL ENTER SET MARKER MARKER 16 9 4 3 BACK MARKER GPI PRESET1 GPI PRESET2 ON OFF OFF NORMAL OFF 4 3 4 3 14 How to Use the On Screen Menu continued Menu operations 1 Push MENU to display the MAIN menu 2 Push to select the menu then push ENTER 3 Push to select the sub menu then push ENTER The setting values in the sub menu change to green 4 Push to select the setting values then push E...

Страница 5: ... except for SETUP LOAD SAVE and REMOTE of CONTROL including the button function settings on the front of the monitor Screen adjustment values changed in picture adjusting knob Saving user data Loading user data 4 Push to select the file you wish to save to from USER1 USER5 then push ENTER The following screen appears 1 Push MENU to display the MAIN menu 2 Push to select the SYSTEM CONFIG menu and ...

Страница 6: ...P LOAD SETUP SAVE PWR ON SETUP WHITE BALANCE VAR1 3 COLOR TEMP GAIN RED GAIN GREEN GAIN BLUE BIAS RED BIAS GREEN BIAS BLUE RESET VF CONFIG VF CONTROL CROSS HATCH REAR TALLY ZEBRA RETURN CH FUNCTION FUNCTION1 FUNCTION2 FUNCTION3 FUNCTION DISPLAY CONTROL CONTROL LOCAL ENABLE HOURMETER OPERATION LCD INPUT SELECT YPBPR VF VIDEO SDI COMPONENT LEVEL VIDEO YPBPR SIGNAL TYPE FORMAT NTSC SETUP ON ON ON ON ...

Страница 7: ...operation page 31 GPI PRESET2 Used to select the marker to be displayed using the GPI terminal MARKER2 ON OFF operation page 31 4 3 4 3 marker 13 9 13 9 marker 14 9 14 9 marker CNSCO CNSCO marker VISTA VISTA marker 95 16 9 95 Area marker when the aspect ratio is 16 9 93 16 9 93 Area marker when the aspect ratio is 16 9 90 16 9 90 Area marker when the aspect ratio is 16 9 88 16 9 88 Area marker whe...

Страница 8: ...isplayed when using SD with a 4 3 aspect ratio A dotted line is displayed as the marker 95 Area marker 93 Area marker 90 Area marker 88 Area marker 80 Area marker Displayed when using HD or when using SD with a 16 9 aspect ratio A dotted line is displayed as the marker 95 Area marker 93 Area marker 90 Area marker 88 Area marker 80 Area marker You can display 4 3 marker at the same time as 16 9 mar...

Страница 9: ...ield Interpolation MODE1 Frame Interpolation MONO 4 OFF ON Used to switch between color and monochrome MONO OFF Color ON Monochrome When this is ON the picture adjusting knob CHROMA setting is fixed at 0 SD ASPECT 4 4 3 16 9 Used for setting the aspect ratio settings when using SD signal input 4 3 4 3 display 16 9 16 9 display 1 When selecting USER 0 63 1 Push ENTER USER changes to blue 2 Select 0...

Страница 10: ...63 D93 D65 D56 Used to select the color temperature that will become the basis for adjustments USER 0 63 Adjustable settings 0 63 color temperature around 3000K 9300K D93 Color temperature around 9300K D65 Color temperature around 6500K D56 Color temperature around 5600K GAIN RED 0 511 Factory presets are values for color temperature D65 The presets are values adjusted before shipment from factori...

Страница 11: ...isplayed SETUP LOAD FACTORY USER1 USER2 USER3 USER4 USER5 Used to load the saved factory preset setting values FACTORY or user data USER 1 USER 5 FACTORY The factory preset settings USER1 5 The saved USER data 2 When the unit is shipped from the factory the USER 1 to 5 data items are the same as the factory preset values SETUP SAVE USER1 USER2 USER3 USER4 USER5 Used to save user data Up to 5 sets ...

Страница 12: ...amp lights when TALLY control from a GPI camera is ON OFF Lamp does not light ZEBRA ON OFF Used to set ZEBRA information in the camera ON Sets the information to ON OFF Sets the information to OFF RETURN CH 1 2 YPBPR VF VIDEO SDI Used to select the signal input line by operating the RETURN RET button of the camera lens Note When there is no SDI input unit option the SDI item is displayed in gray a...

Страница 13: ...isplay a cross hatch MONO Used to switch the display between color and black and white UNDEF Undefined FUNCTION DISPLAY 8 ON1 ON2 9 OFF Used to display the functions assigned from FUNCTION1 to FUNCTION3 buttons on the front panel The button action can also be selected 1 touch 2 touch OFF ON1 Function display and function operation can be performed with one touch ON2 Function display and function o...

Страница 14: ...oes not operate while WFM is ON or GPI items are being set If operated during the conditions described above INVALID FUNCTION is displayed FOCUS IN RED Does not operate while WFM is ON or GPI items are being set If operated during the conditions described above INVALID FUNCTION is displayed MONO Does not operate while GPI items are being set If operated during the conditions described above INVALI...

Страница 15: ...N With the function on press another one of the buttons FUNCTION1 to FUNCTION3 page 23 assigned with PIXEL POS or PIXEL POS Each time the button assigned with PIXEL POS is pressed the signal display position switches Restrictions on WFM The underlined values are factory preset setting values Sub menu Settings Explanation PIXEL TO PIXEL OFF ON Used to set the display of the screen size to the input...

Страница 16: ...GHT BOTTOM 5 LEFT BOTTOM Display position sequence during an SD signal input The input signal is displayed in the same size but POSITION selections are not possible 3 Displayed in the same size even when the aspect is 16 9 2 The following display positions are used after the input signal format is switched from 1080i to 720P 9 LEFT MID 2 LEFT TOP 3 MID TOP 1 CENTER 7 MID BOTTOM 1 CENTER 5 RIGHT MI...

Страница 17: ...e the FOCUS IN RED function When the FOCUS IN RED function is displayed the detection sensitivity level 0 30 can be changed with the FOCUS R knob 30 is the most sensitive detection Each time the FUNCTION button to which the CROSS HATCH function is assigned is pushed the display is switched as follows With HD SD 16 9 images With SD 4 3 images About CROSS HATCH When the CROSS HATCH function is used ...

Страница 18: ...ONTROL DISABLE ENABLE GPI functions enable disable settings DISABLE Deactivate ENABLE Activate GPI1 GPI8 UNDEF MARKER1 ON OFF MARKER2 ON OFF MARKER BACK HALF MARKER BACK BLACK CENTER MARKER INPUT SEL YPBPR INPUT SEL VF INPUT SEL VIDEO INPUT SEL SDI SD ASPECT RED TALLY GREEN TALLY MONO PIXEL TO PIXEL FOCUS IN RED Used to set the GPI control terminal pin assign You can set the same items for each te...

Страница 19: ...IDEO ON OFF Used to set the VIDEO line to the INPUT SELECT button 1 FORMAT AUTO NTSC PAL Used to select the format for VIDEO input 2 AUTO NTSC or PAL is selected automatically NTSC NTSC PAL PAL NTSC SETUP 00 75 Used to set the setup level for NTSC 75 Select this when the signal is at a 7 5 IRE setup level 00 Select this when the signal is at a 0 IRE setup level SDI ON OFF Used to set the SDI line ...

Страница 20: ...The menu can be displayed when the lock is engaged The only menu setting that can be changed when the lock is engaged is the CONTROL LOCAL ENABLE item When the lock is engaged the picture adjusting knob is disabled Operations when the lock is engaged follow the settings in LOCAL ENABLE When the lock is engaged the key mark is displayed on the screen Main Menu continued Key mark HOURMETER The under...

Отзывы: