


Getting Started
13
English
•
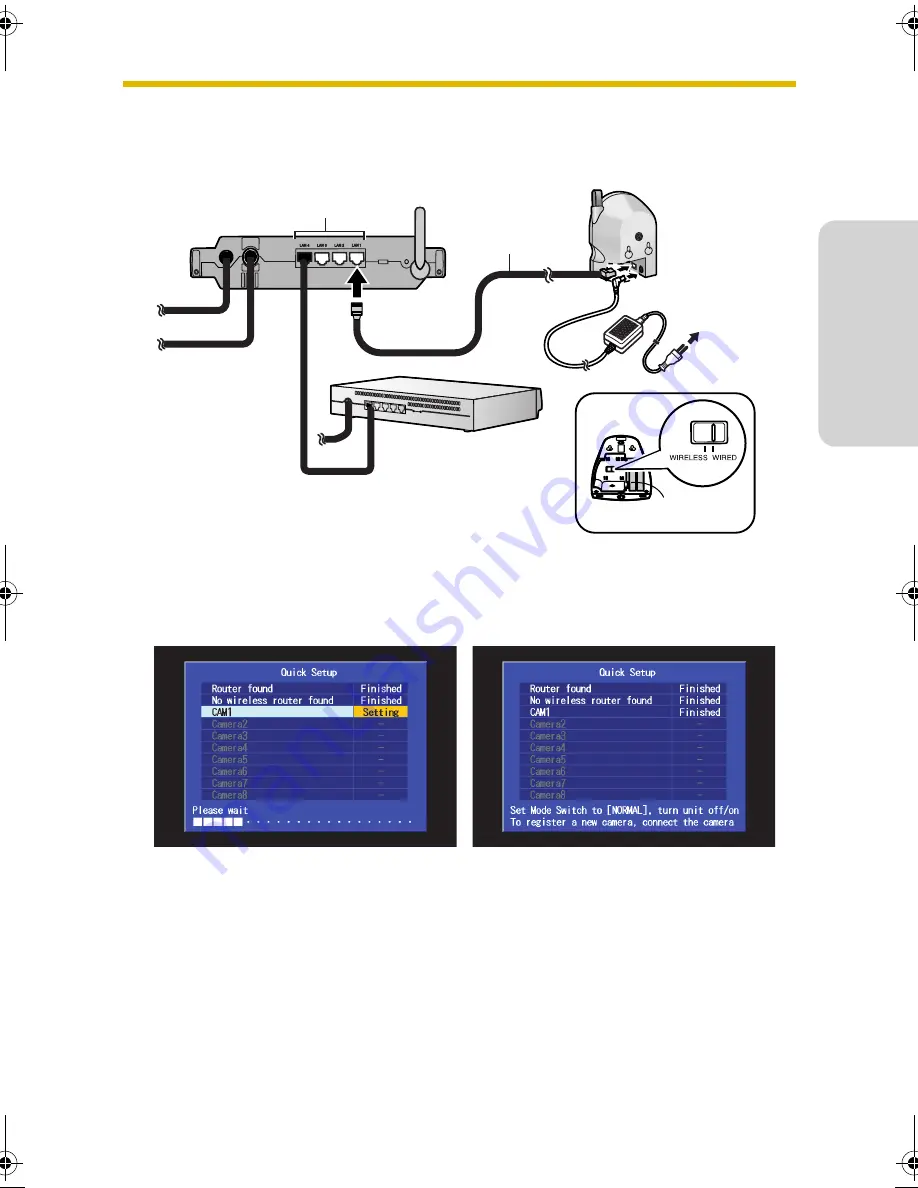
To configure a wireless camera with a wired/wireless switch, such as the
BL-C30, set the switch to
WIRED
during Quick Setup.
3.
Connect the camera to the power outlet.
4.
Wait while the Quick Setup utility restarts, configures, and registers the
camera.
•
When the camera has been configured and registered, [Finished] is
displayed next to the camera name ([CAM1], for example) and the buzzer
sounds.
•
If [This camera’s firmware is out of date] is displayed, you must update the
camera’s firmware. Refer to the information on page 6. It is also
recommended that you erase the camera (see “Erasing a Camera” on
page 104 of the Operating Instructions) and then register it again.
Ethernet cable
LAN jacks
Rear panel of
BL-WV10
Router
Bottom of BL-C30
Rear panel
of camera
To
power
outlet
BL-WV10_GS-en.book Page 13 Wednesday, January 25, 2006 5:18 PM
Содержание BL-WV10
Страница 90: ...90 1 2 3 4 5 6 AC AC 7 AC AC 8 AC AC Panasonic 9 AC 10 11 AC AC 12 13 AC AC 14 15...
Страница 92: ...92 1 2 3 4 5 6 7 AA Panasonic 1 2 4 GHz POS 2 3 2...
Страница 96: ...96 1 1 1 1 1 1 BL WV10 1 1 2 BL WV10 RETURN ENTER BL WV10 0 7 8 2 0 RETURN 8 7 ENTER 5 5 6 6...
Страница 102: ...102 5 LAN BL WV10 6 BL WV10 NORMAL DC DC 107...
Страница 108: ...108 color night view pan tilt color night view 1 5 1 Quick Setup utility BL C30 WIRED HCM WIRELESS HCM DISPLAY 92...
Страница 109: ...109 1 6 8 BL WV10 Quick Setup utility SETUP Quick Setup utility 98 103 1 7 ENTER 1 STOP...
Страница 129: ...129 LAN BL WV10 92 BL WV10 PC BL WV10...
Страница 130: ...130 3 11 built in BL C10 BL C30 privacy privacy 30 85 5 BL WV10...
Страница 131: ...131 BL C10 BL C30...


