4.2.2 Configuring the Camera to Use a Third-party Dynamic DNS
Service
Before configuring the camera to use a third-party Dynamic DNS service, you will first need to subscribe to the
desired service. Ask the Dynamic DNS service provider for the settings required to use that service.
Note
•
Certain third-party Dynamic DNS services may not be compatible with your camera. We cannot
guarantee that your camera will be compatible with third-party Dynamic DNS services, and therefore
we cannot take responsibility for any damage or performance issues that may occur when using a
Dynamic DNS service other than Viewnetcam.com (see Page 105).
•
Please direct any questions you may have regarding the settings required to use a third-party Dynamic
DNS service to the Dynamic DNS service provider.
•
After configuring the camera to use a third-party Dynamic DNS service, it may take several minutes
before the camera can be accessed over the Internet.
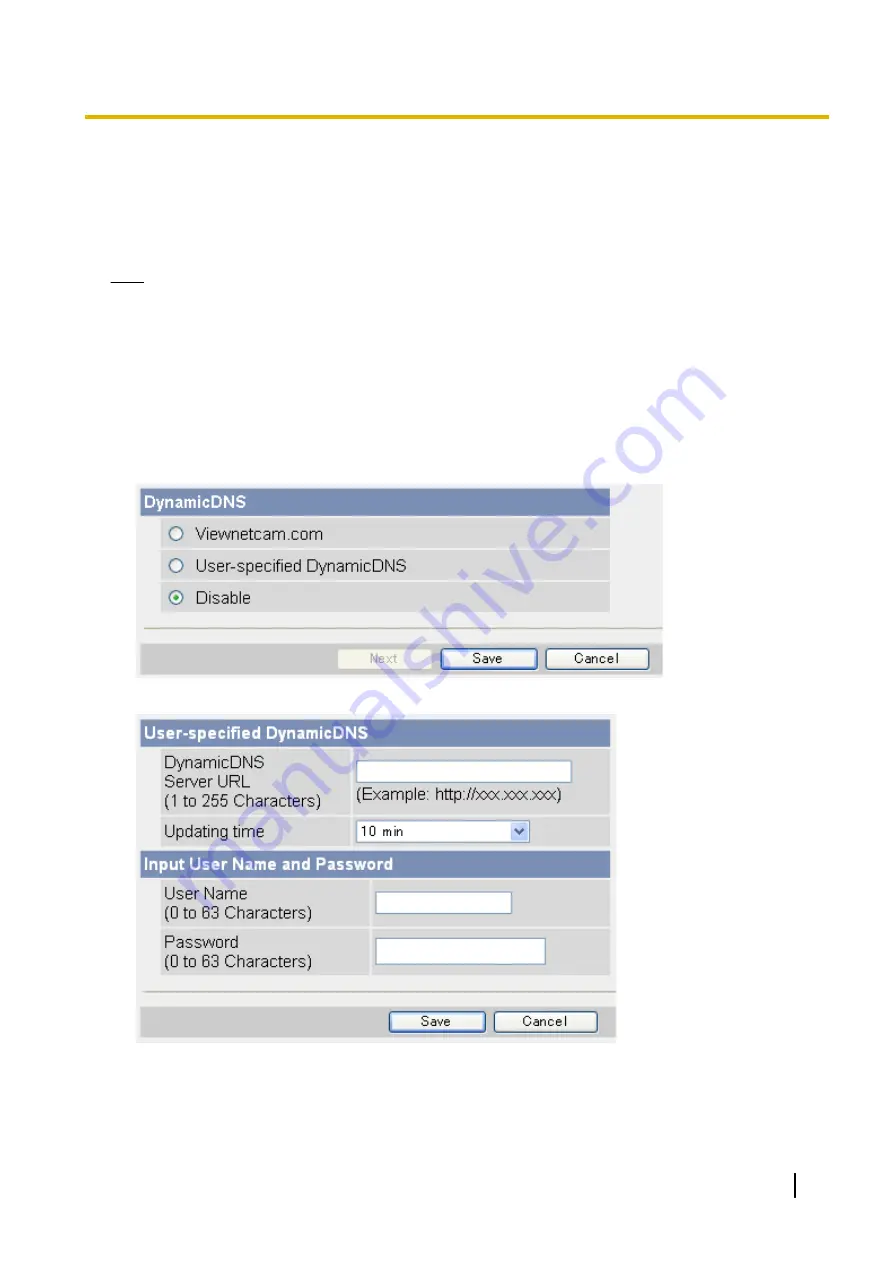
1.
Click the [Setup] tab.
2.
On the left side of the screen under [Basic], click [DynamicDNS].
3.
Select [User-specified DynamicDNS], then click [Next].
4.
Enter the URL (including
http://
)
provided or required by your Dynamic DNS service provider (max.
255 characters).
5.
Select how often the camera notifies the Dynamic DNS service of its current global IP address.
6.
Enter the user name
provided by the Dynamic DNS service provider (max. 63 characters).
Operating Instructions
109
4.2.2 Configuring the Camera to Use a Third-party Dynamic DNS Service
Содержание BL-C210 Series
Страница 122: ...4 Click Certificate Error in the address bar then click View certificates 122 Operating Instructions 5 2 HTTPS Settings ...
Страница 124: ...6 After the wizard is displayed click Next 124 Operating Instructions 5 2 HTTPS Settings ...
Страница 126: ...9 Click Next 126 Operating Instructions 5 2 HTTPS Settings ...
Страница 127: ...10 Click Finish Operating Instructions 127 5 2 HTTPS Settings ...
Страница 131: ...6 Click Finish 7 Click Yes Operating Instructions 131 5 2 HTTPS Settings ...
Страница 196: ...3 Click the Connections tab then click LAN Settings 196 Operating Instructions 11 1 Proxy Server Settings ...


