59
Controls and settings from web screen
(continued)
●
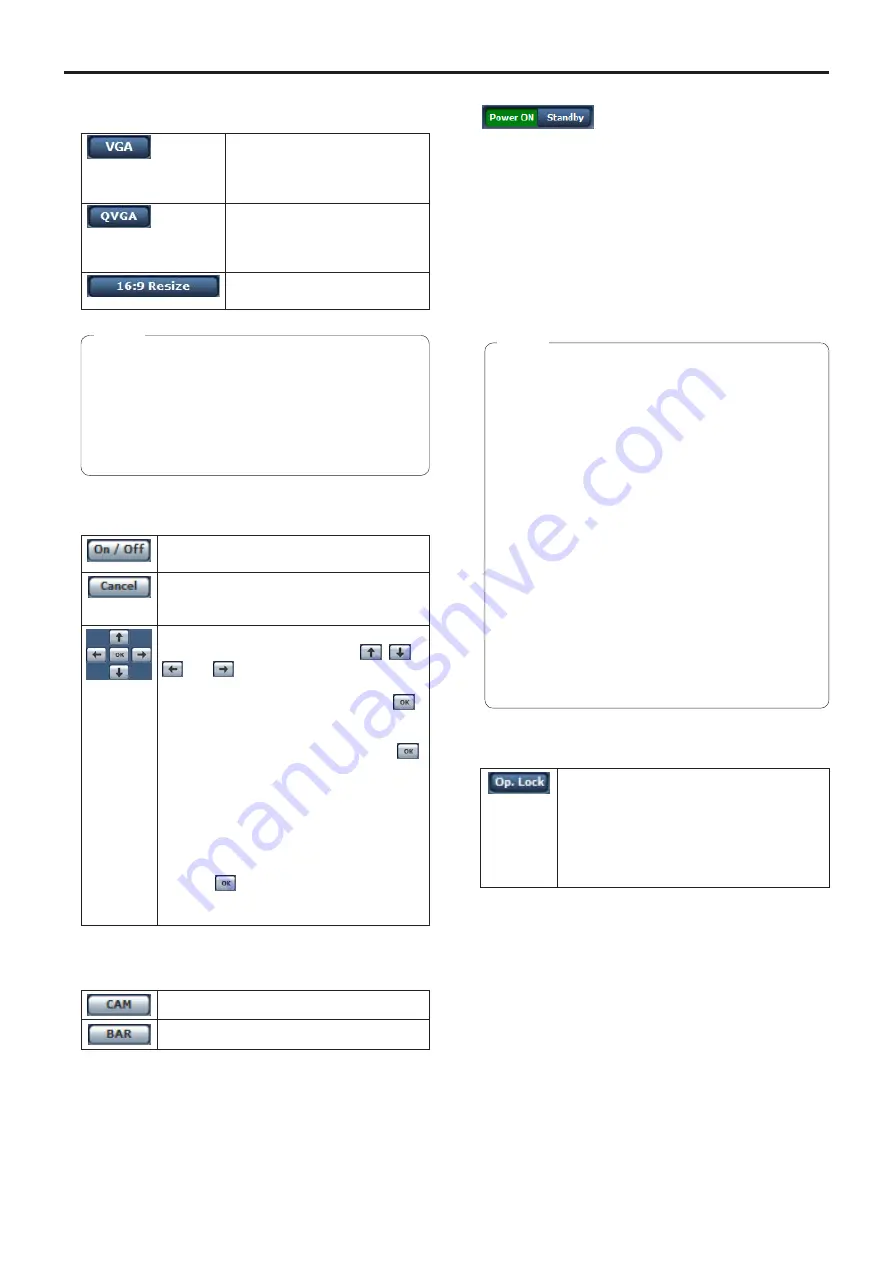
Image Capture Size button
(Image Capture Size)
The IP video in the main area is
displayed in the VGA size.
This button is enabled only when
JPEG images are displayed.
The IP video in the main area is
displayed in the QVGA size.
This button is enabled only when
JPEG images are displayed.
The IP video in the main area is
displayed in the 16:9 size.
●
●
After returning from another screen to the Live
screen (single display mode) or after updating
the screen, the following settings will return to the
settings made in the IP video settings.
●
●
“Image capture size” in “JPEG image settings”
(see page 67)
●
●
“16 : 9 resize” (see page 66)
Note
●
OSD Menu Operation
Use this to select whether the camera’s
on-screen displays are to be shown.
It cancels the selection of the setting which
is being changed.
It restores the pre-change setting.
Use these to perform the menu operations.
The items are selected using the
,
,
and
buttons.
If a selected item has a sub menu, this
sub menu is displayed by pressing the
button.
When the cursor is moved to any item on
the bottom-level setting screen and the
button is pressed, the setting of the selected
item starts flashing.
A setting for a regular menu item is
reflected immediately if it is changed while
it is still flashing. However, there are a
number of menu items (Scene, Format and
Initialize) whose setting is reflected only
after the
button has been pressed,
causing the setting to stop flashing and the
new setting to be entered.
●
Camera button / Color bar button (CAM/BAR)
Use this to output the camera pictures.
Use this to output the color bar signals.
●
Power ON button / Standby button
The unit’s power is turned on when the Power ON button
is pressed.
When the Standby button is pressed, the unit is set to the
standby mode.
In the standby mode, all the buttons on the Live screen
except for the Setup button, Multi-screen list box,
Power ON button, Standby button and Op. Lock button are
disabled.
Similarly, on the Setup screen, it is not possible to select
Image/Position or System under the Image button or
Backup under the Maintenance button.
●
●
If Power ON or Standby is selected too quickly,
the status selected and the display shown may not
correspond.
In a case like this, follow the steps below to restore
the correct status display:
[When using Windows]
Press the [F5] key on the keyboard of the
personal computer.
[When using Mac OS X]
Press the [Command] + [R] keys on the
keyboard of the personal computer.
●
●
When operation is transferred to the STANDBY
mode: The current zoom, focus and iris positions
are stored in the memory (POWER ON preset).
●
●
When operation is transferred to the POWER ON
mode: The zoom, focus and iris are transferred
to the positions which were stored in the memory
(POWER ON preset) when operation was
transferred to the STANDBY mode.
Notes
●
Operation lock button (Op. Lock)
Use this to lock the operation of the pan, tilt,
zoom, focus, brightness, speed, preset and
scene operations on the control screen.
Use this also to lock the on-screen display
menu operations, CAM/BAR and Power ON
button/Standby button to prevent operations
from being performed by accident.
Содержание AW?HE60HN
Страница 119: ...119 Memo ...
Страница 120: ...Web Site http panasonic net Panasonic Corporation 2012 ...


