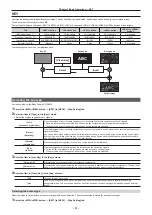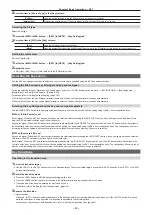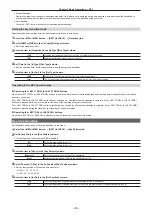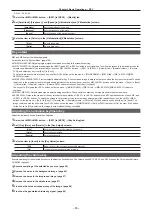
– 65 –
Chapter 5 Basic Operations — KEY
-
SQ: 42, 43, 44, 45
1
Select the <ME1>/<ME2> button
→
[KEY1] to [KEY4]
→
[Modify] tab.
2
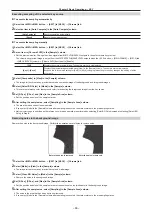
Set [Amplitude], [Frequency], and [Speed] in [H Modulation] and [V Modulation] column.
[Amplitude]
Sets the amplitude of the wave.
[Frequency]
Sets the frequency of the wave.
[Speed]
Sets the speed of the wave movement.
3
Select an item in [Pattern] in the [H Modulation]/[V Modulation] column.
[Sine]
Selects sine waves.
[Delta]
Selects delta wave.
Key output
ME1 and ME2 output the following signals.
For details, refer to “System Menu” (page 140).
f
ME1PGM, ME2PGM: Outputs program signals combined according to the transition setting.
f
ME1PVW, ME2PVW: Outputs preview signals of BKGD and KEY1 to KEY4 selected in next transition. To switch the screen to the preview screen for
chroma key adjustment of the relevant keyer, use the <ME1>/<ME2> buttons
→
[KEY1] to [KEY4]
→
[Chroma] tab
→
[Sample] column
→
[Chroma
PVW], and select any key from [Key1] to [Key4].
To set not to always combine for each key, use the <SYS> button on the top menu
→
[MAIN FRAME]
→
[ME1,2] tab
→
[ME1 KEYPVW]/[ME2
KEYPVW] columns.
f
ME1KEYPVW, ME2KEYPVW: Preview output dedicated for key. A key combined image is always output even when the key is not combined.To switch
the screen to the preview screen for chroma key adjustment of the relevant keyer, use the <ME1>/<ME2> buttons on the top menu
→
[Key1] to [Key4]
→
[Chroma] tab
→
[Sample] column
→
[Chroma PVW], and select any key from [Key1] to [Key4].
The key set to [On] using the <SYS> button on the top menu
→
[MAIN FRAME]
→
[ME1,2] tab
→
[ME1 KEYPVW]/[ME2 KEYPVW] column is
combined.
f
ME1CLN, ME2CLN: Outputs clean signals before adding key effects. These can also output key out signals used for key compositions.
f
SEL KEYPVW: Outputs the preview of the key relevant to the operation of <KEY1> to <KEY4> buttons in the KEY operation section of each ME, and
<DSK1> to <DSK4> buttons. To switch the screen to the preview screen for chroma key adjustment of the relevant keyer, use the <ME1>/<ME2>
buttons on the top menu
→
[Key1] to [Key4]
→
[Chroma] tab
→
[Sample] column
→
[Chroma PVW], and select any key from [Key1] to [Key4]. The
image combined with the key where the <SYS> button on the top menu
→
[MAIN FRAME]
→
[Sel KeyPVW] tab is set to [On] is output. If the button
for the key set to [Off] is selected, the image is output without the key combined.
Adjusting the luminance key/linear key
Adjust the luminance key and linear key definition.
1
Select the <ME1>/<ME2> button
→
[KEY1] to [KEY4]
→
[Key Setting] tab.
2
Set [Clip], [Gain], and [Density] in the [Key Adjust] column.
[Clip]
Sets the reference level for creating key signals.
[Gain]
Sets the key amplitude.
[Density]
Sets the key density.
3
Select an item in [Invert] in the [Key Adjust] column.
[Off]
Does not invert the key signals generated internally.
[On]
Inverts the key signals generated internally.
Adjusting the chroma key
Execute sampling for the selected key source to adjust the key definition. The chroma keys KEY2, KEY3, and KEY4 require the Chromakey Software
AV-SFU60 (optional).
1
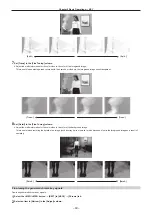
Execute sampling of the selected key source. (page 66)
2
Remove the noise in the background image. (page 66)
3
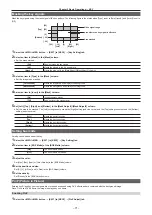
Remove the noise in the foreground image. (page 67)
4
Remove the noise in the detail areas. (page 67)
5
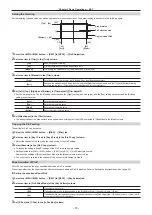
Fine‑tune the noise or transparency of the image. (page 68)
6
Содержание AV-HS60C1E
Страница 5: ...Please read this chapter and check the accessories before use Chapter 1 Overview ...
Страница 32: ...This chapter describes basic operations and matters to be performed prior to use Chapter 4 Preparations ...
Страница 52: ...This chapter describes menu operations Chapter 5 Basic Operations ...
Страница 118: ...This chapter describes the input output signal settings Chapter 6 Input Output Signal Settings ...
Страница 129: ...This chapter describes how to operate the CONFIG menu displayed when the CONF button is pressed Chapter 7 CONFIG Menu ...
Страница 140: ...This chapter describes how to operate the system menu displayed when the SYS button is pressed Chapter 8 System Menu ...
Страница 162: ...This chapter describes the difference with the Standard mode Chapter 9 3G mode 4K mode ...
Страница 168: ...This chapter describes the terminals and signals of the unit Chapter 10 External Interfaces ...
Страница 173: ...This chapter describes the dimensions and specifications of this product Chapter 11 Specifications ...
Страница 184: ...This chapter describes the setting menu table and terms Chapter 12 Appendix ...
Страница 206: ...Web Site http www panasonic com Panasonic Corporation 2014 ...

