Panamorph Paladin and Phoenix Lens Installation Guide, V1.5 Page | 4
Paladin Lens Adjustments. Adjust the tilt of the Paladin to vertically position the image
onto the screen then adjust the height of the Paladin so that the entire projector beam
passes through unobstructed.
If the top of the image has significantly different curvature than the bottom of the image
then slightly tilt the Lens to shift the image and then adjust the projector vertical lens shift to
return the image to the screen. In one direction this will increase the curvature of the top
and decrease the curvature of the bottom. In the other direction the reverse will happen.
When the top and bottom curvatures (if any) are even then this will minimize edge
distortion. NOTE: If desired, this operation can also be used to fine tune the aspect ratio (ie
change the image height) although some unequal curvature may result. You may need to
do these steps several times for the best adjustment. After these adjustments adjust the
height of the Paladin Lens as needed to make sure the entire projector beam passes
through. Finally, tighten the Bracket Screws to secure the lens configuration.
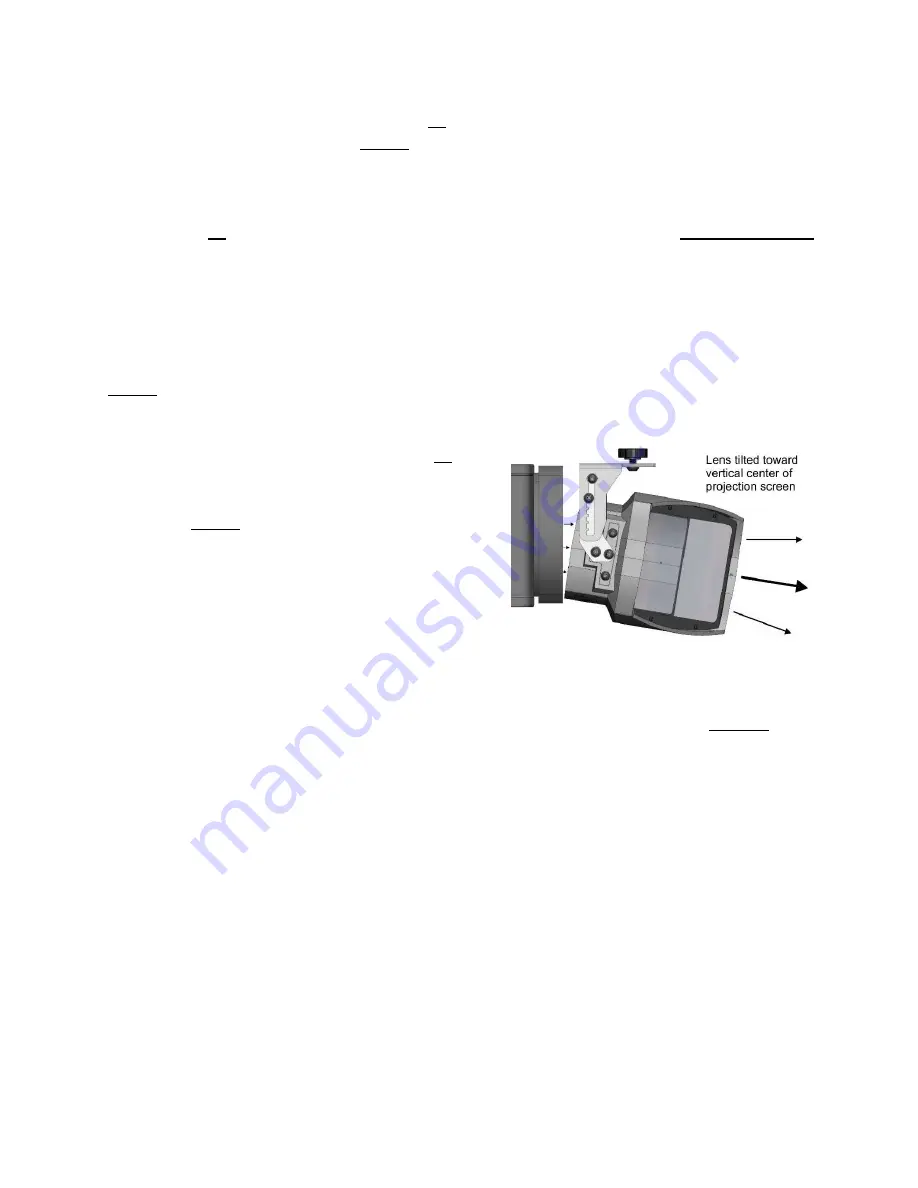
Phoenix Lens Adjustments. Adjust the tilt of
the Lens so that the top and bottom edges of the
image have the same amount of curvature and
adjust the height of the Lens so the projector
beam passes through the unobstructed.
Typically this tilt adjustment results in the lens
facing the approximate vertical center of the
screen. Once these adjustments are made,
tighten the Bracket Screws to secure the lens
configuration. Finally, loosen the Thumb Knobs
and rotate the lens about the vertical axis to horizontally re-center the image on the screen.
6. CORRECTING STRANGE GEOMETRIES. If the left / right geometries of a Paladin image
do not appear the same then pivot the Lens Bracket about the vertical axis to correct (yaw
adjustment). For all lens models, if one side of the image appears higher than the other
then the lens must be leveled to correct (roll adjustment). This is most easily done by
adding a washer between the Attachment Plate and the Lens Bracket.
7. Adjust the projector zoom and vertical lens shift to fill the screen with the 2.4:1 movie,
eliminating any residual gaps by slightly overscanning onto the screen border as
necessary. Perform a final focus adjustment.
8. If using the XM2 Attachment Plate, loosen the Thumb Knobs and move the Lens Bracket
toward the projector to minimize the distance between the Lens and projector lens. If using
the XMU Attachment Plate, slightly loosen the RPA000 thumb nuts just enough so that
the Attachment Plate can be slid back to minimize the distance between the Lens and
projector lens. The final distance is not important. Check to make sure the image alignment
on the screen has not changed then tighten all adjustments.


