background image

Important Safety Cautions

1

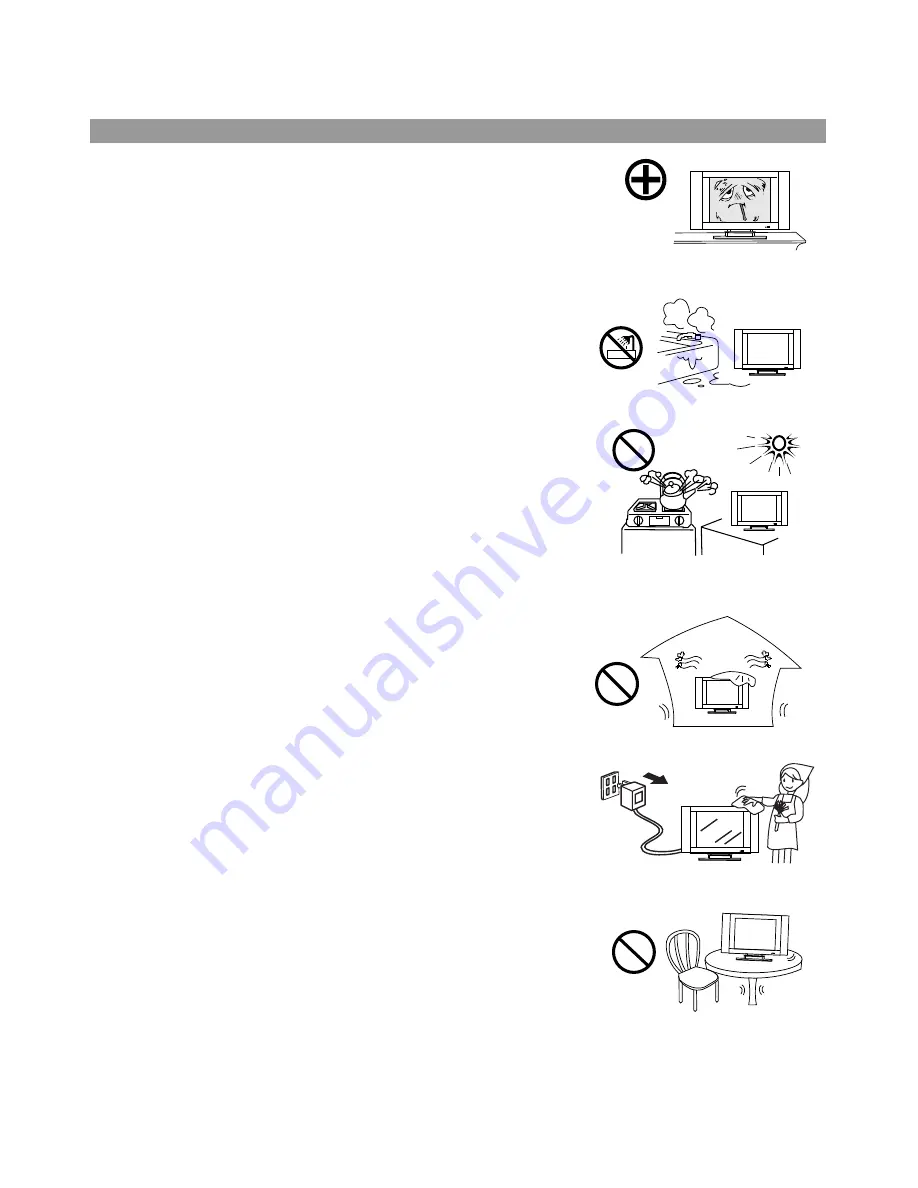
When any unusual situation occurs, turn off the power supply at once and
remove the plug from the wall outlet. Contact a qualified service department
in your local area.

Water and moisture - Do not use this product near water - for example, near a
bathtub, washbowl, kitchen sink, or laundry tub, in a wet basement, or near a
swimming pool, and the like. Do not use immediately after moving from a low
temperature to high temperature environment, as this causes condensation, 
which may result in fire, electric shock, or other hazards.

Heat sources - Keep the product away from heat sources such as radiators
heaters, stoves other heat generating products (including amplifiers).
requirement of environment temperature;
0

0

C~50

0

C for storage; 5

0

C~40

0

C for working.

The vents and other openings in the cabinet are designed for ventilation. Do not
cover or block these vents and openings since insufficient ventilation can cause
overheating and/or shorten the life of the product.
Do not place the product on a bed, sofa, rug or other similar surface, since they
can block ventilation openings.
This product is not designed for built-in installation; do not place the product in an
enclosed place such as a bookcase or rack, unless proper ventilation is provided
or the the manufacturer's instructions are followed.

Unplug this product from the wall outlet before cleaning. Do not use liquid
cleaners or aerosol cleaners. Use a damp cloth for cleaning.

Do not place the product on an unstable trolley, stand, tripod or table. Placing
the product on an unstable base can cause the product to fall, resulting in
serious personal injuries as well as damage to the product. Use only a trolley,
stand, tripod, and bracket or table recommended by the manufacturer or sold with
the product.

Содержание TFTV435

Страница 1: ...D 1 JOYNTON AVENUE WATERLOO NSW 2017 AUSTRALIA TEL 02 9313 7111 FAX 02 9313 7555 www palsonic com au PALSONIC CUSTOMER SERVICE TELEPHONE AUSTRALIA 1300 657 888 43CM CORDLESS REMOTE LCD TV MONITOR MODEL TFTV435 OWNER S MANUAL N111 ...

Страница 2: ...n displays and illustrations in this manual may differ from the actual model Contents Index Important Safety Cautions Identification of controls Control buttons Back Remote control Installation Basic operations Main OSD introduction Operations Channel Setting 1 4 4 5 6 8 5 16 17 17 Selecting channel Picture adjustment Audio Setting System Setting OSD Setting Timer setting Operations in RGB YPbPr m...

Страница 3: ... other openings in the cabinet are designed for ventilation Do not cover or block these vents and openings since insufficient ventilation can cause overheating and or shorten the life of the product Do not place the product on a bed sofa rug or other similar surface since they can block ventilation openings This product is not designed for built in installation do not place the product in an enclo...

Страница 4: ...sk of fire or electric shock High Voltage exists in this TV set Do not remove the cover In case the product needs replacement parts make sure that the service person uses replacement parts specified by the manufacturer or those with the same characteristics and performance as the original parts Use of unauthorised parts can result in fire electric shock and or other danger The LCD panel used in th...

Страница 5: ...limited by observing the following steps Reduce the Brightness and Contrast settings to a minimum viewing level DO NOT display the fixed image for extended periods of time Turn the power OFF when not in actual use Recycling This product utilises tin lead solder and has a fluorescent lamp containing a small amount of mercury Disposal of these materials may be regulated in your community due to envi...

Страница 6: ...adjust the value or setting of each item 5 POWER Press this button to turn the unit ON from STANDBY mode Press it again to turn the set back to STANDBY The Power Indicator light will glow yellow when the set is turned on and glows red when the set is in the standby mode Note SOURCE MENU CH VOL and POWER on the main unit have the same functions as the corresponding buttons on the remote control Thi...

Страница 7: ... Connect to the Y Pb Pr or Y Cb Cr and audio output jacks of a Set Top Box or DVD player 4 Headphone 3 5mm jack 5 AV outputs Video Audio L R Connect to the VCR input jacks to record programs 6 AV inputs Video Audio L R Receive video audio signals from external sources such as VCR or DVD player 7 S Video input Receive a S Video signal from external source such as VCR or DVD player 8 Coaxial cable A...

Страница 8: ...own selector In menu operations used to select item Access the menu Exit the menu Colour system select Setting sleep timer Zoom mode selection Clock setting Auto correct picture Previous channel Select picture mode between Bright Nature Soft User Display the current state Direct channel selector Select the input signal source Select OSD menu position Sound mode selection Adjust the treble Adjust t...

Страница 9: ...5 6 7 8 When the remote control will not be used for a long period of time or when the batteries are worn out remove the batteries Do not drop or dampen the remote control Do not disassemble the remote control There should be no obstacle between the TV and the transmitter Use the remote control within the effective range as shown in the figure on the left If the remote control does not work please...

Страница 10: ...ng Optimum reception of colour requires a good signal and will generally mean that an outdoor aerial must be used The exact type and position of the aerial will depend upon your particular area Note It is recommended that the 75 ohm coaxial cable be used to eliminate interference and noise which may occur due to radio wave conditions The aerial cable should not be bundled with the power cord and t...

Страница 11: ...ut of the set 3 Connecting the male plug to the wall outlet as illustrated Note Always turn off the Power to the LCD TV when connecting the AC adapter This product should only be operated with the type source marked on the label on the unit Always unplug the AC adapter from the product and power outlet when the LCD TV is not in use for an extended period of time of time The illustration of power c...

Страница 12: ...Installation continued 10 Elevation adjustment You can adjust the angle of the LCD TV as follows The elevation can be adjusted from 50 to 100 average ...

Страница 13: ...nal connection Connect the composite video signal terminal on the TV to the output of AV equipment through composite cable If you select the video signal please set the input signal source of LCD TV to AV mode Note Composite video is the most common used signal but the picture quality is not as high as S video S VIDEO Signal Connection Connect the S video terminal on the TV to the output of AV equ...

Страница 14: ...ou select PC signal please set the input signal source of LCD TV to RGB mode Not supplied 1 The native display resolution is 1280 x 1024 If the signal resolution exceeds this resolution it may not be possible to show fine detail with sufficient clarity 2 We strongly recommend that you set the refresh rate on the PC to 60Hz If you set it above 60Hz the unit may not display correctly Control Panel D...

Страница 15: ...rough audio cable How to record the TV program 1 Connect cables as shown above 2 Turn on the LCD TV and select source 3 Turn on the VCR and insert the tape 4 Select the video input from the VCR menu that corresponds to the AV in on the VCR 5 Press the RECORD button to begin recording How to enjoy high quality sound by Audio amplifier 1 Connect cables as shown above 2 Turn the volume of the Audio a...

Страница 16: ...er picture quality And connect the audio outputs with the corresponding audio input terminals on the TV set If you select YPbPr signal please set the input signal source of the LCD TV to YPbPr mode Notes The Y Pb Pr outputs on your DVD player are sometimes labelled Y Cb Cr If so connect the cables to like colours ...

Страница 17: ...n to red If you want to turn off the power completely unplug the power cord from the wall outlet Note Do not switch the on off state of the unit quickly The interval of the turning on and turning off should be more than 5 seconds Press the SOURCE button on the unit or button on the remote control The screen displays the menu as shown on the right Press CH to highlight your desired input signal sou...

Страница 18: ...System Setting Menu sleep time back light 20 minutes 6 on off 0 0 0 Audio Setting Menu off SRS bass treble balance AVC System Position Menu 50 50 866 15 h position v position frequency phase System Setting Menu blue screen backlight scaler mode color sys sound sys sleep time 6 on fill all Auto I 10 minutes Picture Setting Menu brightness contrast color temp 5000K 7300K 9300K user customer temp set...

Страница 19: ...use of the menu 1 Access Channel Setting menu Press CH button repeatedly to highlight auto search item Press VOL to start Auto Search All active channels will be preset and stored into the memory automatically During the process of Auto Search pressing MENU will stop the process Use channel select buttons to select a channel number 2 Access Channel Setting menu 3 4 Press VOL or VOL button to perfo...

Страница 20: ... the keypad buttons to enter the channel then access the Channel Setting menu and select skip press VOL to set skip off When you press CH to change channels the channel will be present Fine tuning is not necessary under normal conditions However in area of inferior broadcast conditions where adjustment is necessary for a better picture and sound use Fine tuning Access the Channel Setting menu Pres...

Страница 21: ...menu Press CH to select current channel press VOL to select a current channel number Press CH to select exchange to press VOL to select a target channel number Press CH to select exchange channel press VOL then these two channels contents are exchanged Repeat the above steps to edit the programs in your favourite order Channel edit 1 2 3 4 5 channel number skip manual search auto search fine tune ...

Страница 22: ...mber button then wait for about 2 seconds To select two digit channel numbers Press button to display then input the channel using the 0 9 number button To select three digit channel numbers Press button to display then input the channel using the 0 9 number button Note The period between presses should be within 2 seconds Press CH button the channel number increases Press CH button the channel nu...

Страница 23: ...s Bright Nature Soft and User Bright Select for a bright picture Nature Select for a standard picture Soft Select for a soft picture NOTE Setting the unit to a Bright Picture with high brightness and contrast levels will cause picture quality loss 1 2 3 To adjust picture s brightness To adjust picture s contrast To adjust picture s colour To adjust pictures sharpness To adjust picture s tint 0 100...

Страница 24: ... the channel is changed Turning AVC On lets you automatically adjust the volume of the desired channel by lowering the sound output when the modulation signal is high or by raising the sound output when the modulation signal is low Range 10 10 10 10 10 10 Bass Treble Balance AVC You can press S M button on the remote control to switch the sound mode between user movie music and news Movie Select f...

Страница 25: ...n display size 1 2 3 Item Function Choice Range Blue Screen Selects sound system Selects colour system Setting screen display size Adjusts the backlight brightness If you select on the screen will display blue background when there is no signal in TV AV SVIDEO mode Setting sleep timer When the presetting time is elapsed the set will auto turn off and be in standby mode Color Sys Sound Sys Sleep Ti...

Страница 26: ...em Press VOL to select opaque or translucent If you select Opaque the background of the menu is opaque If you select translucent the background of the menu is translucent Access the OSD Setting menu Press CH to select the OSD timeout item Press VOL to set the timeout 5 10 15 20 25 30 35 40 45 50 55 60 seconds 1 2 1 2 3 1 2 3 1 2 3 language OSD position OSD background opaque translucent OSD timeout...

Страница 27: ...et time After setting current time press CLK button again to display turn on menu bar Press VOL to select hour minute or status Press CH to adjust turn on time and turn on status off everyday today today means the turn on setting effects today everyday means the turn on setting effects everyday Press CLK once more to display turn off menu bar Press VOL to select hour minute or status Press CH to a...

Страница 28: ...rom your PC Video card might distort the image When VGA signal format is changed or when you switch to RGB mode from another source the unit adjusts frequency and phase automatically to obtain the best display During the process of auto correction the screen displays Analog RGB Acquiring Signal and all buttons on the set and on the remote control do not work until this process is finished When the...

Страница 29: ...to change the value of the user mode set color temp to user first then select customer temp setting item and press VOL to access the sub menu Function Adjust the brightness of the picture Adjust the contrast of the picture Notes Adjusting the picture under RGB mode WillNotaffectthedisplaysettingsintheTV AVmode 1 2 3 Press CH to select the item and press VOL to adjust it The value you set will be s...

Страница 30: ...OLUME Check that the unit is not muted Check Whether the sound is output to headphone Good sound but poor colour Poor picture Horizontal dotted line Adjust the contrast colour and brightness settings Sometimes poor picture quality occurs when having activated an S VHS camera or camcorder connected and having connected another peripheral at the same time In this case switch off one of the other per...

Страница 31: ...lour system Sound output Accessories 100 240V 50 60Hz 60W 1280 x 1024 0 264mm x 0 264mm 400 nit 450 1 1400 1400 555 W x 186 D x 396 H with stand 6 2 43cm PAL BG NTSC AV 3W 8 Operating manual x 1 Power cord x1 Remote control x 1 AC Adaptor x 1 AV cable x 1 option Audio cable x 1 option UHF 21 69 CATV X Z 2 S1 S41 Note Design and specifications are subject to change without notice 29 VHF 2 12 ...

Страница 32: ...SONIC CORPORATION PTY LTD 1 JOYNTON AVENUE WATERLOO NSW 2017 AUSTRALIA TEL 02 9313 7111 FAX 02 9313 7555 www palsonic com au PALSONIC CUSTOMER SERVICE TELEPHONE AUSTRALIA 1300 657 888 604 L17H33 00 Ver1 0 ...

Отзывы: