background image

28

System Setup

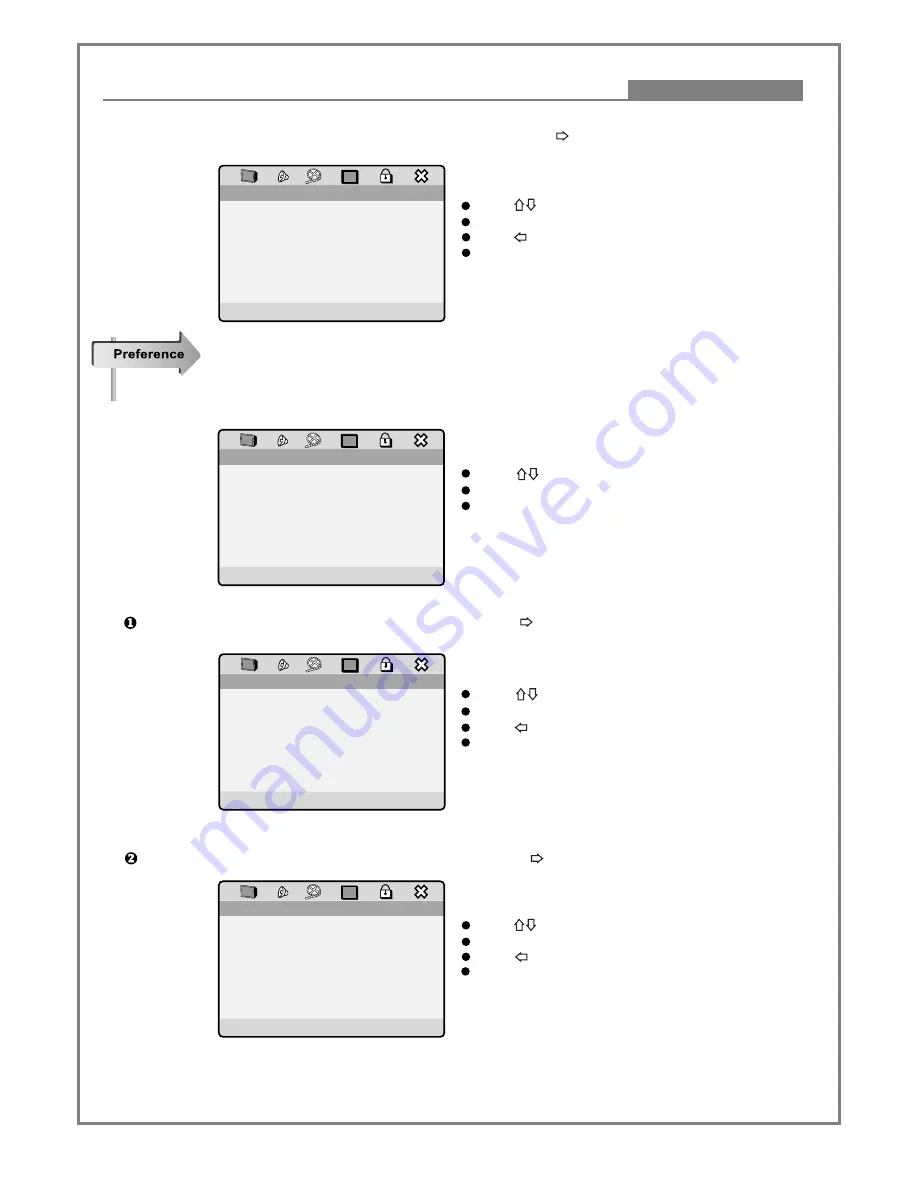
Function Illustrations

G> Select 

Luma Delay

 to display the submenu and press 

ENTER

 or     button to get into the item you desired.

Press        button to select.
Press 

ENTER

 button to confirm.

Press      button to back to the upper menu
Press 

SETUP

 button to exit.

# Note: Select according to different brightness and
   hue of TV set, generally select 1T for DVD discs and
   0T for others.

(Available only when player is in 

Stop

 mode, 

No disc

 mode or 

Tray open

 mode.)

Select 

Preference Page

 in the main setup page and press 

ENTER

 button to get into the respective page.

Press         button to select.
Press 

ENTER

 button to confirm.

Press 

SETUP

 button to exit.

Select 

Audio

 to display the submenu and press 

ENTER

 or      button to get into the item you desired.

Press         button to select.
Press 

ENTER

 button to confirm.

Press      button to back to the upper menu.
Press 

SETUP

 button to exit.

# This function is subject to discs.

Select 

Subtitle

 to display the submenu and press 

ENTER

 or      button to get into the item you desired.

Press        button to select.
Press 

ENTER

 button to confirm.

Press      button to back to the upper menu
Press 

SETUP

 button to exit.

# This function is subject to discs.

Luma Delay

Low
00
00
None
00
00           0T
1T           1T

Sharpness
Brightness
Contrast
Gamma
Hue
Saturation
Luma Delay

Video Quality Setup..

Go To Preference Page

ENG

ENG

ENG

Audio

Subtitle

Disc Menu

Parental

Default

Preference Page..

ENG

ENG

ENG 

Audio
Subtitle
Disc Menu
Parental
Default

Preference Page..

English
French
Spanish
Chinese
Japanese
Korean
Russian
Thai

Preferred Audio Language

ENG

ENG

ENG 

Audio
Subtitle
Disc Menu
Parental
Default

Preference Page..

English
French
Spanish
Chinese
Japanese
Korean
Russian
Thai

Preferred Subtitle Language

Содержание DVD9300PS

Страница 1: ...DVD9300PS User s Manual DVD Player...

Страница 2: ...8 Connecting to a TV Set Connecting to an AV Amplifier with 2 Channel Analog Audio Input Connecting to an AV Amplifier with 5 1 Channel Analog Audio Input Connecting to a AV Amplifier with Digital Au...

Страница 3: ...MANUAL CAREFULLY AND KEEP IT FOR FUTURE REFERENCE IF THE UNIT REQUIRES SERVICING CONTACT THE SELLER OR OUR SERVICE CENTRE SEE TROUBLE SHOOTING TO PREVENT DIRECT EXPOSURE TO THE LASER RADIATION DO NOT...

Страница 4: ...or replacement of the obsolete outlet 10 Protect the power cord from being walked on or pinched particularly at plugs convenience receptacles and the point where they exit from the apparatus 11 Only u...

Страница 5: ...player has been operating for a long time Do not move this product during playback Otherwise it may cause damage to the pick up and the disc Press OPEN CLOSE on the front panel or remote to open or cl...

Страница 6: ...s Confidential Unpublished Works 1992 1997 Dolby Laboratories Inc All right reserved RESTRICTED R This product incorporates copyright protection technology that is protected by method claims of certai...

Страница 7: ...right Optical audio output Coaxial Surround right Surround left S video output Sub woofer Main left Down mix right Centre Component video output Composite video output VGA output Open Close Mic jacks...

Страница 8: ...VCD SVCD Indicate the track number CD VCD SVCD Indicates the total playing time on a disc Illuminates when audio is DOLBY out Illuminate during playback is paused Illuminate during repeat playback Re...

Страница 9: ...A B ANGLE SUBTITLE PAUSE STEP ZOOM CHANNEL AUDIO PROGRAM MUTE REVERSE SCAN MEMORY NAVIGATION ARROWS ENTER SEARCH PROGRESSIVE INTERLACE SCAN PBC SETUP OSD TITLE ON STANDBY FORWARD SCAN STOP PLAY FOLLO...

Страница 10: ...cting the player s AV output to the TV set 1 YUV cord and left right cable set the component to YUV see page 25 2 S video cable and left right audio cable set the component to off see page 25 3 Compos...

Страница 11: ...ion s AV input to the channel you have connected 4 Please make sure the Video Output has been set with PS mode when you want to use these two connection ways For more information please kindly refer t...

Страница 12: ...ave connected 3 Set the amplifier s audio input to the channel you have connected Connecting to an AV amplifier with 2 channel analog audio input Connections BASS TREBLE ECHO DOWN UP VOLUME INPUT SELE...

Страница 13: ...nnected 3 Set the amplifier s audio input to the channel you have connected Connecting to an AV amplifier with 5 1 channel analog audio input Connections BASS TREBLE ECHO DOWN UP VOLUME INPUT SELECTOR...

Страница 14: ...Set the amplifier to the AV input connected to the DVD player Connecting to an AV amplifier with digital audio input Connections BASS TREBLE ECHO DOWN UP VOLUME INPUT SELECTOR MUTE KARAOKE CHANNEL TES...

Страница 15: ...Press the PLAY button on the front panel or remote control The player will automatically read and identify the disc display the type and total time and begin play Step 2 Press OPEN CLOSE button eithe...

Страница 16: ...button to select Press ENTER button to confirm Press button to back to the upper menu Press SETUP button to exit PAL PAL output Auto meet your TV system automatically NTSC NTSC output Select TV Displa...

Страница 17: ...to the upper menu Press SETUP button to exit This function is subject to TV and the playing disc Note Please make sure you have a NTSC TV and a disc with such function Select Screen Saver to display t...

Страница 18: ...udio program when DVD Video is selected the unit will play DVD Video program when DVD Audio is selected the unit will play DVD Audio program Select Audio Setup Page in the main setup page and press EN...

Страница 19: ...menu and press ENTER or button to get into the item you desired Press button to select Press ENTER button to confirm Press button to back to the upper menu Press SETUP button to exit This function is...

Страница 20: ...t Post DRC to display the submenu and press ENTER or button to get into the item you desired Select SPDIF Output in Audio Setup Page and press ENTER or button to display the submenu Press button to se...

Страница 21: ...F Output is set as Manual Press button to select Press ENTER button to confirm Press button to back to the upper menu Press SETUP button to exit Press button to select Press ENTER button to confirm Pr...

Страница 22: ...n to display the submenu A Select EQ Type to display the submenu and press ENTER or button to get into the item you desired Press button to select Press ENTER button to confirm Press button to back to...

Страница 23: ...UP button to exit Press button to select Press ENTER button to confirm Press button to back to the upper menu Press SETUP button to exit Press button to select Press ENTER button to confirm Press butt...

Страница 24: ...xit Music During stereo music playback it can create the full music effect Movie During discs with Dolby surround effect play back this function can have both the Prologic effect and the effect of ful...

Страница 25: ...n to back to the upper menu Press SETUP button to exit In MUS mode adjust the balance between front speakers and rear speakers by controlling Dimension to get the better music effect Press button to s...

Страница 26: ...rm Press SETUP button to exit Press button to select Press ENTER button to confirm Press button to back to the upper menu Press SETUP button to exit Press button to select Press ENTER button to confir...

Страница 27: ...ck to the upper menu Press SETUP button to exit Press button to select Press ENTER button to confirm Press button to back to the upper menu Press SETUP button to exit Press button to select Press ENTE...

Страница 28: ...xit Press ENTER button to display the submenu Press button to increase the hue and button to decrease it Press ENTER button to confirm and back to the upper menu Press SETUP button to exit F Select Sa...

Страница 29: ...ss button to select Press ENTER button to confirm Press button to back to the upper menu Press SETUP button to exit This function is subject to discs Select Subtitle to display the submenu and press E...

Страница 30: ...red level Press SETUP button to exit Note If the password setup has been set as off it need not to do the password confirmation Select Default to display the submenu and press ENTER or button to get i...

Страница 31: ...Press SETUP button to exit After selecting your desired item enter your password in the following menu Enter the correct password to set the desired level Press SETUP button to exit Enter old password...

Страница 32: ...back this function is invalid Note This function is subject to the discs During DVD playback press MENU key to display the menu of the current title During VCD SVCD playback PBC on press MENU key to d...

Страница 33: ...n be displayed only when PBC is Off Press PS IS key to shift PS IS system and it will shift as the menu setting automatically If you press the key in carelessness when your television is without progr...

Страница 34: ...RCH key once to display disc search menu by time Use digit keys to input the desired time Press this key twice to display the track search menu by time Use digit keys to input the desired time Press t...

Страница 35: ...ng DVD CD VCD SVCD Press the key once to play from the every start of playing item Press the key twice to play the previous chapter or track PREV 19 REV 18 FWD 17 RETURN 16 During playback press the k...

Страница 36: ...lear A and B points Note During CD VCD SVCD playback point A and B should be at the same track During DVD playback point A and B should be at the same chapter During SVCD playback press this key conti...

Страница 37: ...le number Use the digit keys to input the desired title and chapter and then select Start the player will play in the order you have set Note The track number title number and chapter number you have...

Страница 38: ...he subtitles automatically You can not turn off the subtitle by this button During playback press the key to stop press PLAY key to resume Two successive presses of the key will stop playing and retur...

Страница 39: ...on to select track Press ENTER or PLAY button to play Press button to back to upper menu During playback press PROGRAM button to shift between Directory Play and File List modes File List list all the...

Страница 40: ...ng Standard of ISO The pictures on KODAK Picture CD are stored in this format JPEG This player can decode the JPEG pictures in KODAK Picture CD and playback the pictures in different modes Now you can...

Страница 41: ...y twelve pictures at a pro ratio Press direction to select the desired picture and the selected picture will zoom into full screen Press PREV or NEXT key to select the previous or next twelve picture...

Страница 42: ...instruction Operating steps 1 Connect the microphone with the MIC1 MIC2 and you can connect single or two microphones 2 Input the disc 3 Select the track chapter in the program menu 4 Turn the knob M...

Страница 43: ...It is the same as the operation on remote controller Time display It is the same as the OSD operation on remote controller during VCD or SVCD playback press SEARCH button to display as follows Press b...

Страница 44: ...ms by the suggestions mentioned below If you can not remove the trouble after using all the suggestions please contact our company or the technical service centre authorised by us For the sake of your...

Страница 45: ...gnal System PAL NTSC Unit Weight 2 5 kg Unit Dimensions 430mm W x 258mm D x 50 mm H Audio out Analog out 1 85V rms 10k RCA pin Jack L R x 1 Coaxial out 0 5V p p 75 RCA pin Jack x 1 Optical out Optical...

Страница 46: ...Improper use of batteries may cause battery leakage and corrosion To operate the remote controller correctly follow the instruction below Do not insert batteries in the wrong direction Do not charge...

Страница 47: ...ALSONIC CORPORATION PTY LTD 1 JOYNTON AVENUE WATERLOO NSW 2017 AUSTRALIA TEL 02 9313 7111 FAX 02 9313 7555 www palsonic com au PALSONIC CUSTOMER SERVICE TELEPHONE AUSTRALIA 1300 657 888 FKV2 037 746SS...

Отзывы: