NOTE:
* You can use either RF or Audio/Video input from the VCR, but the quality of picture and
sound is better using the Audio/Video sockets.
* If the VCR has Mono sound, connect it to the L/Mono input socket. The R/Stereo cable is
optional for Stereo and need not be used.
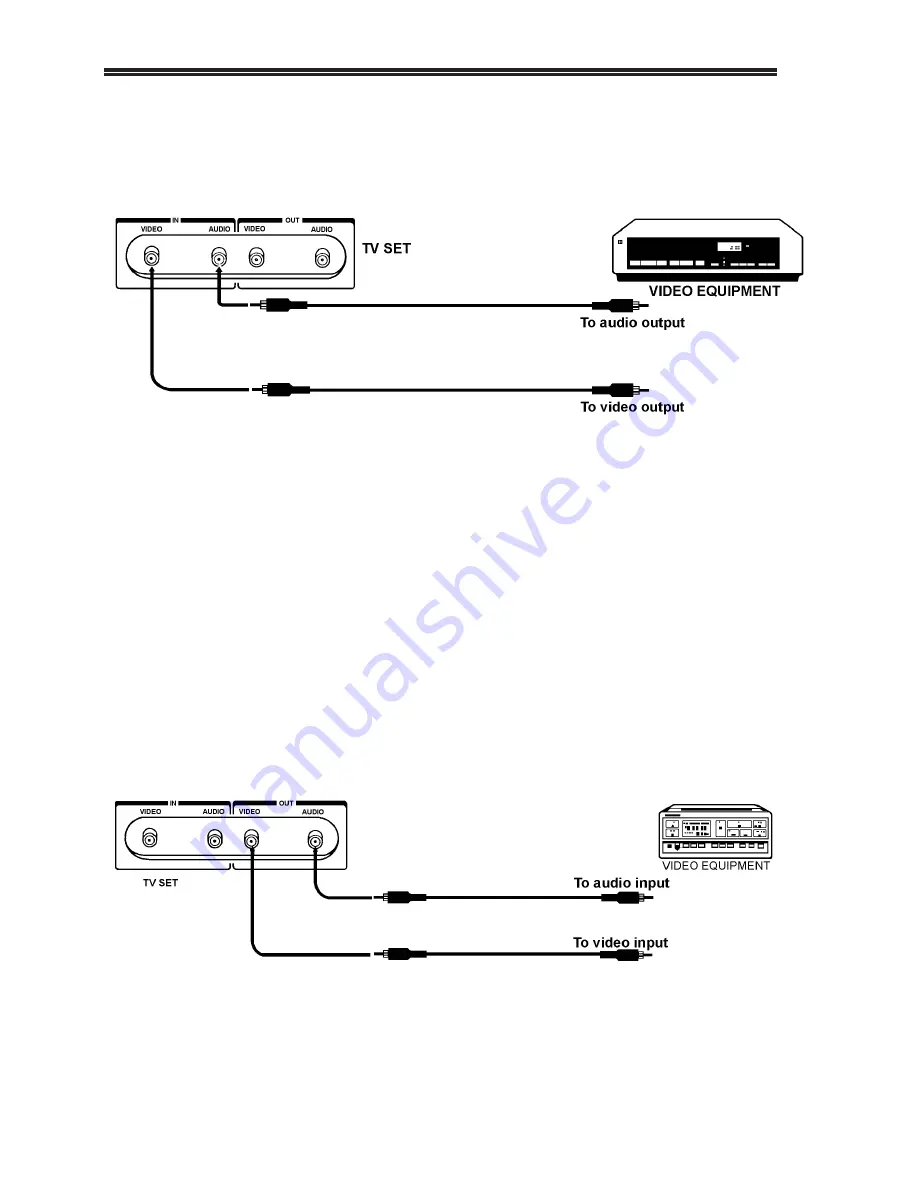
CONNECTION DIAGRAMS
1. VIDEO PLAYBACK/RECORD
This is the usual connection where Audio/Video is taken out of the VCR and is connected
IN to the TV set.
The material being played on the VCR can be viewed on the TV screen by pressing the AV
Button (13).
Pressing the TV Button (14) shows the TV station being tuned by the TV set.
If the VCR is recording (using its own tuner), you can watch what the VCR is recording
by pressing the AV button (13), or what the TV set is getting off-air, by pressing the TV
Button (14). In one case it monitors the Audio/Video from the VCR, and in the other its
own tuner.
It is easy to record one channel and watch another, or switch between without disturbing
the VCR recording. You can even turn off the TV set.
2. RECORDING FROM THE TV
This is useful if the VCR does not have a tuner, or if the quality of the VCR tuner is not
as good as the one in the TV set.
Press the TV Button (14) to select TV mode and choose a TV channel.
Check you VCR manual for how to record Audio/Video. The VCR has to be switched to
AV. Some VCR's do this automatically. Check your VCR manual.
Start the recorder. The VCR will now record what is on the screen. If you change channels
while recording, then that will be recorded too.
16
.
.
.
.
.
.


