background image


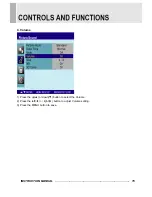
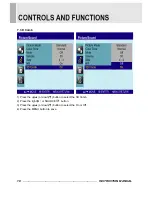
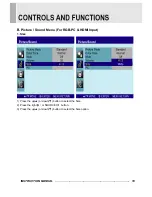
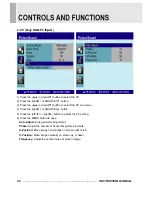
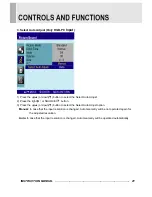
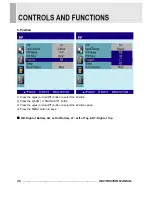
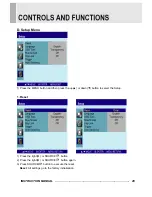
3. Select Auto Adjust (Only RGB-PC 

Input


1) Press the up(

) or down(

) button to select the Select Auto Adjust. 

2) Press the right(

▶)

 or SOURCE/

 button. 

3) Press the up(

) or down(

) button to select the Select Auto Adjust option. 

Manual:

 In case that the input resolution is changed, Auto Geometry will be not operated again for 

the adjusted resolution.


Auto: 

In case that the input resolution is changed, Auto Geometry will be operated automatically.


INSTRUCTION MANUAL  …………………………………………………………………….  21


Содержание PAC-17LED-P

Страница 1: ...TFT LED MONITOR PAC 17LED P PAC 19LED P User s Manual Please read this manual thoroughly before use and keep it handy for future reference ...

Страница 2: ......

Страница 3: ...TERFERENCE STATEMENT 5 CONNECTING WITH EXTERNAL EQUIPMENT 6 REMOTE FUNCTIONS 7 CONTROLS AND FUNCTIONS 8 42 MOUNTING GUIDE 43 D SUB CONNECTOR PIN ASSIGNMENTS 44 POWER MANAGEMENT 45 SPECIFICATIONS 46 TROUBLE SHOOTING GUIDE 47 INSTRUCTION MANUAL 1 ...

Страница 4: ...let consult an electrician for replacement of the bsolete outlet 10 Protect the power cord from being walked on or pinched particularly at plugs convenience receptacles and the point where they exit from the apparatus 11 Only use attachment accessories specified by the manufacturer 12 Use only with the cart stand tripod bracket or table specified by the manufacturer or sold with the apparatus When...

Страница 5: ...pparatus shall not be exposed to dripping or splashing and no objects filled with liquids such as vases shall be placed on the apparatus This symbol is intended to alert the user to the presence of uninsulated dangerous voltage with in the product s enclosure that may be of sufficient magnitude to constitute a risk of electric shock to persons This symbol is intended to alert the user to the prese...

Страница 6: ... rain or moisture This unit is designed to be used in the office or home Do not subject the unit to vibrations dust of corrosive gases KEEP IN A WELL VENTILATED PLACE Ventilation holes are provided on the cabinet to prevent the temperature from rising Do not cover the unit or place anything on the top of unit AVOID HEAT Avoid placing the unit in direct sunshine or near a heating appliance TO ELIMI...

Страница 7: ...g the equipment off and on the user is encouraged to try to correct the interference by one or more of the following measures Reorient or relocate the receiving antenna Increase the separation between the equipment and receiver Connect the equipment into an outlet on a circuit different from that to which the receiver is connected Consult the dealer or an experienced radio TV technician for help O...

Страница 8: ...CONTROL 1 DC 12V IN 2 HDMI IN 3 VGA D SUB IN 4 VIDEO1 AV1 IN 5 VIDEO1 AV1 OUT 6 VIDEO2 AV2 IN 7 VIDEO2 AV2 OUT 8 9 AUDIO IN R L for AV1 AV2 10 PC STEREO IN 11 TRIGGER INPUT 6 INSTRUCTION MANUAL 1 2 4 5 6 7 8 9 10 11 3 ...

Страница 9: ...ur selection or displays the current mode 11 INFO Input mode information Display 12 STILL Stop the picture 13 PIP Picture In Picture Activate PIP mode 14 P INPUT Change source of sub picture in PIP mode 15 P POS Move the position of sub picture for PIP mode 16 P SIZE Change the size of sub and main picture for PIP mode 17 SWAP Alternates between main and sub picture 18 ARC Aspect Ratio Control Sel...

Страница 10: ... sub menu of the activated function AUTO Auto geometry adjustment 5 6 VOL Adjust the volume and menu settings 7 IR Sensor Remote controller sensor 8 POWER LED The power LED lights with green when the power is turned ON The power is turned off by pressing the power switch again and the power LED goes to off 9 POWER ON OFF I Turns the power ON or OFF There will be a few seconds delay before the disp...

Страница 11: ...eft or right button to adjust the picture setting 4 Press the MENU button to save Brightness Increase or decrease the intensity of the image Contrast Increase or decrease the intensity lightness or dimness of the image Color Increase or decrease the colour of the picture Tint Increase or decrease the tint of the picture Sharpness Increase or decrease the sharpness of the picture INSTRUCTION MANUAL...

Страница 12: ... the MENU button and then press the up or down button to select the Custom 2 Press the up or down button to select the sub menu 3 Press the left or right button to adjust the picture setting 4 Press the MENU button to save 10 INSTRUCTION MANUAL ...

Страница 13: ...the up or down button to select the Picture Sound 2 Press the right or SOURCE button 3 Press the up or down button to select the Picture Mode 4 Press the right or SOURCE button 5 Press the up or down button to select the Picture Mode option 6 Press the MENU button to save INSTRUCTION MANUAL 11 ...

Страница 14: ...or down button to select the Color Tone 2 Press the right or SOURCE button 3 Press the right or SOURCE button again 4 Press the up or down button to select the Color Tone option 5 Press the MENU button to save 12 INSTRUCTION MANUAL ...

Страница 15: ... down button to select the User 2 Press the MENU button 3 Press the up or down button to select the User option 4 Press the left or right button to adjust the Red Green or Blue setting 5 Press the MENU button to save INSTRUCTION MANUAL 13 ...

Страница 16: ...3 Mute 1 Press the up or down button to select the Mute 2 Press the right or SOURCE button 3 Press the up or down button to select the On or Off 4 Press the MENU button to save 14 INSTRUCTION MANUAL ...

Страница 17: ...4 Volume 1 Press the up or down button to select the Volume 2 Press the left or right button to adjust Volume setting 3 Press the MENU button to save INSTRUCTION MANUAL 15 ...

Страница 18: ...5 Size 1 Press the up or down button to select the Size 2 Press the right or SOURCE button 3 Press the up or down button to select the Size option 4 Press the MENU button to save 16 INSTRUCTION MANUAL ...

Страница 19: ... Noise Reduction 1 Press the up or down button to select the NR 2 Press the right or SOURCE button 3 Press the up or down button to select the On or Off 4 Press the MENU button to save INSTRUCTION MANUAL 17 ...

Страница 20: ... 3D Comb 1 Press the up or down button to select the 3D Comb 2 Press the right or SOURCE button 3 Press the up or down button to select the On or Off 4 Press the MENU button to save 18 INSTRUCTION MANUAL ...

Страница 21: ...ture Sound Menu For RGB PC HDMI Input 1 Size 1 Press the up or down button to select the Size 2 Press the right or SOURCE button 3 Press the up or down button to select the Size option INSTRUCTION MANUAL 19 ...

Страница 22: ... SOURCE button 5 Press the left or right button to adjust the PC setting 6 Press the MENU button to save Auto Adjust Auto geometry adjustment Phase Adjust the number of horizontal picture elements H Position Move image horizontally on screen right or left V Position Move image vertically on screen up or down Frequency Adjust the vertical noise of screen image 20 INSTRUCTION MANUAL ...

Страница 23: ...r SOURCE button 3 Press the up or down button to select the Select Auto Adjust option Manual In case that the input resolution is changed Auto Geometry will be not operated again for the adjusted resolution Auto In case that the input resolution is changed Auto Geometry will be operated automatically INSTRUCTION MANUAL 21 ...

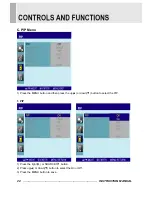
Страница 24: ...ss the MENU button and then press the up or down button to select the PIP 1 PIP 1 Press the right or SOURCE button 2 Press up or down button to select the On or Off 3 Press the MENU button to save 22 INSTRUCTION MANUAL ...

Страница 25: ...ight or SOURCE button 3 Press the up or down button to select the Source option 4 Press the MENU button to save Possible PIP Combination Main Sub Video Video Video RGB PC or HDMI RGB PC or HDMI Video Impossible PIP Combination Main Sub RGB PC or HDMI RGB PC or HDMI INSTRUCTION MANUAL 23 ...

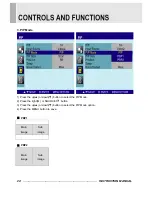
Страница 26: ...wn button to select the PIP Mode 2 Press the right or SOURCE button 3 Press the up or down button to select the PIP Mode option 4 Press the MENU button to save PBP1 Main image Sub image PBP2 Main image Sub image 24 INSTRUCTION MANUAL ...

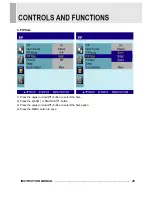
Страница 27: ... PIP Size 1 Press the up or down button to select the Size 2 Press the right or SOURCE button 3 Press the up or down button to select the Size option 4 Press the MENU button to save INSTRUCTION MANUAL 25 ...

Страница 28: ...n to select the Position 2 Press the right or SOURCE button 3 Press the up or down button to select the Position option 4 Press the MENU button to save RB Right of Bottom LB Left of Bottom LT Left of Top RT Right of Top 26 INSTRUCTION MANUAL ...

Страница 29: ...6 Swap 1 Press the up or down button to select the Swap 2 Press the right or SOURCE button to swap the main image for the sub one INSTRUCTION MANUAL 27 ...

Страница 30: ...ect 1 Press the up or down button to select the Sound Select 2 Press the right or SOURCE button 3 Press the up or down button to select the Sound Select option 4 Press the MENU button to save 28 INSTRUCTION MANUAL ...

Страница 31: ...press the up or down button to select the Setup 1 Reset 1 Press the right or SOURCE button 2 Press the right or SOURCE button again 3 Press SOURCE button to execute the reset Reset All settings go to the factory initialization INSTRUCTION MANUAL 29 ...

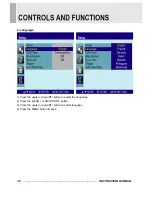
Страница 32: ...2 Language 1 Press the up or down button to select the Language 2 Press the right or SOURCE button 3 Press the up or down button to select language 4 Press the MENU button to save 30 INSTRUCTION MANUAL ...

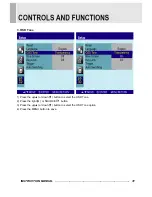
Страница 33: ... Tone 1 Press the up or down button to select the OSD Tone 2 Press the right or SOURCE button 3 Press the up or down button to select the OSD Tone option 4 Press the MENU button to save INSTRUCTION MANUAL 31 ...

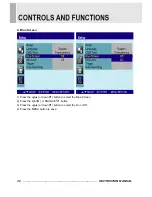
Страница 34: ...e Screen 1 Press the up or down button to select the Blue Screen 2 Press the right or SOURCE button 3 Press the up or down button to select the On or Off 4 Press the MENU button to save 32 INSTRUCTION MANUAL ...

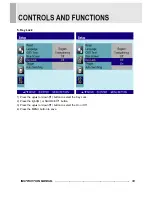
Страница 35: ...Key Lock 1 Press the up or down button to select the Key Lock 2 Press the right or SOURCE button 3 Press the up or down button to select the On or Off 4 Press the MENU button to save INSTRUCTION MANUAL 33 ...

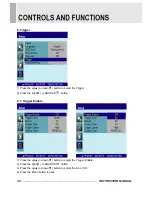
Страница 36: ...ger 2 Press the right or SOURCE button 6 1 Trigger Enable 1 Press the up or down button to select the Trigger Enable 2 Press the right or SOURCE button 3 Press the up or down button to select the On or Off 4 Press the Menu button to save 34 INSTRUCTION MANUAL ...

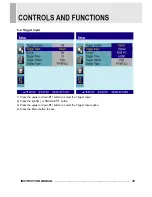
Страница 37: ...put 1 Press the up or down button to select the Trigger Input 2 Press the right or SOURCE button 3 Press the up or down button to select the Trigger Input option 4 Press the Menu button to save INSTRUCTION MANUAL 35 ...

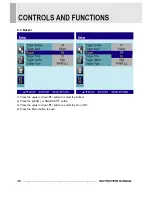
Страница 38: ... 3 Buzzer 1 Press the up or down button to select the Buzzer 2 Press the right or SOURCE button 3 Press the up or down button to select the On or Off 4 Press the Menu button to save 36 INSTRUCTION MANUAL ...

Страница 39: ...6 4 Trigger Time 1 Press the up or down button to select the Trigger Time 2 Press left or right button to adjust Trigger Time setting 3 Press the MENU button to save INSTRUCTION MANUAL 37 ...

Страница 40: ...function is activated when the trigger cable is opened N O Normally Opened The Trigger function is activated when the trigger cable is closed High The Trigger function is activated when the trigger signal is DC 2 5 V Low The Trigger function is activated when the trigger signal is DC 0 0 6 V Note In this case trigger port has high status electrically so the trigger cable has to have ground or eart...

Страница 41: ...t the Display Type option 4 Press the Menu button to save PIP FULL When the condition is below the Trigger Input image will be displayed as PIP Main Trigger Input Video Video Video RGB PC or HDMI RGB PC or HDMI Video Otherwise it will be displayed as full screen FULL The Trigger Input image will be displayed as a full screen INSTRUCTION MANUAL 39 ...

Страница 42: ... button to select the Auto switching 2 Press the right or SOURCE button 7 1 Auto switching On Off 1 Press the right or SOURCE button 3 Press the up or down button to select the On or Off 4 Press the Menu button to save 40 INSTRUCTION MANUAL ...

Страница 43: ...ton to select the Inputs enabled 2 Press the right or SOURCE button 3 Press the up or down button to select the Input 4 Press the right or SOURCE button 5 Press the up or down button to select the On or Off 6 Press the Menu button to save INSTRUCTION MANUAL 41 ...

Страница 44: ...7 3 Auto switching Time 1 Press the up or down button to select the Time 2 Press the left or right button to adjust the Time setting 3 Press the MENU button to save 42 INSTRUCTION MANUAL ...

Страница 45: ...00mm hole pattern on the back panel to install the LCD monitor to the wall Wall mount Installation Option 1 The Monitor fixing bracket to the monitor using the fixing screws provided 2 The monitor fixing bracket assembled with monitor INSTRUCTION MANUAL 43 ...

Страница 46: ...DA for DDC 5 GROUND 13 H SYNC or H V SYNC 6 RED GROUND 14 V SYNC 7 GREEN GROUND 15 SCL for DDC 8 BLUE GROUND ACCESSORIES 1 Power cord 2 Power adaptor 3 User s manual 4 PC cable 5 Trigger cable Option 6 Stereo cable Option 7 Remote controller Option 8 Batteries Option 9 Wall mount Option 44 INSTRUCTION MANUAL ...

Страница 47: ...0W 45W POWER OFF 1W LED INDICATOR The power management feature of the monitor is comprised of four stages ON GREEN and POWER OFF GREEN OFF MODE LED COLOR MONITOR OPERATION ON GREEN Normal Operation POWER OFF GREEN OFF Not Operation INSTRUCTION MANUAL 45 ...

Страница 48: ...terminated loop through out VGA RGB PC AV composite Sound in HDMI High Definition Multimedia Interface PC Stereo Sound ACTIVE DISPLAY AREA W x H 337 920 mm X 270 336 mm 376 32 mm X 301 06 mm PACKING DIMENSIONS W x D x H 445mm X 235mm X 475mm 17 52 X 9 25 X 18 7 500mm X 235mm X 515mm 19 69 X 9 25 X 20 28 WEIGHT Net Weight 5 8kg 12 79 lbs Net Weight 6 5kg 14 33 lbs Gross Weight 7 6kg 16 76 lbs Gross...

Страница 49: ... the environment or human health from uncontrolled waste disposal please separate this from other types of wastes and recycle it responsibly to promote the sustainable reuse of material resources Household users should contact either the retailer where they purchased this product or their local government office for details of where and how they can take this item for environmentally safe recyclin...

Страница 50: ...MEMO ...

Страница 51: ...MEMO ...

Страница 52: ......

Страница 53: ......

Страница 54: ...P N L39ME0358 Rev 0 ...

Отзывы: