


Packshot
Creator
installation
Installing the accessories
Assemble and place the product stand inside of the lightbox.
See Picture 2.
Step
C
Insert the lamps into each corner of the lightbox. Gently turn the lamp until you
hear a click.
See Picture.
Step
F
Plug one end of the power adapter into the camera and the other end into the
universal power socket located inside of the camera housing.
See Picture.
If you are using a PackshotCreator 360, please refer to the O3T Quick Installation
Guide to install the turntable.
Step
A
Place the lightbox where you intend to use it.
Note:
There should be a power outlet with proper grounding nearby.
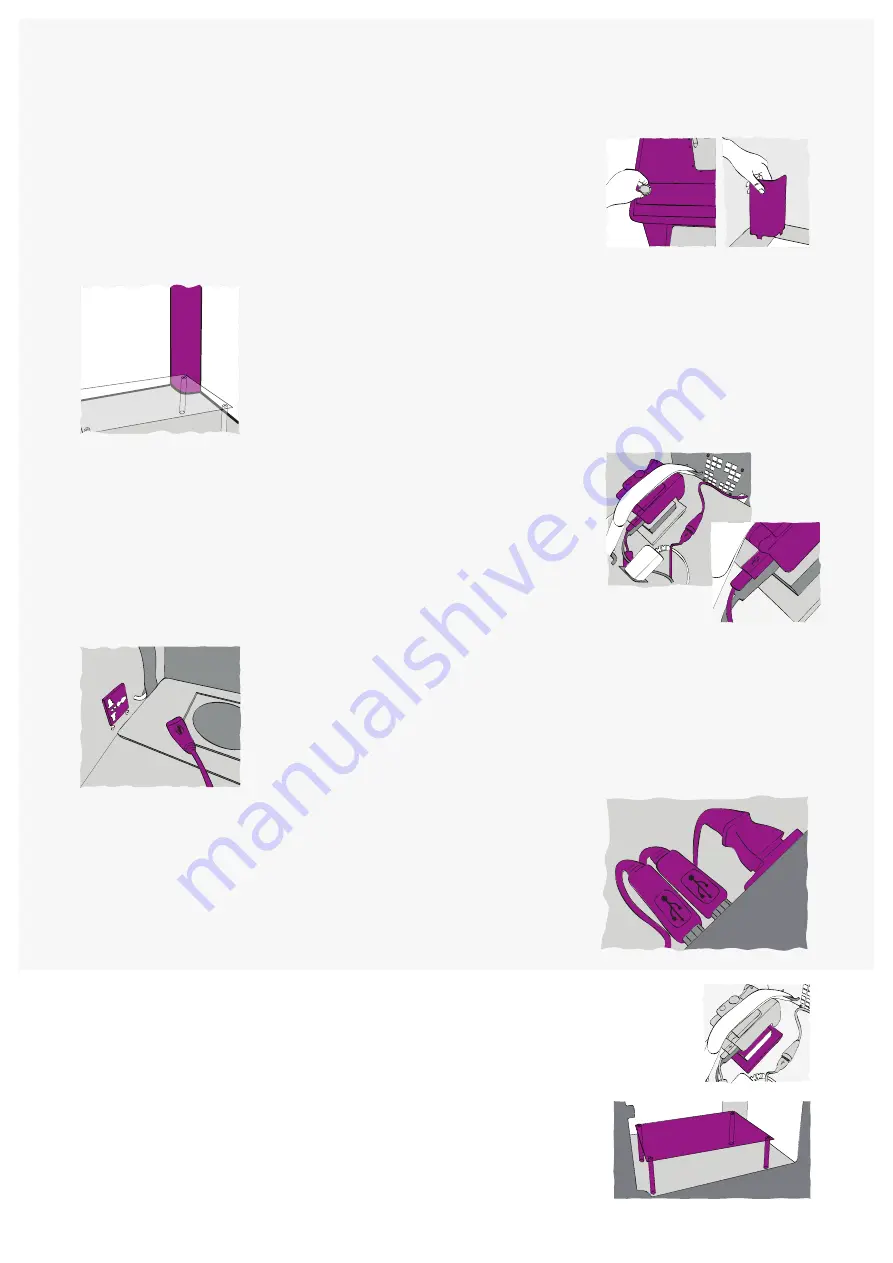
Step
B
Unscrew the four screws located at the top corners of your PackshotCreator. Pull out
the four diffusion plates that cover the lamp receptacles.
See Picture 1 and Picture 2.
Step
G
Plug the lightbox into a power outlet.
See Picture.
Step
H
Plug the two USB cords into your computer.
See Picture.
Check if the switch button
located at the back of the lightbox is set to the “PC Controlled” mode or “I” position.
Picture 1
Picture 1
Picture 2
Picture 2
Find the right foam support for your camera and point the lens through the opening down into the
box.
See Picture 1.
The background provided in the package can be put and removed very easily from the back of the
lightbox thanks to a plunger system. Use it for side shots and for creating animations.
Note:
A whitebackground is included in the PackshotCreator package. However you can purchase an additional
black background.
Step
E
Plug the USB cable connected to the camera into the USB connector
coming from the side of the camera housing.
Step
D
Open the camera housing located on the top of the lightbox.
Note:
Both the USB cord and the power adapter are provided in the PackshotCreator package.


