background image


99 


SECTION 5


MAINTENANCE


5.0 MAINTENANCE


This section describes the maintenance of the AMX-Series AC Power Source. 


5.1 MAINTENANCE 

INTERVAL


Maintenance of the Models 105-AMX, 108-AMX, 112-AMX, 305-AMX, 308-AMX, and 312-AMX Power 
Sources is required once every six months and consists of performing regular calibration. 


Maintenance of the Models 125-AMX, 140-AMX, 160-AMX, 320-AMX, 345-AMX, 360-AMX, 390-AMX, 
and 3120-AMX Power Sources is required once every three months and consists of checking/cleaning the fan 
filter, with regular calibration once every six months. 


5.2 MAINTENANCE 

REQUIREMENTS


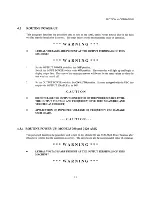
5.2.1  MODELS 105, 108, 112, 305, 308, & 312-AMX


The Models 105-AMX, 108-AMX, 112-AMX, 305-AMX, 308-AMX, and 312-AMX require calibration once 
every six months as regular maintenance.  Refer to Section 6 for details. 


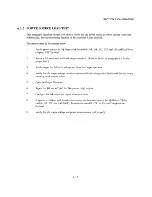
5.2.2  MODELS 125, 140, 160, 320, 345, 360, 390, & 3120-AMX


The Models 125, 140, 160, 320, 345, 360, 390, and 3120-AMX require maintenance once every three months.  
Maintenance of these models consists of verifying that the fan filter is clean.  It is important that this filter is 
kept clean in order to insure proper cooling of internal components. 


The fan filter is cleaned as follows: 


1. 

Slide the chassis forward to reveal the fan filter access panel, located on the bottom of the 
chassis.   

2. 

Remove the fan filter access panel.  (The 320-AMX has no access panel.  Loosen the 2 
screws that partially protrude from the side panels, directly above the filter, to allow the filter 
to slide out of its holder.) 

3. 

The filter will slide out of its holder.  Remove the filter. 

4. 

Wash and dry the fan filter.  The filter is a metal screen mesh type.  It is reusable and is best 
cleaned by washing with warm soapy water.  Make sure that the filter is dry before installing 
it into the chassis. 

5. 

Install the filter and then replace the fan filter access plate (if so equipped). 

6. 

Slide the chassis back into its normal position. 


If system operation is suspect or the calibration interval has passed, perform the calibration procedure outlined 
in Section 6. 

Содержание AMX series

Страница 1: ......

Страница 2: ......

Страница 3: ...120 AMX AND THE UMC 31 THIS MANUAL ASSIGNED TO MODEL_____________________ S N______________________ THE INFORMATION CONTAINED IN THIS MANUAL IS PROPRIETARY TO PACIFIC POWER SOURCE MAY NOT BE COPIED OR...

Страница 4: ...lifornia This warranty does not cover batteries It does not cover damage arising from mis use of the unit or attempted field modifications or repairs This warranty specifically excludes damage to othe...

Страница 5: ...8 2 3 2 COOLING 38 2 3 3 THERMAL PROTECTION 38 3 0 INSTALLATION 3 1 CHASSIS PLACEMENT 39 3 2 OUTPUT VOLTAGE RANGE CONFIGURATION 41 3 2 1 OUTPUT VOLTAGE RANGE CONFIGURATION MODELS 105 and 108 AMX 43 3...

Страница 6: ...4 3 1 ROUTINE POWER UP MODELS 390 AMX and 3120 AMX 91 4 4 SYSTEM TURN OFF 92 4 4 1 SYSTEM TURN OFF MODELS 390 AMX and 3120 AMX 93 4 5 SYSTEM SHUTDOWN 93 4 5 1 SHUTDOWN CONDITIONS 93 4 5 2 RESETTING S...

Страница 7: ...20 AMX 110 7 3 10 FACTORY PART NUMBERS MODEL 345 AMX 111 7 3 11 FACTORY PART NUMBERS MODEL 360 AMX 112 7 3 12 FACTORY PART NUMBERS MODEL 390 AMX 113 7 3 13 FACTORY PART NUMBERS MODEL 3120 AMX 114 8 0...

Страница 8: ...PER E1 LOCATION 45 FIGURE 3 2 4 MODELS 105 108 AMX OUTPUT VOLTAGE CONFIGURATION 48 FIGURE 3 2 5 A MODEL 312 AMX OUTPUT VOLTAGE CONFIGURATION TABLE 49 FIGURE 3 2 5 B MODEL 312 AMX OUTPUT VOLT RANGE JUM...

Страница 9: ...of the AMX Series Power Source Sections 5 and 6 list maintenance and calibration requirements of this equipment Refer to these sections when either maintenance or calibration is required Section 7 des...

Страница 10: ......

Страница 11: ......

Страница 12: ...SECTION 1 GENERAL 4 FIGURE 1 3 w UPC 32 Controller w UMC 31 Controller MODEL 305 AMX MODEL 360 AMX...

Страница 13: ...provide higher voltages Voltage ratios up to 2 5 1 are available The AMX Series consists of the basic models listed below 1 Model 105 AMX 500 VA Chassis capable of 1 or 2 Phase operation Standard Outp...

Страница 14: ...14 Model 3120 AMX Same as 305 AMX but rated for 12 0 kVA output power External voltage sense is provided on all systems Systems configured with the programmable controller also feature Continuous Self...

Страница 15: ......

Страница 16: ......

Страница 17: ...rvice Recommended 5 240 416 VAC 6 Arms 10 A Service Recommended cost option 6 277 480 VAC 5 Arms 10 A Service Recommended MODEL 140 AMX INPUT VOLTAGE The Model 140 AMX accepts one of the following thr...

Страница 18: ...5 240 416 VAC 10 47 63 Hz 360 440 Hz cost option cost option 6 277 480 VAC 10 47 63 Hz 360 440 Hz cost option INPUT CURRENT The input current required by the Model 360 AMX at full rated load is state...

Страница 19: ...SECTION 2 SPECIFICATIONS 9B THIS PAGE INTENTIONALLY BLANK...

Страница 20: ...rms 15 A Service Recommended 4 230 VAC 4 Arms 15 A Service Recommended 5 240 VAC 4 Arms 15 A Service Recommended MODEL 308 AMX INPUT VOLTAGE The Model 308 AMX accepts one of the following single phase...

Страница 21: ......

Страница 22: ......

Страница 23: ......

Страница 24: ...o the Power Factor Derating chart of Figure 2 1 2 A N for maximum current at reduced voltage Output current ratings are scaled appropriately when using transformer coupled outputs 1 2 3 MODELIout rms...

Страница 25: ......

Страница 26: ......

Страница 27: ......

Страница 28: ......

Страница 29: ......

Страница 30: ...SECTION 2 SPECIFICATIONS 19A FIGURE 2 1 2 E2 MODEL 160 AMX OUTPUT DERATING CURVES...

Страница 31: ...SECTION 2 SPECIFICATIONS 19B THIS PAGE INTENTIONALLY BLANK...

Страница 32: ......

Страница 33: ......

Страница 34: ......

Страница 35: ......

Страница 36: ......

Страница 37: ......

Страница 38: ......

Страница 39: ......

Страница 40: ......

Страница 41: ......

Страница 42: ......

Страница 43: ...Model 160 AMX MODEL 305 AMX Height 5 25 134 mm Width 19 00 483 mm front panel 16 75 426 mm chassis Depth 23 00 584 mm measured from back side of front panel excludes terminal blocks Weight 60 lbs 27 k...

Страница 44: ...Height 5 25 134 mm Width 19 00 483 mm front panel 16 75 426 mm chassis Depth 23 00 584 mm measured from back side of front panel excludes terminal blocks Weight 70 lbs 32 kg Refer to Figure 2 2 1 for...

Страница 45: ...SECTION 2 SPECIFICATIONS 31B THIS PAGE INTENTIONALLY BLANK...

Страница 46: ......

Страница 47: ......

Страница 48: ......

Страница 49: ......

Страница 50: ...SECTION 2 SPECIFICATIONS 36 FIGURE 2 2 3 OUTLINE DRAWING MODELS 125 140 160 345 360 AMX...

Страница 51: ......

Страница 52: ...the Models 125 AMX and 320 AMX is 300 CFM The maximum airflow of the Models 140 AMX 160 AMX 345 AMX and 360 AMX is 600 CFM The maximum airflow of the Models 390 AMX and 3120 AMX is 1200 CFM 2 3 3 THE...

Страница 53: ...SE EXTREME CARE WHEN MOVING THE UNIT THE MAGNETICS MODULE MODELS 125 AMX 140 AMX 160 AMX AND 320 AMX THROUGH 3120 AMX ARE NOT A ONE PERSON LIFT UNIT MUST BE LIFTED BY TWO OR MORE INDIVIDUALS IN ORDER...

Страница 54: ...of two inches on each side and 12 inches to the rear is required for proper operation of these models When the chassis is placed in a 19 inch rack it must be supported by either chassis slides or ful...

Страница 55: ...time of order Systems are configured at the factory as ordered The System ID label or Magnetics Module ID label will state the factory configured Voltage Range if transformer coupled outputs are prese...

Страница 56: ......

Страница 57: ......

Страница 58: ......

Страница 59: ......

Страница 60: ......

Страница 61: ......

Страница 62: ......

Страница 63: ......

Страница 64: ......

Страница 65: ......

Страница 66: ......

Страница 67: ......

Страница 68: ...SECTION 3 INSTALLATION 54 FIGURE 3 2 7 MODELS 140 160 345 360 390 3120 AMX OUTPUT VOLTAGE CONFIGURATION...

Страница 69: ...he rear panel of the power source 5 Set the Transformer Ratio Switch of the UPC to 1 5 Refer to the UPC Series Operation Manual for details This step does not apply to systems equipped with the UMC co...

Страница 70: ......

Страница 71: ......

Страница 72: ......

Страница 73: ......

Страница 74: ......

Страница 75: ......

Страница 76: ......

Страница 77: ......

Страница 78: ...SECTION 3 INSTALLATION 64 FIGURE 3 3 7 MODELS 140 160 345 360 390 3120 AMX INPUT VOLTAGE CONFIGURATION...

Страница 79: ...tory for details Figure 3 3 7 shows the location of the various jumpers which need attention relative to input voltage form The position of these jumpers is listed on the accompanying table The first...

Страница 80: ...SECTION 3 INSTALLATION 66 FIGURE 3 3 8 AMX SERIES INPUT WIRING DIAGRAM...

Страница 81: ...ock located on the rear panel of the power source In this case the input wiring is brought to this terminal block from the distribution panel The connection points are labeled A B C N and CHS The inpu...

Страница 82: ...SECTION 3 INSTALLATION 68 FIGURE 3 4 1 1 SINGLE PHASE OUTPUT CONNECTION...

Страница 83: ......

Страница 84: ......

Страница 85: ......

Страница 86: ...SECTION 3 INSTALLATION 72 FIGURE 3 4 2 1 SPLIT PHASE OUTPUT CONNECTION...

Страница 87: ......

Страница 88: ......

Страница 89: ......

Страница 90: ......

Страница 91: ......

Страница 92: ......

Страница 93: ......

Страница 94: ......

Страница 95: ......

Страница 96: ......

Страница 97: ......

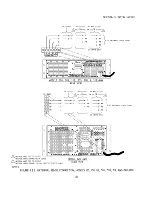
Страница 98: ...SECTION 3 INSTALLATION 84 FIGURE 3 8 1 EXTERNAL SENSE CONNECTION MODELS 125 140 160 345 360 390 3120 AMX...

Страница 99: ......

Страница 100: ......

Страница 101: ......

Страница 102: ......

Страница 103: ...odels Refer to the UPC Series OPERATION MANUAL or Section 8 of this manual for information relative to the installed controller 1 INPUT POWER SWITCH Circuit Breaker Circuit Breaker used as the main in...

Страница 104: ......

Страница 105: ......

Страница 106: ......

Страница 107: ......

Страница 108: ......

Страница 109: ......

Страница 110: ......

Страница 111: ...ge ranges of the various transformer output forms are VR1 5 0 to 408 VACl l Models 105 108 140 305 308 345 360 390 and 3120 AMX VR2 0 0 to 546 VACl l Models 105 108 140 160 305 308 345 360 390 and 312...

Страница 112: ......

Страница 113: ...maintenance once every three months Maintenance of these models consists of verifying that the fan filter is clean It is important that this filter is kept clean in order to insure proper cooling of...

Страница 114: ......

Страница 115: ...4 Digit True RMS responding 5000 Hz bandwidth min 2 Frequency counter 5 digit counter min 3 Digital Ammeter 3 Digit True RMS responding 5000 Hz bandwidth min Alternate Approach Current transformer us...

Страница 116: ......

Страница 117: ......

Страница 118: ......

Страница 119: ...0 7 2 ROSTER OF SYSTEM LEVEL FACTORY PART NUMBERS The following is a list of system level factory part numbers for the models which comprise the AMX Series line of equipment Part numbers are stated fo...

Страница 120: ......

Страница 121: ......

Страница 122: ......

Страница 123: ...139071 CHASSIS COMPONENT FACTORY PART No Input Circuit Breaker 716053 Front Panel Handle 702113 Trunk Handle 702128 Input Terminal Block 705009 Output Terminal Block 705009 External Sense Terminal Blo...

Страница 124: ...SECTION 7 SERVICE 108B THIS PAGE INTENTIONALLY LEFT BLANK...

Страница 125: ......

Страница 126: ......

Страница 127: ......

Страница 128: ......

Страница 129: ......

Страница 130: ......

Страница 131: ......

Страница 132: ......

Страница 133: ......

Страница 134: ......

Страница 135: ......

Страница 136: ......

Страница 137: ......

Страница 138: ......

Страница 139: ......

Страница 140: ......

Страница 141: ......

Страница 142: ......

Страница 143: ......

Страница 144: ......

Страница 145: ......

Страница 146: ......

Страница 147: ......

Страница 148: ...127 Sync Out 127 Errata 1 135 Fan filter cleaning and removal 99 Frequency control UMC 31 125 Frequency meter UMC 31 118 GPIB82 w 390 and 3120 AMX 81 Grounding requirements 3 output 78 Split output 74...

Страница 149: ......

Страница 150: ......

Страница 151: ......

Страница 152: ......

Страница 153: ...lock PAGE 7 PARAGRAPH 2 1 1 INPUT POWER REQUIREMENTS MODEL 105 AMX PAGE 8 PARAGRAPH 2 1 1 INPUT POWER REQUIREMENTS MODEL 108 AMX PAGE 10 PARAGRAPH 2 1 1 INPUT POWER REQUIREMENTS MODEL 305 AMX PAGE 10...

Страница 154: ...Service Recommended 2 220 VAC 39 Arms 60 A Service Recommended 3 240 VAC 36 Arms 60 A Service Recommended IS Vin INPUT CURRENT 1 208 VAC 42 Arms 80 A Service Recommended 2 220 VAC 39 Arms 80 A Servic...

Страница 155: ...0 305 308 320 345 360 390 and 3120 AMX and VR2 5 0 to 341 VACl n Models 105 108 140 305 308 320 360 390 and 3120 AMX WAS The 2 PHASE mode of operation is a two vector output form where the vectors are...

Страница 156: ...cs module output to the 320 AMX And changing the part number for the external magnetics module WAS Magnetics Module for the 140 345 360 390 3120 AMX 134310 IS Magnetics Module for the 140 320 345 360...

Страница 157: ...ut Circuit Breaker 716053 Input and Output Terminal Blocks 705009 IS SUB ASSEMBLY FACTORY PART No LVPS Fuse PCB 140374 NEW CHASSIS COMPONENT FACTORY PART No Input Circuit Breaker 716079 208 220 240VAC...

Страница 158: ...put Terminal Block 705009 black case Output Contactor 717038 IS SUB ASSEMBLY FACTORY PART No LVPS Fuse PCB 140373 New CHASSIS COMPONENT FACTORY PART No Input Circuit Breaker 716077 208 220 240VACA Inp...

Страница 159: ......

Отзывы: