


25
INSTALLER
INFORMATION
5056.412-E
Propane Conversion
Before starting the conversion make sure to shut off
the gas supply to the unit and allow fireplace to cool to
room temperature.
To convert the gas fireplace from natural gas to propane
the (GASC.LPKIT) kit is required. This kit comes with new
pilot and burner orifices as well as a new pressure
modulator for the valve.
To switch the pressure modulator, follow the instructions
that are provided with the conversion kit.
To change the orifices you are required to remove the
door, media set, and burner. Please refer to the
appropriate sections of this manual and follow instructions
on how to correctly remove the components.
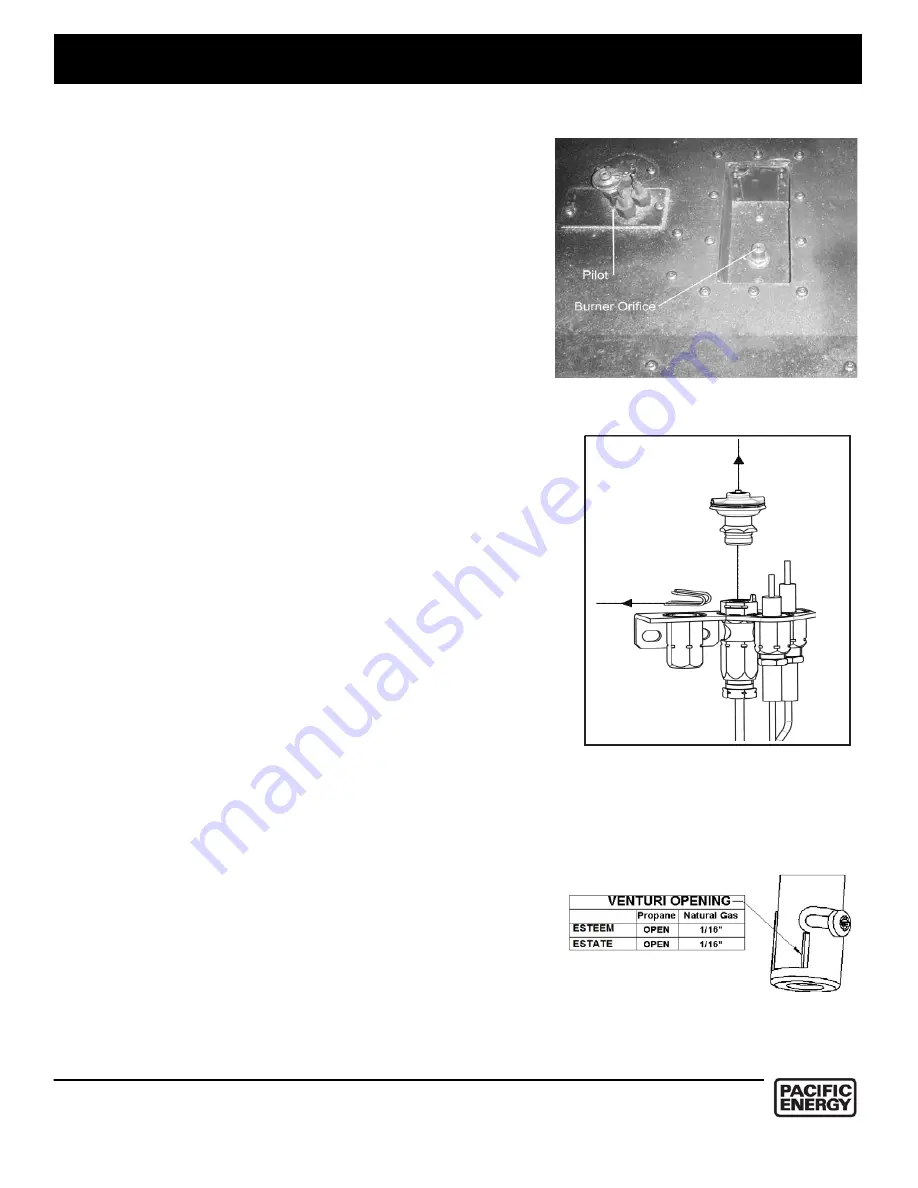
After removing the burner you will have access to the
burner orifice which is located on the bottom of the burner
tray, as seen in figure 32a. The orifice can be removed
using a ½” socket. Before installing the new orifice, Thread
Sealant needs to be applied to the threads of the new
orifice to ensure a proper seal when installed.
To replace the pilot orifice you will need to remove the pilot
hood which is held in place by a spring. First remove the
spring, and then remove the hood by pulling it up from the
pilot bracket, seen in figure 32b. To remove the existing
orifice insert a 5/32” or 4mm Allen wrench into the
hexagonal key-way of the orifice and rotate counter-
clockwise until free. Insert the new orifice using the same
Allen wrench and tighten it until a torque of 9 lbf in (1 Nm)
is achieved. R
eplace the pilot hood by aligning the tab on
the base of the hood with the slot in the side of the pilot
journal
,
and push the hood down onto the pilot bracket.
Replace the spring by pushing it onto its seat.
Before returning the burner into position, the venturi
shutter will have to be adjusted to the correct opening. The
correct venturi settings are shown in figure 33.
Loosen the
screw with a Phillips screwdriver and rotate the shutter
until the open slots on both sides are completely open.
Tighten the screw, and return the burner into
position
.
Figure 32b: Pilot
Figure 32a: Burner Orifice and Pilot
Figure 33: Venturi Shutter
Содержание ESTEEM
Страница 14: ...14 OWNER S INFORMATION 5056 412 E Lighting Instructions...
Страница 36: ...36 INSTALLER INFORMATION 5056 412 E...


