background image

GENERAL PROCEDURE FOR CHECKING LEAKS

Generally, leaks can be broken down into two categories:

(a) Below waterline leaks.
(b) Deck leaks.

A systematic procedure is the best way of finding and fixing any leak. Therefore, the following is a general
procedure for finding leaks in any boat:

ABOVE WATERLINE OR DECK LEAKS: These leaks are usually easier to find than the below waterline
type. This is because the source is more readily apparent. Use the following list to check the possible
source:

1. All deck hardware, such as cleats, chocks, genoa track, etc.
2. Chain plates.
3. Windows
4. Hatches
5. Vent.

Screws and bolts are the culprits in most cases. If the right one can be found, back it off or remove it and
squirt some silicone sealer in the hole and replace the bolt. Fittings that leak are best repaired by
removing and sealing with silicone.

Deck leaks along the hull deck joint are the most difficult to find and repair. Generally these can be
repaired with silicone from the inside. However, in extreme cases, the removal of the gunwale may be
necessary to seal from outside. Again screws or pop rivets may be the problem. These sometimes
penetrate the bonding material and cause leaks. These are difficult to find and only leak under sail when
the rail is well down.

UNDERWATER LEAKS; Firstly try to determine if the leak only develops when under sail or power or
does it leak at the mooring. This fact can tell you a great deal about where to look.

If the boat leaks when at the mooring, it generally means this is a filling, which is below the waterline at all
times. Such items as centerboard pins, shaft logs, packing nuts, centerboard lever assemblies and rudder
parts fall into this group. If the leak develops under sail or power, it can be in areas where the water level
rises as the hull speed increases. Such items as, centerboard trunks, cockpit drains, toilets, ice boxes
and sink drains are in this group.

Once you have isolated the leak into one of these categories, start checking at the bow and work your
way toward the stern. Inspect every fitting or place where a hole has been made in the hull. Check the
following, starting at the bow:

1. Head (toilet).
2. Seacock for Head.
3. Ice box drain & seacock.
4. Sink drain and seacock.
5. Centerboard pin.
6. Centerboard cable and attachment.
7. Engine drains, water pump, and seacock.
8. Cockpit drains and seacocks.
9. Shaft log and stuffing box.
10. Rudder port.
11. Bulkhead between outboard well and interior.

Page 14

Содержание CRUISING YACHT

Страница 1: ...PACESHIP CRUISING YACHT MAINTENANCE MANUAL ...

Страница 2: ...h should be easily understood Much of the technical terminology has been omitted for clarity We believe that PACESHIP builds a fine product however we also realize that it is possible to have minor problems from time to time Many times I have found problems have occurred because owners have not used the boat properly or have misinformation concerning some aspect of it The information contained her...

Страница 3: ... sailing in more shallow waters than keel craft and prevent sliding away from wind leeway When raised it is housed in a centerboard trunk The dagger board a sliding form of centerboard which has no pivot may only be lowered or lifted vertically CHAIN PLATES Metal plates bolted or bonded to the side of a hull or deck to which stays are attached to support rigging CHOCK A metal casting usually at th...

Страница 4: ...or sail is pulled in or slacked off usually through a system of blocks MAST A vertical spar supporting sails and rigging MIZZEN A small aft mast on a yawl or ketch OUTHAUL A line used to secure the clew of a sail PINTLE A metal pin like fitting allowing a rudder to swing RAIL The outer edge of the deck RAKE The inclination of a m3st from the vertical RIGGING The wires and ropes of a boat running s...

Страница 5: ...polmerization or condensation POLYMERIZATION A chemical reaction in which two or more small molecules combine to form large molecules RESINS Any of various solid or semi solid amorphous fusible flammable natural organic substances that are usually transparent or translucent and yellowish to brown in color are formed especially in plant secretions are soluble in ether and other organic solvents but...

Страница 6: ...valve If tank was not drained during storage inspect for gum formation which may clog lines and filters 5 Check crankcase oil level Oil should have been changed prior to storage If not follow outline in off season storage 6 Clean and inspect flame arrester 7 Check and adjust generator or alternator drive belt 8 Close all water drains Check all water hoses and replace if necessary Check cooling sys...

Страница 7: ...Check cooling system and make sure water pump is operating by checking water out of exhaust pipe Temperature indicated on gauge should gradually go up to 140 to 160 10 If oil pressure or water flow is not normal stop engine at once and check for problem 11 When shifting into forward or reverse position the engine should be running at 600 to 1000 RPM 12 After the break in period a good cruising spe...

Страница 8: ...il engine stalls from lack of fuel 4 Remove spark plugs and inject an ounce of rust preventive oil into each cylinder With spark plugs removed crank engine for about 15 seconds with starter to assure a good coating on cylinder walls Remove excess oil from around spark plug holes and install spark plugs NOTE ALTERNATE TO STEPS 3 4 Shut off fuel at tank remove flame arrestor from carburetor and slow...

Страница 9: ...protecting their boats from lightning strikes they should obtain a copy of the National Fire Protection Association s No 302 Standard Briefly the following guide may be helpful to the owner to appraise whether or not he will go ahead NON METALLIC BOATS A bonding system consists of a heavy conductor either insulated or non insulated no smaller than No 6 AWG wire or equivalent It should be installed...

Страница 10: ...in the direction of the polishing marks on the stainless using a soft cloth Stainless steel wool of the finest possible texture is sometimes used to remove extremely resistant deposits Although stainless steel is easy to keep clean you should take care in the selection of the proper cleaning agent for the job For example certain cleaning agents should NOT be used such as steel wool scouring pads s...

Страница 11: ...ass fibers and polyester resins each is important in its own way The polyester resin in its liquid state is plastic and adhesive This material holds the glass fibers without damaging or reacting with them yet bonds the fibers so they cannot migrate or pull out this type of composite also Is able to distribute the stress evenly as well as retain the fibers if it breaks The combination of polyester ...

Страница 12: ...finger or the tip of a putty knife fill the hole with the gelcoat mixture about 1 16 above the surrounding surface 5 Lay a piece of cellophane or waxed paper over the repair to cut off the air and start the cure 6 After 10 or 15 minutes the patch will be partially cured 70 degrees F When it feels rubbery to the touch remove the cellophane and trim flush with the surface Use a sharp razor blade or ...

Страница 13: ...ct the gelcoat RUST REMOVAL FROM GELCOAT To remove rust from gelcoat surfaces the following method is satisfactory Soak the rust area with a mild solution of Hydrofluoric Acid This is the same type of solution that is used by dry cleaning establishments to remove rust from clothing Two precautions must be taken 1 Hydrofluoric acid can cause severe skin burns particularly under fingernails therefor...

Страница 14: ...ntegrate 20 pounds of steel in one year Other agents combined with air and water such as salty or acidic pollutants help speed corrosion Luckily some metals take care of themselves by automatically forming their own surface coating Pure aluminum oxidizes rapidly in the air to form a transparent protective film of aluminum oxide about one ten millionth of a millimeter thick Stainless steel sets up ...

Страница 15: ...sometimes penetrate the bonding material and cause leaks These are difficult to find and only leak under sail when the rail is well down UNDERWATER LEAKS Firstly try to determine if the leak only develops when under sail or power or does it leak at the mooring This fact can tell you a great deal about where to look If the boat leaks when at the mooring it generally means this is a filling which is...

Страница 16: ...ese circumstances because of less pressure and strain SUGGESTED METHODS OF REPAIR Silicone sealer is the best method of sealing leaks around fillings and screws It s easy to use and does an excellent lob Two companies manufacture the product Dow Corning and General Electric For seeps and weeps above or below the waterline epoxy sealers work well One such product is Glu Vit made by Travaco Lab Inc ...

Страница 17: ...coated on the inside Its capacity is approximately 38 gallons The gas tank is made of fiberglass using fire retardant resin It is located under the port cockpit locker On older models it was made of monel The capacity is 16 U S gallons The shaft log stuffing box may occasionally require tightening A slight drip is desirable as this lubricates the shaft and packing and prevents scaring The thread i...

Страница 18: ...t RUDDER The rudder is fiberglass with a fabricated stainless steel stock The rudder port is bronze with bronze bushings The rudder is held in place by a bronze heel casting attached to the hull It would be necessary to remove this casting In order to remove the rudder This is a split two piece casting held together with stainless steel bolts SPECIAL INSTRUCTIONS FOR NORTHWIND OWNERS The seacock o...

Страница 19: ...urable Even when left bare it doesn t check easily and is highly immune to rot Yet if utterly neglected it can look drab giving a boat an unkempt appearance Some owners have asked How do I get that clean silvery look The more you rely on the washing and bleaching action of the sun the better Unless your location is par ticularly dirty an occasional scrubbing should suffice Don t overdo it A wire o...

Страница 20: ...loor To remove it sand or chip off the fiberglass over the pin The pennant wire is attached with a clevis pin to the board Two sheaves are located in the trunk for the wire to pass over The centerboard winch is located on a pedestal on the cockpit floor The wire is held into the winch with an allen head screw The centerboard should be raised to the full up position when not in use Lubricate the ce...

Страница 21: ...ng Stainless steel pintles and gudgeons are used to secure it to the hull The tiller head is stainless steel and the tiller Is ash RIGGING The mast and boom is aluminum type 6351 The standing rigging is s 7x19 flexible construction with a breaking strength of 2100 lbs The main and jib sheets are Samson braid with a breaking strength of 3500 lbs Owners should tape both ends of their turnbuckles and...

Страница 22: ...ting into the boat A bilge pump would also be a useful extra INTERIOR LINER MORCEE The main difference between the two versions of the Bluejacket is in the deck arrangement The Morcee has a self balling cockpit The cockpit is an Integral part of the deck The cuddy cabin is enclosed with a hatch slide arrangement The liner in the cabin is a separate moulding and contains two berth cushions and a si...

Страница 23: ...f the centerboard opening Most of the weight should be taken at the centerline of the boat and the remainder by the side supports 4 Make sure the cradle has padding on the side supports and there are no nails to scratch the hull 5 If there are under water fillings such as hull speed indicators be careful when placing the boat in the cradle 6 The boat should be stored on level ground If this is not...

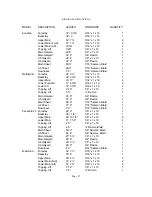
Страница 24: ...g Lift 0 20 1 8 x 7 x 19 1 Topping Lift 5 0 Dacron 1 Main Halyard 33 8 3 8 Dacron 1 Jib Halyard 37 0 3 8 Dacron 1 Main Sheet 96 0 7 16 Samson Braid 1 Jib Sheet 77 0 7 16 Samson Braid 1 Downhaul 5 0 5 16 Samson Braid 1 Paceship 23 Forestay 28 9 1 8 x 1 x 19 1 Backstay 30 1 1 8 1 8 x 1 x 19 1 Upper Main 26 10 7 8 1 8 x 1 x 19 2 Lower Main 13 7 1 8 1 8 x 1 x 19 2 Topping Lift 2 0 1 8 x 1 x 19 1 Toppi...

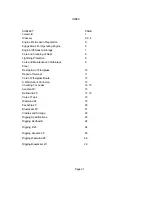
Страница 25: ...ce of Stainless 9 Steel Description of Fiberglass 10 Repair of Gelcoat 11 Care of Fiberglass Boats 12 A Word About Corrosion 13 Checking For Leaks 14 15 Acadian 30 16 Northwind 29 17 18 Care of Teak 18 Westwind 24 19 Paceship 23 20 Bluejacket 23 21 Cradles and Storage 22 Rigging Specifications 23 Rigging Northwind 24 Rigging P 23 24 Rigging Acadian 30 25 Rigging Westwind 24 26 Rigging Bluejacket 2...

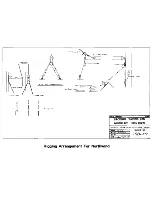
Страница 26: ... I 6P J 011 L2 II f e 6 O J _ Rigging Arrangement For Northwlnd HAUl PACESHIP YACHrS LTD MAHONE BAY NOVA SCOTIA l0t1 a AR1tANGo ENT NO tTHWINJ 58 477 ...

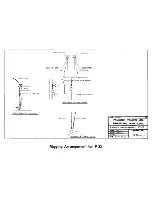
Страница 27: ...M N P T c ST a S 14IAvlL 9 c 1 oJ M T H A D I I r III H J lt w L y R T 1t b u H Po 5 IL v Rigging Arrangement for P 23 PACISHIP YACHTS LTD MAHONE IAYj NOVA SCOllA ICMIa NTS ...

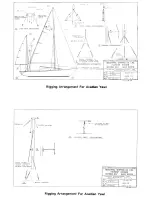
Страница 28: ... _ UPPEfO M zzeN 5 0 TO F STI N IN ArT oLE l OV l H C C HAIN ATII I H Rigging Arrangement For AcadIan Yawl t 1100 _ __ _ _ _ T O C AT AT F OO 0 M I l N M T K Z Zf N H FT ARRAN6I M T INDUSTRIAL SHIPPING CO LTD PACESHIP DIVISION MAHONE BAY NOVA SCOTIA JL DR WING NO RI G 61 NG ARR ANG T O O R C I r J _ L OR IIY P I 1_ a _HDL E TERMINAL 158 33 CK ay OAT y 6 7 Rigging Arrangement For Acadian Yawl S o C...

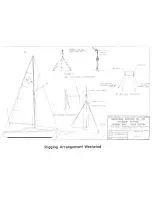
Страница 29: ... o I H YA R I J U L T l I l c 1 1 n b lW 1 _ L 1 1 lt r L c_ 1 LA c J Rigging Arrangement Westwind 0 D T IIO RI QU I r VI I c D H D _ r Mr I I 1 INDUSTRIAL SHIPPING CO LTD PACESHIP DIVISION MAHON BAY NOVA SCOTIA C Nu nnAN t NT n E T N D 5C L r N I Jn W I G 0 c AV p r K B Pi c O 0 ...

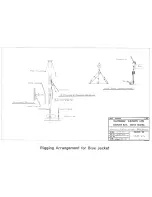
Страница 30: ... o i I B Ji B l D t I O C Il D Rigging Arrangement for Blue Jacket YACHTS MAHONE BAYj NOVA SCOTIA I SB ...

Отзывы: