


RP5-GM41
Radio Replacement & Steering Wheel Control Interface
with OnStar Retention for General Motors Vehicles
Pacific Accessory Corporation
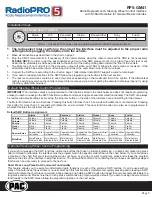
Optional Steering Wheel Control Programming (cont.)
Alpine
JVC
Kenwood
Clarion
Other
Pioneer
Sony
Fusion
1
2
Volume -
Volume -
Volume -
Volume -
Volume -
Volume -
Volume -
Volume -
3
Mute
Mute
Mute
Mute
Mute
Mute
Mute
Mute
4
Source
Source
Source
Source
5
Preset -
Track +
Play
Preset -
Preset -
Preset -
Track +
6
Source
Track -
Track +
Search -
Source
Source
Source
Track -
7
Track +
Band/Disc +
Track -
Band
Track +
Track +
Track +
Audio
8
Track -
Preset/Disc -
Disc/FM +
Send/End
Track -
Track -
Track -
Power
9
Power
Select
Disc/AM -
Send
Band
Band
Band
10
Enter/Play
Attenuation
Answer
End
Answer
Phone Menu
Reject Call/Source
(Bluetooth equipped
radios only)
11
Band/Program
Phone Receive
Voice Dial
END
Answer Call
Answer/End Call
12
Receive
Phone Reject
On Hook
PTT
End Call
13
End
Voice Dial
Off Hook
VR
14
VR
Power
Mute (Multimedia
units only)
15
- Advent, Boyo, Dual, Lightning Audio, Jensen, Rockford Fosgate & Visteon
- Jensen & Advent ONLY
Optional Programming Order
Page 3
Page 2
Testing & Verificatio
1. Turn the ignition on. The LED on the interface will turn on & the +12v accessory wire will turn on.
2. Turn on the radio and check balance & fade.
3. Verify that all SWC are functioning properly for both the aftermarket radio and OnStar. To adjust OnStar volume, press the
OnStar button on the mirror then use the volume buttons on the SWC to adjust the level. The volume will raise a total of 8
times before returning to the original level.
4. Pressing the OnStar® button on the rearview mirror will turn off the rear speakers and allow the OnStar® audio to be heard
in the two front speakers. The OnStar® active LED will also turn on. When OnStar® disconnects, the radio will un-mute or
turn back on and the OnStar® LED will turn off. Pressing the Mute/OnStar® button on the steering wheel for 1.5 seconds
will also activate Onstar®.
5. Turn off vehicle and remove key. RAP will be active and keep the radio on for 10 minutes, or until the drivers door is opened.
6. The LED and radio will turn off when RAP turns off or the drivers door is opened.
Product Updates (Firmware)
The RP5-GM41 can be updated with new firmware as it becomes available using the PAC-UP interface updater (sold separately).
Programming the SWC assignments
1. Turn the key to the ignition position.
2. Press and release the programming button on the side of the interface. The LED will turn on solid.
3. Within 7 seconds, press the button that is to be learned on the steering wheel. The LED will turn off when the button is pressed.
At this
point you have two options:
A.
For short press functionality:
Release the button within 1.5 seconds. The LED will turn back on.
B.
For long press functionality:
Hold the button until the LED starts blinking. Release the button and the LED will go back to solid.
4. If you need to program more buttons, repeat step 3 for each additional audio function on the steering wheel.
5.
If you come across a function in the chart that your steering wheel does not have, or you do not want to program, press and release the
program button on the side of the interface to skip that function.
6. Once programming is completed, wait seven seconds. The LED will flash three times indicating end of programming
7. Test the interface for proper functionality. Whenever a SWC is pressed the LED on the interface should blink. If any function does not work,
repeat the programming steps.


