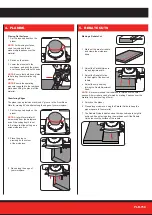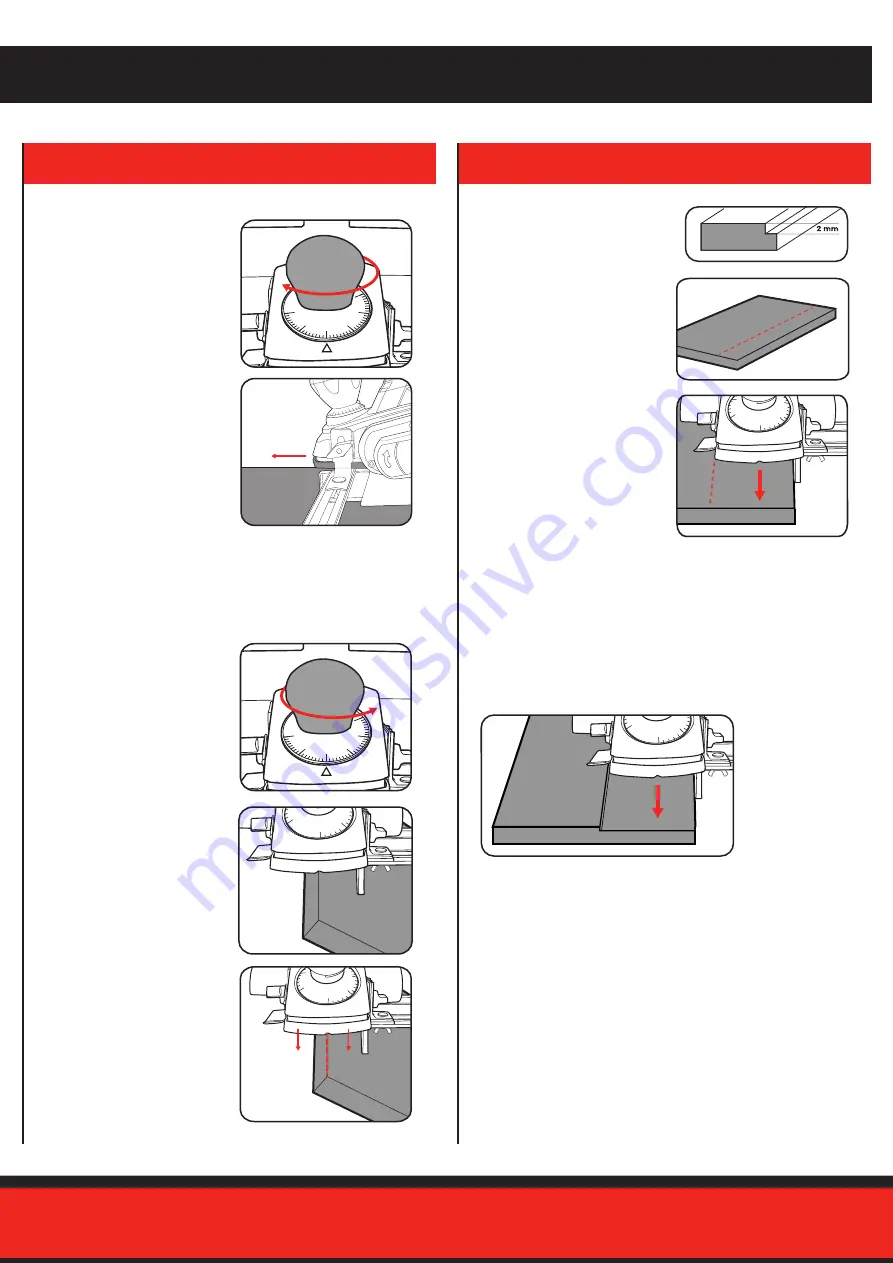
The planer has a precision machined ‘V’ groove in the Front Base
Plate for making 45
o
chamfers along the edges of your workpiece.
PLR-750
4. PLANING
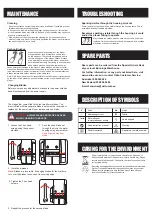
5. REBATE CUTS
2 Place the groove
precisely on the corner
of the workpiece.
1 Set the required depth on the
planer.
NOTE:
A layer of material will
be removed from the workpiece
even if the cutting depth is set
to 0; always test the setting on a
scrap workpiece first.
1 Set the required depth on the
planer.
NOTE:
For finishing surfaces,
use a low chip depth and
make multiple passes over the
material.
2 Switch on the planer.
3 Lower the planer onto the
workpiece, and push the planer
over the surface with both hands.
NOTE:
Ensure that both base plates
lie flat along the material during
planing.
NOTE:
Ensure the operating
pressure is applied to the rear base
plate when lifting the planer off the
material.
5 Switch on the planer.
6 Plane along workpiece, using the Parallel Guide to keep the
planer square to the material.
7 The Rebate Guide indicates when the required rebate height is
achieved. Keep planing along the workpiece until the Rebate
Guide touches the surface of the rebate.
2 Adjust the Parallel Guide to
the appropriate width.
3 Adjust the Rebate Guide
to the height of the desired
rebate.
4 Adjust the chip depth by
turning the Depth Adjustment
Knob.
NOTE:
It is recommended that rebates are formed over several
passes. A 6mm rebate can be formed by making 3 passes over the
material at a depth setting of 2mm.
1 Mark out the area for rebate
and clamp the workpiece
down.
1
1
2
Chamfering Edges
Making a Rebate Cut
Planing Flat Surfaces
3 Plane along the edge of
your workpiece.


