background image

ONLINE MANUAL

Scan this QR Code with your 

mobile device to take you to 

the online manual.

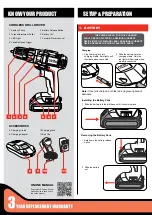
KNOW YOUR PRODUCT

SETUP & PREPARATION

1.  BATTERY

1  Keyless Chuck
2  Torque Adjustment Collar
3  LED Light
4  Variable Speed Trigger

5  Battery Release Button
6  Battery 18V
7  Forward/ Reverse Lever

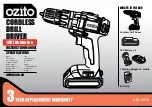
CORDLESS DRILL DRIVER

1 2 3 4

5

8

6

9

7

10

8  Charging Cradle
9  Charging Adaptor

10 Charging Jack
11 Belt Clip

Charging

Installing the Battery Pack

1   Plug charging jack into 

charging cradle. Both lights will 

illuminate when connected.

1   Slide the battery into the drill base until it clicks into place.

2   Slide the battery onto the 

charging cradle. Only the 

red light will illuminate when 

properly connected.

Note: 

Once fully charged, both the red and green lights will 

illuminate.

Removing the Battery Pack

1   Hold down the battery release 

button.

2   Slide the battery 

out.

WARNING! 

THE POWER SUPPLY FOR THIS CHARGER 

SHOULD BE PROTECTED BY A RESIDUAL CURRENT 

DEVICE (RATED AT 30MA OR LESS). A RESIDUAL CURRENT 

DEVICE REDUCES THE RISK OF ELECTRIC SHOCK.

11

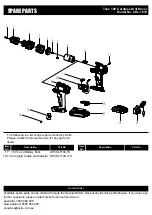
ACCESSORIES

Содержание CDL-1810

Страница 1: ...Input 18V Chuck Size 10mm Keyless No Load Speed 0 550 min Torque Setting 21 Max Torque 16Nm Battery Power 1 5Ah Lithium Ion Charge time 3 5 Hours Weight 0 9kg CDL 1810 WHAT S IN THE BOX Cordless Dril...

Страница 2: ...ttery Pack 1 Plug charging jack into charging cradle Both lights will illuminate when connected 1 Slide the battery into the drill base until it clicks into place 2 Slide the battery onto the charging...

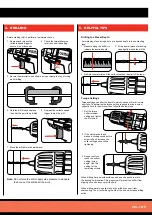
Страница 3: ...huck collar and remove the frill bit 3 Tighten the chuck by turning clockwise 2 Insert the drill bit making sure it is centred in the chuck 4 Pull on the bit to ensure it is firmly secured Note The mo...

Страница 4: ...ld the drill firmly and place the bit at the point to be drilled 2 Check the forward reverse lever is on desired setting 2 Wrap a small piece of masking tape tightly around the drill bit 6 Depress the...

Страница 5: ...shock unplug the charger from the outlet before attempting any cleaning Removing the battery pack will not reduce this risk 9 Never attempt to connect 2 chargers together 10 DO NOT store or use the to...

Страница 6: ...s can be ordered through the Special Orders Desk at any Bunnings Warehouse If you have any further questions please contact Ozito Customer Service on Australia 1800 069 486 New Zealand 0508 069 486 en...

Страница 7: ...ng parts g If devices are provided for the connection of dust extraction and collection facilities ensure these are connected and properly used Use of dust collection can reduce dust related hazards 4...

Страница 8: ...within the instruction manual If the tool is disassembled or tampered with in any way WARRANTY TO ENSURE A SPEEDY RESPONSE PLEASE HAVE THE MODEL NUMBER AND DATE OF PURCHASE AVAILABLE A CUSTOMER SERVI...

Отзывы: