Содержание CDL-018
Страница 1: ......
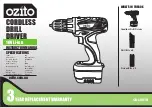
Ozito CDL-018 - компактный и надежный инструмент для профессионального использования. Получите подробное руководство по эксплуатации с нашим бесплатным инструкциям по manualshive.com. Скачайте руководство по эксплуатации прямо сейчас, чтобы использовать этот инструмент по максимуму.
Страница 1: ......