3
SPECIFICATIONS
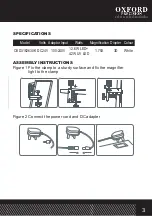
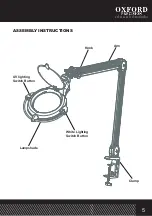
ASSEMBLY INSTRUCTIONS
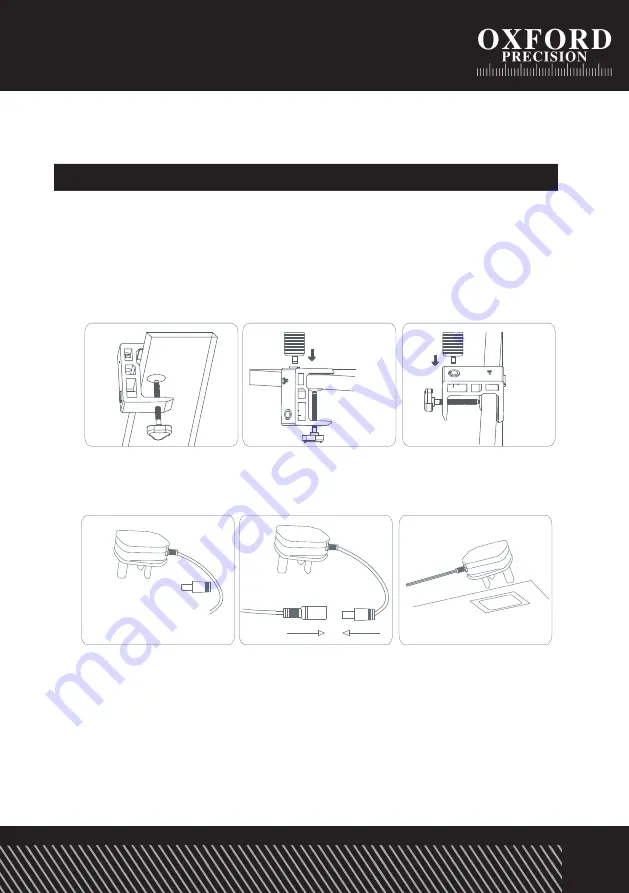
Figure 1 Fix the clamp to a sturdy surface and fix the magnifier
light to the clamp
Model
Volts Adaptor Input
Watts
Magnification Diopter Colour
OXD3162630K DC24V 100-240V 12.6W LED+
4.2W UV LED
1.75X
3D
White
1.Turn off/unplug and allow to cool before replacing lamp.
2.Lamp gets HOT quickly! Only contact switch/plug when turning on.
3.Do not touch hot lens, guard, or enclosure.
4.Do not rerain in light if skin feels warm.
5.Do not look directly at lighted lamp.
6.Keep lamp away from materials that may burn.
7.If the external cord is damaged, it should be replaced with the manufacturer's replacement part by a certified service
agent to the manufacturer to avoid any sort of hazard.
8.Do not touch the lamp at any time. Use a soft cloth. Oil from skin may damage lamp.
9.Do not operate the lamp with a missing or damaged guard, lamp containment barrier.
10.Never tilt backwards.
To reduce the risk of FIRE, ELECTRIC SHOCK, OR INJURY TO PERSONS:
Description
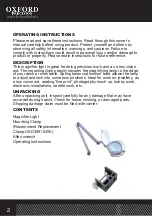
This magnifier light is great for doing precision work and as a low vision aid. The mounting clamp easily secures the
magnifying lamp to the edge of your desk or work table. Spring balanced tension bare allows the lamp to adjust and lock
into numerous positions. Ideal for work on jewelry, as a low vision aid, reading"fine print", photography touch up, hobby
work, electronic installations, needle work, etc.
Unpacking
After unpacking unit, inspect carefully for any damage that may have occurred during transit. Check for loose, missing,
or damaged parts. Shipping damage claim must be filed with carrier
CONTENTS
Magnifier Light
Mounting Clamp
(Recommend Replacement Clamp:OXD3981620K)
Allen wrench
Operating Instructions
Please read and save these instructions. Read through this owner's manual carefully before using product. Protect yourself and others by
observing all safety information, warnings, and cautions. Failure to comply with instructions could result in personal injury and/or damage
to product or property. Please retain instructions for future reference.
OXD3162630K
OXD3162630K
OXD3162630K
OXD3162630K
OXD3981620K
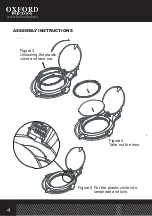
Unlocking the plastic
circle and take out.
Take out the lens.
Put the plastic circle
into lamphead and lock.
Figure 2 Connect the power cord and DC adapter


