background image

TECHNICAL DESCRIPTION 

KMW150CCD


Version 1


USER MANUAL 

KMW150CCD Chiller v1.1.doc

 Page 

10


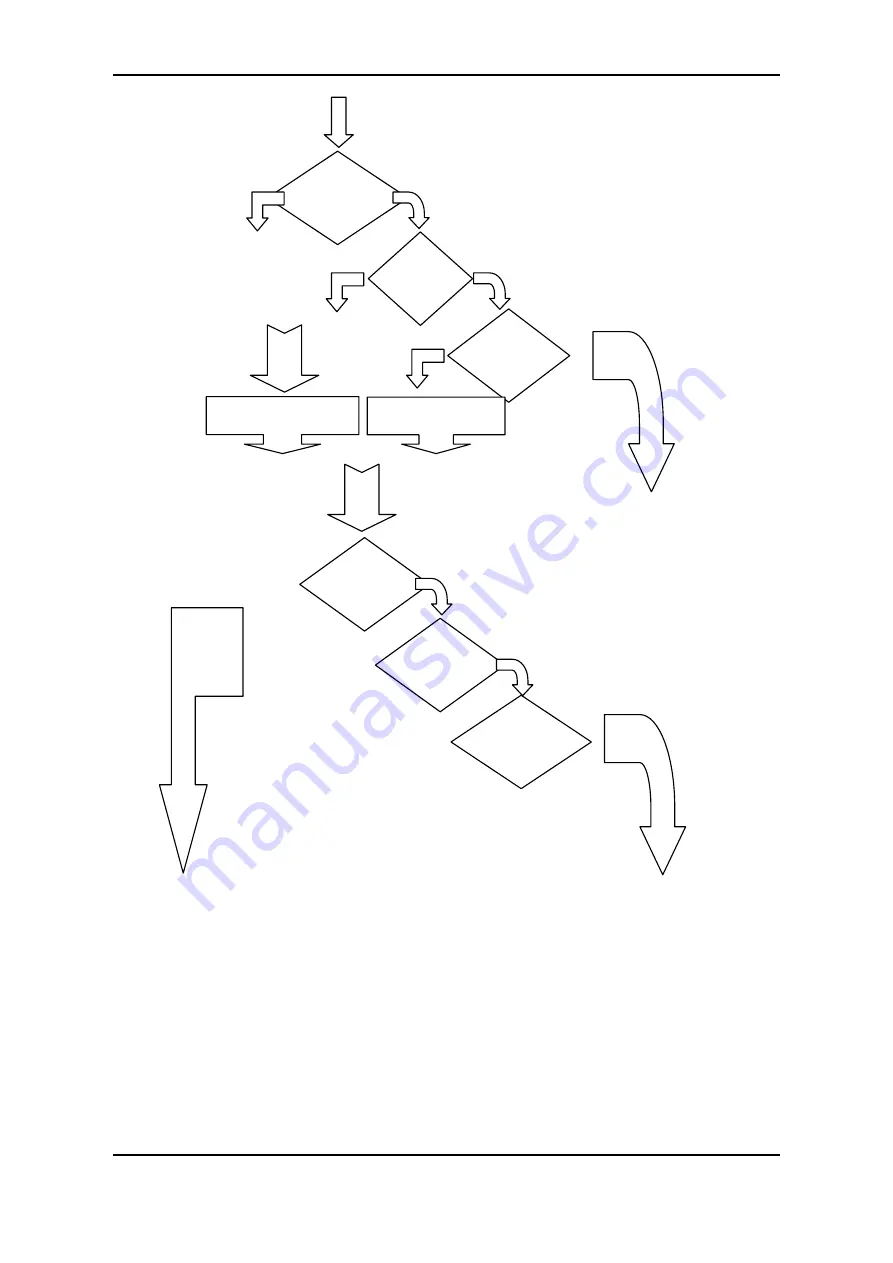
Figure 4.2.3  Sensor’s Subroutine Flow Chart 

4.3 Interfaces 

4.3.1 Water Supply 

Two water connections are located on the left side panel of the KMW150CCD. The connectors are 
combined with manual valves and filters. The connectors are screw type and are designed for pipes 
of size 10 x 3 mm. 

Flow 

Level 

Temp 

Wait 10 sec 

Wait 10 min 

Flow 

Level 

Temp 

Содержание KMW150CCD

Страница 1: ...er Chiller Unit for the Sapphire series CCD Detector October 2001 Version 1 1 Oxford Diffraction Limited 20 Nuffield Way Abingdon Oxfordshire OX14 1RL UK Tel 44 0 1235 532132 Fax 44 0 1235 528005 http www oxford diffraction com ...

Страница 2: ...that the product has not been exposed to any hazardous contamination or that appropriate decontamination procedures have been carried out so that the product is safe to handle Care has been taken to ensure the information in this manual is accurate and at an appropriate level Please inform Oxford Diffraction if you have any suggestions for corrections of improvements to this manual This users manu...

Страница 3: ...pply 5 4 Technical Description 6 4 1 Overview 6 4 2 Operating Principles 7 4 2 1 Water Conditioning Check 9 4 3 Interfaces 10 4 3 1 Water Supply 10 4 3 2 Electrical Connections 11 5 Handling Installation Storage and Transit Information 12 5 1 Reception and Handling 12 5 1 1 Delivery 12 5 1 2 Unpacking 12 5 1 3 Weights Dimensions and Lifting Points 12 5 2 Installation and Setting to Work 13 5 2 1 P...

Страница 4: ...ure 16 7 Maintenance Schedule 17 7 1 Introduction 17 7 2 Annual Maintenance Schedule 17 8 Maintenance Instructions 18 8 1 Filling the Reservoir with Water 18 8 2 Cleaning the Water Filter 19 9 Trouble Shooting 20 10 Spares 21 11 Additional Information 22 11 1 Drawings 22 12 CE Conformity Notice 23 ...

Страница 5: ...potential hazard which may result in injury or death CAUTION Indicates a potential hazard which may result in damage to equipment Warning symbols on the equipment are Protective conductor terminal Earth ground terminal CAUTION Risk of electric shock CAUTION Refer to accompanying documents See original manufacturers manuals for further safety data on third party equipment supplied with the system A...

Страница 6: ... or modify equipment unless you are qualified and authorised to do so and you are fully conversant with its operation and potential hazards or have total assurance through your local electrical permit to work system that the equipment has been made safe Make sure that the mains supply is fused at an appropriate rating and that it can be isolated locally via a clearly labelled clearly visible and e...

Страница 7: ...ied personnel should attempt to dismantle modify or repair equipment Water connections should be made and tested in accordance with any local and national safety regulations 1 5 Moving Parts There are a number of moving parts in the system which are powered by electric motors Warning Injury could result if clothing or body parts become caught in moving mechanisms Keep clothing hands etc away from ...

Страница 8: ...ely to operate the system or come into contact with any of the system components should read the SAFETY section of the manual This provides basic information aimed at highlighting the safety hazards associated with the equipment The purpose of this manual is to explain how to operate the equipment explain how to interface to the equipment list performance characteristics of the equipment describe ...

Страница 9: ...g 3 2 Performance Data Water flow 1 0 l min Water temperature 12 14 ºC Temperature stability 2 ºC Water reservoir capacity 25 l 3 3 Electrical Services Power connection 1 N AC 230V 50 60 Hz Maximum power consumption 150 W Maximum mains current 1 0 A CCD output power consumption 150 W Main fuse T2 5 A 3 4 Water Supply Reservoir water Optically clear neutral pH de ionised water Connections Quick rel...

Страница 10: ...sts of a metal cabinet containing a water reservoir a compressor with a radiator and control circuitry Controls and indicators are located on the front panel of the chiller Water and electrical connections are located on the side of the chiller An overflow pipe from the water reservoir is located on the back of the chiller Overflow i Outlet Inlet Manual valves filters Power connectors Mains CCD ou...

Страница 11: ...tat connected to the compressor ensures that the temperature of the water in the reservoir stays in the range 12 14 ºC or higher depending on the dew point of the operating environment as required by the CCD detector The control circuitry of the KMW150CCD has a logic unit The logic unit checks signals from 1 Temperature and water level sensors inside the water reservoir 2 A flow sensor 3 The water...

Страница 12: ...TECHNICAL DESCRIPTION KMW150CCD Version 1 USER MANUAL KMW150CCD Chiller v1 1 doc Page 8 Figure 4 2 1 Schematic Diagram of the Control Circuit ...

Страница 13: ...e water reservoir The pump stops after 10 seconds if either the rate of water flow or the water level in the reservoir is too low The pump stops after 10 minutes if the water temperature in the water reservoir exceeds 18ºC The state of the unit is displayed on four status lights on the front panel Figure 4 2 2 Water Conditioning Check Routine of the KMW150CCD READY Lamp ON CCD output ON Key switch...

Страница 14: ...routine Flow Chart 4 3 Interfaces 4 3 1 Water Supply Two water connections are located on the left side panel of the KMW150CCD The connectors are combined with manual valves and filters The connectors are screw type and are designed for pipes of size 10 x 3 mm Flow Level Temp Wait 10 sec Wait 10 min Flow Level Temp ...

Страница 15: ... 6 Pump and compressor powering B J3 2 7 CCD socket A J4 1 8 CCD socket B J4 2 CON2 16 Temperature sensor A J5 3 15 Temperature sensor B J5 2 14 Flow sensor GND J5 1 13 Flow sensor SIGNAL J6 3 12 Level sensor A J6 2 11 Level sensor B J6 1 10 Not connected 9 Not connected 8 Flow sensor 5V J7 1 7 Lamp common J8 3 6 Not connected 5 Not connected 4 LEVEL status light J9 2 3 TEMP status light J9 1 2 FL...

Страница 16: ...s WARNING The packing crate is heavy and could cause serious injury and damage to the equipment if not handled correctly Use suitable lifting equipment and procedures Only lift the packing case from the bottom CAUTION Do not remove the equipment from the packing crate until it has been moved to its designated installation site The equipment has been carefully packed to protect the equipment from d...

Страница 17: ...tem Layout The minimum distance between the back or side of the casing and other equipment must be greater than 30 cm Do not place the KMW150CCD close to any other heat producing equipment 5 2 1 3 Electrical Services The electrical supply must conform to the requirements stated in the SPECIFICATIONS section of this manual Locate the electricity supply close to the system and provide Phase L Neutra...

Страница 18: ... for Sapphire series CCD camera Mains power cable for KMW150CCD Water pipes x2 thickness 10 x 3 mm 5 2 2 2 Setting up Procedures 1 Connect the water pipes between the CCD camera and the KMW150CCD Refer to figure 5 2 2 NOTE Water can flow through the Sapphire series CCD camera in either direction Pipes 10 3 mm Figure 5 2 2 Water pipe connection between KMW150CCD and the Sapphire series CCD detector...

Страница 19: ... into the KMW150CCD ensure that the connectors are pushed home firmly 7 Connect the power cable for the Sapphire series CCD camera between connector on the CCD camera and the socket marked as CCD on the KMW150CCD Refer to figure 5 2 3 Figure 5 2 3 Electrical power supply to the KMW150CCD 8 Plug the KMW150CCD power cable into the socket marked Mains IN on the KMW150CCD 9 Plug the other end of the K...

Страница 20: ...e located on the front panel The KMW150CCD is switched on off using the mains key switch There are four indicator lights marked Ready Flow Level and Temp The four lights flash when the chiller is performing its automatic water conditioning check When the chiller is operating correctly the green light illuminates and the three red lights go out A temperature gauge indicates the temperature of the w...

Страница 21: ...od the HEALTH AND SAFETY INFORMATION at the beginning of this manual Planned maintenance that can be performed by the user is limited to cleaning the water filters Other maintenance tasks that the user can perform e g replacing bulbs in the indicator lights and filling the reservoir with distilled water are carried out as required Other tasks should be carried out by the user s authorised service ...

Страница 22: ...he mains power supply before removing the top of the KMW150CCD Dangerous voltages are present on the KMW150CCD s terminals when the power is on Rotating parts are exposed when the top of the KMW150CCD is removed when the power is on 3 Remove the top of the KMW150CCD and locate the filling inlet 4 Remove the inlet cover WARNING Do not allow water to splash on the electrical circuits of the KMW150CC...

Страница 23: ...D 2 Remove the plug from the electricity socket 3 Close the manual valves 4 Using a flat wrench 17 mm or screwdriver carefully unscrew the retaining nut 5 Remove the plastic and metal filters 6 Clean the filters under clean running water 7 Put the plastic and metal filters back in the correct position 8 Tighten the retaining nut using a flat wrench 17 mm 9 Open the manual valves 10 Check for water...

Страница 24: ...ENANCE INSTRUCTIONS chapter Pump stops after about 10 seconds and the FLOW light is illuminated Rate of water flow is too low Clean the water filter refer to the MAINTENANCE INSTRUCTIONS chapter TEMP light illuminated and KMW150CCD stops working after 10 minutes Temperature of the water in the water reservoir exceeds 18 ºC Cool the water in the water reservoir Fuses Designators Value Package Locat...

Страница 25: ...SPARES KMW150CCD Version 1 USER MANUAL KMW150CCD Chiller v1 1 doc Page 21 10 Spares Part Number Description 52 AHX1250 Spares kit fuses and bulbs ...

Страница 26: ...ADDITIONAL INFORMATION KMW150CCD Version 1 USER MANUAL KMW150CCD Chiller v1 1 doc Page 22 11 Additional Information 11 1 Drawings Title Logic Plate Circuit Diagram Logic Plate Component Diagram ...

Страница 27: ...rdshire OX14 1RL declare under our sole responsibility that the following equipment KMW150CCD Serial Number From Oxford1 2000 150CCD to which this declaration relates are in conformity with the relevant provisions of the following standard s or other normative document s when installed in conformance with the installation instructions contained in the product documentation EN 55011 Group 1 Class A...

Отзывы: