background image

39 

GB/IE

Q   

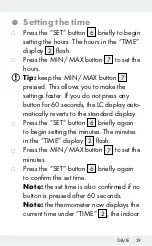
Setting the time


Press the “SET” button 

6

 briefly to begin 

setting the hours. The hours in the “TIME” 
display 

2

 flash.


Press the MIN / MAX button 

7

 to set the 

hours. 

   Tip:

 keep the MIN / MAX button 

7


pressed. This allows you to make the  
settings faster. If you do not press any 
button for 60 seconds, the LC display auto-
matically reverts to the standard display.


Press the “SET” button 

6

 briefly again 

to begin setting the minutes. The minutes 
in the “TIME” display 

2

 flash.


Press the MIN / MAX button 

7

 to set the 

minutes.


Press the “SET” button 

6

 briefly again 

to confirm the set time.


Note:

 the set time is also confirmed if no 

button is pressed after 60 seconds.


Note:

 the thermometer now displays the 

current time under “TIME” 

2

, the indoor  

Содержание 285321

Страница 1: ...ER Operation and Safety Notes THERMOMÈTRE INTÉRIEUR EXTÉRIEUR Instructions d utilisation et consignes de sécurité BINNEN BUITENTHERMOMETER Bedienings en veiligheidsinstructies TEPLOMĚR Pokyny pro obsluhu a bezpečnostní pokyny TERMÓMETRO DE INTERIOR Y EXTERIOR Instrucciones de utilización y de seguridad TERMÓMETRO PARA INTERIOR E EXTERIOR Instruções de utilização e de segurança ...

Страница 2: ...e 26 FR BE Instructions d utilisation et consignes de sécurité Page 45 NL BE Bedienings en veiligheidsinstructies Pagina 67 CZ Pokyny pro obsluhu a bezpečnostní pokyny Strana 88 ES Instrucciones de utilización y de seguridad Página 107 PT Instruções de utilização e de segurança Página 128 ...

Страница 3: ...A B 1 2 3 4 5 6 7 12 13 14 9 10 8 11 ...

Страница 4: ... Sicherheitshinweise für Batterien Akkus Seite 11 Vor der Inbetriebnahme Seite 14 Inbetriebnahme Seite 14 Batterie einsetzen wechseln Seite 14 Produkt aufstellen aufhängen Seite 14 Produkt an der Wand befestigen Seite 17 Temperaturspeicher Seite 18 Uhrzeit einstellen Seite 19 Fehler beheben Seite 20 Reinigung und Pflege Seite 21 Entsorgung Seite 21 Garantie Seite 24 ...

Страница 5: ...ch und Entsorgung Machen Sie sich vor der Benutzung des Produkts mit allen Bedien und Sicherheitshinweisen vertraut Benutzen Sie das Produkt nur wie beschrieben und für die angegebenen Einsatzbereiche Händigen Sie alle Unterlagen bei Weitergabe des Produkts an Dritte mit aus Q Bestimmungsgemäße Verwendung Das Produkt misst die Innen und Außentem peratur in Grad Celsius C Das Thermome ter ist im In...

Страница 6: ...s Produkt ist nicht für den gewerblichen Einsatz bestimmt Q Teilebeschreibung 1 Innen Außenthermometer 2 Uhrzeit Anzeige TIME 3 Innentemperatur Anzeige IN 4 Außentemperatur Anzeige OUT 5 Außenfühler 6 Einstellungs Taste SET 7 MIN MAX Taste 8 Ständer 9 Batteriefachdeckel 10 Batteriefach 11 Aufhängevorrichtung 12 Dübel 13 Schraube 14 Klebepad ...

Страница 7: ...mperaturbereich Innen 10 C bis 40 C Außen 40 C bis 60 C Außenfühler IP44 spritzwasser geschützt Kabel von Außenfühler ca 2 8m LC Display 21x 50mm Breite x Höhe Q Lieferumfang Kontrollieren Sie unmittelbar nach dem Aus packen den Lieferumfang auf Vollständigkeit sowie den einwandfreien Zustand des Produkts und aller Teile Montieren Sie das Produkt ...

Страница 8: ... 1 Bedienungsanleitung Sicherheitshinweise BEWAHREN SIE ALLE SICHERHEITSHIN WEISE UND ANWEISUNGEN FÜR DIE ZUKUNFT AUF Dieses Produkt kann von Kindern ab 8 Jah ren und darüber sowie von Personen mit verringerten physischen sensorischen oder mentalen Fähigkeiten oder Mangel an Er fahrung und Wissen benutzt werden wenn sie beaufsichtigt oder bezüglich des ...

Страница 9: ...usei nander Durch unsachgemäße Reparaturen können erhebliche Gefahren für den Be nutzer entstehen Lassen Sie Reparaturen nur von Fachkräften durchführen Nehmen Sie das Produkt nicht in Betrieb wenn es beschädigt ist Beschädigte Produkte bedeuten Lebensgefahr durch elektrischen Schlag Setzen Sie das Produkt keinem extrem ho hen elektromagnetischen Feld aus Dieses kann die Funktion des Produkts beei...

Страница 10: ...erte Personen von der Garantie ausgeschlossen sind Bringen Sie den Außenfühler 5 so im Außenbereich an dass er keiner direkten Sonneneinstrahlung ausgesetzt ist Achten Sie darauf dass das Kabel des Außenfühlers beim Verlegen nicht beschädigt wird Sicherheitshinweise für Batterien Akkus LEBENSGEFAHR Halten Sie Batterien Akkus außer Reichweite von Kindern Suchen Sie im Falle eines Verschluckens sofo...

Страница 11: ...s in Feuer oder Wasser Setzen Sie Batterien Akkus keiner mechanischen Belastung aus Risiko des Auslaufens von Batterien Akkus Vermeiden Sie extreme Bedingungen und Temperaturen die auf Batterien Akkus einwirken können z B auf Heizkörpern direkte Sonneneinstrahlung Vermeiden Sie den Kontakt mit Haut Augen und Schleimhäuten Spülen Sie bei Kontakt mit Batteriesäure die betroffe nen Stellen sofort mit...

Страница 12: ...n Sie diese sofort aus dem Produkt um Beschädigungen zu vermeiden Verwenden Sie nur Batterien Akkus des gleichen Typs Mischen Sie nicht alte Batterien Akkus mit neuen Entfernen Sie die Batterien Akkus wenn das Produkt längere Zeit nicht verwendet wird Risiko der Beschädigung des Produkts Verwenden Sie ausschließlich den ange gebenen Batterietyp Akkutyp Setzen Sie Batterien Akkus gemäß der Polaritä...

Страница 13: ...s Entfernen Sie vollständig das Verpackungsmaterial Hinweis Entfernen Sie die Schutzfolie Inbetriebnahme Batterie einsetzen wechseln Siehe Abb B Produkt aufstellen aufhängen VORSICHT Stellen Sie bei der Wahl des Aufstellortes sicher dass das Produkt kei ner direkten Sonneneinstrahlung Vibration Hitze Kälte Feuchtigkeit und keinem Staub ausgesetzt ist Stellen Sie das Produkt nicht in ...

Страница 14: ...as Produkt oder andere Sachgegenstände beschädigen Stellen Sie das Produkt auf einer ebenen waagerechten Fläche auf Stellen Sie das Produkt nicht ohne geeig neten Schutz auf wertvolle oder empfindli che Oberflächen Andernfalls können diese beschädigt werden Aufstellen Klappen Sie den auf der Rückseite des Produkts angebrachten Ständer 8 aus um das Produkt aufzustellen Aufhängen Hinweis Sie benötig...

Страница 15: ... Markieren Sie die gewünschte Stelle ggf mit Hilfe eines Bleistifts STROMSCHLAGGEFAHR GEFAHR EINES SACHSCHADENS VERLET ZUNGSGEFAHR Vergewissern Sie sich dass Sie nicht auf Strom Gas oder Wasserleitungen stoßen wenn Sie in die Wand bohren Prüfen Sie ggf mit einem Leitungssucher bevor Sie in eine Wand bohren Bohren Sie mittels einer Bohrmaschine ein passendes Loch in die Wand Drücken Sie einen Dübel...

Страница 16: ...g 11 des Innen Außenthermometers 1 an der Schraube 13 ein Q Produkt an der Wand befestigen Entfernen Sie die Schutzfolie von einer Seite des Klebepads 14 Kleben Sie das Klebepad 14 auf die Rückseite des Produkts Entfernen Sie die Schutzfolie von der anderen Seite des Klebepads 14 Bringen Sie das Produkt an der von Ihnen gewünschten Stelle an und drücken Sie es vorsichtig an eine Wand oder an eine ...

Страница 17: ...Haftung des Klebepads 14 eingeschränkt werden Q Temperaturspeicher Drücken Sie die MIN MAX Taste 7 um die niedrigste gemessene Temperatur des Innen IN 3 und Außenbereichs OUT 4 anzuzeigen Drücken Sie die MIN MAX Taste 7 erneut um zur Anzeige der gemessenen Höchsttemperatur zu gelangen Drücken Sie die MIN MAX Taste 7 erneut um zur Anzeige der aktuellen Temperaturmessung zurückzugelangen Hinweis Wir...

Страница 18: ...n Die Stundenanzeige blinkt in der Uhrzeit Anzeige TIME 2 Drücken Sie die MIN MAX Taste 7 um die Stunden einzustellen Tipp Halten Sie die MIN MAX Taste 7 gedrückt So erreichen Sie ein beschleu nigtes Einstellen der Werte Wenn Sie innerhalb von 60 Sekunden keine Taste drücken kehrt das LC Display automatisch zur Standardanzeige zurück Drücken Sie kurz die Einstellungs Taste SET 6 erneut um die Minu...

Страница 19: ...n nach 60 Sekunden keine Taste betätigt wurde Hinweis Das Produkt zeigt nun die aktuelle Uhrzeit TIME 2 die Innentem peratur IN 3 sowie die Außentempe ratur OUT 4 an Q Fehler beheben Hinweis Das Produkt enthält empfindliche elektronische Bauteile Daher ist es möglich dass es durch Funkübertragungsgeräte in unmittelbarer Nähe gestört wird Entfernen Sie derartige Geräte aus der Um gebung des Produkt...

Страница 20: ...ln erneut ein Reinigung und Pflege Verwenden Sie keinesfalls ätzende oder scheuernde Reinigungsmittel Andernfalls kann die Oberfläche des Produkts beschädigt werden Verwenden Sie zur Reinigung ein leicht angefeuchtetes fusselfreies Tuch Entsorgung Die Verpackung besteht aus umwelt freundlichen Materialien die Sie über die örtlichen Recyclingstellen entsorgen können Der Grüne Punkt gilt nicht für D...

Страница 21: ...rodukt und die Verpackungs materialien sind recycelbar entsorgen Sie diese getrennt für eine bessere Abfallbehandlung Das Triman Logo gilt nur für Frankreich Möglichkeiten zur Entsorgung des ausgedienten Produkts erfahren Sie bei Ihrer Gemeinde oder Stadtverwaltung Werfen Sie Ihr Produkt wenn es ausgedient hat im Interesse des Umweltschutzes nicht in den Haus müll sondern führen Sie es einer fachg...

Страница 22: ...r das Produkt über die angebotenen Sammeleinrichtungen zurück Umweltschäden durch falsche Entsorgung der Batterien Akkus Batterien Akkus dürfen nicht über den Haus müll entsorgt werden Sie können giftige Schwermetalle enthalten und unterliegen der Sondermüllbehandlung Die chemischen Symbole der Schwermetalle sind wie folgt Cd Cadmium Hg Quecksilber Pb Blei Geben Sie deshalb verbrauchte Batterien A...

Страница 23: ...tie nicht eingeschränkt Sie erhalten auf dieses Produkt 3 Jahre Garantie ab Kaufdatum Die Garantiefrist be ginnt mit dem Kaufdatum Bitte bewahren Sie den Original Kassenbon gut auf Diese Unter lage wird als Nachweis für den Kauf benötigt Tritt innerhalb von 3 Jahren ab dem Kaufda tum dieses Produkts ein Material oder Fabri kationsfehler auf wird das Produkt von uns nach unserer Wahl für Sie kosten...

Страница 24: ...fehler Diese Garantie erstreckt sich nicht auf Produktteile die normaler Abnut zung ausgesetzt sind z B Batterien und da her als Verschleißteile angesehen werden können oder für Beschädigungen an zer brechlichen Teilen z B Schalter Akkus oder die aus Glas gefertigt sind ...

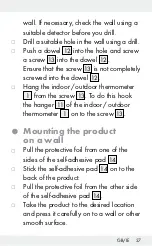
Страница 25: ...instructions for batteries rechargeable batteries Page 32 Before use Page 34 Getting started Page 35 Inserting changing the battery Page 35 Positioning installing the product Page 35 Mounting the product on a wall Page 37 Temperature memory Page 38 Setting the time Page 39 Troubleshooting Page 40 Cleaning and care Page 40 Disposal Page 41 Warranty Page 43 ...

Страница 26: ...ct please familiarise yourself with all of the safety information and instructions for use Only use the product as described and for the specified applications If you pass the product on to anyone else please ensure that you also pass on all the documentation with it Q Intended use The product measures the indoor and out door temperature in Degree Celsius C The main unit is placed indoor and exter...

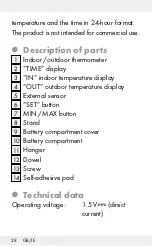
Страница 27: ...s 1 Indoor outdoor thermometer 2 TIME display 3 IN indoor temperature display 4 OUT outdoor temperature display 5 External sensor 6 SET button 7 MIN MAX button 8 Stand 9 Battery compartment cover 10 Battery compartment 11 Hanger 12 Dowel 13 Screw 14 Self adhesive pad Q Technical data Operating voltage 1 5V direct current ...

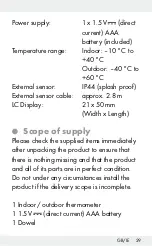
Страница 28: ...8m LC Display 21x 50mm Width x Length Q Scope of supply Please check the supplied items immediately after unpacking the product to ensure that there is nothing missing and that the product and all of its parts are in perfect condition Do not under any circumstances install the product if the delivery scope is incomplete 1 Indoor outdoor thermometer 1 1 5V direct current AAA battery 1 Dowel ...

Страница 29: ...en aged from 8 years and above and persons with reduced physical sensory or mental capabilities or lack of experience and knowledge if they have been given super vision or instruction concerning use of the product in a safe way and understand the hazards involved Children shall not play with the product Cleaning and user maintenance shall not be made by chil dren without supervision ...

Страница 30: ...tromagnetic field This may impair the correct functioning of the product Please prevent the housing of the product from rubbing to strongly against textiles This may result in static charges and affect the results of the measurements Please note that the guarantee does not cover damage caused by incorrect handling non compliance with the oper ating instructions or interference with the product by ...

Страница 31: ... reach of children If accidentally swallowed seek immediate medical attention DANGER OF EXPLOSION Never recharge non recharge able batteries Do not short circuit batteries rechargeable batteries and or open them Overheating fire or bursting can be the result Never throw batteries rechargeable batteries into fire or water Do not exert mechanical loads to batteries rechargeable batteries ...

Страница 32: ...lush the affected area with plenty of clean water and seek immediate medical attention WEAR PROTECTIVE GLOVES Leaked or dam aged batteries rechargeable batteries can cause burns on contact with the skin Wear suitable protective gloves at all times if such an event occurs In the event of a leakage of batteries re chargeable batteries immediately remove them from the product to prevent damage Only u...

Страница 33: ...eries rechargeable batteries according to polarity marks and on the battery rechargeable battery and the product Clean the contacts on the battery rechargeable battery and in the battery compartment before inserting Remove exhausted batteries rechargea ble batteries from the product immediately Q Before use Note Remove all packaging material from the product Note Remove the protective foil from th...

Страница 34: ...heat cold damp or dust Do not install products close to heat sources e g radiators There is other wise a danger that the product will be dam aged Take care that the product is suspended properly if mounted on a wall If the prod uct falls it could cause injury or damage to itself or other property Place the product on a flat level surface Do not place the product on valuable or sensitive surfaces w...

Страница 35: ...OF INJURY AND DAMAGE TO PROPERTY Please read the operating and safety instructions for your drill carefully Hold the product on the wall to find a suitable position for installation Use a pencil if necessary to mark the required position DANGER OF ELECTRIC SHOCK DAN GER OF DAMAGE TO PROPERTY DANGER OF INJURY Ensure that you do not strike electrical cables gas or water pipes when you are drilling i...

Страница 36: ...the indoor outdoor thermometer 1 from the screw 13 To do this hook the hanger 11 of the indoor outdoor thermometer 1 on to the screw 13 Q Mounting the product on a wall Pull the protective foil from one of the sides of the self adhesive pad 14 Stick the self adhesive pad 14 on to the back of the product Pull the protective foil from the other side of the self adhesive pad 14 Take the product to th...

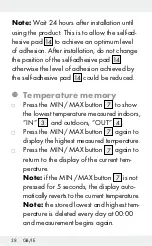
Страница 37: ...ed Q Temperature memory Press the MIN MAX button 7 to show the lowest temperature measured indoors IN 3 and outdoors OUT 4 Press the MIN MAX button 7 again to display the highest measured temperature Press the MIN MAX button 7 again to return to the display of the current tem perature Note if the MIN MAX button 7 is not pressed for 5 seconds the display auto matically reverts to the current temper...

Страница 38: ...not press any button for 60 seconds the LC display auto matically reverts to the standard display Press the SET button 6 briefly again to begin setting the minutes The minutes in the TIME display 2 flash Press the MIN MAX button 7 to set the minutes Press the SET button 6 briefly again to confirm the set time Note the set time is also confirmed if no button is pressed after 60 seconds Note the the...

Страница 39: ...immediate vicinity may cause interference Remove any such device from the vicinity of the product if errors occur on the display Note electrostatic discharge may interfere with operation In the event of any malfunction briefly remove the battery and replace it as described under Inserting changing the battery Q Cleaning and care Do not under any circumstances use corrosive or abrasive cleaning age...

Страница 40: ...g is made entirely of recyclable materials which you may dispose of at local recycling facilities The Green Dot is not valid for Germany b a Observe the marking of the packaging materials for waste separation which are marked with abbreviations a and numbers b with following meaning 1 7 plastics 20 22 paper and fibreboard 80 98 composite materials ...

Страница 41: ...protect the environment please dispose of the product properly when it has reached the end of its useful life and not in the household waste Information on collection points and their opening hours can be obtained from your local authority Faulty or used batteries rechargeable batter ies must be recycled in accordance with Directive 2006 66 EC and its amendments Please return the batteries recharg...

Страница 42: ...aste treatment rules and regulations The chemical symbols for heavy metals are as follows Cd cadmium Hg mercury Pb lead That is why you should dispose of used batteries rechargea ble batteries at a local collection point Warranty The product has been manufactured to strict quality guidelines and meticulously examined before delivery In the event of product de fects you have legal rights against th...

Страница 43: ...ranty period begins on the date of purchase Please keep the original sales receipt in a safe location This document is required as your proof of purchase This war ranty becomes void if the product has been damaged or used or maintained improperly The warranty applies to defects in material or manufacture This warranty does not cover product parts subject to normal wear thus possibly considered con...

Страница 44: ...nes de sécurité relatives aux piles aux piles rechargeables Page 52 Avant la mise en service Page 55 Mise en service Page 55 Mise en place remplacement de la pile Page 55 Installation accrochage du produit Page 55 Fixer le produit au mur Page 58 Mémorisation de la température Page 59 Réglage de l heure Page 60 Problèmes et solutions Page 61 Nettoyage et entretien Page 62 Mise au rebut Page 62 Gara...

Страница 45: ... la sécurité l utilisation et la mise au rebut Veuillez lire consciencieusement toutes les indications d utilisation et de sécurité du produit Ce produit doit uniquement être utilisé conformé ment aux instructions et dans les domaines d application spécifiés Lors d une cession à tiers veuillez également remettre tous les documents Q Utilisation conforme à l usage prévu Le produit mesure la tempéra...

Страница 46: ...e produit n est pas destiné à une utilisation commerciale Q Description des pièces 1 Thermomètre d intérieur d extérieur 2 Affichage de l heure TIME 3 Affichage de la température intérieur IN 4 Affichage de la température extérieure OUT 5 Capteur extérieur 6 Touche de réglage SET 7 Touche MIN MAX 8 Pied 9 Couvercle du compartiment à pile 10 Compartiment à pile 11 Dispositif de suspension 12 Chevil...

Страница 47: ...ntation électrique 1x pile 1 5V courant continu AAA fournie Plage de température Intérieur 10 C jusqu à 40 C Extérieur 40 C jusqu à 60 C Capteur extérieur IP44 protégé contre les projec tions d eau Câble du capteur extérieur env 2 8m Écran à cristaux liquides 21x 50mm largeur x hauteur ...

Страница 48: ...oduit et toutes les pièces se trouvent en parfait état Ne jamais assem bler le produit si le contenu de la livraison n est pas au complet 1 thermomètre d intérieur d extérieur 1 pile 1 5V courant continu 1 cheville 1 vis 1 point adhésif 1 mode d emploi Consignes de sécurité CONSERVEZ TOUTES LES CONSIGNES DE SÉCURITÉ ET INSTRUCTIONS POUR L AVENIR ...

Страница 49: ...sques liés à son utilisation Les enfants ne doivent pas jouer avec le produit Le nettoyage et l entretien du produit ne doivent pas être effectués par des enfants laissés sans sur veillance Ne démontez en aucun cas le produit Toute réparation incorrecte peut exposer l utilisateur à des dangers et des risques importants Ne confiez les réparations qu à des personnes qualifiées en la matière Ne pas f...

Страница 50: ...ectrostatiques influençant le résultat des mesures N oubliez pas que sont exclus de la ga rantie les endommagements résultant d une manipulation incorrecte du non respect du mode d emploi ou de l inter vention sur le produit de personnes non autorisées Installez le capteur extérieur 5 dans un espace extérieur de façon à ne pas l ex poser directement aux rayons solaires Veillez à ne pas endommager ...

Страница 51: ...mmédiatement un médecin RISQUE D EXPLOSION Ne rechargez jamais des piles non rechargeables Ne court circuitez pas les piles piles rechar geables et ou ne les ouvrez pas Autre ment vous risquez de provoquer une surchauffe un incendie ou une explosion Ne jetez jamais des piles piles rechar geables au feu ou dans l eau Ne pas soumettre les piles piles rechar geables à une charge mécanique ...

Страница 52: ... peau les yeux ou les muqueuses En cas de contact avec l acide d une pile rincez la zone touchée à l eau claire et consultez immé diatement un médecin PORTER DES GANTS DE PROTECTION Les piles piles rechargeables endomma gées ou sujettes à des fuites peuvent provoquer des brûlures au contact de la peau Vous devez donc porter des gants adéquats pour les manipuler En cas de fuite des piles piles rech...

Страница 53: ...e période prolongée Risque d endommagement du produit Exclusivement utiliser le type de pile pile rechargeable spécifié Insérez les piles piles rechargeables conformément à l indication de polarité et indiquée sur la pile pile rechar geable et sur le produit Nettoyez les contacts de la pile pile rechargeable et du compartiment à pile avant d insérer la pile Retirez immédiatement les piles piles re...

Страница 54: ...e Voir ill B Installation accrochage du produit ATTENTION Lors du choix du lieu d installation du produit assurez vous que les produits ne soient pas exposés aux rayons di rects du soleil à des vibrations à la chaleur au froid à l humidité et à la poussière N ins tallez pas le produit à proximité de sources de chaleur par exemple de radiateurs Risque d endommagement du produit dans le cas contrair...

Страница 55: ...t horizontale Ne pas poser le produit sur des surfaces précieuses ou sensibles sans protection adéquate Dans le cas contraire ces surfaces pourraient être endommagées Installation sur pied Dépliez le pied 8 situé à l arrière du produit afin de poser le produit Accrochage Remarque Il vous faut une perceuse pour cette étape de travail ATTENTION DANGER DE MORT ET RISQUES DE BLESSURES AINSI QUE DÉGÂTS...

Страница 56: ...E RISQUE DE DOMMAGE MATÉ RIEL RISQUE DE BLESSURE Lorsque vous percez des trous dans le mur assurez vous de ne toucher ni lignes électriques ni conduites de gaz et d eau Le cas échéant contrôlez le mur avec un détecteur de conduites et lignes électriques avant de percer A l aide d une perceuse percez dans le mur un trou adapté Appuyez une cheville12 dans le trou et vissez une vis 13 dans la chevill...

Страница 57: ...int adhésif 14 Collez le point adhésif 14 à l arrière du produit Enlevez le film de protection de l autre côté du point adhésif 14 Placez le produit à l endroit souhaité et pressez le prudemment sur le mur ou sur une autre surface lisse Remarque De préférence n utiliser le produit que 24 heures après son installation Le point adhésif 14 possède alors un degré d adhérence optimal Après l installati...

Страница 58: ...ur OUT 4 Rappuyez sur la touche MIN MAX 7 afin d accéder à l affichage de la tempé rature maximale mesurée Rappuyez sur la touche MIN MAX 7 afin de revenir à l affichage de la tempé rature actuellement mesurée Remarque Lorsque la touche MIN MAX 7 n est pas actionnée du rant 5 secondes le retour vers l affichage de la température actuelle se fait automa tiquement Remarque La sauvegarde de la tem pé...

Страница 59: ...a touche MIN MAX 7 afin de paramétrer les heures Conseil Maintenez la touche MIN MAX 7 enfoncée Cette tech nique permet de régler les valeurs plus rapidement Si vous n activez aucune touche pendant 60 secondes l écran à cristaux liquides repasse automatique ment à l affichage par défaut Rappuyez brièvement sur la touche de ré glage SET 6 afin de pouvoir paramé trer les minutes L affichage des minu...

Страница 60: ... actionnée après 60 secondes Remarque Le produit indique désor mais l heure actuelle TIME 2 la tem pérature intérieure IN 3 ainsi que la température extérieure OUT 4 Problèmes et solutions Remarque Le produit contient des compo sants électroniques fragiles Certaines interfé rences dues aux appareils à transmission radio placés à proximité sont donc possibles Retirez ces appareils de l environnemen...

Страница 61: ...emplacement de la pile Nettoyage et entretien N utilisez en aucun cas un produit net toyant corrosif ou abrasif Autrement la surface du produit peut s endommager Utilisez un chiffon légèrement humidifié et ne peluchant pas pour le nettoyage Mise au rebut L emballage se compose de ma tières recyclables pouvant être mises au rebut dans les déchette ries locales Le point vert n est pas valable en All...

Страница 62: ...riaux composite Le produit et les matériaux d em ballage sont recyclables met tez les au rebut séparément pour un meilleur traitement des déchets Le logo Triman n est valable qu en France Votre mairie ou votre municipalité vous renseigneront sur les possibili tés de mise au rebut des produits usagés Afin de contribuer à la protection de l environnement veuillez ne pas jeter votre produit usagé dan...

Страница 63: ... 66 CE et ses modi fications Les piles et ou piles rechargeables et ou le produit doivent être retournés dans les centres de collecte proposés Pollution de l environnement par la mise au rebut incor recte des piles piles rechargeables Les piles piles rechargeables ne doivent pas être mises au rebut avec les ordures ménagères Elles peuvent contenir des métaux lourds toxiques et doivent être con sid...

Страница 64: ...défaillance vous êtes en droit de retourner ce produit au vendeur La présente garantie ne constitue pas une restriction de vos droits légaux Ce produit bénéficie d une garantie de 3 ans à compter de sa date d achat La durée de garantie débute à la date d achat Veuillez conserver le ticket de caisse original Il fera office de preuve d achat Si un problème matériel ou de fabrication devait survenir ...

Страница 65: ... défaillant La garantie couvre les vices matériels et de fabrication Cette garantie ne s étend ni aux pièces du produit soumises à une usure nor male p ex des piles et qui par conséquent peuvent être considérées comme des pièces d usure ni aux dommages sur des compo sants fragiles comme des interrupteurs des batteries ou des éléments fabriqués en verre ...

Страница 66: ...gina 71 Veiligheidsinstructies voor batterijen accu s Pagina 73 Voor de ingebruikname Pagina 76 Ingebruikname Pagina 76 Batterij plaatsen vervangen Pagina 76 Product plaatsen ophangen Pagina 76 Product aan de wand bevestigen Pagina 79 Temperatuuropslag Pagina 80 Tijd instellen Pagina 81 Storingen verhelpen Pagina 82 Reiniging en onderhoud Pagina 83 Afvoer Pagina 83 Garantie Pagina 85 ...

Страница 67: ...t U zich voor de ingebruikname van het product met alle bedienings en veiligheidsvoorschriften vertrouwd Gebruik het product alleen zoals beschreven en voor de aangegeven toepas singsgebieden Overhandig alle documenten bij doorgifte van het product aan derden Q Correct gebruik Het product meet de binnen en buitentempe ratuur in graden Celsius C De thermometer moet binnenshuis de buitensensor 5 bui...

Страница 68: ...eel gebruik Q Beschrijving van de onderdelen 1 Binnen buitenthermometer 2 Tijdsweergave TIME 3 Weergave binnentemperatuur IN 4 Weergave buitentemperatuur OUT 5 Buitensensor 6 Instellingstoets SET 7 MIN MAX toets 8 Standaard 9 Batterijvakdeksel 10 Batterijvak 11 Ophangmogelijkheid 12 Plug 13 Schroef 14 Kleefpad ...

Страница 69: ...n 10 C tot 40 C Buiten 40 C tot 60 C Buitensensor IP44 spatwater dicht Kabel van buitensensor ca 2 8m LCD display 21x 50mm breedte x hoogte Q Omvang van de levering Controleer de levering direct na het uitpakken op volledigheid en op de optimale staat van het product en alle onderdelen Monteer het product in geen geval als de levering niet compleet is ...

Страница 70: ...M DEZE EVENTU EEL LATER TE KUNNEN RAADPLEGEN Dit product kan door kinderen vanaf 8 alsmede door personen met verminderde fysieke sensorische of mentale vaardig heden of een gebrek aan ervaring en kennis worden gebruikt als zij onder toe zicht staan of geïnstrueerd werden met betrekking tot het veilige gebruik van het product en zij de hieruit voortvloeiende gevaren begrijpen Kinderen mogen niet ...

Страница 71: ...product niet in gebruik als het beschadigd is Bij beschadigde produc ten bestaat levensgevaar door elektrische schokken Stel het product niet bloot aan een extreem hoog elektromagnetisch veld Hierdoor kan de functie van het product worden beïnvloed Wrijf de productbehuizing niet te inten sief aan textiel Dit kan leiden tot statische oplading en tot beïnvloeding van het meetresultaat Beschadigingen...

Страница 72: ...sen sor tijdens het leggen niet worden be schadigd Veiligheidsinstructies voor batterijen accu s LEVENSGEVAAR Houd batte rijen accu s buiten het bereik van kinde ren Raadpleeg bij inslikken onmiddellijk een arts EXPLOSIEGEVAAR Laad niet oplaadbare batterijen nooit op Sluit de batterijen accu s niet kort en of open deze niet Daardoor kan de batterij oververhit ra ken in brand vliegen of exploderen ...

Страница 73: ...s zouden kunnen hebben bijv radi atoren direct zonlicht Vermijd contact met huid ogen en slijm vliezen Spoel in geval van contact met batterijzuur de desbetreffende plekken direct af met voldoende schoon water en raadpleeg onmiddellijk een arts DRAAG VEILIGHEIDS HANDSCHOENEN Lek kende of beschadigde batterijen accu s kunnen in geval van huidcontact chemische brandwonden veroorzaken Draag daarom in...

Страница 74: ...rwijder de batterijen accu s als u het product gedurende een langere periode niet gebruikt Risico op beschadiging van het product Gebruik uitsluitend het aangegeven type batterij accu Plaats de batterijen accu s volgens de weergegeven polariteit en op bat terij accu en op product Reinig de contacten van de batterij accu en die in het batterijvak voordat u deze plaatst Verwijder verbruikte batterij...

Страница 75: ...ie Ingebruikname Batterij plaatsen vervangen Zie afb B Product plaatsen ophangen VOORZICHTIG Waarborg bij de keuze van de locatie dat het product niet wordt blootgesteld aan directe zonlicht vi bratie hitte kou en vocht en stof Plaats het product niet in de buurt van hittebronnen bijv verwarmingen Anders dreigt het product te beschadigen ...

Страница 76: ... voorwerpen beschadigd raken Plaats het product op een vlakke hori zontale ondergrond Plaats het product niet zonder geschikte bescherming op waardevolle of gevoe lige oppervlakken Anders kunnen ze beschadigd raken Plaatsen Klap de standaard 8 aan de achterkant van het product uit om het product te plaatsen Ophangen Opmerking voor deze werkzaamheden heeft u een boormachine nodig ...

Страница 77: ...vinden Markeer de gewenste locatie evt met behulp van een potlood KANS OP ELEKTRISCHE SCHOK KEN KANS OP MATERIËLE SCHADE KANS OP LETSEL Waar borg dat u niet op stroom gas of water leidingen stoot als u in de wand boort Controleer indien nodig met een leiding detector voordat u in de wand boort Boor met behulp van een boormachine een geschikt gat in de wand Druk een plug 12 in het gat en schroef ee...

Страница 78: ...hermende folie van één kant van de kleefpad 14 Kleef de kleefpad 14 op de achterkant van het product Verwijder de beschermende folie van de andere kant van de kleefpad 14 Bevestig het product op de door u ge wenste locatie en druk het voorzichtig op een wand of op een ander glad oppervlak Opmerking gebruik het product zo mogelijk pas 24 uur na de installatie De kleefpad 14 heeft dan het optimale h...

Страница 79: ...nogmaals op de MIN MAX toets 7 om de gemeten maximumtemperatuur weer te geven Druk nogmaals op de MIN MAX toets 7 om terug te keren naar de weergave van de huidige temperatuurmeting Opmerking als de MIN MAX toets 7 5 seconden lang niet wordt bediend keert het product automatisch terug naar de huidige temperatuurweergave Opmerking de opgeslagen laagste en hoogste temperatuur wordt dagelijks om 0 00...

Страница 80: ...ert u de functie voor het snelle instellen van de waarden Wanneer u niet binnen 60 se conden een andere toets indrukt keert het LCD display automatisch terug naar de standaardweergave Druk nogmaals kort op de instellingstoets SET 6 om de minuten in te kunnen stellen De minutenweergave knippert in de tijdsweergave TIME 2 Druk op de MIN MAX toets 7 om de minuten in te stellen Druk nogmaals kort op d...

Страница 81: ...oelige elektronische componenten Daarom is het mogelijk dat het door radiografische appara ten in de directe omgeving wordt verstoord Verwijder dergelijke apparaten uit de omgeving van het product als er onjuiste weergaven op het display verschijnen Opmerking elektrostatische ontladin gen kunnen tot functiestoringen leiden Verwijder in geval van functiestoringen even de batterij en plaats deze opn...

Страница 82: ...ging een iets vochtige pluisvrije doek Afvoer De verpakking bestaat uit milieu vriendelijke grondstoffen die u via de plaatselijke recyclingcontainers kunt afvoeren De Grüne Punkt geldt niet voor Duitsland b a Neem de aanduiding van de verpakkingsmaterialen voor de afvalscheiding in acht Deze zijn gemarkeerd met de afkortingen a en een cijfers b met de volgende betekenis 1 7 ...

Страница 83: ...go geldt al leen voor Frankrijk Informatie over de mogelijkheden om het uitgediende product na ge bruik te verwijderen verstrekt uw gemeentelijke overheid Gooi het afgedankte product om wille van het milieu niet weg via het huisvuil maar geef het af bij het daarvoor bestemde depot of het gemeen telijke milieupark Over afgifteplaatsen en hun openingstijden kunt u zich bij uw aange wezen instantie i...

Страница 84: ...foutieve verwijdering van de batterijen accu s Batterijen accu s mogen niet via het huisvuil worden weggegooid Ze kunnen giftige zware metalen bevatten en vallen onder het chemisch afval De chemische symbolen van de zware metalen zijn Cd cadmium Hg kwik Pb lood Geef verbruikte batterijen accu s daarom af bij een gemeentelijk inza melpunt Garantie Het product wordt volgens strenge kwaliteits richtl...

Страница 85: ...ft Dit document is nodig als bewijs voor aankoop Wanneer binnen 3 jaar na de aankoop datum van dit product een materiaal of pro ductiefout optreedt dan wordt het product door ons naar onze keuze gratis voor u gerepareerd of vervangen Deze garantie komt te vervallen als het product beschadigd wordt niet correct gebruikt of onderhouden wordt De garantie geldt voor materiaal en produc tiefouten Deze ...

Страница 86: ...87 NL BE batterijen of voor beschadigingen aan breekbare onderdelen zoals bijv scha kelaars accu s of dergelijke onderdelen die gemaakt zijn van glas ...

Страница 87: ...yny pro baterie a akumulátory Strana 94 Před uvedením do provozu Strana 96 Uvedení do provozu Strana 97 Výměna a vkládání baterie Strana 97 Postavení nebo zavěšení výrobku Strana 97 Připevnění výrobku na stěnu Strana 99 Paměť naměřených teplot Strana 100 Nastavení času Strana 101 Odstranění poruch Strana 102 Čistění a ošetřování Strana 103 Zlikvidování Strana 103 Záruka Strana 105 ...

Страница 88: ...e seznamte se všemi pokyny k obsluze a bezpečnostními pokyny Používejte výrobek jen popsa ným způsobem a na uvedených místech Při pře dání výrobku třetí osobě předejte i všechny podklady Q Použití ke stanovenému účelu Výrobek měří teplotu v místnosti a venkovní teplotu ve stupních Celsia C Teploměr se umisťuje v místnosti venkovní čidlo 5 venku Dále výrobek zobrazuje nejvyšší a nejnižší naměřenou ...

Страница 89: ...ení času TIME 3 Zobrazení vnitřní teploty IN 4 Zobrazení venkovní teploty OUT 5 Venkovní čidlo 6 Nastavovací tlačítko SET 7 Tlačítko MIN MAX 8 Stojánek 9 Víko přihrádky na baterie 10 Přihrádka na baterie 11 Závěs 12 Hmoždinka 13 Šroub 14 Lepící polštářek Q Technické údaje Provozní napětí 1 5V stej nosměrný proud ...

Страница 90: ...C do 60 C Venkovní čidlo IP44 chráněné proti stříkající vodě Kabel venkovního čidla cca 2 8m LC displej 21x 50mm šířka x výška Q Obsah dodávky Bezprostředně po rozbalení zkontrolujte rozsah dodávky vzhledem k úplnosti jakož i k bezvadnému stavu výrobku a všech dílů V žádném případě výrobek nesestavujte není li obsah dodávky úplný ...

Страница 91: ...TE SI VŠECHNY BEZPEČNOSTNÍ UPOZORNĚNÍ A POKYNY PRO BUDOUCNOST Tento výrobek mohou používat děti od 8 let osoby se sníženými fyzickými smys lovými nebo duševními schopnosti nebo s nedostatečnými zkušenostmi a znalostmi jestliže budou pod dohledem nebo byly poučeny o bezpečném používání vý robku a chápou nebezpečí která z jeho používání vyplývají S výrobkem si děti ...

Страница 92: ...škozené výrobky znamenají nebezpečí ohrožení života zásahem elektrického proudu Nevystavujte výrobek vlivu extrémního magnetického pole Může dojít k ome zení funkce výrobku Zabraňte příliš silnému tření tělesa výrobku o textilie Může dojít k tvoření elektrostatického náboje a tím k ovlivnění výsledku měření Mějte na paměti že poškození způso bená neodborným zacházením nedbá ním na návod k obsluze ...

Страница 93: ...Uchovávejte baterie a akumulátory mimo dosah dětí V případě spolknutí okamžitě vyhledejte lékařskou pomoc NEBEZPEČÍ VÝBUCHU Nenabíjecí baterie nikdy znovu nenabíjejte Baterie nebo akumulátory nezkratujte ani je neotevírejte Hrozí přehřátí nebezpečí požáru nebo jejich prasknutí Nikdy neházejte baterie nebo akumulá tory do ohně ani do vody Nevystavujte baterie nebo akumulátory mechanickému zatížení ...

Страница 94: ...í ihned omyjte postižená místa dostateč ným množstvím čisté vody a okamžitě vyhledejte lékařskou pomoc NOSTE OCHRANNÉ RU KAVICE Vyteklé i poškozené baterie nebo akumulátory mo hou při kontaktu s pokožkou způsobit její poleptání Noste proto vhodné rukavice V případě vytečení ihned odstraňte bate rie nebo akumulátory z výrobku abyste zabránili jeho poškození Používejte jen baterie nebo akumulátory s...

Страница 95: ...te baterie nebo akumulátory podle označení polarity a na bate riích nebo akumulátorech a na výrobku Vyčistěte před vložením kontakty baterie nebo akumulátoru a kontakty v přihrádce na baterie Vybité baterie nebo akumulátory ihned vyjměte z výrobku Před uvedením do provozu Upozornění Prosíme odstraňte úplně obalový materiál Upozornění Odstraňte ochrannou fólii ...

Страница 96: ...čnímu záření vibraci prachu horku chladnu ani vlhkosti Nestavte výrobek do blízkosti zdrojů tepla např topení Jinak hrozí poškození výrobku Dbejte na to aby byl výrobek při insta laci na stěnu řádně zavěšen Padající výrobek by mohl zranit osoby nebo poškodit předměty Výrobek stavte na rovnou vodorovnou plochu Výrobek nestavte bez vhodné ochrany na cenné nebo choulostivé povrchy V ...

Страница 97: ...R NEBEZPEČÍ OHROŽENÍ ŽIVOTA ZRANĚNÍ A NEBEZPEČÍ VĚC NÝCH ŠKOD Pozorně si pročtěte návod k obsluze a bezpečnostní upozornění k vrtačce K nalezení vhodného místa k zavěšení vý robku nejdříve přiložte výrobek na stěnu Označte si vyhlédnuté místo tužkou NEBEZPEČÍ ZÁSAHU ELEKTRIC KÝM PROUDEM NEBEZPEČÍ VĚCNÉ ŠKODY NEBEZPEČÍ ZRA NĚNÍ Ujistěte se že při vrtání do stěny nenarazíte na vodiče proudu plynové ...

Страница 98: ...13 úplně do hmoždinky 12 Zavěste teploměr 1 na šroub 13 Zavě šení proveďte zaháknutím závěsu 11 tep loměru 1 na šroub 13 Připevnění výrobku na stěnu Stáhněte ochranou fólii z jedné strany lepícího polštářku 14 Přilepte lepící polštářek 14 na zadní stranu výrobku Stáhněte ochranou fólii z druhé strany lepícího polštářku 14 Přiložte výrobek na Vámi vybrané místo na stěně a opatrně ho přitlačte nebo ...

Страница 99: ... Paměť naměřených teplot K zobrazení nejnižší naměřené vnitřní teploty IN 3 a nejnižší naměřené ven kovní teploty OUT 4 stiskněte tlačítko MIN MAX 7 Stiskněte znovu krátce tlačítko MIN MAX 7 pro přechod k zobrazení nejvyšších naměřených teplot Stiskněte znovu krátce tlačítko MIN MAX 7 pro návrat k zobrazení aktuální teploty Upozornění Po přidržení tlačítka MIN MAX 7 na 5 vteřin následuje automatic...

Страница 100: ...ní hodiny stiskněte tlačítko MIN MAX 7 Tip Držte tlačítko MIN MAX 7 stisk nuté Docílíte tak rychlejšího nastavení hodnot Nestisknete li po dobu 60 vteřin žádné tlačítko vrátí se LC displej automa ticky zpět ke standardnímu zobrazení K nastavení minuty stiskněte krátce znovu nastavovací tlačítko SET 6 Zobrazení minut bliká v zobrazení času TIME 2 Pro nastavení minuty stiskněte tlačítko MIN MAX 7 Po...

Страница 101: ...nění poruch Upozornění Výrobek obsahuje citlivé elek tronické součástky Proto může být rušen i ji nými výrobky pracujícími s rádiovými signály Jestliže se na displeji objeví chybné hodnoty odstraňte podobné přístroje z blízkosti výrobku Upozornění Elektrostatické výboje mohou rušit funkce výrobku Při poruchách funkce odstraňte krátce ba terii a znovu ji vložte do výrobku postu pujte podle kapitoly...

Страница 102: ...vlhčenou tkaninu bez nitek Zlikvidování Obal se skládá z ekologických materiálů které můžete zlikvidovat prostřednictvím místních sběren re cyklovatelných materiálů Zelený bod neplatí pro Německo b a Při třídění odpadu se řiďte podle označení obalových materiálů zkratkami a a čísly b s následu jícím významem 1 7 umělé hmoty 20 22 papír a lepenka 80 98 složené látky ...

Страница 103: ...obce nebo města V zájmu ochrany životního pro středí vysloužilý výrobek nevyha zujte do domovního odpadu ale předejte k odborné likvidaci O sběrnách a jejich otevíracích hodinách se můžete infor movat u příslušné správy města nebo obce Vadné nebo vybité baterie resp akumulátory se musí podle směrnice 2006 66 ES a je jích příslušných změn recyklovat Baterie akumulátory i výrobek odevzdejte zpět do ...

Страница 104: ...lovo Proto odevzdejte opotřebované baterie akumulátory u komunální sběrny Záruka Výrobek byl vyroben s nejvyšší pečlivostí podle přísných kvalitativních směrnic a před odesláním prošel výstupní kontrolou V případě závad máte možnost uplatnění zákonných práv vůči prodejci Vaše práva ze zákona ne jsou omezena naší níže uvedenou zárukou Na tento artikl platí 3 záruka od data zakou pení Záruční lhůta ...

Страница 105: ...le našeho roz hodnutí bezplatně opravíme nebo vyměníme Tato záruka zaniká jestliže se výrobek poškodí neodborně použil nebo neobdržel pravidelnou údržbu Záruka platí na vady materiálu a výrobní vady Tato záruka se nevztahuje na díly výrobku podléhající opotřebení např na baterie dále na poškození křehkých chou lostivých dílů např vypínačů akumulátorů nebo dílů zhotovených ze skla ...

Страница 106: ... seguridad sobre las pilas baterías Página 113 Antes de la puesta en marcha Página 116 Puesta en funcionamiento Página 116 Insertar cambiar la pila Página 116 Colocar colgar el producto Página 117 Fijar el producto a la pared Página 119 Registro de temperatura Página 120 Ajustar la hora Página 121 Solucionar problemas Página 122 Limpieza y conservación Página 123 Eliminación Página 124 Garantía Pá...

Страница 107: ...ación Antes de usar el producto familiarícese con todas las indicaciones de manejo y de seguridad Utilice el producto únicamente como se describe a continuación y para las aplicaciones indicadas Adjunte igualmente toda la documentación en caso de entregar el producto a terceros Q Uso previsto El producto mide la temperatura interior y ex terior en grados celsius C Coloque el ter mómetro en una zon...

Страница 108: ...Q Descripción de los componentes 1 Termómetro de interior y exterior 2 Indicador de hora TIME 3 Indicador de temperatura interior IN 4 Indicador de temperatura exterior OUT 5 Sensor exterior 6 Botón de ajustes SET 7 Botón MIN MAX 8 Soporte 9 Tapa del compartimento para la pila 10 Compartimento para la pila 11 Colgador 12 Taco 13 Tornillo 14 Disco adhesivo ...

Страница 109: ...men de suministro Rango de temperatura interior de 10 C hasta 40 C exterior de 40 C hasta 60 C Sensor exterior IP44 protegido contra salpicaduras de agua Cable del sensor exterior aprox 2 8 m Pantalla LCD 21x 50 mm ancho x alto Q Contenido Tras desembalar el producto compruebe su integridad y condiciones así como las de to dos sus componentes En ningún caso monte ...

Страница 110: ...llo 1 disco adhesivo 1 manual de instrucciones Indicaciones de seguridad GUARDE TODAS LAS ADVERTENCIAS E INDICACIONES DE SEGURIDAD POR SI LAS NECESITA EN UN FUTURO Este producto puede ser utilizado por niños mayores de 8 años así como por personas con capacidades físicas senso riales o mentales reducidas o que cuen ten con poca experiencia y o falta de ...

Страница 111: ... a cabo por niños sin la vigilancia de un adulto Nunca desmonte el producto Las repa raciones inadecuadas pueden suponer un riesgo considerable para el usuario Encargue las reparaciones únicamente a personal técnico cualificado No ponga el producto en funciona miento si está dañado Los productos dañados conllevan peligro de muerte por descarga eléctrica No exponga el producto a campos elec tromagn...

Страница 112: ...um plimiento del manual de instrucciones o la manipulación por parte de personas no autorizadas están excluidos de la ga rantía Coloque el sensor exterior 5 en una zona fuera de la vivienda donde no reciba la radiación solar directa Asegúrese de que al colocar el cable del sensor exterior este no resulte dañado Indicaciones de seguridad sobre las pilas baterías PELIGRO DE MUERTE Mantenga las pilas...

Страница 113: ...endio Nunca arroje pilas baterías al fuego o al agua No aplique cargas mecánicas sobre las pilas baterías Riesgo de sulfatación de las pilas baterías Evite condiciones y temperaturas extre mas que puedan influir en el funciona miento de las pilas baterías por ejemplo acercarlas a un radiador o exponerlas directamente a la luz solar Evite el contacto con la piel ojos y mu cosas En caso de que se pr...

Страница 114: ...cindible el uso de guantes de protección en estos casos En caso de sulfatación de las pilas baterías retírelas inmediatamente del producto para evitar daños Utilice únicamente pilas baterías del mismo tipo No mezcle pilas baterías usadas con nuevas Retire las pilas baterías del producto si no va a utilizarlo durante un período de tiempo prolongado Riesgo de daño del producto Utilice exclusivamente...

Страница 115: ... Limpie los contactos de las pilas bate rías y del compartimento para pilas antes de colocarlas Retire inmediatamente las pilas baterías agotadas del producto Antes de la puesta en marcha Nota Retire completamente el material de embalaje Nota Retire la película protectora Puesta en funcionamiento Insertar cambiar la pila Ver fig B ...

Страница 116: ...ca de fuentes de calor p ej radiadores En caso contrario el producto podría dañarse Si instala el producto en la pared asegú rese de colgarlo correctamente Su des prendimiento podría lesionar a alguien o dañar el producto o bienes materiales Coloque el producto sobre una superficie horizontal y plana Utilice un protector adecuado si coloca el producto sobre superficies delicadas o de valor En caso...

Страница 117: ...AÑOS MATERIA LES Lea atentamente las instrucciones de uso e indicaciones de seguridad de su taladro Sujete el producto contra la pared para determinar el lugar de montaje ade cuado Marque el punto deseado con un lápiz PELIGRO DE DESCARGA ELÉC TRICA RIESGO DE DAÑOS MATE RIALES PELIGRO DE LESIONES Asegúrese de no acercarse a conductos de agua gas o corriente eléctrica cuando perfore la pared En caso...

Страница 118: ...13 no quede completamente encajado en el taco 12 Cuelgue el termómetro de interior y exte rior 1 del tornillo 13 Para ello engan che el colgador 11 del termómetro de interior y exterior 1 en el tornillo 13 Fijar el producto a la pared Retire la lámina protectora de uno de los lados del disco adhesivo 14 Pegue el disco adhesivo 14 en la parte trasera del producto Retire la lámina protectora del otr...

Страница 119: ...e fijación No cambie el disco adhesivo 14 de lugar una vez finali zada la instalación De lo contrario podría disminuir la adherencia del disco adhesivo 14 Registro de temperatura Pulse el botón MIN MAX 7 para vi sualizar la menor temperatura medida en el interior IN 3 y en el exterior OUT 4 Pulse de nuevo el botón MIN MAX 7 para visualizar la temperatura más alta registrada Vuelva a pulsar el botó...

Страница 120: ...y se comienzan a registrar de nuevo Ajustar la hora Pulse brevemente el botón de ajuste SET 6 para fijar la hora La hora parpadeará en el indicador de hora TIME 2 Pulse el botón MIN MAX 7 para ajustar la hora Consejo Mantenga pulsado el botón MIN MAX 7 De este modo podrá ajustar los valores más rápidamente Si durante 60 segundos no se presiona nin gún botón la pantalla LCD vuelve auto máticamente ...

Страница 121: ...ara confirmar la hora estable cida Nota La hora ajustada también se guarda si no pulsa ningún botón durante 60 segundos Nota El producto mostrará entonces la hora actual TIME 2 la temperatura interior IN 3 y la temperatura exterior OUT 4 Solucionar problemas Nota El producto contiene componentes electrónicos sensibles Por ello podría sufrir interferencias por otros equipos de radio transmisión que...

Страница 122: ... en el funcionamiento Si se producen tales fallos retire la pila brevemente y colóquela de nuevo de acuerdo a lo explicado en el capítulo Insertar cambiar la pila Limpieza y conservación No utilice en ningún caso productos de limpieza abrasivos o corrosivos Si lo hace puede dañarse la superficie del producto Para la limpieza utilice un paño ligera mente humedecido y sin pelusas ...

Страница 123: ...a Tenga en cuenta el distintivo del embalaje para la separación de residuos Está compuesto por abre viaturas a y números b que significan lo siguiente 1 7 plásticos 20 22 papel y cartón 80 98 materiales compuestos El producto y el material de emba laje son reciclables Separe los materiales para un mejor trata miento de los residuos El logotipo Triman se aplica solo para Francia ...

Страница 124: ...ea útil Deséchelo en un contenedor de reci claje Diríjase a la administración competente para obtener información sobre los puntos de recogida de residuos y sus horarios Las pilas baterías defectuosas o usadas deben ser recicladas según lo indicado en la directiva 2006 66 CE y en sus modificacio nes Recicle las pilas baterías y o el pro ducto en los puntos de recogida adecuados Daños en el medio a...

Страница 125: ...ías deben reciclarse en un punto de recolección específico para ello Garantía El producto ha sido fabricado cuidadosa mente siguiendo exigentes normas de cali dad y ha sido probado antes de su entrega En caso de defecto del producto usted tiene derechos legales frente al vendedor del mismo Nuestra garantía abajo indicada no supone una restricción de dichos dere chos legales Este producto dispone d...

Страница 126: ...stituiremos gratuitamente por un producto nuevo según nuestra elección La garantía quedará anulada si el producto resulta dañado o es utilizado o mantenido de forma inadecuada La garantía cubre defectos de materiales o de fabricación Esta garantía no cubre aque llos componentes del producto sometidos a un desgaste normal y que por ello puedan considerarse piezas de desgaste por ej las pilas Tampoc...

Страница 127: ...e segurança relativas às pilhas baterias Página 134 Antes da utilização Página 137 Colocação em funcionamento Página 137 Colocação substituição da pilha Página 137 Montar pendurar produto Página 137 Fixar o produto na parede Página 140 Memória de temperatura Página 141 Ajustar a hora Página 142 Eliminar erros Página 143 Limpeza e conservação Página 144 Eliminação Página 144 Garantia Página 146 ...

Страница 128: ...es à segurança utilização e eliminação Familiari ze se com todas as indicações de utilização e de segurança do produto Utilize o produto apenas como descrito e para as áreas de aplicação indicadas Se transmitir o artigo a terceiros entregue também os respectivos documentos Q Utilização adequada O produto mede a temperatura interior e exterior em graus Celsius C O termómetro deve ser colocado no es...

Страница 129: ... para a utilização comercial Q Descrição das peças 1 Termómetro interior exterior 2 Indicação da hora TIME 3 Indicação da temperatura interior IN 4 Indicação da temperatura exterior OUT 5 Sensor exterior 6 Botão de configuração SET 7 Botão MIN MAX 8 Suporte 9 Tampa do compartimento das pilhas 10 Compartimento das pilhas 11 Dispositivo de suspensão 12 Bucha 13 Parafuso 14 Disco adesivo ...

Страница 130: ...rnecido Amplitude de temperaturas Interior 10 C até 40 C Exterior 40 C até 60 C Sensor externo IP44 protegido contra salpicos de água Cabo do sensor exterior cerca 2 8m Visor LC 21x 50mm Largura x Altura Q Material fornecido Depois de desempacotar o material forne cido verifique se todo o material está in cluído assim como se o produto e todas as ...

Страница 131: ...tínua Pilhas AAA 1 buchas 1 parafuso 1 disco adesivo 1 manual de instruções Indicações de segurança GUARDE TODAS AS INDICAÇÕES DE SEGURANÇA E INSTRUÇÕES PARA FUTURAS UTILIZAÇÕES Esse produto pode ser utilizado por crianças a partir dos 8 anos assim como por pessoas com capacidades físicas sensoriais ou mentais reduzidas ou defi ciências na experiência e conhecimento ...

Страница 132: ...devidas podem originar situações de perigo significativo para o utilizador As reparações só devem ser efetuadas por pessoal especializado Não coloque o produto em funciona mento se este estiver danificado Os pro dutos danificados representam perigo de morte por choque elétrico Não exponha o produto a fortes campos eletromagnéticos Isto pode limitar a função do produto Evite que a caixa do produto ...

Страница 133: ...steja exposto a raios solares directos Certifique se de que o cabo de rede não seja danificado aquando da colocação Indicações de segurança relativas às pilhas baterias PERIGO DE MORTE Mantenha as pilhas e baterias fora do alcance das crianças Se a pilha bateria for inge rida contacte imediatamente um médico PERIGO DE EXPLOSÃO Nunca carregue pilhas não recarregáveis Não faça liga ção direta de pil...

Страница 134: ...s pilhas baterias Evite condições e temperaturas extremas que possam ter efeito sobre as pilhas ou baterias por ex elementos de aqueci mento radiação solar direta Evite o contacto com a pele olhos e mu cosas Em caso de contacto com o ácido das pilhas lave imediatamente as zonas afetadas com água limpa e consulte um médico logo que possível UTILIZAR LUVAS DE PRO TECÇÃO As pilhas ou bate rias gastas...

Страница 135: ...po Não misture pilhas novas com pilhas ou baterias antigas Remova as pilhas ou baterias se o pro duto não foi utilizado durante um longo período Perigo de dano ao produto Utilize apenas o tipo de pilha ou bateria indicado Insira as pilhas baterias de acordo com a especificação de polaridade e na pilha bateria e produto Limpe os contactos na pilha bateria e no compartimento de baterias antes de col...

Страница 136: ...a protetora Colocação em funcionamento Colocação substituição da pilha Ver fig B Montar pendurar produto CUIDADO Ao escolher o local certifi que se que o produto não fica exposto à luz solar directa a vibrações calor frio humi dade e a pó Não coloque o produto na proximidade de fontes de calor por ex aquecedores Caso contrário o produto pode ficar danificado ...

Страница 137: ...ctos Coloque o produto numa superfície plana e horizontal Não coloque o produto sem uma protec ção adequada sobre superfícies valiosas ou delicadas Caso contrário as mesmas poderão ficar danificadas Instalação Abra o suporte 8 na parte traseira do produto para que o produto fique devidamente apoiado Suspensão Aviso necessita de um berbequim para efectuar este passo ...

Страница 138: ...Se necessário marque o local desejado com um lápis PERIGO DE CHOQUE ELÉCTRICO PERIGO DE DANOS MATERIAIS PERIGO DE FERIMENTOS Certifique se de que não perfura cabos elétricos ou condutas de gás ou de água ao furar a parede Se necessário verifique com um detetor de cabos antes de perfurar uma parede Efectue um furo adequado na parede com o auxílio de um berbequim Insira uma bucha 12 adequada no orif...

Страница 139: ...otectora de um dos lados do disco adesivo 14 Cole o disco adesivo 14 na traseira do produto Retire a película protectora do outro lado do disco adesivo 14 Coloque o produto no local desejado e pressione o cuidadosamente contra uma parede ou uma outra superfície lisa Aviso Preferencialmente utilize o produto somente 24 horas após a instalação O disco adesivo 14 atinge então o seu grau ideal de ader...

Страница 140: ...Prima novamente o botão MIN MAX 7 para ver a temperatura mais elevada me dida Prima novamente o botão MIN MAX 7 para voltar à indicação da temperatura actual Aviso Se o botão MIN MAX 7 não for premido durante 5 segundos o ter mómetro voltará automaticamente para a indicação da temperatura actual Aviso A memória da temperatura mais baixa e mais elevada será eliminada diariamente às 0 00 horas e rei...

Страница 141: ...o MIN MAX 7 premido Deste modo o ajuste dos valo res será mais rápido Se não premir qual quer botão dentro de 60 segundos o visor LCD regressa automaticamente à indicação padrão Prima brevemente o botão SET 6 de novo para poder ajustar os minutos A indicação dos minutos fica intermitente no indicador da hora TIME 2 Prima o botão MIN MAX 7 para ajus tar os minutos Prima brevemente o botão SET 6 de ...

Страница 142: ... contém componentes ele trónicos sensíveis Por isso é possível que aparelhos com radiotransmissão na proximi dade imediata deste interfiram com o seu funcionamento Afaste tais aparelhos da proximidade do produto se aparecerem indicações de erro no visor Nota Cargas electroestáticas podem causar interferências no funcionamento Em caso de tais interferências retire a pi lha tal como descrito no capí...

Страница 143: ...o ligeira mente humedecido e que não liberte pelos Eliminação A embalagem é feita de materiais não poluentes que podem ser eli minados nos contentores de reci clagem locais O ponto verde não vale para a Alemanha b a Esteja atento à especificação dos materiais da embalagem para a separação de lixo Estas são iden tificadas com abreviações a e números b com o seguinte significado 1 7 ...

Страница 144: ...As possibilidades de reciclagem dos artigos utilizados poderão ser averiguadas no seu Município ou Câmara Municipal Não deposite o produto utilizado no lixo doméstico a favor da pro teção do ambiente Elimine o de forma responsável Pode informar se no seu município sobre os locais de recolha adequa dos e o seu período de funcionamento As pilhas ou baterias avariadas ou gastas têm de ser recicladas ...

Страница 145: ...odem ser elimina das no lixo doméstico Podem conter metais pesados nocivos e estão sujeitas à regulação de lixos tóxicos Os símbolos químicos dos metais pesados são os seguintes Cd cád mio Hg mercúrio Pb chumbo Como tal deposite as pilhas baterias utilizadas num ponto de recolha adequado do seu município Garantia O producto foi cuidadosamente fabricado segundo rigorosas directivas de qualidade e m...

Страница 146: ...omprovativo da compra Esse documento é necessário para comprovar a compra Caso num espaço de tempo de 3 anos a par tir da data da compra deste producto surja um erro de material ou de fabrico o producto será reparado ou substituído por nós se gundo a nossa escolha e sem qualquer custo Esta garantia expira se o producto esti ver danificado se não for devidamente utili zado ou se não for efectuada a...

Страница 147: ... por isso podem ser consideradas peças de desgaste por ex º pilhas ou a danos em peças frágeis por ex º interruptores baterias ou peças de vidro Com a troca do aparelho de acordo com DL 67 2003 o tempo de garantia se inicia novamente ...

Страница 148: ...GERMANY Model No Z31482A Z31482B Version 03 2017 Stand der Informationen Last Information Update Version des informations Stand van de informatie Stav informací Estado de las informaciones Estado das informações 04 2017 Ident No Z31482A B042017 8 IAN 285321 ...

Отзывы: