OverTek OT-3407SUX Скачать руководство пользователя страница 4

1.3 Package Contents 


Chapter 2 Hardware Installation

2.1 Quick Installation Guide


      1 piece of 7-port Ethernet Switch

      1 piece of external power adapter

      1 piece of console cable

      4 pieces of rubber padding

      User's manual

 Choose a proper place for the rack mountable switch, considering the 

 surroundings such as power source, space, keep it away from strong 

 sunlight, heat source, and electromagnetism interference. 

 Installation & Connection method:

    1.Stick rubber paddings onto the bottom side of the switch.

    2.Connect the switch to power source with offered power adapter, 

        turn it on, the switch  will test itself, all its indication lights are on 

        at the same time, test is done when the lights go off after 5 seconds.

    3.Connect the switch to network devices, including Lan cards, 

        switches etc. with Cat3,4,5 cable(Cat5 recommended); related 

        indication lights flash when attached network devices are working. 

        ALL ports support Uplink. 

        Note: Please not plug a phone line into a RJ45  port, otherwise it 

                   may cause damage. 

2.2 LED Indications

LED

Power

Link/Act

Speed

Status

ON/OFF

Flash

ON/OFF

ON/OFF

Indication

Power on/off

Ports connected/Ports unconnected

Data frames running

Maximum transmission rate 1000Mbps;

Maximum transmission rate 10/100 Mbps.

Chapter 3 Configuration Guide

3.1 Fast Log on   


Notice:  You may have to configure a new IP for a managing computer, 

               because default switch IP is 192.168.2.1. You can log on as 

               following steps:

1. Connect the switch with the managing computer Lan card;

2. Turn on the switch;

3. Make sure the managing computer IP address belongs to 

    192.168.2.2~254,  e.g:192.168.2.100

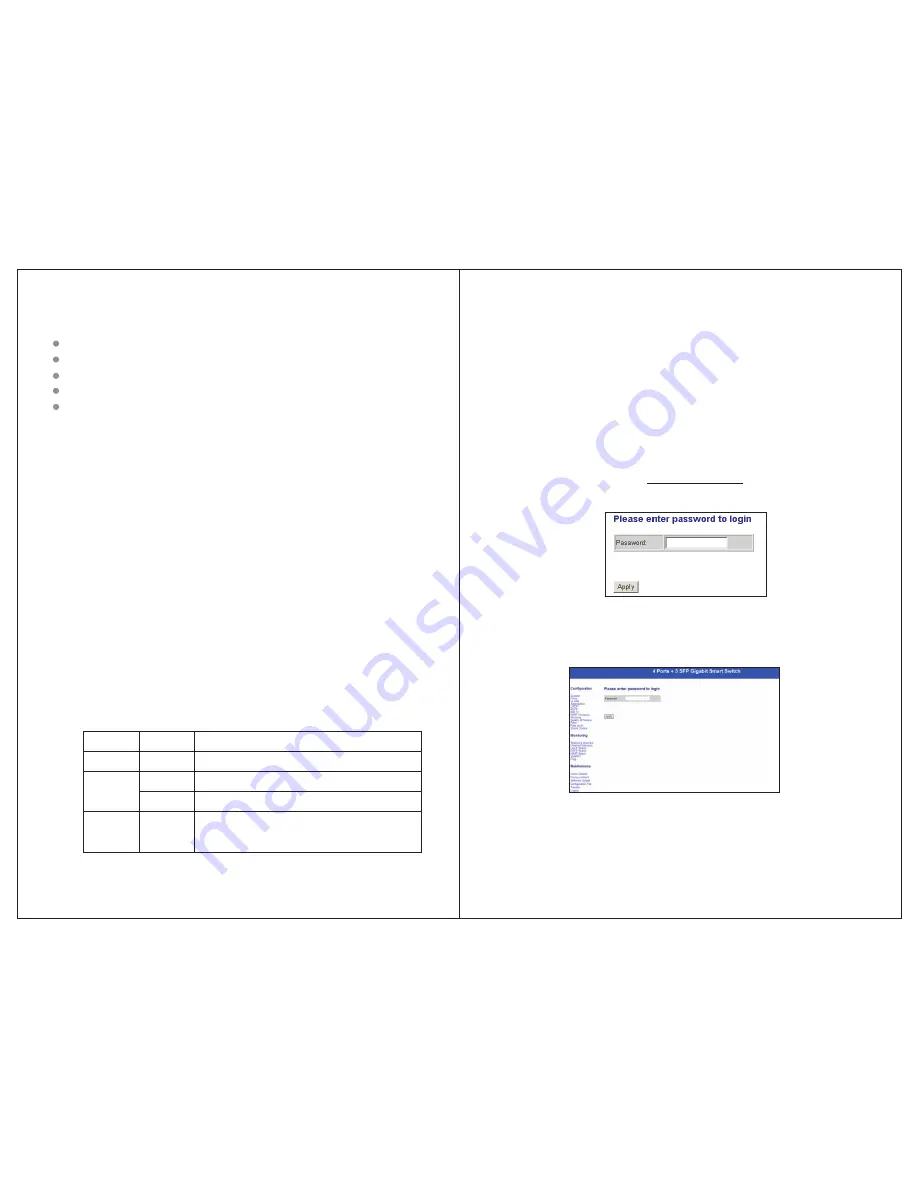
4. Open IE browser , input http://192.168.2.1 and 'Enter', you will see

     login window as  below:

5. Input Password (no password in default), and click“Apply”, 

    configuration window comes as below:

-3-

-4-

Содержание OT-3407SUX

Страница 1: ...4 Ports 3 SFP Gigabit Smart Switch User Manual Ver A0 OT 3407SVW UX...

Страница 2: ...s 4 3 LACP Status 4 4 RSTP Port Status 4 5 IGMP Status 1 1 1 3 3 3 3 4 4 5 5 6 6 7 7 8 8 9 9 10 10 11 11 11 11 12 12 13 4 6 VeriPHY 13 4 7 Ping 14 14 Chapter 3 Configuration Guide 14 14 5 3 Software U...

Страница 3: ...er adapter supply 1 2 Product Specifications 1 1 Product Characteristics 1 2 Power 100 240VAC 50 60Hz Max 13W Input Consumption Standards IEEE802 3 802 3u 802 3ab 802 3x Wire speed Performance MAC Add...

Страница 4: ...at3 4 5 cable Cat5 recommended related indication lights flash when attached network devices are working ALL ports support Uplink Note Please not plug a phone line into a RJ45 port otherwise it may ca...

Страница 5: ...255 0 in default DHCP Server 0 in default Lease Time Left 0 default Here provides port status and available to set speed and flow control options to 10M half duplex 10M full duplex 100M half duplex 1...

Страница 6: ...regation between switches automatically 3 7 RSTP Configuration RSTP is a protocol that prevents loops in a network and dynamically it reconfigures to forward frames 3 8 802 1X Configuration Here provi...

Страница 7: ...through ports to block unwanted access 3 13 Rate Limit Configuration Policer ShaperSpeed options 128kbps 256kbps 384kbps 512kbps 640kbps 768kbps 836kbps 896kbps 1024Mbps 1152kbps 1280kbps 1408kbps 15...

Страница 8: ...8192fps 16384fps 32768fps 4 1 Statistics Overview Here provides statistics of current forwarding and receiving data Chapter 4 Monitoring Guide 4 2 Detailed Statistics Here provides detailed statistic...

Страница 9: ...r 5 Maintenance Guide 5 1 Warm Restart Warm Restart click Yes to start restart the switch 5 2 Factory Default Restore Factory Configuration click Yes to default factory configuration NOTICE Please do...

Страница 10: ...ncluding group or you may change context into a group by entering the name of the group At group level you may enter commands for the particular group you have chosen without specifying the group name...

Страница 11: ...onfiguration Console Password password Console Timeout timeout Console Prompt prompt string Console password Syntax Console Password password Description Set or display console password The empty stri...

Страница 12: ...o hold the SFP optical module and insert it into a slot and in place Step 3 Insert it with right fiber optic cable Matching fiber optic cables according to spec label are required to avoid of possible...

Страница 13: ...n because invisible rays from it may hurt eyes Fix it with a dust cover when no optical connectors connected Right connectors and optical cables are chosen before connection 7 7 Notes on optical conne...

Отзывы: