Outsunny 845-489V70 Скачать руководство пользователя страница 10

17. 

If the appliance becomes clogged, switch off and allow the cutting means to 

stop. Pull the plug from the mains supply before cleaning debris.

18. 

Keep  the  motor  cooling  vents  clean  of  debris  and  other  accumulations  to 

prevent damage to the motor or possible fire.

19. 

Switch off, allow the cutting means to stop and pull the plug from the mains 

supply whenever you leave the work area.

20. 

Do not allow processed material to build up in the discharge zone; this may 

prevent proper discharge and can result in kickback of material through the feed 
intake opening.

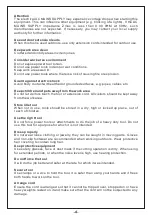
How do I operate this product?

Starting and Stopping the shredder

Press the switch marked “1” to start and marked “0” to stop the motor.
Press  the  “circuit  breaker”  button  if  the  machine  does  not  work,  ensure  you  have 
connected to the power supply.
When the motor has been running for a few seconds you can commence shredding.

The circuit breaker will be activated in the following circumstances:
a.  A build up of shredded material around the cutting disc.
b.  If the material bring shredded is greater then the motor capacity.
c.  Where there is too much resistance against the cutting blade.

When  the  circuit  breaker  has  been  activated  switch-off  the  shredder  and 
disconnect the power supply.
a.  Unscrew the reamer knob at the base of the turret and open top section
b.  Remove the debris or obstruction from the cutting area
c.  Return the top section and tighten the reamer knob.
d.  Leave motor a few minutes to cool down
e.  Reconnect to the power supply and press the circuit breaker button.
f.  When ready to start shredding press the “1” switch. 

Warning

:  NEVER  slacken  off  the  tightening  knob  without  having  turned  off  the 

On/Off switch and pulled the plug out off the socket.

Warning

: The shredder will stop within 5 seconds after switching off. 

Using the Plunger

There are a plunger provided to aid feeding less bulky material such as small twigs, 
leaves, other garden waste and vegetation into the in-feed chute.

1.  Load the material into the hopper.
2.  Insert  the  plunger  into  the  in-feed  chute  pushing  the  material  onto  the  blade 

disc.

3.  Wait until all the material has been shredder before adding more material.

Содержание 845-489V70

Страница 1: ...ASSEMBLY INSTRUCTION MANUAL IMPORTANT RETAIN FOR FUTURE REFERENCE READ CAREFULLY INbma083_UK_845 INbma083_UK_845 489V70 Assembly video please scan the QR code ...

Страница 2: ...use injury 8 Before starting the machine check that all screws nuts bolts and other fasteners are properly secured and that guards and screens are in place Replace damaged or unreadable labels Operation 1 Before starting the machine look into the feeding chamber to make certain that it is empty 2 Keep your face and body away from the feed intake opening 3 Do not allow hands or any other part of th...

Страница 3: ...n or storage or to change an accessory shut off the power source disconnect from supply make sure that all moving parts have come to a complete stop and where a key is fitted remove the key Allow the machine to cool before making any inspections adjustments etc 2 Always allow the machine to cool before storing 3 When servicing the cutting means be aware that even though the power source will not st...

Страница 4: ... switched off WARNING If the cord becomes damaged during use do not touch Immediately disconnecting the plug from the supply or disconnect the shredder from the mains supply also when not in use or during work on the machine itself e g changing parts repairs cleaning and adjustment WARNING Always wear safety glasses ear muffs and protective gloves WARNING Do not use the shredder in the rain or dam...

Страница 5: ... cord All visitors should be kept away from the work area Store idle tool When not in use tools should be stored in a dry high or locked up place out of reach of children Use the right tool Do not force power tools or attachments to do the job of a heavy duty tool Do not use this tool for a purpose for which it is not intended Dress properly Do not wear loose clothing or jewelry they can be caught...

Страница 6: ...d when changing accessories such as blades and cutters always ensure the machine is disconnected from the mains supply Removing keys and wrenches Form the habit of checking to see that keys and adjusting wrenches are removed from the tool before turning it on Avoid unintentional starting Do not move a plugged in tool with a finger on the switch Ensure the switch is off when plugging in Stay alert W...

Страница 7: ...s are damaged or worn 10 Not to connect a damaged cord to the supply or touch a damaged cord before it is disconnected from the supply A damaged cord can lead to contact with live parts 11 Not to touch the shredding means before the machine is disconnected from the supply and the shredding means have come to a complete stop 12 To keep extension cords away from the shredding means The shredding mea...

Страница 8: ...d B which are identified by the letter stamped on the actual support Insert the foot into the body Fig 4 Foot A Axle Fig 3 Foot B Fig 4 Insert Put the cotter pin in to the pipe hole Tighten the reamer knob The reamer knob has a safety switch please ensure the knob is tightened or the motor will not activate Reamer knob Fig 6 ...

Страница 9: ...up 8 Warning Long material extending out from the machine could lash out when being drawn in by the blades Please keep at safe distance 9 Ensure the shredded material can fall freely from the discharge chute 10 To make finer compost the shredded material can be shredded for a second time 11 Do not allow the shredded material to build up to a level where it blocks the discharge chute If the material...

Страница 10: ...aterial around the cutting disc b If the material bring shredded is greater then the motor capacity c Where there is too much resistance against the cutting blade When the circuit breaker has been activated switch off the shredder and disconnect the power supply a Unscrew the reamer knob at the base of the turret and open top section b Remove the debris or obstruction from the cutting area c Retur...

Страница 11: ...ust never be covered by the collection bag or shredded material How do I replace the blades 1 Ensure that the shredder is switched off and disconnected from the mains supply 2 Remove the top feed assembly by unscrewing the reamer knob securing it to the body of the machine 3 The blades have two cutting edges When the blades become worn they can be reversed to use the second cutting edge 4 It is re...

Страница 12: ...urned by hand 6 Never attempt to override the interlock feature of the guarding 7 Remove deposited matter from the machine using a brush 8 Always clean the machine after use Clean the plastic body and plastic parts using soap and a moist cloth Do not use aggressive agents or solvents for cleaning 9 Never clean the shredder with a jet of water or by rinsing Make sure that no water is allowed to ent...

Страница 13: ......

Отзывы: