background image


2

power of 5V DC 60mA. In case a CCD (barcode scanner) is connected, KP-180’s power 
requirement increases, including that of CCD’s. 
To use independent power through 5V 400mA adapter connected to KP-180’s DC Jack.  When 
using an independent power, KP-180 automatically stops power from the printer through RS-232 
cable. The 5V DC 400mA adapter is a piece of optional equipment provided by GODEX.   

1-4. PRINT 

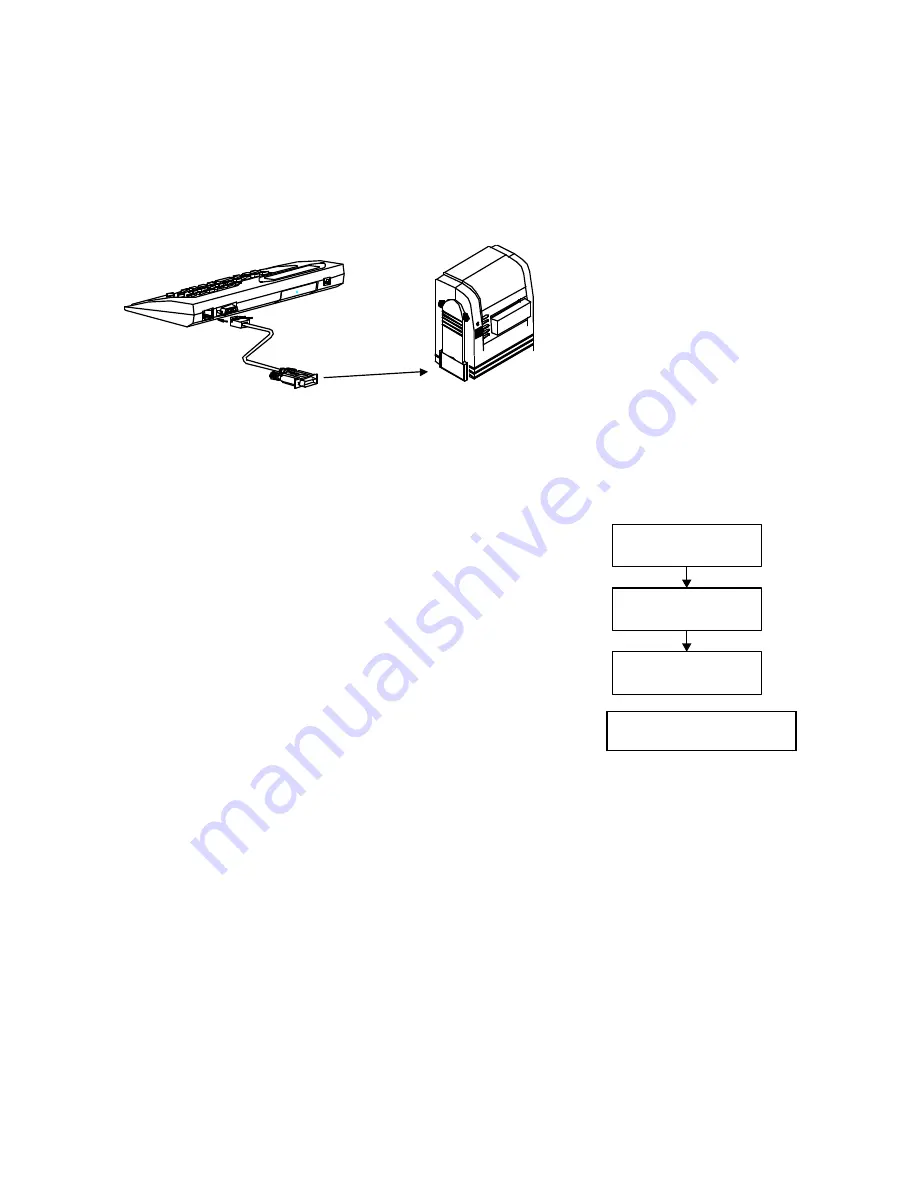
Be sure KP-180 has been connected to printer’s RS-232 port (see figure 1.4.1). 

EZ-2P/4P/4TT

to RS232

(RS232 cable)

Figure 1.4.1 

Be sure the flash memory card has been put into the printer’s slot if your want to print label forms in 
the card. KP-180 has its own 8K built-in memory card, which can store some simple forms. In case 
of big forms or graphic, printer’s external flash memory cards are suggested. 

1-5. STARTUP 

Power on printer, KP-180 begins self-test, and LCD shows messages 
like right flowchart. Then LCD shows name of printer in about 2 
seconds, if printer, EZ-4TT for example, is connected correctly. 
 
If printer connected improperly, LCD keeps showing “Searching 
Printer”, with cursor flashing. If LCD goes this way for a long time, 
please reconnect printer. 
 
As printer correctly connected, LCD begins to check if an external 
memory card has been installed into printer. 

DATA TERMINAL

KP-180 VX.X

Searching Printer

>>>>>

Your device is

EZ-4TT


[1] KMC WAY 
[2] PMC WAY 

If installed, LCD shows message like right screen.  
Press 1 to go to paragraph 2-1, to print label forms stored in KP-180’s 
built-in memory card. 


Press 2 to go to paragraph 2-2, to print label forms stored in Printer’s External Memory Card (this 
is an optional product). 
 

2. OPERATION MODE 

2-1. KMC WAY 

2-1-1. Form choice 

When entering KMC WAY, KP-180 begins to check whether any form has been downloaded into 
the built-in memory card. 

Содержание KP-180

Страница 1: ...ORM CHOICE 2 2 1 2 VARIABLE SETTING 3 2 1 3 PRINT QUANTITY 3 2 1 4 PRINT JOB END 3 2 2 PMC WAY 4 2 2 1 FORM CHOICE 4 2 2 2 VARIABLE SETTING 4 2 2 3 PRINT QUANTITY 4 2 2 4 PRINT JOB END 4 3 SETUP MODE...

Страница 2: ...with firmware version earlier than V1 60 and EZ 2P 4P with firmware version earlier than V1 52 are incompatible with KP 180 For further information about compatibility of printer specification of CCD...

Страница 3: ...e suggested 1 5 STARTUP Power on printer KP 180 begins self test and LCD shows messages like right flowchart Then LCD shows name of printer in about 2 seconds if printer EZ 4TT for example is connecte...

Страница 4: ...xxxxx is the format of the variable Both must have been defined before label data is downloaded into memory card For example When a form has two variables Prompt1 Employee Prompt2 Salary After input o...

Страница 5: ...graphics in the memory card As to some form you want to pick up please key in the name and press Enter or press keys to reach it and press Enter If the desired form is a case of either variable or se...

Страница 6: ...ET CUTTER 4 DOWNLOAD FORM TO KP Ready 1 Power on the printer 2 Using the RS232 cable to connect the KP 180 and printer see figure 1 4 1 Printer s RS232 setting 9600 N 8 1 3 Using the download cable to...

Страница 7: ...more file 10 forms have been stored in and there is no more form to be accepted Too many variables in label format KP 180 allows 20 variables at most LCD will go back to previous screen in about 1 se...

Страница 8: ...ard There are to types of external flash memory cards 1MB or 2MB used by the printer Each card can store up to 330 forms that KP 180 accepts The name of each form accepts up to 20 characters Each form...

Страница 9: ...8 EZ 2P 4P 4TT to RS232 RS232 cable to 9Pin RS232 connector Download cable to PC s serial port PC 2 Download form to printer s memory card PC SYSTEM to Parallel port using printer cable...

Отзывы: