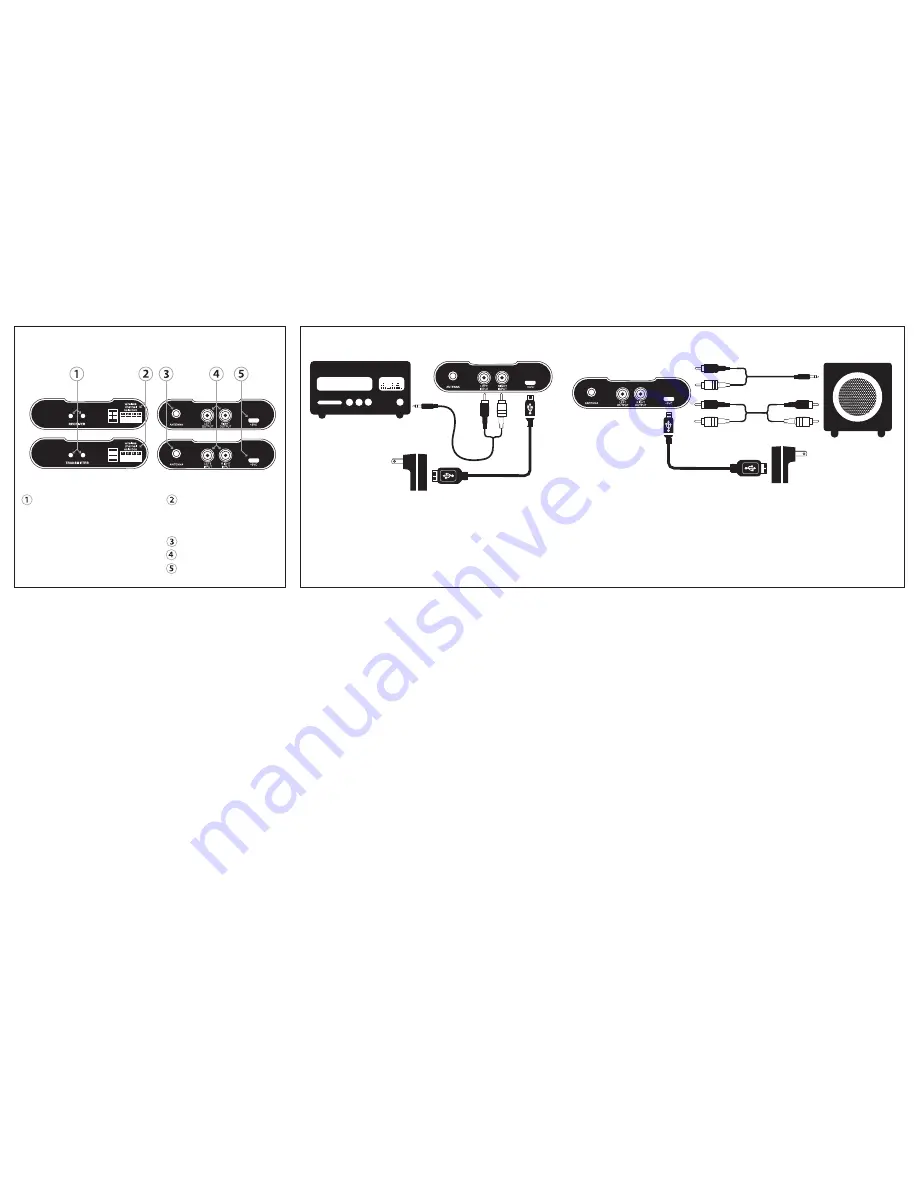
1. Connect the OAW4-Tx transmitter using the supplied power supply and micro-USB cable.
e front LED should turn a steady red and the blue LED will blink on and off.
2. Choose the appropriate cable to connect the OAW4-Tx to your chosen source.
Most computers and phones will use the 1/8˝ (3.5mm) connector.
Receivers and other sources may use the standard RCA cable.
3. Select the channel you want to use.
Consult the front panel of the OAW4-Tx for more information on selecting the channel.
Status LED
ere are two LEDs on each OAW4 transmitter
and receiver. A red power indicator and a blue
status indicator. e Red LED will remain lit as
long as the unit is on. e blue LED will either
flash or remain constant. If the blue LEDs are
flashing every two seconds, the transmitter and
receiver are not paired. If the blue LED is con-
stant the unit has successfully paired with the
receiver or transmitter.
Connections and Configurations
Zone Switch
e OAW4 features four different
selectable channels. Be sure to set
both the transmitter and receiver
to the same channel.
Antenna connection
Analog input/output connection
Micro USB power port
Part 1: Connecting the OAW4-Tx Transmitter
Part 2: Connecting the OAW4-Rx Receiver
1. Connect the OAW4-Rx Receiver using the supplied power supply and micro-USB cable.
e front LED should turn a steady red and the blue LED will blink on and off.
2. Choose the appropriate cable to connect the OAW4-Rx to your chosen component.
If you are connecting a mono signal, be sure to use the same input and output.
For example, if you connect an AV receiver's LFE out to the R input on the wireless transmitter, connect your subwoofer
to the R output on the wireless receiver.
3. Select the same channel you set the OAW4-Tx transmitter to.
Consult the front panel of the OAW4-Rx for more information on selecting the channel.
4. e blue LED should switch to a steady blue when the receiver and transmitter are paired.
OR


