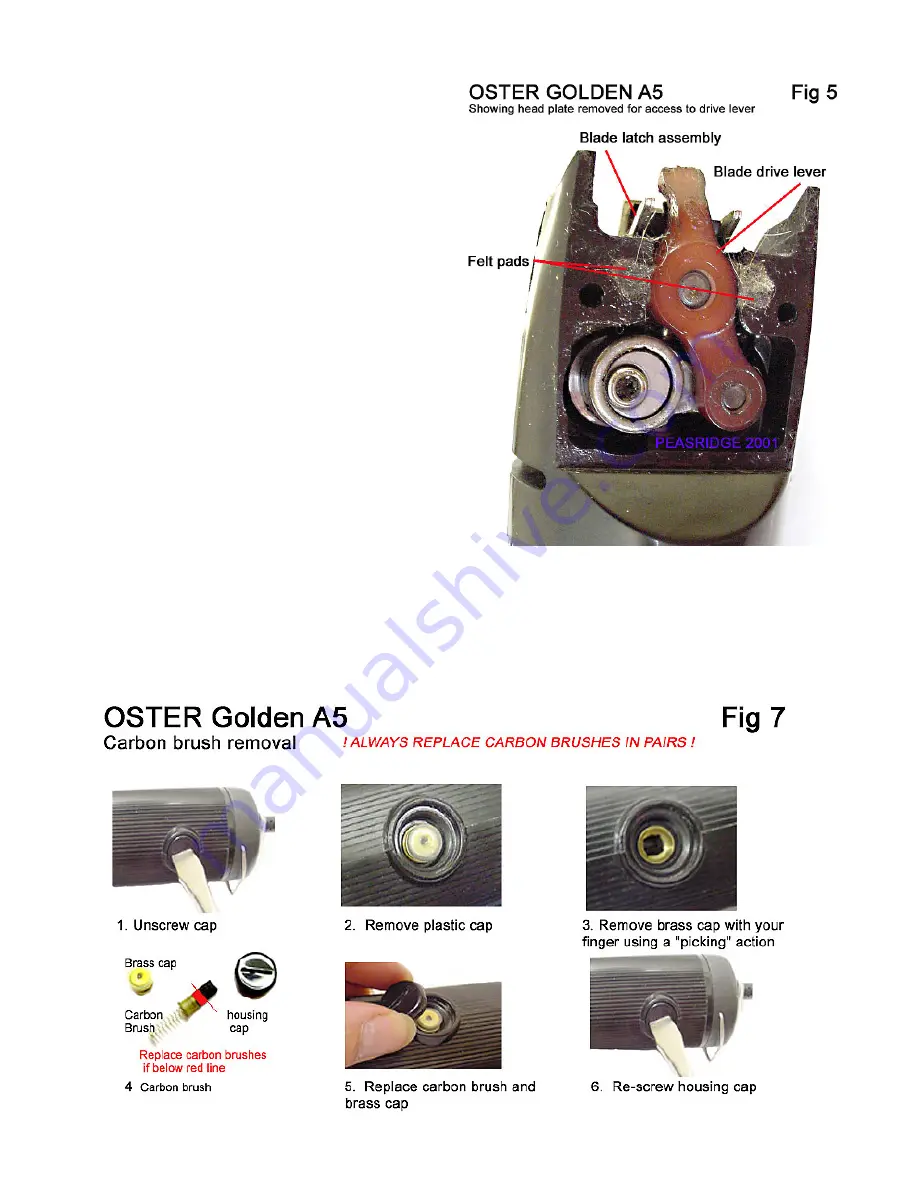
Blade lever replacement: (See fig 5)
BEFORE carrying out any work on the clipper first
disconnect from the mains power supply
Replace the blade drive lever when it shows signs of
becoming worn or in the event of clipper's performance
starting to drop off, signs of tracking, when tapping or
clicking noises occurring. This maintenance task can be
easily undertaken by most operators and only requires
the clipper nameplate to be removed by undoing the
two screws and lifting off. Remove the plate to expose
the drive lever bar which should be gently raised to
remove it from it’s the two oval pins onto which it fits.
Be careful not to dislodge or lose the two "felt brushes"
positioned either side of the lever
When replacing the drive lever seat it gently into the
two pins using equal pressure. Grease lightly before
replacing the head plate and finally fixing back the two
screws. It is NOT necessary to use excessive amounts of
grease
Greasing:
BEFORE carrying out any work on the clipper first
disconnect from the mains power supply
Please note that over greasing can cause leakage and
reduce the operating efficiency of the machine. Check
monthly by removing the metal nameplate. Then
remove the nylon drive lever, metal link, and gear.
Insert grease tube nozzle into the hole on the top of the gear post. NOTE: If grease does not come through, clean
holes. Do NOT fill the cavity with grease. Replace the link and gear and add a small amount of grease to the teeth
of the gear & linkage. Use only Oster Grease, which is specially formulated for double insulated clippers.
Carbon Brushes
Содержание Golden A5
Страница 7: ......


